


So, you're tackling a tile project and wondering about the glue. Specifically, white thinset. It might seem like a small detail, but picking the right kind of white thinset can really make a difference, especially if you're working with natural stone or lighter colored tiles. Let's break down what you need to know to get this part of your project right.
Key Takeaways
- White thinset is generally preferred for natural stone and light-colored tiles to prevent color bleed-through and maintain the true look of the material.
- Always match your white thinset to the specific tile material, size, and weight, as well as the installation environment (e.g., wet areas).
- Proper mixing is key; aim for a peanut butter-like consistency and avoid over or under-mixing for good adhesion.
- When applying, prepare your substrate well and use the correct trowel size to ensure full coverage and a strong bond.
- Allow adequate curing time for the white thinset before grouting or exposing the tile to heavy traffic.
- Troubleshooting common issues like poor adhesion or crumbling mortar involves checking mixing, application, and substrate prep.
- Consider environmental factors and safety precautions, like ventilation and using PPE, when working with any type of thinset.
- Choosing a high-quality white thinset from a reputable brand can lead to a more durable and aesthetically pleasing final tile installation.
Understanding White Thinset Mortar
When you're planning a tile project, especially one involving natural stone or lighter colored tiles, the type of mortar you use matters. White thinset mortar is a popular choice for good reason. It's not just about the color; it's about how it performs and how it affects the final look of your tile installation. Let's break down what white thinset is all about.
The Essential Role of White Thinset
Thinset mortar is the adhesive that holds your tiles to the surface. It's a cement-based mixture that you prepare with water. Its primary job is to create a strong, lasting bond between the tile and the substrate, like a concrete floor or a cement board wall. Without the right thinset, tiles can loosen, crack, or even fall off over time. White thinset is specifically formulated to offer excellent adhesion, making it a reliable choice for many projects.
Why White Thinset Stands Out
The most obvious difference is its color. Unlike gray thinset, white thinset is, well, white. This might seem minor, but it makes a big difference, particularly when you're working with tiles that are translucent or have light colors. Gray thinset can sometimes show through these tiles, altering their appearance. White thinset avoids this issue, helping your tiles look exactly as intended. It's a simple solution to a common aesthetic problem in tile work.
Key Components of White Thinset
White thinset mortar is typically made from Portland cement, fine sand, and sometimes lime. The specific blend is what gives it its adhesive properties. When mixed with water, a chemical reaction occurs, causing the mortar to harden and create a strong bond. Some white thinsets are also 'modified' with polymers, which can improve flexibility and water resistance, making them suitable for a wider range of applications. These additives are key to its performance.
The Science Behind Thinset Adhesion
Adhesion is all about creating a physical and chemical bond. When you spread thinset on the substrate and press the tile into it, the mortar fills in any small voids. As it cures, it hardens and forms a mechanical lock with the tile and the surface. The cement particles create a strong matrix, and the fine sand provides a stable structure. The goal is to achieve 100% coverage under the tile for maximum durability.
When to Choose White Thinset Over Gray
While gray thinset is perfectly fine for many jobs, white thinset is the preferred choice in several situations:
- Light-colored tiles: To prevent the gray color from showing through.
- Natural stone: Especially marble, travertine, or other stones that can be affected by color bleed.
- Translucent tiles: Where the color of the adhesive is visible.
- Glass tiles: To maintain their clarity and color.
- Projects where color consistency is paramount.
Common Misconceptions About White Thinset
One common idea is that white thinset is weaker than gray thinset. This isn't true. The color is purely a pigment difference; the adhesive strength is determined by the formulation and quality of the cement and additives. Another misconception is that it's only for decorative purposes. While it helps with aesthetics, its primary function is still strong adhesion, just like its gray counterpart. You can find thin-set mortar mix that is specifically designed for various needs.
The Impact of White Thinset on Tile Appearance
Ultimately, the color of your thinset can significantly impact the final look of your tiled surface. Using white thinset ensures that the true color and tone of your tiles are preserved. It helps create a clean, professional finish, especially when working with materials where color accuracy is important. For designers and homeowners alike, this attention to detail can make all the difference in achieving the desired aesthetic for a U.S. project.
Selecting the Ideal White Thinset
Picking the right white thinset mortar is more than just grabbing a bag off the shelf; it's about making sure your tiles stick well and look their best for years to come. Think of it like choosing the right glue for a specific job – you wouldn't use the same adhesive for paper as you would for wood, right? The same applies here. Getting this choice right means fewer headaches down the road and a finish you'll be proud of.
Matching Thinset to Your Tile Material
Different tile materials have different needs. For instance, natural stones like marble or travertine can be a bit sensitive. They're porous, meaning they can absorb color from whatever they touch. That's where white thinset really shines. It won't cause those unwanted color changes that gray thinset sometimes can, especially with lighter stones. For ceramic or porcelain tiles, most standard white thinsets will work just fine, but it's always good to check the manufacturer's recommendations. Using the wrong type of thinset can lead to discoloration or poor adhesion, so always double-check.
Considering Tile Size and Weight
Larger and heavier tiles need a mortar with a bit more oomph. You'll want a thinset that offers a strong bond and good support. Some white thinsets are specifically formulated for large format tiles, offering extended open time and better sag resistance. This means the mortar stays workable longer, and it won't slump or sag on vertical surfaces, which is a big help when you're dealing with those big, heavy slabs. A good tile adhesive is key here.
Understanding Mortar Coverage Rates
Ever looked at a bag of thinset and seen a coverage rate? It's basically telling you how much area a single bag can cover. This number can change depending on the trowel size you use and how thick you spread the mortar. Using a larger trowel means you'll spread the mortar thinner, covering more square footage per bag. It's a good idea to calculate this before you buy to avoid running out mid-project or buying way too much. You can usually find this info on the product packaging.
The Importance of Open Time and Working Time
Open time is how long the thinset stays wet and workable after you spread it on the wall or floor. Working time is how long you have to adjust the tile once it's set in the mortar. For big projects or if you're working in a warm, dry environment, you'll want a thinset with a longer open time. This gives you more flexibility and prevents the mortar from drying out before you can set your tiles. Some thinsets are designed for quick setting, which can be great for certain jobs, but generally, a bit more working time is helpful for most DIYers.
Evaluating Additives for Enhanced Performance
Many white thinsets come with additives, like polymers, that make them perform better. Polymer-modified thinsets are generally stronger, more flexible, and have better adhesion than standard ones. They're especially good for areas that might experience some movement or for tiling over surfaces that aren't perfectly rigid. If you're tiling a shower floor or an area with potential for moisture, a polymer-modified thinset is often a smart choice for added durability and water resistance. These additives can make a big difference in the longevity of your tile installation.
Choosing the Right Brand for Reliability
When it comes to thinset, brand reputation matters. Sticking with well-known brands often means you're getting a product that's been tested and proven. These companies usually have good customer support and clear product specifications. While it might be tempting to go for the cheapest option, investing in a quality brand can save you a lot of trouble later. Look for brands that specialize in tile setting materials; they tend to have a better handle on what installers need. You can find many reliable options for your tile projects.
Reading and Interpreting Product Specifications
Don't skip the technical details on the bag! Product specifications tell you exactly what the thinset is designed for. Look for information on:
- Tile types: What kind of tiles is it suitable for?
- Substrate compatibility: What surfaces can it be applied to (e.g., concrete, drywall, cement board)?
- Setting time: How long until it's ready for grout?
- Water resistance: Is it suitable for wet areas?
- Flexibility: Is it polymer-modified?
Understanding these specs helps you pick the perfect match for your specific installation, avoiding potential problems before they even start.
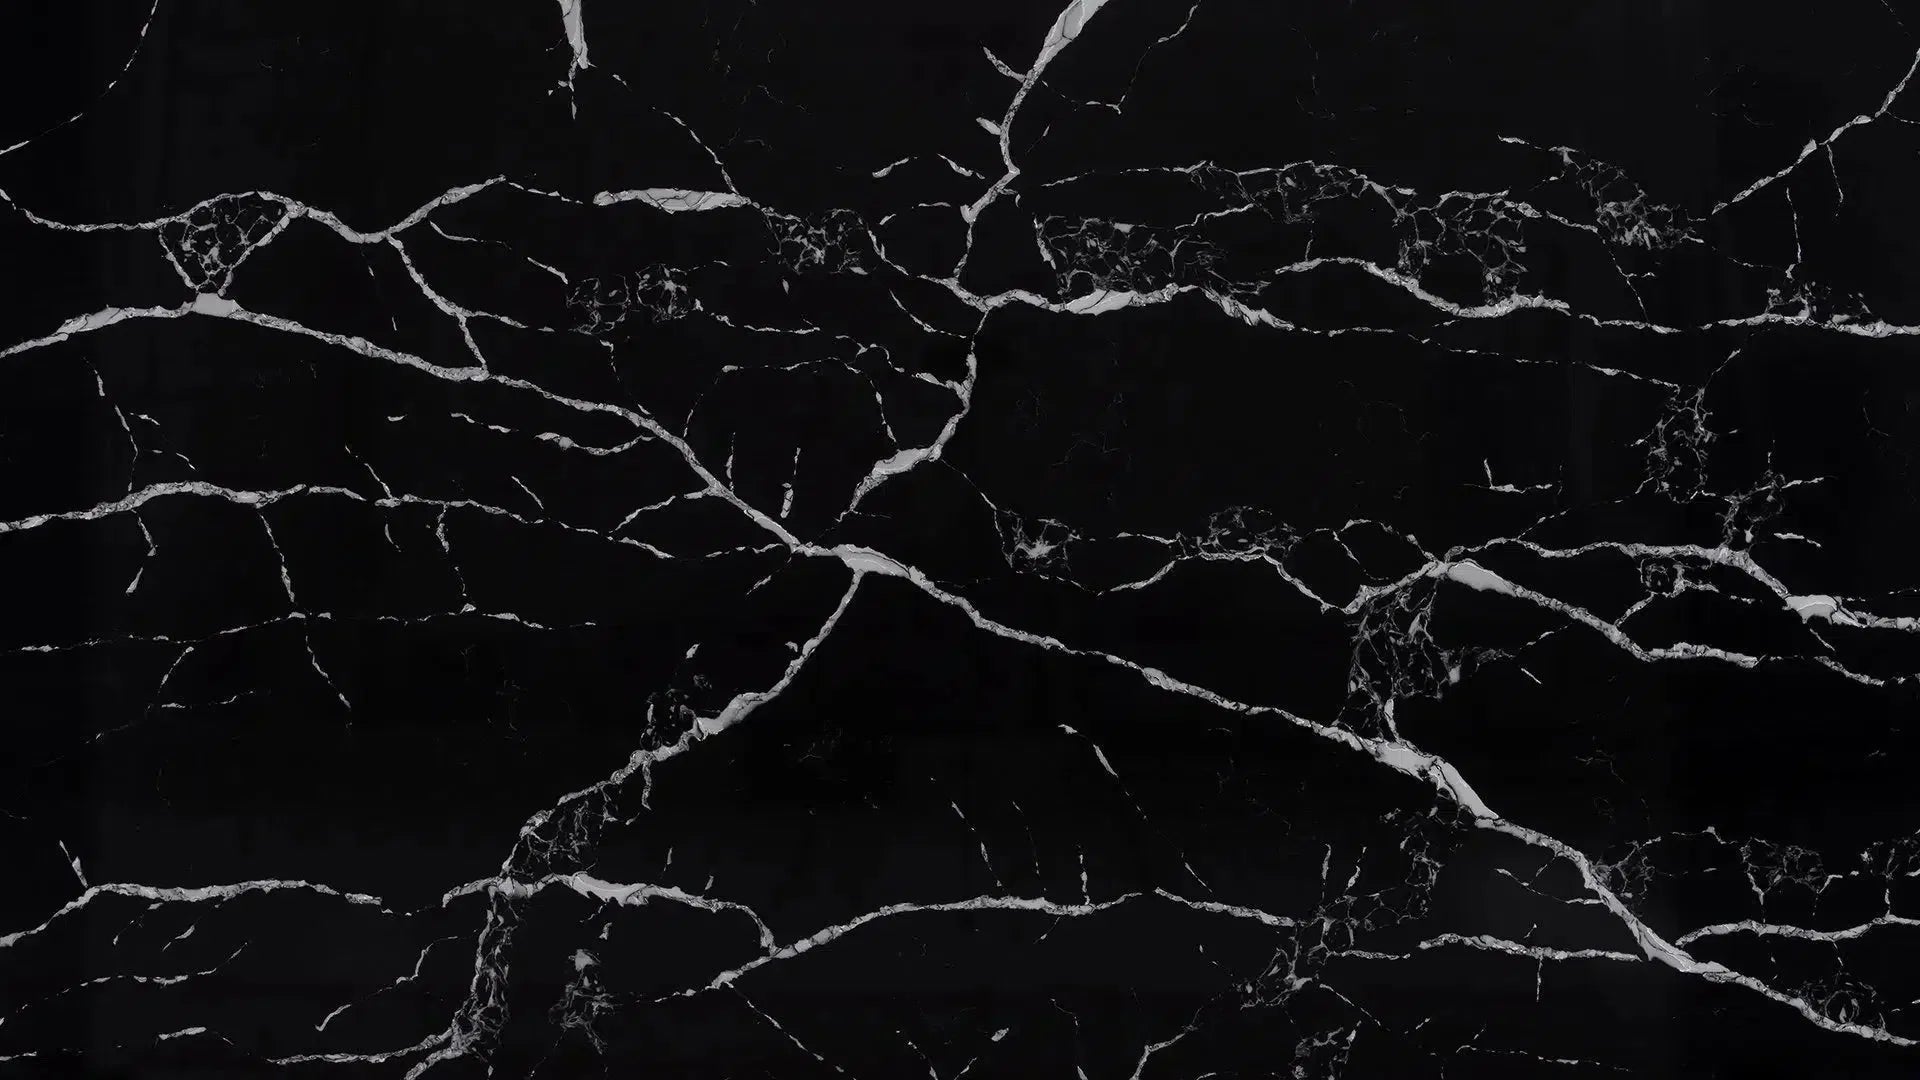
The Advantages of White Thinset for Natural Stone
When you're working with natural stone tiles, like marble or travertine, the choice of thinset mortar really matters. Gray thinset, while common, can sometimes cause issues with lighter colored stones. That's where white thinset comes in as a real game-changer for these beautiful, often delicate materials.
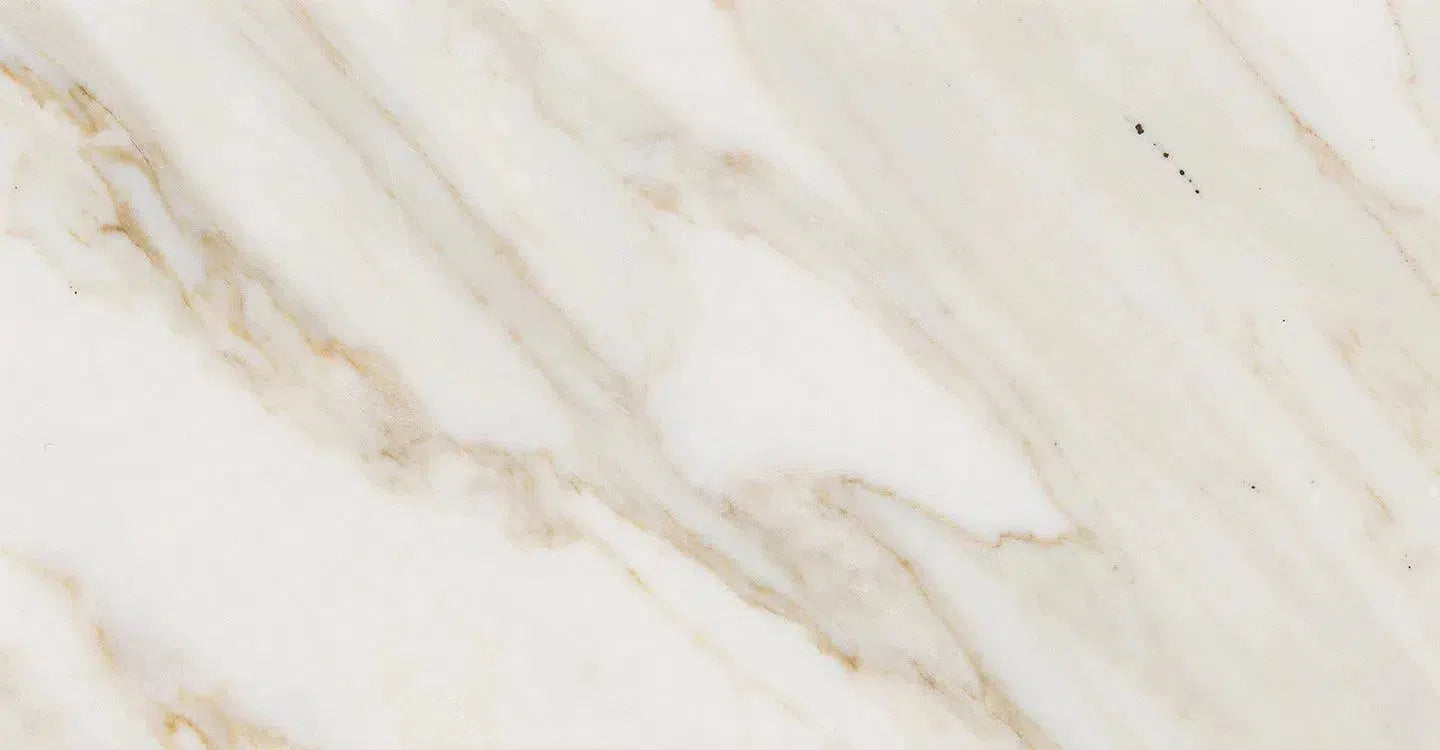
Preserving the True Color of Marble
Marble is prized for its unique veining and subtle color variations. Using white thinset helps ensure that the stone's natural beauty isn't compromised by the mortar color showing through. Gray thinset can sometimes cast a shadow, making white marble look dingy or altering its intended hue. White thinset provides a neutral base, allowing the marble's true colors and patterns to shine.
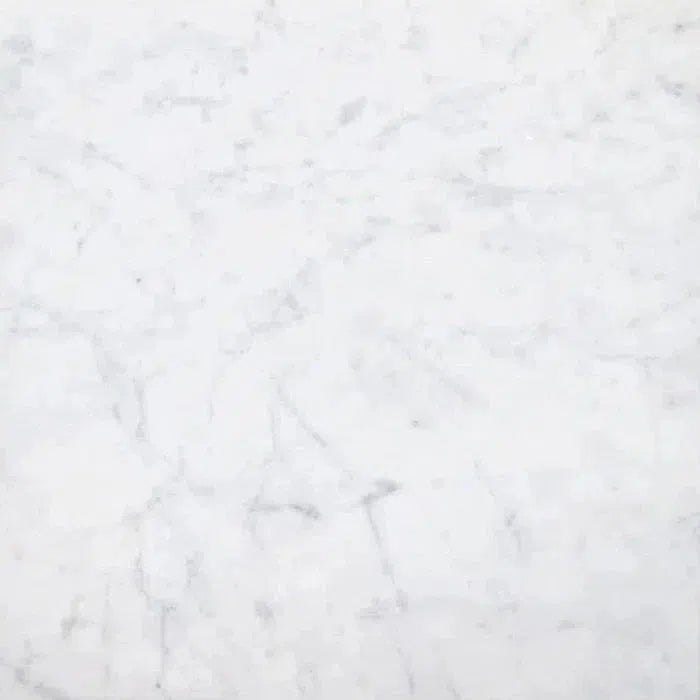
Preventing Color Bleed-Through with Travertine
Travertine, with its characteristic porous surface and earthy tones, can also be affected by the wrong mortar. If the gray from a standard thinset seeps into the pores or shows through thinner sections of the stone, it can create an inconsistent and undesirable look. White thinset acts as a barrier, maintaining the integrity of the travertine's natural color and texture.
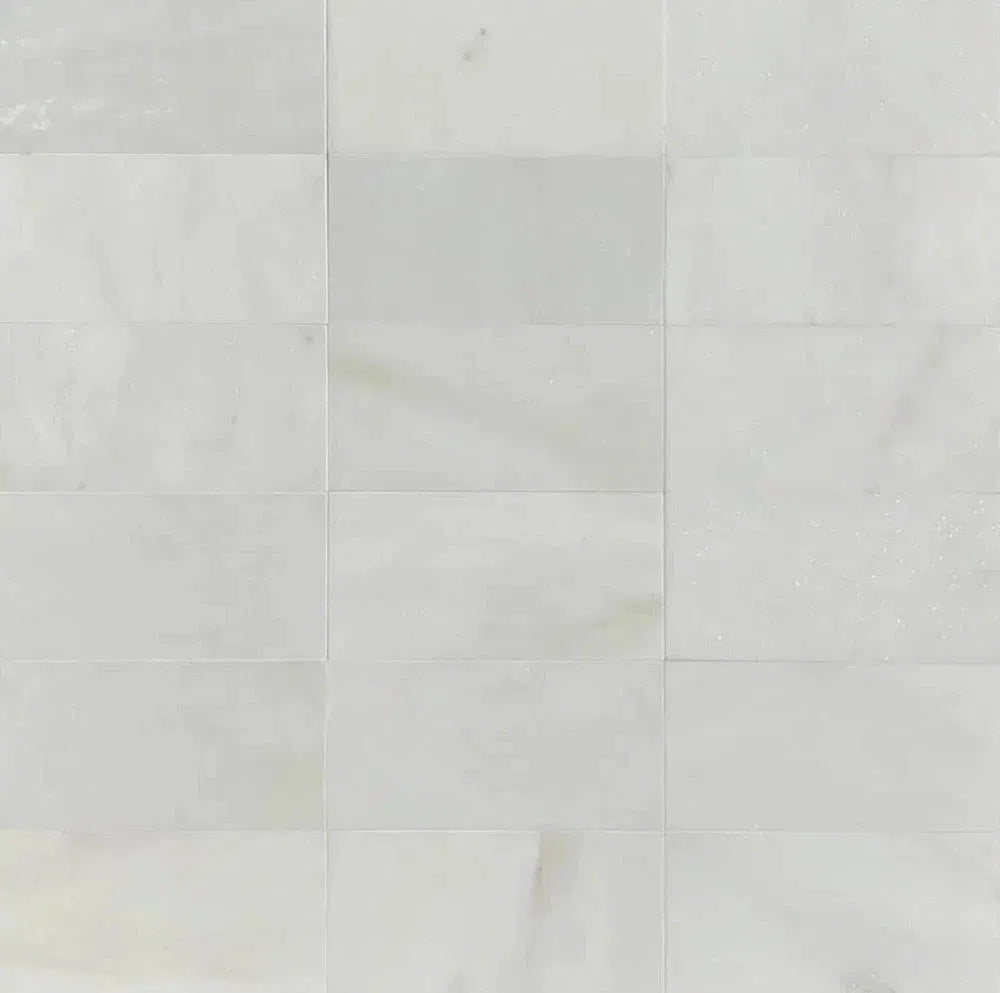
Ensuring Consistent Aesthetics with Natural Stone
Natural stone projects are often chosen for their sophisticated and timeless appeal. Achieving a uniform look across all tiles is key. White thinset contributes to this by providing a consistent, neutral background. This is especially important when laying tiles side-by-side, where any color variation from the mortar could disrupt the overall visual harmony.
The Benefits for Light-Colored Stone Tiles
For any light-colored natural stone, from pale limestone to creamy alabaster, white thinset is the preferred choice. It prevents the underlying gray from tinting the stone, which can happen even with thicker tiles if the mortar isn't completely opaque or if there are slight gaps. This is particularly true for translucent stones where light can pass through.
Avoiding Discoloration in Delicate Materials
Some natural stones are more sensitive to chemical reactions or staining. While most modern thinsets are formulated to be inert, the color itself can be a factor. White thinset is generally considered the safest bet for delicate materials where any hint of discoloration is unacceptable. It minimizes the risk of unexpected color shifts.
Achieving a Seamless Look with White Thinset
Ultimately, the goal with natural stone is often to create a luxurious, flowing surface. White thinset supports this by not introducing competing colors. It allows the tile itself to be the focal point, contributing to a more refined and polished final appearance. This is why many professionals recommend it for high-end natural stone installations.
Expert Recommendations for Natural Stone Projects
Industry experts and experienced tile setters frequently advise using white thinset when working with natural stone, especially lighter varieties. It's a simple step that can prevent costly mistakes and ensure the project lives up to its full aesthetic potential. For projects where the stone's natural color is paramount, white thinset is the professional's choice. It's a small detail that makes a big difference in the final outcome, especially when you're aiming for that premium look. When selecting your materials, consider looking into options like Custom Building Products ProLite for lightweight, high-performance applications.
Proper Mixing Techniques for White Thinset
Getting the mix right for your white thinset mortar is pretty important. It's not just about dumping powder and water together; there's a bit of a science to it, and doing it wrong can lead to tiles that don't stick well or look off. Think of it like baking – too much or too little of an ingredient can ruin the whole batch.
Achieving the Perfect Consistency
The goal is a smooth, workable paste. It shouldn't be too runny, or it'll slide off your trowel and won't hold the tile. On the other hand, if it's too stiff, it'll be hard to spread and might not create a good bond. You're looking for a consistency that holds its shape on the trowel but still spreads easily. A good test is to see if it holds a peak when you lift the trowel.
The Role of Water in Mortar Mixing
Water is the activator for the cement in the thinset. Too little water, and the cement won't hydrate properly, leading to a weak bond. Too much water, and you weaken the mix, making it prone to shrinking and cracking. Always start with the amount recommended on the bag, and add small amounts of water only if needed to reach the right consistency. Remember, you can always add a little more water, but you can't take it out.
Avoiding Over or Under-Mixing
Over-mixing can introduce too much air into the mortar, which can weaken the bond. Under-mixing means you'll have dry pockets of powder that won't adhere properly. Mix until the powder is fully incorporated and the consistency is uniform throughout the batch. This usually takes a few minutes with a mixing paddle.
Tools and Equipment for Mixing
For small jobs, a sturdy mixing paddle attached to a drill works well. For larger projects, a dedicated mortar mixer might be more efficient. You'll also need a clean mixing bucket. Make sure your tools are clean before you start; any residue from previous jobs can affect the new mix.
Batch Mixing for Consistent Results
It's best to mix only as much thinset as you can use within its open time. Mixing in smaller batches helps ensure that the mortar stays workable and doesn't start to set up before you can apply it. This also helps maintain a consistent mix from one batch to the next.
Understanding Slaking Time
Some thinsets require a "slaking" period, which is a resting time after the initial mix. This allows the chemicals in the mortar to fully hydrate. Check the manufacturer's instructions; skipping this step can affect the mortar's performance. Typically, it's a short rest of 5-10 minutes, after which you might give it a final quick mix.
Troubleshooting Common Mixing Issues
- Too Dry: Add a tiny bit more water, mix thoroughly.
- Too Wet: Add a small amount of dry thinset mix, mix thoroughly.
- Lumpy: You likely under-mixed. Keep mixing until smooth.
- Setting Too Fast: You might have used too little water, or the ambient temperature is high. Try mixing smaller batches.
Proper mixing is a foundational step for a successful tile installation. It directly impacts the strength and longevity of your tilework, especially when using premium materials like marble or travertine. Taking the time to get it right saves headaches down the line.
When you're ready to select the right adhesive for your project, consider the wide range of options available for tile installation. Getting the mix right is just one part of the process, but it's a critical one for a durable and beautiful finish.
Application Best Practices with White Thinset
Getting your tile project right really comes down to the details, and how you apply that white thinset is a big one. It's not just about slapping it on; there's a method to the madness that makes sure your tiles stick well and look great for years. Using white thinset, especially with natural stone, means you're already thinking about appearance, so let's make sure the application lives up to that.
Preparing the Substrate for Optimal Adhesion
Before you even think about mixing thinset, the surface you're tiling needs to be ready. This means it has to be clean, dry, and sound. Any dust, grease, paint, or old adhesive needs to go. If you're tiling over concrete, make sure it's fully cured. For wood subfloors, you might need an underlayment like cement board to prevent flexing, which can crack your tiles. A well-prepared substrate is the foundation for a durable tile installation. Think of it like prepping a canvas before you paint; you wouldn't start painting on a dirty, uneven surface, right?
Choosing the Correct Trowel Size
The trowel you use is super important for getting the right amount of thinset on the back of your tile. Too little, and you'll have voids, leading to weak spots. Too much, and it'll squeeze out between the tiles, making a mess and potentially causing an uneven surface. The general rule is to match the trowel size to your tile size. Smaller tiles need smaller notches, and larger tiles need larger notches. Check the thinset manufacturer's recommendations, as they often specify trowel sizes based on tile dimensions.
- Small tiles (e.g., 4"x4"): 1/4" x 1/4" square notch
- Medium tiles (e.g., 8"x8" to 12"x12"): 1/4" x 3/8" square or U-notch
- Large format tiles (e.g., 18"x18" and up): 1/2" x 1/2" or larger square notch
Applying Thinset Evenly and Consistently
Once you've got your thinset mixed to the right consistency (like peanut butter, not too stiff, not too runny), it's time to apply it. Use the flat side of your trowel to spread a thin, even layer onto the substrate. Then, hold the trowel at about a 45-degree angle and comb the thinset with the notched side. This creates ridges that help collapse evenly when you set the tile, providing full contact. Work in small sections so the thinset doesn't dry out before you get the tiles in. This is especially important when using white thinset, as dried-out spots can be hard to fix without leaving a mark.
Ensuring Full Coverage for Durability
Full coverage is key, especially for areas that get a lot of foot traffic or moisture, like bathroom floors. You want at least 90% coverage for dry areas and 95% for wet areas like showers. This means the entire back of the tile should be in contact with the thinset, with no significant air pockets. This prevents tiles from cracking under pressure and stops moisture from getting underneath, which can cause bigger problems down the line. For natural stone, this level of adhesion is even more critical to prevent movement and ensure the stone's integrity.
The Technique of Back-Butter Application
For larger tiles, or tiles with a very flat back, you might need to 'back-butter'. This means applying a thin layer of thinset to the back of the tile itself, in addition to troweling it on the substrate. This extra step helps guarantee full coverage and a strong bond. Make sure to comb the back-butter in the same direction as the ridges on the substrate for the best results. It takes a little extra time, but it's worth it for a solid installation.
Working in Manageable Sections
Don't try to spread thinset over your entire floor or wall at once. Thinset has an 'open time,' which is how long it stays workable before it starts to skin over. This time varies depending on the product and environmental conditions like temperature and humidity. Work in sections that you can tile within that open time. A good rule of thumb is to work in areas about 2x2 feet at a time. This way, you can be sure the thinset is still wet and sticky when you set your tiles.
Setting Tiles into the Mortar Bed
When you place a tile into the thinset, give it a slight twist or wiggle. This helps to collapse the ridges created by the trowel and ensures good contact between the tile and the mortar. Don't just press it straight down. You want to feel that the tile is firmly set and level with its neighbors. You can use a rubber mallet or a tapping block to gently tap tiles into place if needed, but be careful not to overdo it and crack the tile or push too much thinset out the sides. For tricky areas like installing bathroom floor tile, precision here makes all the difference.
Proper application of white thinset isn't just about sticking tiles down; it's about creating a lasting bond that supports the tile's integrity and appearance. Taking the time to prepare your surface, use the right tools, and apply the material correctly will pay off in a beautiful, durable finish for your U.S. projects.
Curing and Setting Times for White Thinset
After you've mixed and applied your white thinset, the next big step is letting it do its thing. This is where the magic happens, turning that creamy mixture into a solid bond that holds your tiles in place. Rushing this part can lead to all sorts of problems down the line, so it's really important to get it right.
Understanding the Curing Process
Curing isn't just about the thinset drying out. It's a chemical reaction, especially with cement-based mortars like white thinset. Water is a key ingredient in this reaction, and it needs time to fully hydrate the cement particles. This hydration process is what gives the thinset its strength and durability. Think of it like baking a cake – you can't just pull it out of the oven too early, or it won't set properly.
Factors Affecting Setting Times
Several things can speed up or slow down how long your thinset takes to set. Temperature is a big one; warmer conditions generally mean faster setting, while cooler temperatures make it take longer. Humidity plays a role too – high humidity can slow down the evaporation of water, extending the setting time. The type of thinset itself matters, as some are formulated for quicker setting. And, of course, how much water you used during mixing can impact the setting time. Too much water can prolong the process.
When to Grout After Applying Thinset
This is a common question, and the answer usually depends on the specific product you're using. Most manufacturers will give a recommended timeframe. Generally, you'll want to wait until the thinset has set enough that the tiles don't move when you press on them. For many standard white thinsets, this is around 24 to 48 hours. Always check the manufacturer's instructions on the bag for the most accurate guidance. Waiting too soon can dislodge tiles, while waiting too long might not be necessary.
The Impact of Humidity and Temperature
As mentioned, these environmental factors are significant. In a hot, dry climate, your thinset might set faster than expected, reducing your working time. This means you need to mix smaller batches and work more quickly. On the flip side, in a cold, damp environment, setting can take much longer. You might need to wait longer than the typical 24 hours before grouting, and you should also be mindful of potential frost if working in unheated spaces during colder months. Proper ventilation can help manage humidity levels.
Ensuring Adequate Cure Before Heavy Traffic
Even after grouting, your tile installation isn't ready for heavy use. The thinset needs to achieve a significant portion of its final strength before it can withstand foot traffic, furniture, or other loads. Most manufacturers recommend waiting at least 72 hours, and sometimes up to 7 days, before allowing heavy traffic. For areas that will see a lot of wear, like entryways or busy hallways, it's wise to err on the side of caution and wait longer. This prevents cracking or loosening of the tiles over time.
Testing for Proper Adhesion
Before you grout, it's a good idea to do a quick check for adhesion. Gently try to wiggle a few tiles. They shouldn't budge. You can also tap on the tiles with a rubber mallet or the handle of your trowel; you should hear a solid sound. A hollow sound might indicate poor adhesion or voids under the tile, which could be a sign of insufficient thinset coverage or improper application. This is a good time to address any issues before they become permanent. laying ceramic tile often involves these checks.
Common Mistakes to Avoid During Curing
- Walking on tiles too soon: This is probably the most common mistake and can lead to cracked tiles or weak spots.
- Exposing the area to extreme temperatures: Rapid drying or freezing can compromise the thinset's integrity.
- Not allowing enough time before grouting: This can cause tiles to shift, leading to uneven grout lines.
- Ignoring manufacturer instructions: Every thinset product is slightly different, so always follow the specific guidelines provided.
Being patient during the curing phase is key to a long-lasting and beautiful tile installation. It’s worth the wait to ensure your project stands the test of time.
Troubleshooting Common White Thinset Issues
Even with the best intentions and careful planning, sometimes things don't go exactly as planned when tiling. White thinset mortar, while fantastic for many applications, can present a few hiccups. Don't worry, though; most common problems have straightforward solutions. Let's look at what might go wrong and how to fix it.
If your tiles feel loose or the thinset seems to be crumbling away from the back of the tile, you've got an adhesion issue. This is often due to an improperly prepared substrate. The surface needs to be clean, dry, and free of dust, grease, or old adhesive. If the substrate wasn't prepped right, the thinset can't bond properly. This is a common problem that can compromise the entire installation. You might need to remove the affected tiles and re-prep the surface before reapplying the thinset. For more on this, check out advice on improper floor preparation.
Dealing with Crumbling or Brittle Mortar
Mortar that crumbles easily after it's cured is usually a sign of mixing problems. Did you use too much water? Or maybe not enough cement? Using too much water weakens the mix significantly. On the flip side, not enough water can prevent it from curing properly. Always follow the manufacturer's instructions for water ratios. Another cause could be using an old bag of thinset that has lost its binding properties.
Resolving Uneven Tile Levels
Lippage, where one tile edge is higher than another, can happen for a few reasons. Sometimes it's the tile itself being uneven, but often it's how the thinset was applied. If you didn't spread it evenly, or if you used the wrong size trowel, you can end up with high and low spots. Using the correct trowel for your tile size and ensuring consistent, even coverage are key. If the lippage is minor, sometimes it can be addressed during grouting, but significant lippage might require removing and relaying the tiles. Sometimes, even with proper application, lippage can be an issue, as seen in some failed bathroom floor tile installations.
Fixing Grout Line Inconsistencies
If your grout lines aren't uniform, it can make the whole job look messy. This usually comes down to inconsistent tile spacing during installation or issues with the thinset bed. Make sure you're using tile spacers and keeping them in place until the thinset has set. If the thinset bed is uneven, it can also cause grout lines to vary in depth.
Managing Efflorescence on Natural Stone
White thinset is often chosen for natural stone, but sometimes you might see a white, powdery residue on the surface, especially with porous stones like marble or travertine. This is called efflorescence. It's usually caused by moisture trapped within the substrate or mortar, which then carries salts to the surface as it evaporates. Using a quality, water-resistant white thinset and ensuring the substrate is properly sealed can help prevent this. Sometimes, a specific stone sealer can also help.
When to Remove and Reapply Thinset
If you're experiencing significant adhesion problems, widespread crumbling, or severe lippage that can't be corrected, it's often best to remove the affected tiles and start over. Trying to patch over a bad installation rarely works long-term. It's better to invest the time now to do it right than to deal with bigger problems later.
Preventative Measures for Future Projects
- Always read and follow the manufacturer's instructions for mixing and application.
- Use the correct trowel size for your tile.
- Ensure your substrate is clean, level, and properly prepared.
- Don't mix more thinset than you can use within its open time.
- Consider using a high-quality, polymer-modified white thinset for better performance, especially with natural stone or large-format tiles.
Dealing with thinset issues can be frustrating, but with a bit of knowledge and patience, you can overcome them. Remember, a solid foundation is key to a beautiful and lasting tile installation.
White Thinset for Specific Tile Installations
When you're tackling a tile project, the type of thinset you use can make a big difference, especially when it comes to white thinset. It's not just about sticking tiles down; it's about making sure they stay put and look good for years to come. White thinset is particularly useful in certain situations where appearance and performance are key.
Backsplashes Requiring Precision
For kitchen backsplashes, especially those with lighter colored tiles or intricate patterns, white thinset is often the go-to. It helps maintain the clean look you're aiming for. You don't want any gray showing through, right? Using white thinset prevents any unwanted color bleed-through, ensuring your backsplash looks exactly as intended. This is super important for those detailed mosaic or glass tiles where even a slight color shift can be noticeable.
Shower Floors and Wet Areas
In bathrooms, particularly on shower floors and walls, moisture is a constant factor. While any good thinset needs to handle water, white thinset can be beneficial here too. It provides a strong bond that resists water penetration when properly applied. For these areas, you'll want a thinset that's formulated for wet environments. Always check the product specs to make sure it's suitable for constant moisture exposure.
Large Format Tile Applications
Laying large format tiles (think 12x24 inches or bigger) requires a robust adhesive. White thinset, especially polymer-modified versions, offers excellent adhesion and flexibility. This is vital for large tiles because they have more surface area and are more prone to movement if not fully supported. Proper trowel technique and full coverage are non-negotiable here to avoid lippage (uneven tile edges).
Mosaic Tile Projects
Mosaic tiles, whether they're glass, ceramic, or natural stone, often have a delicate appearance. White thinset is ideal because it won't tint the tiles, especially if you're using translucent or very light-colored pieces. It ensures the true color and beauty of each small tile shines through. You'll want to use a smaller trowel notch for these to get the right amount of adhesive without overwhelming the delicate tiles.
Outdoor Patios and High-Traffic Zones
For outdoor installations or areas that see a lot of foot traffic, durability is the name of the game. While gray thinset is often used outdoors, white thinset can be a good choice if you're working with light-colored pavers or stone. Look for a high-performance, polymer-modified white thinset that's rated for exterior use and freeze-thaw cycles. This will give you the strength and resilience needed for these demanding applications. A good thin-set mortar mix is key for longevity.
Fireplace Surrounds and Heat Exposure
Fireplaces can get hot, and not all adhesives can handle that. Some white thinsets are formulated with additives that give them heat resistance. If you're tiling around a fireplace, it's critical to select a thinset specifically designed for high heat. This prevents the adhesive from degrading and causing tiles to loosen over time. Always consult the manufacturer's recommendations for heat-rated applications.
Wall Tile Installations
For most wall tile installations, white thinset provides a clean base and reliable adhesion. It's suitable for a wide range of wall tiles, from standard ceramic to natural stone. The key is to ensure you're using the correct trowel size to achieve full coverage, which is especially important on vertical surfaces to prevent tiles from sliding or detaching. Proper mixing is also vital for a consistent bond.
The Environmental Impact of Thinset Choices
When you're planning a tile project, it's easy to get caught up in the look of the tiles and the color of the grout. But what about the stuff holding it all together? The thinset mortar you choose can actually have a pretty significant impact on the environment. It's not just about how well it sticks; it's about where it comes from, how it's made, and what happens to it afterward.
Low-VOC Options for Healthier Homes
Volatile Organic Compounds, or VOCs, are chemicals that can be released into the air from many building materials. Some thinsets contain these. If you're working indoors, especially in a space that will be lived in soon after, opting for a low-VOC or zero-VOC thinset is a good idea. This means fewer fumes and better air quality in your home. It's a simple switch that makes a difference for the people living there and for the workers applying it. Choosing low-VOC products contributes to a healthier indoor environment.
Sustainable Sourcing of Materials
Think about where the raw materials for thinset come from. Many are natural minerals. Companies that focus on sustainable sourcing try to minimize their impact on the land where these materials are extracted. This might involve responsible mining practices or using recycled content in their products. It’s worth looking into brands that are transparent about their material origins and their efforts to be good stewards of the environment. Some manufacturers are even exploring alternatives to traditional cementitious bases, like those using natural hydraulic lime, which can have a lower carbon footprint [ba76].
Reducing Waste During Application
How you use the thinset matters too. Using the right trowel size for your tiles and substrate helps you apply the correct amount of mortar. Too much thinset means you're wasting material and adding unnecessary weight. Too little, and you risk poor adhesion, which could lead to premature failure and the need for a complete redo – a lot more waste in the long run. Planning your project and mixing only what you need for a manageable section can also cut down on waste. Some thinsets are designed for better coverage, meaning a bag goes further.
The Longevity of Properly Installed Thinset
One of the best environmental choices you can make is to use a high-quality thinset and install it correctly. A durable installation means your tiles will last longer. This avoids the need for frequent repairs or full replacement, saving resources, energy, and money over time. When tiles and their setting materials stand the test of time, it's a win for both your wallet and the planet. This is especially true for natural stone projects where proper adhesion is key to the stone's longevity [0a35].
Choosing Brands with Eco-Conscious Practices
Some companies are really stepping up their game when it comes to environmental responsibility. They might invest in energy-efficient manufacturing processes, reduce water usage, or develop products with a lower environmental impact. Looking for certifications or statements from manufacturers about their sustainability efforts can guide your choice. For example, Sika offers solutions designed for more environmentally friendly construction practices [55fd].
Understanding Product Certifications
Certifications can be a helpful way to identify products that meet certain environmental standards. Organizations often test and verify that products meet specific criteria for things like low VOCs, recycled content, or sustainable manufacturing. While not every thinset will have a specific eco-certification, understanding what different labels or claims mean can help you make a more informed decision. It’s about looking for products that align with your project's sustainability goals.
Minimizing Your Project's Footprint
Ultimately, choosing your thinset is part of a larger picture. By considering the environmental impact of your materials, you're contributing to more sustainable building practices. It’s about making conscious choices, from the sourcing of raw materials to the longevity of the final installation. Even small decisions, like opting for a low-VOC product or ensuring proper application to avoid waste, add up to a more responsible project overall. When you're ready to select materials for your U.S. project, keep these environmental factors in mind.
Advanced Techniques with White Thinset
When your tile project goes beyond the basics, white thinset mortar can still be your best friend. It’s not just about sticking tiles down; sometimes, you need a little extra performance or a specialized approach. Let's look at some advanced ways white thinset plays a role.
Using Modified Thinset for Flexibility
Sometimes, tiles are installed in areas that might experience slight movement or vibration. This is where modified thinset comes in. It contains polymers that give it more flexibility than standard thinset. This flexibility helps prevent tiles from cracking if the substrate shifts a bit. It’s particularly useful for larger tiles or in areas with potential for movement, like over certain types of subflooring. Using a polymer-modified white thinset provides a strong bond with added resilience.
The Role of Polymer Additives
Polymer additives are what make modified thinset different. These are usually synthetic resins mixed into the dry mortar. When water is added, these polymers create a more robust, flexible, and water-resistant bond. They improve adhesion to difficult surfaces and reduce the chance of cracking. For projects demanding higher performance, especially with natural stone or large-format tiles, these additives are a big deal.
Waterproofing Membranes and Thinset
In wet areas like showers or around tubs, a waterproofing membrane is often installed before tiling. White thinset is then used to adhere the tiles to this membrane. It’s important that the thinset is compatible with the specific membrane being used. The goal is to create a fully waterproof system, and the thinset is a key part of that chain. Proper application here prevents water damage behind your tilework.
Soundproofing Underlayments
For areas where noise reduction is a goal, like between floors in a multi-story home, soundproofing underlayments can be installed. White thinset is then used to bond the tile to the underlayment. This adds another layer to the sound-dampening system. It’s about creating a quiet and comfortable living space, and the right setting materials contribute to that.
Heated Flooring Systems
Installing tile over a radiant heated floor system requires specific considerations. White thinset is often used, but it needs to be a type that can handle temperature fluctuations without degrading. The thinset must be able to bond the tile securely while also allowing for the expansion and contraction that occurs with heating and cooling cycles. This prevents tiles from loosening or cracking over time.
Combining Thinset with Other Setting Materials
In some complex installations, thinset might be used in conjunction with other setting materials. For example, it could be part of a multi-layer system for a specialized floor or wall finish. The key is understanding how different materials interact and ensuring compatibility for a lasting installation. Always check manufacturer guidelines when mixing different product types.
Achieving Specialized Finishes
While thinset's primary job is adhesion, its application can influence the final look. Techniques like using specific trowel notches or back-buttering can help achieve perfectly flat surfaces, which is vital for certain finishes, especially with reflective tiles or mosaics. For intricate work, like mosaic tile on bathroom walls, precise thinset application is non-negotiable.
Maintaining Your White Thinset Installation
So, you've got that beautiful tile job done, and the white thinset looks fantastic. But what happens next? Keeping it looking good means a little bit of regular care. It’s not complicated, but it does matter if you want your tile to last and stay looking its best.
Routine Cleaning Practices
Regular cleaning is your first line of defense. For most everyday messes, a simple damp cloth or a soft-bristled brush with a mild, pH-neutral cleaner is all you need. Avoid abrasive scrubbers or harsh chemicals, as these can wear down the grout and even affect the thinset over time. The goal is to clean gently and consistently. For spills, wipe them up as soon as they happen, especially if they're acidic or oily.
Protecting Against Stains and Damage
Some materials are more prone to staining than others. If you're working with natural stone tiles, which can be porous, consider using a quality sealer specifically designed for stone. This creates a barrier that helps prevent liquids from soaking in and causing discoloration. For general tile installations, be mindful of dragging heavy furniture across the floor, which can scratch tiles or even dislodge them if the thinset bond isn't perfect.
Sealing Grout Lines
While we're talking about protection, don't forget the grout lines. Grout is porous and can absorb stains and moisture. Applying a grout sealer every year or two, depending on traffic and exposure, can make a huge difference in keeping your grout lines clean and preventing discoloration. This is especially important in areas like bathrooms and kitchens.
Addressing Minor Repairs Promptly
See a loose tile or a small chip? Don't wait. Small issues can become bigger problems if left unaddressed. A single loose tile might seem minor, but it can lead to water getting under the tile, compromising the thinset bond and potentially causing more tiles to loosen. For minor repairs, you might be able to re-adhere a tile with a small amount of fresh thinset, but for anything significant, it's often best to consult a professional.
Long-Term Care for Natural Stone
Natural stone tiles, like marble or travertine, require a bit more attention. They are beautiful but can be sensitive. Always use cleaners recommended for natural stone. Avoid acidic cleaners like vinegar or lemon-based products, as they can etch the surface of the stone, dulling its natural shine. Regular sealing, as mentioned, is key to maintaining their look and preventing stains.
Avoiding Harsh Cleaning Chemicals
This bears repeating: harsh chemicals are the enemy of a well-maintained tile installation. Bleach, ammonia, and abrasive cleaners can break down the grout and even the thinset over time. They can also damage the surface of certain tiles, especially natural stone. Stick to mild, pH-neutral cleaners for the best results and longest life for your tile work.
Extending the Life of Your Tilework
Ultimately, good maintenance is about longevity. By following these simple steps – regular cleaning, prompt repairs, and using the right products – you're not just keeping your tile looking good, you're actively extending its lifespan. A well-maintained tile installation, set with quality white thinset, can last for decades. It’s an investment in your home that pays off with lasting beauty and durability. If you're dealing with stubborn cement residue on your tiles, a mild acidic cleaner or a vinegar solution can help remove cement from tiles. Just remember to rinse thoroughly afterward.
Understanding Thinset Standards and Certifications
When you're picking out thinset for your tile project, especially white thinset, you'll see a lot of numbers and acronyms on the packaging. It can feel a bit overwhelming, but these standards and certifications are actually pretty important. They're basically a way for manufacturers to show that their product meets certain performance levels, and for you to know what you're getting.
The American National Standards Institute (ANSI) sets the benchmarks for a lot of building materials, including tile mortars. For thinset, you'll often see references to ANSI A118.4 or ANSI A118.15. These standards tell you about the mortar's properties, like its bond strength, flexibility, and water resistance. Meeting these standards means the thinset has been tested and proven to perform reliably under specific conditions. For instance, A118.4 covers standard cementitious mortars, while A118.15 covers enhanced versions with better performance characteristics, often found in polymer-modified thinsets.
TCNA Guidelines for Tile Installation
The Tile Council of North America (TCNA) provides detailed guidelines and methods for installing tile. While they don't certify thinset products themselves, their methods often specify the types of mortars that should be used for different applications. Following TCNA guidelines, along with using a properly certified thinset, helps ensure a durable and long-lasting tile installation. You can find their methods in resources like the TCNA Handbook, which is a go-to for many professionals.
The Significance of Product Testing
Before a thinset can claim to meet an ANSI standard, it has to go through rigorous testing. This involves checking things like:
- Bond Strength: How well the mortar sticks to both the tile and the substrate.
- Water Resistance: How much water it lets through, which is key for wet areas.
- Flexibility: Its ability to handle slight movements without cracking.
- Shrinkage: How much it shrinks as it dries, which can affect adhesion.
This testing is done in independent labs, so you know the results aren't just the manufacturer's opinion.
What Certifications Mean for Quality
When you see a certification mark on a thinset bag, like an ANSI standard number, it's a good sign. It means the manufacturer has invested in ensuring their product meets a recognized level of quality and performance. This can save you a lot of headaches down the road, preventing issues like tiles detaching or grout lines cracking. For projects where tile coverage is critical, like in wet areas needing 95% coverage, using a certified mortar is a smart move [3cc9].
Ensuring Compliance with Building Codes
In many areas, building codes require that tile installations meet certain standards for safety and durability. Using thinset that meets recognized industry standards, like those set by ANSI, helps ensure your project complies with these codes. This is especially important for commercial projects or renovations that require inspections.
Choosing Products That Meet Industry Benchmarks
When you're shopping, look for those standard numbers on the packaging. If you're unsure, don't hesitate to ask the store staff or check the manufacturer's website. For professionals, understanding these benchmarks is part of providing quality tile installations, as detailed by Certified Tile Installers (CTIs) [51c6].
The Importance of Manufacturer Data Sheets
Beyond the packaging, manufacturers provide detailed Technical Data Sheets (TDS) for their products. These sheets go into much more detail about the specific performance characteristics, mixing instructions, application guidelines, and the standards the product meets. Always check the TDS for the most accurate and complete information about the white thinset you're considering.
Cost Considerations for White Thinset
When you're planning your next tile project, thinking about the budget is a big part of the process. The cost of white thinset mortar is definitely something to factor in, and it can vary quite a bit. It’s not just about the price tag on the bag, though; there are other things to consider that affect the overall expense.
Comparing Prices of Different Brands
Just like with most building materials, there are tons of brands out there offering white thinset. Some are budget-friendly, while others are on the pricier side. You might see a big difference in cost between a store brand and a premium, specialized one. It’s often worth paying a little more for a high-quality thinset, especially for natural stone or delicate tiles, as it can prevent costly mistakes down the line. Keep an eye out for sales or bulk discounts if you're working on a larger project.
Calculating Material Needs Accurately
One of the biggest ways to control costs is to buy just the right amount of thinset. Buying too much means wasted product and money. Too little, and you'll have to make a trip back to the store, potentially delaying your project and incurring extra costs. Most thinset bags will have a coverage chart on them, showing how many square feet a bag can cover based on the trowel size you use. Always measure your tile area carefully and use the recommended trowel size for your tile type to get a good estimate. Remember, larger tiles generally require a larger trowel and thus less thinset per square foot, but you'll be using more bags overall due to the larger surface area.
The Value of Premium White Thinset
While it might seem like a good idea to grab the cheapest option, premium white thinset often provides better performance and reliability. These products might have advanced polymer additives that improve flexibility, adhesion, and water resistance. For projects involving natural stone, large format tiles, or areas exposed to moisture, investing in a premium thinset can save you from potential issues like cracking, discoloration, or tile failure later on. Think of it as an investment in the longevity and appearance of your tile installation.
Labor Costs Associated with Thinset Application
Don't forget that the cost of the thinset itself is only part of the labor equation. Applying thinset correctly takes time and skill. If you're hiring a professional, their labor rates will be a significant portion of your project's total cost. A good tile installer will know how to mix the thinset properly, use the right trowel, and ensure full coverage, which contributes to a durable installation. If you're doing it yourself, factor in the time you'll spend on mixing and application.
Long-Term Savings from Durable Installations
Choosing the right white thinset and applying it correctly can lead to significant long-term savings. A well-bonded tile installation is less likely to fail, meaning you won't have to pay for repairs or replacements down the road. This is especially true in high-traffic areas or wet environments like bathrooms and kitchens. The initial cost of quality materials and proper installation often pays for itself over the lifespan of your tilework.
Budgeting for Your Tile Project
When you're creating your overall budget, break down the costs. You'll have expenses for the tiles themselves, the thinset, grout, any necessary tools, and potentially labor. It's always a good idea to add a small contingency fund (around 10-15%) for unexpected issues or material overages. For white thinset, research prices from different suppliers and get quotes if you're hiring professionals.
Where to Find Quality White Thinset
Finding reliable sources for your white thinset is key. Look for reputable tile supply stores, home improvement centers, or specialized building material suppliers. Some online retailers also offer competitive pricing and nationwide shipping, which can be convenient for U.S. projects. Always check product reviews and manufacturer specifications to ensure you're getting a product that meets industry standards like ANSI specifications. For natural stone projects, consider suppliers who specialize in stone and offer compatible setting materials.
The Role of White Thinset in Tile Durability
When you're laying tile, the thinset mortar is like the foundation of a house – it's not always seen, but it's absolutely critical for the whole structure to last. White thinset, in particular, plays a big part in how durable your tile installation will be, especially when you're working with certain types of tiles. It's not just about sticking tiles to the wall; it's about making sure they stay put, resist damage, and look good for years to come.
Creating a Strong Bond Between Tile and Substrate
The primary job of any thinset is to create a strong connection between your tile and the surface it's being applied to, like a concrete slab or cement board. White thinset, when mixed and applied correctly, forms a tenacious bond. This bond is what prevents tiles from shifting or becoming loose over time. Think of it as a handshake between the tile and the substrate – a firm, reliable grip that holds everything together. This strong adhesion is the first line of defense against wear and tear.
Preventing Tile Movement and Cracking
Loose tiles are not only unsightly but can also lead to bigger problems. If tiles can move, they're more likely to chip, crack, or even pop off, especially in areas with foot traffic or temperature fluctuations. White thinset, with its excellent bonding properties, minimizes this movement. By filling the voids between the tile's back and the substrate, it creates a solid bed that supports the tile. This support is key to preventing stress fractures and maintaining the integrity of your tiled surface.
Resistance to Moisture and Humidity
Many white thinsets are formulated to offer good resistance to moisture, which is vital for areas like bathrooms, kitchens, and showers. While the tile and grout are the primary barriers against water, the thinset layer underneath is also important. A well-bonded, properly cured layer of white thinset helps prevent water from seeping behind the tiles and reaching the substrate. This is particularly important for preventing mold growth and structural damage to the underlying surfaces. Some white thinsets are even specifically designed for wet areas, offering enhanced water resistance.
Impact of Proper Thinset on Load Bearing
For floor tiles, the thinset's ability to bear load is a significant factor in durability. When you walk on a tiled floor, the weight is distributed through the tiles, to the thinset, and then to the substrate. If the thinset isn't strong enough or doesn't provide full coverage, the tiles can flex under pressure, leading to cracking. White thinset, especially polymer-modified versions, can offer superior load-bearing capabilities. Ensuring full, consistent coverage with the correct trowel is paramount for floors.
Ensuring Longevity in High-Traffic Areas
Areas that see a lot of foot traffic, like entryways or busy hallways, put extra stress on tile installations. The constant impact and friction can wear down weaker materials. A high-quality white thinset provides the necessary strength and resilience to withstand this kind of use. It creates a stable, durable surface that resists chipping, cracking, and loosening, even under heavy daily activity. This means your tile will look great and perform well for much longer.
The Link Between Thinset and Tile Failure
It's often said that tile failure isn't usually the tile's fault; it's more often a problem with the installation, and the thinset is a major component of that installation. Using the wrong type of thinset, mixing it improperly, or applying it incorrectly can all lead to premature failure. This can manifest as loose tiles, cracked tiles, or even the entire tile assembly detaching from the substrate. Choosing a reputable white thinset and following best practices for mixing and application significantly reduces the risk of these issues.
Investing in Quality for Lasting Results
When it comes to tile durability, skimping on the thinset is a false economy. Investing in a premium white thinset, like those offered by trusted manufacturers, means you're using a product designed for superior performance and longevity. These products often contain advanced additives that improve bond strength, flexibility, and resistance to environmental factors. For any project where durability is a concern, selecting a high-quality white thinset is a smart investment that pays off in the long run, saving you from costly repairs and replacements down the line. We offer handpicked A+ top-quality natural stone products, and the right thinset is key to showcasing their lasting beauty.
Comparing White Thinset to Other Mortars
When you're getting ready for a tile project, picking the right adhesive is a big deal. You've probably heard about white thin-set, and maybe you're wondering how it stacks up against other options out there. It’s not just about color; different mortars have different strengths and are suited for various jobs.
White Thinset vs. Gray Thinset
The most common comparison people make is between white and gray thin-set. Honestly, the main difference is the pigment. White thin-set uses white pigments, while gray uses iron oxides. This might seem minor, but it matters a lot, especially when you're working with light-colored or translucent tiles. Using gray thin-set behind a light marble could cause the tile to look dingy or discolored. White thin-set provides a neutral base that won't interfere with the tile's natural hue. For most general tiling jobs, either will work, but for anything where the tile color is critical, white is the way to go.
Understanding Specialty Mortars
Beyond the basic white and gray, there are specialty mortars designed for specific challenges. These might include additives for increased flexibility, water resistance, or faster setting times. Think about the environment your tile will be in. Is it a high-moisture area like a shower? Is it a floor that will see a lot of foot traffic? Specialty mortars are formulated to handle these conditions better than a standard mix.
When Epoxy Mortars Are Necessary
Epoxy mortars are a whole different ballgame. They're typically a two-part system (resin and hardener) that creates an incredibly strong, waterproof, and stain-resistant bond. You'll usually see epoxy mortars used in places that demand extreme durability and hygiene, like commercial kitchens, laboratories, or swimming pools. They are more expensive and can be trickier to work with than cement-based thin-sets, so they're not for everyday DIY projects. However, for demanding applications, they are unmatched.
The Benefits of Polymer-Modified Thinset
Polymer-modified thin-set mortars are cement-based but have added polymers. These polymers give the mortar increased flexibility, better adhesion, and improved water resistance. This makes them a great choice for areas that might experience some movement or temperature fluctuations, like exterior installations or floors with radiant heating. They offer a significant upgrade over basic thin-set without the complexity of epoxy. Many homeowners find these strike a good balance for their renovations.
Choosing the Right Mortar for Specific Applications
So, how do you pick? It really comes down to your tile and where it's going.
- Light or translucent tiles: Always opt for white thin-set.
- High-moisture areas (showers, tubs): Look for a polymer-modified thin-set or a specific waterproofing mortar.
- Large format tiles: These often benefit from a flexible, polymer-modified thin-set for better adhesion and to accommodate slight substrate movement.
- Areas needing extreme durability: Consider epoxy mortar, but be prepared for the cost and application.
- General indoor walls and floors: Standard gray or white thin-set is usually sufficient.
Limitations of Standard Thinset
Standard thin-set, whether gray or white, has its limits. It's not as flexible as polymer-modified versions, so it might crack if the substrate moves significantly. It also doesn't offer the same level of water or stain resistance as epoxy. Understanding these limitations helps you avoid potential problems down the line. For many common projects, standard thin-set mortar mix is perfectly adequate, but it's good to know when to step up.
The Importance of Manufacturer Recommendations
Ultimately, the best guide is always the tile manufacturer's and the mortar manufacturer's recommendations. They know their products best and will specify what type of adhesive is suitable. Always check the packaging or technical data sheets for guidance. This is especially true when working with premium materials like natural stone, where using the wrong mortar could ruin the look. For example, if you're working with marble, you'll want to be sure your chosen mortar won't cause discoloration. Many suppliers offer a wide range of thin-set mortar mix options to suit various needs.
Safety Precautions When Working with White Thinset
Working with any construction material requires a mindful approach to safety, and white thinset mortar is no exception. While it's a key component for a beautiful tile installation, taking the right precautions will make your project smoother and safer. It’s not just about getting the tiles down; it’s about protecting yourself throughout the process.
Understanding Material Safety Data Sheets (MSDS)
Before you even open a bag of white thinset, take a moment to locate and review its Material Safety Data Sheet (MSDS), or Safety Data Sheet (SDS) as they are now commonly called. These documents are packed with important information about the product's composition, potential hazards, and recommended safety measures. Think of it as the manufacturer's guide to using their product safely. You can usually find these on the manufacturer's website or sometimes right on the product packaging. Reading the SDS is your first line of defense.
Proper Ventilation During Mixing and Application
Mixing and applying thinset can create dust. This dust, especially from cementitious products, can be irritating to your respiratory system. Always ensure the area where you're working is well-ventilated. Open windows and doors, or use fans to keep the air circulating. If you're working in a confined space, consider using a ventilation fan to exhaust dust outside. This is particularly important when mixing large batches or working for extended periods.
Using Personal Protective Equipment (PPE)
Donning the right Personal Protective Equipment (PPE) is non-negotiable. At a minimum, you should always wear:
- Safety Glasses: To protect your eyes from dust and splashes.
- Gloves: Thinset can dry out your skin and cause irritation. Wear sturdy work gloves, preferably waterproof or nitrile, to keep your hands protected.
- Dust Mask or Respirator: A simple dust mask can help prevent inhaling fine particles, especially during mixing. For more extensive work, a respirator offers better protection.
- Long Sleeves and Pants: These provide a barrier against skin contact and can prevent irritation.
Handling Cementitious Materials Safely
White thinset is a cement-based product. Cement can be alkaline and can cause skin irritation or even chemical burns if left in prolonged contact with wet skin. Always wash your hands thoroughly after working with thinset, even if you were wearing gloves. If you get thinset on your skin, wash it off immediately with soap and water. Avoid rubbing your eyes or face with contaminated hands.
First Aid Measures for Skin or Eye Contact
Accidents happen, so knowing what to do is key. If thinset gets into your eyes, flush them immediately with plenty of clean water for at least 15 minutes, holding your eyelids open. Seek medical attention if irritation persists. If thinset gets on your skin and causes irritation, wash the affected area thoroughly with soap and water. For more severe reactions, consult a healthcare professional.
Disposal of Excess Materials
Proper disposal of excess thinset is important for environmental reasons and to avoid creating messes. Small amounts of mixed thinset can often be disposed of in your regular trash once fully hardened. However, check your local regulations, as some areas have specific rules for construction debris. Never pour wet thinset down drains or into storm sewers, as it can harden and clog pipes or harm aquatic life. Allow excess material to dry out completely before discarding.
Protecting Yourself and Your Workspace
Beyond personal protection, think about protecting your surroundings. Cover floors and nearby surfaces with drop cloths or plastic sheeting to catch spills and dust. This makes cleanup much easier and prevents accidental staining or damage to existing finishes. When working on a tile project, especially a shower remodel, it's recommended to work in smaller sections to avoid spreading thinset over too large an area. Thinset can dry out quickly, making it difficult to embed tiles properly. Check the consistency with your finger before it hardens to ensure you're still within the workable time frame.
The Aesthetics of White Thinset
When you're tiling, the color of your thinset mortar might not seem like a big deal, but it really can be, especially when you're going for a certain look. White thinset mortar plays a significant role in how your finished tile project looks, particularly with certain types of tiles. It's not just about sticking tiles down; it's about making sure the final appearance is exactly what you envisioned.
Achieving a Clean Grout Line Appearance
One of the main reasons people opt for white thinset is its ability to contribute to a clean, crisp grout line. Unlike gray thinset, which can sometimes show through lighter grout or even slightly tint it, white thinset provides a neutral base. This is especially important if you're using light-colored grout or if the grout lines are very thin. A white base helps the grout color appear true and vibrant. It prevents any underlying gray from dulling the effect, leading to a more polished and professional finish.
Preventing Dark Grout Lines from Showing Through
If you're working with tiles that have slight translucency or are very thin, gray thinset can sometimes be visible through the tile itself, creating a darker, muddier appearance than intended. White thinset avoids this issue entirely. It acts as a blank canvas, allowing the true color and design of the tile to shine without interference from the mortar color. This is particularly noticeable with natural stones or delicate ceramic tiles.
Enhancing the Visual Appeal of Light Tiles
For projects featuring light-colored tiles – think pale marble, off-white ceramic, or light beige stone – white thinset is almost a necessity. It complements these lighter shades, helping them to appear brighter and more luminous. Gray thinset, in contrast, could cast a subtle shadow or a grayish hue onto the tile, diminishing its natural warmth and brightness. White thinset ensures that the tile's inherent color is showcased to its fullest potential.
The Impact on Translucent Stone
Translucent stones, like some types of marble or onyx, have a unique quality where light can pass through them. When using gray thinset with these materials, the gray can be visible through the stone, altering its perceived color and depth. White thinset provides a much cleaner, brighter backdrop, allowing the natural translucency and subtle veining of the stone to be fully appreciated. It helps maintain the stone's authentic character and luxurious feel.
Creating a Seamless Transition
White thinset contributes to a more cohesive and unified look across your tiled surface. By providing a consistent, neutral color beneath the tiles, it helps to minimize visual distractions. This is especially true when dealing with projects that have very tight grout joints or when the tiles themselves have subtle variations in color. The white mortar helps bridge any minor gaps and creates a smoother overall aesthetic.
How Thinset Color Affects the Final Look
Ultimately, the color of your thinset is a small detail that can have a big impact on the final visual outcome of your tile installation. While gray thinset is perfectly functional and often the standard choice, white thinset offers specific aesthetic advantages that can make a significant difference, particularly for projects where color accuracy, brightness, and a clean appearance are paramount. It's a choice that reflects attention to detail and a desire for a superior finish.
Visualizing the Finished Project
Before you even mix your first batch, take a moment to visualize the finished project. Consider the color of your tiles, the grout you plan to use, and the overall mood you want to create. If you're aiming for a bright, airy, and clean look, especially with lighter materials, white thinset is likely your best bet. It's a simple material choice that supports a more refined and intentional design.
Sourcing Premium White Thinset
Finding the right white thinset mortar is key to a successful tile project, especially when you want your tiles to look their absolute best. It’s not just about sticking tiles down; it’s about ensuring longevity and maintaining the intended aesthetic. When you're aiming for a high-quality finish, especially with natural stone or light-colored tiles, the source of your thinset matters.
Identifying Reputable Manufacturers
When you're looking for premium white thinset, you want to stick with brands that have a solid reputation in the tiling industry. Think about companies that have been around for a while and are known for consistent quality. These manufacturers often invest more in research and development, meaning their products are formulated for better performance and reliability. Look for brands that clearly state their product specifications and offer technical support. It’s a good sign when a company stands behind its products and provides detailed information about what makes them work.
Where to Purchase High-Quality Thinset
Your best bet for finding top-tier white thinset is usually through specialized tile and stone suppliers, or well-stocked home improvement centers that cater to professionals. While you might find basic thinset at a general hardware store, premium options are more likely to be found where tile installation is taken seriously. Sometimes, direct importers of natural stone also carry high-quality setting materials because they understand the importance of using the right products with their premium stone. This direct importer advantage can sometimes translate to better pricing and assurance of quality.
The Advantage of Direct Importers
Direct importers often have a deeper understanding of the materials they sell, including the setting materials. Because they source directly from quarries and manufacturers worldwide, they can often ensure a higher grade of product. They're not just selling a box; they're selling a complete solution for high-end projects. This means they're more likely to stock or recommend white thinset that complements the luxury natural stone they offer. They understand that using a subpar mortar can ruin the look and durability of expensive tile.
Understanding Product Guarantees
A good indicator of a premium product is a strong manufacturer's guarantee or warranty. This shows the company's confidence in the performance and durability of their white thinset. While not all thinsets come with a formal warranty, reputable brands will often have clear guidelines on proper usage and what to expect in terms of performance. Always check the packaging or the manufacturer's website for any stated guarantees. This is especially important for projects where long-term durability is a must.
Seeking Expert Advice for Selection
Don't hesitate to ask for help. If you're unsure about which white thinset is best for your specific tile and substrate, talk to the experts. This could be the staff at a dedicated tile store, your contractor, or even the technical support line of a thinset manufacturer. They can guide you based on your project's needs, such as the type of tile, the size of the tiles, and the environment where they'll be installed. For instance, some projects might benefit from a polymer-modified thin-set for added flexibility.
Comparing Online and In-Store Options
Both online retailers and physical stores have their pros and cons when sourcing white thinset. Online, you might find a wider selection and potentially better prices, especially from direct importers or specialized online tile supply stores. However, you can't physically inspect the product or get immediate advice. In-store, you can see the packaging, ask questions directly, and sometimes even feel the texture of the dry mix. For premium products, it's often worth visiting a reputable local supplier to get the best advice and product.
Ensuring Authenticity and Performance
When buying premium white thinset, make sure you're getting the real deal. Stick to known brands and reputable sellers. Check that the packaging is intact and that the product details match what you expect. Using an authentic, high-quality thinset is the first step towards a tile installation that looks great and lasts for years. For example, products like Schluter All-Set White are formulated for specific performance benefits.
Future Trends in Thinset Technology
The world of tile installation is always moving forward, and thinset mortar is no exception. While we've got reliable options today, the future promises even better performance, easier application, and more eco-friendly choices for your U.S. projects. Let's look at what's on the horizon.
Innovations in Adhesion Science
Think about how thinset sticks to your tile and substrate. Scientists are constantly working on new ways to make that bond even stronger and more reliable. This means less worry about tiles coming loose down the road, especially in challenging areas like wet rooms or high-traffic zones. New formulations are being developed to create a molecular bond, not just a mechanical one. This could mean thinner layers of thinset providing the same or even better hold.
Development of Faster-Curing Formulas
We all want to finish projects quicker, right? The next generation of thinset is likely to include formulas that set and cure much faster. Imagine being able to grout just a few hours after setting your tiles, instead of waiting 24 hours or more. This speeds up the entire installation process, saving you time and potentially labor costs. This is especially good for tight renovation schedules.
Environmentally Friendly Thinset Options
There's a growing demand for building materials that are better for the planet and for our homes. Expect to see more thinset products made with recycled content, lower VOCs (Volatile Organic Compounds), and manufacturing processes that reduce waste. Some brands are already working on bio-based binders. This means you can achieve a beautiful tile installation while also making a more sustainable choice for your project.
Smart Thinset for Enhanced Monitoring
This might sound like science fiction, but some researchers are exploring 'smart' thinset. These could be materials that change color to indicate proper mixing, or even contain sensors that monitor curing conditions. While still in early development, this could lead to fewer installation errors and a more foolproof process for DIYers and pros alike.
New Additives for Improved Performance
Beyond just sticking power, additives are being developed to give thinset new capabilities. We're talking about enhanced flexibility to handle building movement, improved water resistance for wet areas, and even better thermal conductivity for use with underfloor heating systems. These specialized additives mean thinset can be tailored for almost any installation challenge.
The Evolution of Tile Setting Materials
Thinset is just one part of the tile setting puzzle. The future will likely see better integration of thinset with other setting materials, like waterproofing membranes and sound-deadening underlayments. The goal is a complete system that works together for maximum performance and longevity. This holistic approach simplifies installation and guarantees better results.
Anticipating Industry Advancements
Keeping an eye on these trends can help you make informed decisions for your next tile project. Whether you're a homeowner planning a renovation or a designer specifying materials, understanding what's coming next in thinset technology can lead to more durable, beautiful, and efficient installations across the U.S.
The world of tile setting is always changing! New ways to stick tiles down are being invented all the time. These new methods make sure your tiles stay put better and last longer. Want to know what's next in making tiles stick? Check out our website for the latest updates on thinset technology.
Wrapping Up Your Thinset Choice
So, picking the right white thinset might seem like a small detail, but it really makes a difference in how your tile project turns out. We've gone over why white is often the way to go, especially with lighter tiles, and how to check what the bag says to make sure it's the right stuff for your job. Don't just grab the first box you see; take a minute to read up. It’s like when I tried to fix my bike – a little bit of planning saves a lot of headaches later. A good thinset means your tiles will stick well and look great for years. If you’re still unsure, remember there are experts ready to help guide you, just like the folks at American Stone Center who know their natural stone inside and out. Happy tiling!
Frequently Asked Questions
What exactly is white thinset, and why is it special?
White thinset is a special kind of sticky stuff, like a cement glue, that you use to stick tiles to walls or floors. It's called 'white' because it's white, which is super important when you're using light-colored tiles, especially natural stones like marble. Unlike gray thinset, it won't make your pretty white tiles look dingy or change their color.
When should I pick white thinset over the regular gray kind?
Always go for white thinset when you're working with tiles that are light-colored, see-through, or made of natural stone. Think marble, travertine, or any stone that might let the color of the thinset show through. Gray thinset can sometimes bleed through and make your tiles look a bit off or discolored.
Does the color of the thinset really matter for my tiles?
Yes, it really does! If you use gray thinset on white or light tiles, the gray color can peek through the tile, especially if it's a bit thin or translucent. This can make your beautiful tile job look dull or stained. White thinset keeps the true color of your tiles shining through.
How do I mix white thinset the right way?
Mixing is key! You want to add water to the white powder slowly until it looks like peanut butter – smooth and creamy, not too runny and not too stiff. Use a drill with a mixing paddle for the best results. Make sure there are no dry clumps left.
What's the best way to put the thinset on the wall or floor?
You'll use a special notched trowel. Spread the thinset evenly on the surface, making sure to create ridges with the trowel. Then, you can also spread a little bit on the back of the tile itself – this is called 'back-buttering' – to make sure every bit of the tile sticks well.
How long do I have to wait before I can grout my tiles?
This depends on the type of thinset and the conditions, like how warm and dry it is. Usually, you need to wait at least 24 hours. The thinset needs time to get hard and dry, or 'cure,' before you add the grout. Always check the instructions on the thinset bag.
Can white thinset be used for all types of tiles?
White thinset is fantastic for natural stone and light-colored tiles. For other types of tiles, like ceramic or porcelain, gray thinset is often fine. Some projects might need special thinset, like ones with added polymers for extra strength or flexibility, especially for large tiles or areas that get wet a lot.
What if my thinset seems crumbly after it dries?
Crumbly thinset usually means it wasn't mixed with enough water or it dried out too fast. It's important to get the mix just right and not let it sit out too long before applying. If it's really bad, you might have to remove it and start over.
Is white thinset better for bathrooms or shower areas?
White thinset is a great choice for bathrooms and showers, especially if you're using light tiles. It helps ensure a clean look and prevents any color issues. For wet areas, you'll also want to make sure you use a good waterproofing membrane underneath the tiles.
How much area does one bag of white thinset cover?
The amount of coverage depends on the size of the tile and the size of the notches on your trowel. Generally, a bag might cover around 70-100 square feet for wall tiles and a bit less for floor tiles. Always check the product details for an estimate.
Can I use white thinset for very large tiles?
For large format tiles, you often need a thinset that's specifically designed for them, which might be a polymer-modified white thinset. These give a stronger bond and better support for the bigger, heavier tiles. Proper trowel size and back-buttering are also crucial.
What's the difference between 'open time' and 'working time' for thinset?
'Open time' is how long the thinset stays wet and sticky enough to grab a tile after you've spread it. 'Working time' is how long you have to spread and adjust the thinset before it starts to get stiff. You want a thinset with enough open time for your project but not so long that it dries out too fast.