


Key Takeaways
Designing with these small-format circular tiles offers a blend of historical charm and modern durability for various home projects. Understanding their material properties ensures your chosen surface remains resilient and visually striking for years to come.
- Ceramic penny tiles provide exceptional textural depth through their distinct circular shape.
- Proper substrate preparation is vital for ensuring long-term adhesion in wet areas.
- Mesh-backing simplifies installation, though it requires specific mortar techniques for seamless results.
- Selecting the right grout color can transform the visual impact of your chosen pattern.
- Routine maintenance protects the glaze and preserves the integrity of high-traffic floors.
The enduring appeal of ceramic penny tile
Ceramic penny tiles have captivated homeowners and designers for generations thanks to their unique ability to bridge the gap between vintage nostalgia and contemporary design. These classic circular units possess a rhythmic geometry that invites tactile interaction, creating surfaces that feel both intentional and approachable. When considering a renovation that prioritizes character, these tiles stand out as a premier choice for achieving an authentic look with reliable performance. By selecting the right Penny Round Ceramic Mosaic Tile, you can elevate any room from a standard space into something truly bespoke.
Historical significance in interior design
The origins of the penny-round format are deeply rooted in late 19th and early 20th-century architecture, particularly in public spaces and residential bathrooms where sanitation and style converged. These small tiles were favored for their ability to accommodate curved surfaces, offering a practical solution for drains and corners before large-format tiles became standard. Today, they remain a visual shorthand for classic interior design, evoking a timeless sensibility that resonates with those looking to honor the character of older homes or introduce a sense of history to new constructions.
Aesthetic versatility in modern homes
Modern interiors benefit immensely from the adaptability of the circular mosaic, which can serve as a subtle texture or a bold focal point depending on the application. Designers often use these tiles to soften the hard angles prevalent in kitchens and bathrooms, introducing a organic visual flow that contrasts beautifully with sharp cabinet lines or metallic fixtures. Whether you are aiming for a minimalist, monochromatic retreat or an eclectic, multi-colored statement, the small scale allows for creative freedom that larger tiles simply cannot replicate in the same way.
Why ceramic remains a top material choice
Among the various materials available, ceramic continues to be selected for its balance of affordability, consistency, and chemical stability. Ceramic glazes offer a level of protection against surface staining, provided the tiles are installed and sealed appropriately, making them ideal for high-contact environments. Beyond function, these tiles possess a warmth to the touch that stone or glass often lacks, ensuring that areas like shower floors and mudrooms feel comfortable and grounded underfoot.
Understanding technical specifications
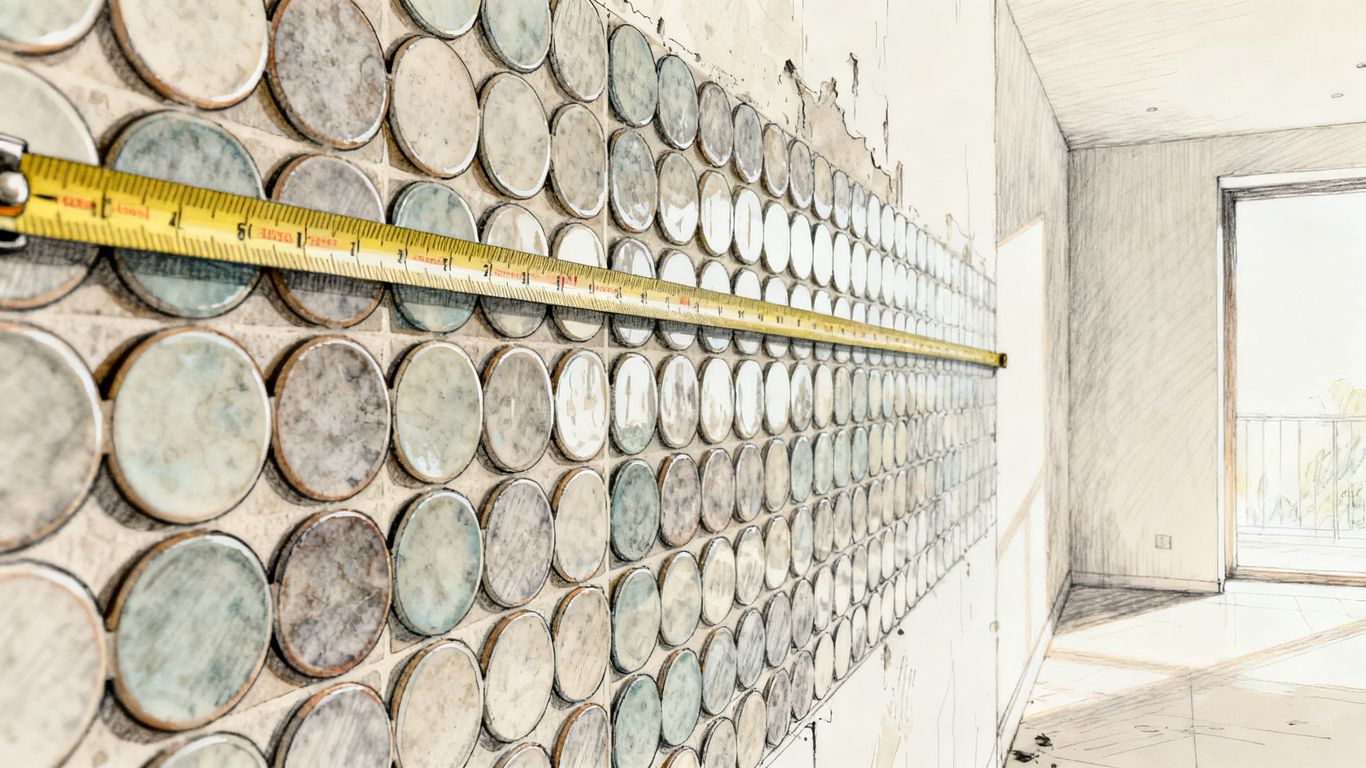
Choosing the right technical specifications for your project is the first step toward a successful design, as the physical characteristics of the tile dictate its longevity in specific environments. While aesthetic appeal is crucial, you must ensure that your selection meets standard requirements for durability, absorption, and surface finish. Many professional designers prioritize understanding the weight and mesh density of their chosen Penny Round Tiles, as these factors directly correlate to the ease of alignment during the tiling process.
Standard sizing and mesh-backed formats
The industry standard for these mosaics typically centers around 3/4 inch to 1-inch diameters, which come pre-assembled on mesh sheets. This backing is essential for maintaining uniform spacing between each circular unit and significantly reduces the labor time compared to installing individual pieces. Understanding these sheet dimensions allows for more precise material estimation, minimizing the risk of ordering insufficient product for your specific square footage.
Glaze types and finish durability
Ceramic glazes vary significantly, with choices ranging from matte finishes that offer improved grip to high-gloss options designed to reflect ambient light. When evaluating these options, consider the usage cycle and chemical exposure of the environment:
| Surface Finish | Best Application | Primary Benefit |
|---|---|---|
| Matte Finish | Bathroom Floors | High slip resistance |
| High Gloss | Kitchen Backsplash | Easy to clean surface |
| Textured Glaze | Entryways | Hides minor floor debris |
The table above illustrates how selecting the correct finish ensures that the material performs optimally in its intended zone. Always balance your aesthetic preference for a shiny wall with the practical need for a sturdy, safe floor finish.
Water absorption and suitability for wet areas
When working in moisture-prone rooms, the porosity of the ceramic body is a critical specification to investigate. Porcelain bodies generally offer lower water absorption than standard ceramic, which is a major factor for shower pans or outdoor balconies where freeze-thaw cycles might occur. If you are uncertain, consult the product data sheet—specifically the water absorption percentage—to ensure the tile is rated for full submersion when intended for shower walls or floors.
Design applications for every room
Designing with intention means identifying the right locations to showcase these unique circular motifs throughout your property. From intimate powder rooms to grand entryways, these tiles offer a sophisticated yet durable surface that holds up to daily wear while remaining a central design element. We often encourage clients to Explore our complete collection and see how different color palettes change the entire energy of a bathroom or mudroom.
Creating a statement in the primary bathroom
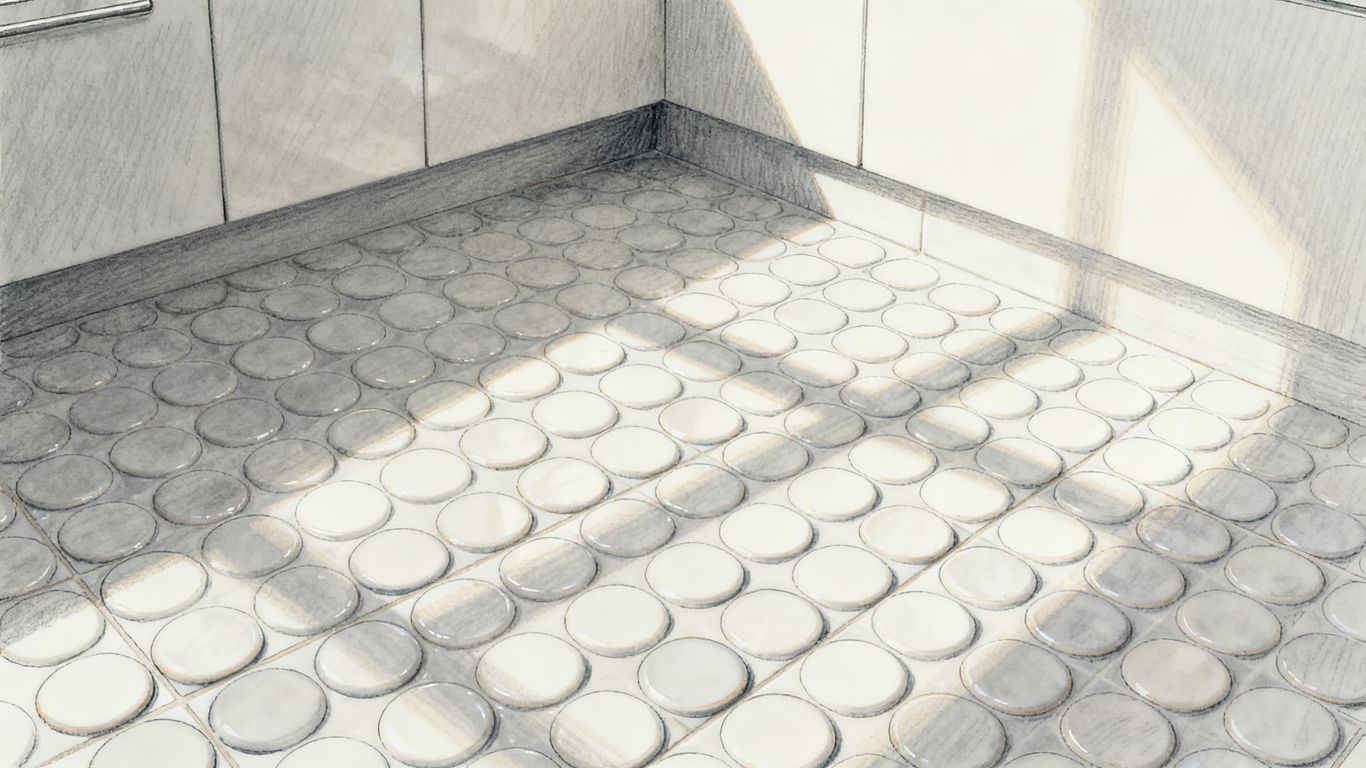
In the primary bathroom, these mosaics excel as flooring because their high grout-to-tile ratio contributes to excellent natural slip resistance. Using them to frame a walk-in shower or as a cohesive floor material creates a spa-like environment where the repetitive pattern acts as a calming texture. By keeping the color palette neutral, you can maintain a timeless feel that keeps the focus squarely on the quality of the ceramic finish.
Elevating the kitchen backsplash
A kitchen backsplash is perhaps the most visible application for these tiles, where they add a layer of complexity that feels more tactile than a standard subway tile. The reflective nature of a glossy glaze in the kitchen also helps distribute natural light more evenly across your workspaces. Consider pairing your tile with a deep, dark grout to highlight the circular shape, turning a functional wall into a geometric masterpiece that anchors the entire room design.
Using penny tiles for entryways and mudrooms
Entryways serve as the first impression of your home, and using these durable tiles for the floor ensures that high foot traffic is handled with style. Because these areas deal with dust, potential street moisture, and debris, selecting a matte finish is often recommended for better grip. The modular grid layout also makes it easier to cut around irregular doorways or transition strips, providing a clean edge that fits seamlessly into existing flooring materials.
Adding texture to accent feature walls
Sometimes an accent wall acts as the perfect canvas for creative expression, and circular mosaics are uniquely suited for this task. By choosing a high-contrast blend or a metallic-flecked glaze, you can create a sculptural surface that shifts under different lighting conditions. This type of application is highly effective in powder rooms or behind floating vanities, where the visual impact of the small circles can be fully appreciated at eye level.
Planning your layout and color patterns
Developing a plan for your layout requires a balance between mathematical precision and artistic vision, especially when playing with color gradients or custom design motifs. The key to a professional outcome is ensuring that the sheets are aligned perfectly at the beginning, as minor drifts in the mesh pattern can affect the visual rhythm of the entire floor. For those seeking expert guidance for your project, understanding how to map out these shapes is vital for a seamless installation.
Selecting monochromatic versus multi-tonal blends
Monochromatic layouts provide a sense of order and cleanliness, making them perfect for smaller spaces where you want to expand the visual feel of the room. Multi-tonal blends, on the other hand, allow you to introduce depth and movement, using varied shades of a single color to create a subtle ombre effect. When mixing colors, ensure they share the same physical thickness to avoid any uneven surfaces between individual tiles.
The impact of grout selection on visual cohesion
Grout is not merely a functional necessity; it is a design element that dictates whether the tiles appear as a unified surface or a collection of individual dots. A matching grout color minimizes the grid lines, emphasizing the overall color of the tile, whereas a darker or lighter grout will highlight the shape of each unit and create a stark graphic effect. This decision should correlate directly to your desired mood for the space.
Incorporating custom patterns and optical motifs
The beauty of mosaic design lies in the capability to create custom shapes that elevate a room from a standard living space into an immersive visual experience that reflects your personal aesthetic values.
Through simple planning on graph paper, you can create stripes, borders, or even intricate floral motifs by manually swapping individual penny rounds before the final setting. This level of customization elevates the humble ceramic tile into an artisan-quality feature that feels one-of-a-kind. It is a rewarding DIY-friendly approach for anyone who enjoys meticulous detail and wants to define their home with a unique, handcrafted spirit.
Essential installation best practices
Installing these tiles requires patience, but the process becomes significantly easier when you treat the mesh sheets with care. A common mistake is rushing the set, which often leads to misaligned rows or uneven mortar depth—problems that are magnified by the small size of the pieces.
Preparing a perfectly level substrate
Before you even touch a bag of thin-set, ensure the floor or wall is exceptionally smooth and structurally sound. Any dips or humps in the subfloor will be telegraphically revealed in the final tile work, as the mesh sheets are flexible and will follow the contours of the surface. Using a high-quality cement backer board is usually the best approach to guarantee an ideal, flat plane that will support your tiles for years.
Working with mesh backing for seamless connectivity
Mesh backing is designed to make installation efficient, but you must be careful not to stretch the mesh during placement. If you pull it too strongly, the gap between the tiles will widen, creating an inconsistent look that reveals the grid. When laying your sheets, butt them edge-to-edge as tightly as possible to ensure that the transition between one sheet and the next is virtually invisible to the naked eye.
Expert tips for precise mortar application
Select a notched trowel suitable for small mosaic sheets to ensure the mortar coverage is sufficient without overflowing the gaps.
- Apply the thinset in small, manageable sections to prevent it from skinning over.
- Use a rubber float to set the tiles, pressing gently to achieve a perfectly level plane.
- Periodically step back and check the grid alignment from multiple angles to catch deviations.
- Allow adequate drying time before applying grout to prevent shifting.
Precision during the mortar application phase is the most critical step to avoid future bond failure, especially in moisture-heavy environments like bathrooms or showers.
Maintenance and care for lasting beauty
Once installed, these tiles are quite robust, but they do require regular care to remain looking their best. The high number of grout joints means that grout maintenance is your primary focus, but a few consistent habits will keep the entire surface clean and vibrant.
Routine cleaning protocols for high-traffic zones
In zones like entryways or kitchens, dirt can accumulate quickly in the grooves between the circles. We recommend a regular neutral cleaner applied with a soft-bristled brush, which can reach deep into the low areas of the grout without scratching the ceramic glaze. Avoid heavy scrubbing with abrasive pads, as these can eventually dull the finish of the tile.
Best practices for long-term grout protection
Applying a high-quality grout sealer after all moisture has left the grout lines is mandatory for stain resistance. Depending on the traffic and the type of sealant, you should look to reapply every one to two years to prevent the grout from darkening over time. Using an epoxy grout is an alternative for particularly demanding environments if you want to avoid future re-sealing altogether.
Managing minor repairs and surface chips
Despite their durability, ceramic tiles can occasionally suffer from impacts. Keep a few spare sheets aside during the initial installation so you have an exact color match should you need to swap out a single compromised tile. The process involves carefully removing the damaged piece and the surrounding grout before thin-setting a clean replacement into the empty void.
Preventing chemical damage to delicate ceramic glazes
Harsh acidic cleansers, such as those formulated for lime scale or heavy rust, can permanently etch the surface of many ceramic glazes. Always read the label on your cleaning products to ensure they are safe for ceramic and stone. Even if the cleaner works, it is best to test on a small, inconspicuous area first before applying it to the entire floor to be absolutely certain of the reaction.
Conclusion
Designing with ceramic penny tile is a rewarding way to bring timeless texture and personalized character into your home. By leaning into the technical requirements of preparation and grout maintenance, you ensure that this elegant material remains a functional cornerstone of your space for generations to come.
Frequently Asked Questions
Are penny tiles suitable for installation in a full shower?
Yes, these tiles are excellent for shower use, particularly on floors where their shape and grout spacing provide reliable grip, provided the tiles are properly rated for moisture and the substrate is correctly waterproofed.
Do I need a specific type of grout for small mosaic tiles?
While standard grout is often used, opting for a high-performance or epoxy grout can be beneficial for small mosaics to ensure color consistency and superior stain resistance across the many joints.
How difficult is the installation process for a DIYer?
Installation is manageable for beginners, but it requires much more patience and precision than large-format tiles due to the increased number of alignments and the delicacy of the mesh backing.
Can penny tiles be used on walls as well as floors?
Absolutely, they are a fantastic choice for feature walls, backsplashes, and shower niches, where they add a layer of dimensional texture that is very difficult to achieve with larger tiles.
What should I look for when calculating material needs?
Always add 10% to your total square footage requirement to account for cuts, potential breakage during transport, and any mistakes made during the layout phase.
How does the size of the ceramic penny tile affect the room?
Their small size can effectively break up sharp lines and soften the overall geometry of a space, making them ideal for adding warmth to modern, angular room layouts.
Is it possible to create patterns using different colored penny tiles?
Yes, since they come on sheets, you can easily swap out individual colors from different mesh patterns to create stripes, borders, or custom geometric motifs that feel entirely bespoke.