


So, your cultured marble has started looking a bit… yellow? It happens. Maybe it’s the sun, maybe it’s just age, or maybe something you used reacted with it. Whatever the reason, seeing that yellowing can be a bummer, especially when you love how your marble looks. But don't worry, figuring out how to clean cultured marble that has yellowed doesn't have to be a huge ordeal. We're going to break down what causes it and what you can do about it, from simple stuff to more involved fixes. You can get that shine back.
Key Takeaways
- Cultured marble can yellow due to sunlight, chemical reactions, age, or material degradation.
- Start with a visual inspection and gentle cleaning methods like mild soap and water.
- Baking soda paste can be effective for mild to moderate yellowing when applied gently.
- Diluted white vinegar can help, but use it sparingly and rinse thoroughly to avoid damage.
- Hydrogen peroxide offers a brighter clean for tougher yellow stains, but always spot-test first.
- Specialized cultured marble cleaners can be useful, but follow instructions carefully.
- For deep or stubborn stains, consider poultices or professional refinishing.
- Regular maintenance, including prompt spill cleanup and using pH-neutral cleaners, prevents future yellowing.
Understanding Cultured Marble Yellowing
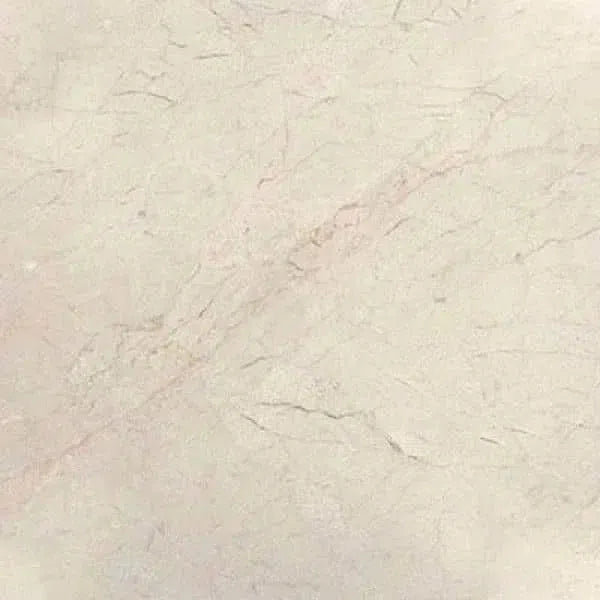
Cultured marble, a popular choice for its beauty and durability, can sometimes develop a yellow tint over time. This isn't usually a sign of poor quality, but rather a natural process influenced by several factors. Understanding why this happens is the first step toward keeping your cultured marble looking its best.
Cultured marble is an engineered composite material made from marble dust or chips, resin, and other additives. It's cast into molds to create a variety of shapes, like sinks, bathtubs, and countertops. While it mimics the look of natural marble, its composition is different, which affects how it ages and reacts to its environment.
Several things can contribute to cultured marble yellowing. It's often a combination of factors rather than a single culprit.
- Oxidation: The resins used in cultured marble can oxidize over time, especially when exposed to light and air. This chemical reaction can cause a gradual yellowing.
- Residue Buildup: Soap scum, hard water deposits, and cleaning product residue can accumulate on the surface. If not removed properly, these layers can appear yellow and make the marble look dull.
- Sunlight Exposure: Prolonged exposure to direct sunlight, particularly UV rays, can degrade the resins and pigments in cultured marble, leading to discoloration.
- Chemical Reactions: Certain cleaning agents, cosmetics, hair dyes, or even some types of food can react with the surface of cultured marble, causing staining or yellowing.
- Age and Material Degradation: Like any material, cultured marble has a lifespan. Over many years, the components can break down, leading to a general yellowing or dullness.
It's helpful to figure out how severe the yellowing is. Is it a light haze, or is it a deep, noticeable stain? This will help you choose the right cleaning method. A quick visual check is usually enough to get a general idea.
Direct sunlight is a common enemy of cultured marble's original color. Those UV rays can really break down the material over time. If your cultured marble is in a sunny spot, like a bathroom window or a vanity near a bright window, this could be a major reason for yellowing. Minimizing exposure to direct sunlight is key to preventing this.
Think about what comes into contact with your cultured marble surfaces daily. Hair sprays, certain lotions, harsh cleaners, and even some nail polish removers can cause chemical reactions. These reactions can lift the color or create new yellow stains that weren't there before. It's why choosing the right cleaning products is so important.
Sometimes, yellowing is simply a sign of age. The materials used to create cultured marble, particularly the resins, can degrade over decades. This isn't a reflection of poor maintenance but rather the natural aging process of the composite. If your fixture is quite old, this might be the primary reason for its change in color.
Prevention is always better than cure. Regular, gentle cleaning, prompt spill cleanup, and avoiding harsh chemicals can go a long way. Using protective mats in high-traffic areas and being mindful of what products come into contact with the surface can also help maintain its original appearance for years to come.
Initial Assessment of Yellowed Cultured Marble
Before you grab any cleaning supplies, it’s smart to take a good look at what you’re dealing with. Not all yellowing is the same, and knowing the specifics helps you pick the right approach. It’s like a doctor diagnosing a problem before prescribing medicine, you know?
Visual Inspection Techniques
Start by just looking. Is the yellowing uniform across the surface, or are there specific spots? Does it look like a surface stain, or does it seem to be coming from deeper within the material? Sometimes, what looks like yellowing can actually be a buildup of soap scum or hard water deposits, especially in areas like shower stalls or around faucets. A quick wipe with a damp cloth might reveal if it’s just surface grime. A thorough visual check is your first, and often most important, diagnostic step.
Testing Surface Porosity
Cultured marble has a gel coat layer, but sometimes this can wear down over time, making the material underneath more exposed. You can get a sense of this by doing a simple water test. Drip a small amount of water onto an inconspicuous area. If the water beads up, the surface is likely still well-sealed. If it soaks in quickly and darkens the marble, it suggests the gel coat might be compromised, and the yellowing could be deeper. This is a key indicator for how aggressive you can be with cleaning.
Determining the Depth of Discoloration
This ties into porosity. If the yellowing wipes away easily with a damp cloth, it's superficial. If it remains after a gentle wipe, it's likely within the gel coat or even the material itself. For instance, a customer might notice their cultured marble vanity top feeling rough and yellowing after just a year, indicating the issue might be more than just surface dirt.
Assessing Surrounding Materials
Take a moment to look at what’s around the cultured marble. Are there metal fixtures that might be corroding and staining the marble? Are there grout lines or caulk that might be discolored and making the marble look worse by comparison? Sometimes, the problem isn't solely with the marble itself but how it interacts with its environment.
Understanding Manufacturer Recommendations
If you still have any documentation from when the cultured marble was installed, check it. Manufacturers often provide specific cleaning and maintenance guidelines. They might warn against certain chemicals or recommend particular products. Ignoring these could void a warranty or, worse, damage the surface. It’s always a good idea to see what the maker suggests.
When to Seek Professional Advice
If the yellowing is extensive, deep, or you’re unsure about the cause, it might be time to call in an expert. Sometimes, what looks like a simple cleaning job can turn into a bigger problem if you use the wrong methods. Professionals have the tools and knowledge to assess severe issues, like those that might arise from leaving a hot curling iron on the surface.
Documenting the Yellowing Process
Take some photos before you start cleaning. This gives you a baseline to compare against as you work. It’s also helpful if you need to consult with a professional later on. You can show them exactly what the problem looked like before any cleaning attempts were made. This helps track progress and identify if your efforts are making a difference.
Gentle Cleaning Methods for Mild Yellowing
When your cultured marble starts showing a bit of yellowing, don't panic. Often, a simple, gentle approach is all it takes to bring back its original luster. This is especially true for mild discoloration that hasn't set in too deeply. The key is to be consistent and use the right techniques without resorting to harsh chemicals that could do more harm than good.
The Power of Mild Soap and Water
For everyday cleaning and to tackle light yellowing, a solution of mild dish soap and warm water is your best friend. It's effective at lifting surface grime and oils that can contribute to discoloration without damaging the marble's finish. Always start with the gentlest method possible.
Using Soft Microfiber Cloths
When applying your cleaning solution, reach for soft microfiber cloths. These cloths are non-abrasive and excellent at picking up dirt and residue. Avoid using rough sponges or scouring pads, as they can scratch the surface, making it more prone to future staining and yellowing.
Rinsing Thoroughly for Residue Removal
After washing, it's really important to rinse the surface well with clean water. Soap residue left behind can attract dirt and create a dull film, which might even contribute to yellowing over time. Make sure all traces of the soap solution are gone.
Drying Surfaces Completely
Water spots can be a real nuisance and can also lead to mineral buildup that causes discoloration. After rinsing, use a dry, clean microfiber cloth to buff the surface dry. This step helps maintain that beautiful shine and prevents water marks.
Avoiding Abrasive Scrubbing Tools
I can't stress this enough: steer clear of anything abrasive. Steel wool, harsh brushes, or abrasive powders will scratch the cultured marble. These scratches not only look bad but also create tiny crevices where dirt and moisture can get trapped, leading to more significant problems down the line.
Frequency of Gentle Cleaning
How often should you do this? For areas with mild yellowing, a gentle cleaning routine a couple of times a week can make a big difference. For high-use areas like bathroom vanities, a quick wipe-down daily is a good habit to get into.
Maintaining a Clean Marble Environment
Keeping your cultured marble looking its best is an ongoing process. By incorporating these gentle cleaning methods into your regular routine, you can effectively manage mild yellowing and keep your surfaces looking great for years to come. It’s all about consistent, careful care.
Harnessing the Cleaning Power of Baking Soda
When your cultured marble starts showing signs of yellowing, it's easy to feel a bit discouraged. But before you start thinking about expensive replacements or harsh chemicals, consider a surprisingly effective and gentle solution: baking soda. This common household item is a real workhorse when it comes to cleaning, and it can work wonders on mild to moderate yellowing on your marble surfaces. It's a great option for homeowners across the U.S. looking for budget-friendly and safe cleaning methods.
Creating a Baking Soda Paste
The magic of baking soda lies in its mild abrasive quality and its ability to absorb odors and lift stains. To get started, you'll want to create a paste. Mix about three parts baking soda with one part water. You're aiming for a consistency that's thick enough to stick to the yellowed areas without running off immediately. Think of it like toothpaste – spreadable but not watery. This simple mixture is a fantastic starting point for tackling discoloration.
Applying the Paste to Yellowed Areas
Once you have your paste ready, it's time to apply it. Use a soft cloth or a non-abrasive sponge to gently spread the paste over the yellowed sections of your cultured marble. Don't scrub hard at this stage; just focus on covering the discolored areas evenly. For larger areas, you might want to work in smaller sections to ensure the paste stays moist.
Gentle Scrubbing Techniques
After the paste has been applied, it's time for some gentle agitation. Use a soft-bristled brush or the damp cloth you used for application to lightly scrub the area in a circular motion. The goal here isn't to remove material, but to help the baking soda work its way into any surface imperfections where the yellowing might be hiding. Remember, cultured marble can be sensitive, so always err on the side of caution with your scrubbing pressure.
Allowing the Paste to Dwell
This is where patience pays off. Let the baking soda paste sit on the yellowed areas for about 15-30 minutes. This dwell time allows the baking soda to break down the discoloration and absorb any unwanted odors. For tougher spots, you might even leave it a bit longer, but keep an eye on it to ensure it doesn't dry out completely.
Rinsing Away Baking Soda Residue
After the dwell time, it's time to rinse. Use a clean, damp cloth to wipe away all the baking soda paste. You'll want to rinse your cloth frequently to make sure you're not just smearing the residue around. Thorough rinsing is key to preventing any chalky film from being left behind on your marble. A good rinse ensures a clean slate for the next steps.
Buffing the Marble Surface
Once all the paste is removed, use a dry, soft microfiber cloth to buff the surface. This step helps to bring back the natural shine of your cultured marble. You might be surprised at how much brighter the area looks already. Buffing also helps to remove any lingering moisture, which is important for preventing water spots.
Repeat Applications for Stubborn Stains
For areas with more persistent yellowing, don't be discouraged if the first attempt doesn't completely solve the problem. You can repeat the baking soda paste application process. Sometimes, a second or even a third application, allowing for adequate dwell time each time, is needed to lift deeper stains. It's a testament to the versatility of baking soda as a cleaning agent. Just remember to be gentle with each application, and you'll likely see significant improvement over time, keeping your marble looking its best for projects nationwide.
Exploring the Efficacy of Vinegar Solutions
Sometimes, you need a little something extra to tackle those yellowing spots on your cultured marble. White vinegar is a common household item that many people turn to. It's acidic, which can help break down certain types of buildup that cause discoloration.
Diluting White Vinegar Correctly
It's really important not to use vinegar straight from the bottle. It's quite strong, and using it undiluted can actually damage your cultured marble. A good starting point is a 50/50 mix of white vinegar and water. You can even dilute it further if you're unsure, maybe starting with one part vinegar to three parts water. Always test any cleaning solution in a small, hidden spot first. This way, you can see how the marble reacts before committing to a larger area.
Applying the Vinegar Solution
Once you have your diluted solution, you'll want to apply it carefully. A spray bottle works well for this. Lightly mist the yellowed areas. You don't want to soak the surface, just get it damp enough to work on the discoloration. If you don't have a spray bottle, you can use a soft cloth dipped in the solution and then wrung out so it's not dripping.
The Importance of Short Contact Time
Because vinegar is acidic, it shouldn't sit on the cultured marble for too long. Leaving it on for extended periods could etch the surface or cause further damage. Aim for just a few minutes – maybe 5 to 10 at most. You're trying to let the acidity do its work on the yellowing without harming the marble itself.
Neutralizing Vinegar with Water
After the short contact time, it's vital to rinse the area thoroughly. Use clean water to wash away any vinegar residue. This step is key to preventing any lingering acidity from causing problems down the line. Some people even follow up with a very mild soap and water rinse just to be absolutely sure.
Rinsing and Drying the Marble
Make sure you get all the vinegar and any loosened grime off the surface. Use a clean, damp cloth to wipe away the solution. Then, and this is really important, dry the marble completely with a soft, dry towel. Leaving water to air dry can lead to water spots, which is just another problem you'll have to deal with.
Potential Risks of Undiluted Vinegar
Using vinegar that's too strong or leaving it on for too long can cause permanent damage. You might see etching, which looks like dull spots on the surface, or even a slight breakdown of the material's finish. It's a risk that's just not worth taking when there are safer methods available. Remember, cultured marble is beautiful but can be sensitive.
When Vinegar Might Not Be Suitable
Vinegar isn't the best choice for every situation. If your cultured marble is already showing signs of wear, has a very delicate finish, or if you're dealing with very deep-set stains, vinegar might not be strong enough or could even make things worse. For these tougher cases, you might need to look into specialized cleaners or other methods discussed in this guide. It's always good to know the limits of each cleaning agent you use for your marble surfaces.
Utilizing Hydrogen Peroxide for Brighter Results
Sometimes, the yellowing on your cultured marble isn't just surface-level dirt. It might be a bit more stubborn, and that's where hydrogen peroxide can come in handy. It's a common household item, but it's got some cleaning power that can really help brighten up those dull, yellowed areas. It works by gently oxidizing the discoloration.
Understanding Hydrogen Peroxide's Properties
Hydrogen peroxide is a mild bleaching agent. Unlike harsher chemicals, it breaks down into water and oxygen, making it a relatively safe option for many surfaces when used correctly. Its oxidizing action can lift organic stains and brighten materials without being overly aggressive. It's a good choice when you want a bit more power than soap and water but aren't ready for industrial-strength cleaners.
Preparing a Hydrogen Peroxide Solution
For cultured marble, you'll typically want to use a standard 3% hydrogen peroxide solution, which you can find at most drugstores. You don't usually need to dilute it further for this purpose. Just pour it into a clean spray bottle.
Spot Testing on an Inconspicuous Area
Before you go spraying it all over your beautiful marble, it's always a smart move to test it first. Find a hidden spot – maybe the underside of a sink rim or a corner that doesn't get much attention. Spray a little on, let it sit for a few minutes, then wipe it off and see if there's any adverse reaction. This step is super important to avoid any unexpected damage.
Applying the Solution with Care
Once you've confirmed it's safe, you can start applying the hydrogen peroxide. You can either spray it directly onto the yellowed areas or dampen a clean cloth with the solution and dab it onto the spots. Make sure to cover the discolored sections thoroughly.
Allowing Sufficient Dwell Time
This is where patience pays off. Hydrogen peroxide needs a little time to work its magic. Let the solution sit on the yellowed areas for about 10 to 30 minutes. For tougher spots, you might even consider covering the area with plastic wrap to keep the peroxide moist and active for longer. This helps it penetrate and lift the stain more effectively. You can find more tips on stain removal on our FAQ page.
Rinsing and Thorough Drying
After the dwell time, rinse the area thoroughly with clean water. Use a damp microfiber cloth to wipe away any remaining peroxide solution. It's really important to get all the residue off. Then, dry the surface completely with a clean, dry towel. Leaving water spots can create new problems, so a good drying is key.
Safety Precautions During Use
While hydrogen peroxide is generally safe, it's still a chemical. Always work in a well-ventilated area. Wear gloves to protect your skin, and avoid getting it in your eyes. If you're working on a large area or for an extended period, consider eye protection too. Remember, this is for cultured marble, and while effective, always proceed with caution.
The Role of Specialized Cultured Marble Cleaners
Sometimes, the usual soap and water just won't cut it when your cultured marble starts looking a bit dingy. That's where specialized cleaners come in. These products are made specifically for cultured marble, meaning they're designed to tackle issues like yellowing without damaging the surface. It's like having a tailor-made solution for your specific marble needs.
Choosing the Right Commercial Cleaner
Walking down the cleaning aisle can be a bit overwhelming, right? So many bottles, so many claims. For cultured marble, you want to look for cleaners that explicitly state they are safe for "cultured marble," "solid surface," or "non-porous acrylics." Avoid anything labeled "all-purpose" unless it specifically mentions suitability for these materials. Some cleaners might be too harsh and could actually make the yellowing worse or dull the finish. It's a bit of a hunt, but finding the right one makes a big difference.
Reading Product Labels Carefully
This is super important. Before you even buy the cleaner, give that label a good read. You're looking for ingredients and instructions. Does it mention "non-abrasive"? That's a good sign. Does it warn against using it on certain surfaces? Pay attention to that. The label is your best guide to making sure you're using the right product for the job. It might seem obvious, but you'd be surprised how many people skip this step and end up with problems.
Following Manufacturer Instructions Precisely
Once you've got your cleaner, don't just wing it. Every product has its own way of working best. Some you spray on and wipe off immediately, others need to sit for a few minutes. Some might require a specific type of cloth or sponge. Sticking to the directions helps get the best results and, more importantly, keeps your cultured marble looking good for years to come. It's not rocket science, but it does require a little attention to detail.
Applying Cleaners to Yellowed Sections
When you're ready to clean, focus on the areas that need it most. You don't necessarily need to clean the entire surface if only a small part is yellowed. Use a soft cloth or sponge – never anything rough that could scratch. Apply the cleaner directly to the cloth first, or spray it lightly onto the yellowed area. Work in small sections, especially if the cleaner has a longer dwell time. This prevents the cleaner from drying out on the surface before you can wipe it away.
Wiping and Rinsing Procedures
After the cleaner has done its work (according to the label, of course), it's time to wipe. Use a clean, damp cloth to remove the cleaner and any loosened grime. Make sure you get all the residue off. Leftover cleaner can sometimes cause streaks or attract more dirt. Rinse your cloth frequently as you wipe. After wiping, a final rinse with plain water is a good idea, followed by drying the surface completely with a soft, dry towel. This step is key to a streak-free shine.
Evaluating Cleaner Effectiveness
Did it work? After you've cleaned and dried the area, take a look. Is the yellowing reduced? Is the surface brighter? Sometimes, one application is enough. Other times, especially with stubborn yellowing, you might need to repeat the process. Keep track of what you used and how you used it. If a cleaner doesn't seem to be making much of a difference after a couple of tries, it might be time to consider a different product or a more advanced method.
Understanding Ingredient Safety
While specialized cleaners are generally safe, it's still good to be aware of what's in them. Look for cleaners that are free from harsh chemicals like ammonia, bleach, or strong acids, as these can damage cultured marble over time. Many effective cleaners use milder solvents or oxygen-based agents. If you have sensitivities or concerns, check the product's safety data sheet (SDS), which is usually available on the manufacturer's website. This helps you make an informed choice for both your marble and your well-being.
Addressing Stubborn Yellow Stains
Sometimes, the usual cleaning tricks just don't cut it. When yellowing on your cultured marble has really set in, it's time to bring out the heavier artillery. These aren't your everyday smudges; these are stains that have bonded with the surface over time, often due to deeper issues or prolonged neglect. Don't worry, though. We've got a few approaches to tackle these more persistent problems.
Identifying Deep-Seated Discoloration
First off, you need to figure out if the yellowing is just on the surface or if it's gone deeper into the material. A quick way to check is to gently scratch a tiny, inconspicuous area with your fingernail. If the yellow comes off easily, it's likely surface-level. If it doesn't budge, or if you see the yellowing continuing beneath the surface layer, you're dealing with something more stubborn. This often happens when the protective gel coat has worn down, allowing stains to penetrate the resin underneath. It's a good idea to check your manufacturer's recommendations at this stage, as they might have specific advice for your particular product.
Considering Poultice Applications
When simple scrubbing fails, a poultice can be a game-changer. A poultice is essentially a paste that draws stains out of porous materials. Think of it like a stain magnet. For cultured marble, you'll want a poultice that's effective but still gentle enough not to damage the surface. The key is to find a material that can absorb the stain without being too abrasive.
Creating a DIY Poultice
Making your own poultice is pretty straightforward. A common and effective base is baking soda mixed with water to form a thick paste. For tougher stains, you might consider adding a bit of hydrogen peroxide to the baking soda paste. The goal is a consistency like peanut butter – thick enough to stick to the surface without dripping off. You can also find commercial poultice products specifically designed for cultured marble, which can be a convenient option if you're short on time or unsure about DIY mixes. Always test any new cleaning agent on a hidden spot first.
Applying and Removing the Poultice
Once you have your paste, apply it generously to the yellowed areas. You want a layer about a quarter-inch thick. Then, cover the poultice with plastic wrap and tape down the edges. This keeps the paste moist and allows it to work its magic over time. Let it sit for at least 24 to 48 hours. The longer it sits, the more stain it can potentially draw out. After the dwell time, carefully remove the plastic wrap and gently scrape away the dried poultice with a plastic scraper or an old credit card. Rinse the area thoroughly with water and dry it completely.
Patience with Persistent Stains
Stubborn stains rarely disappear after just one treatment. You might need to repeat the poultice application several times. It's a slow process, but patience is key. If you're not seeing improvement after a few attempts, it might be time to reassess your approach.
When to Reconsider Cleaning Agents
If multiple poultice applications aren't making a dent, it's a sign that the discoloration might be too deep or permanent for DIY methods. At this point, you might need to consider stronger commercial cleaners. For instance, a product like ZEP Shower, Tub, and Tile Cleaner is formulated for tough grime and is safe for cultured marble, but always follow its instructions precisely and test it first.
The Limits of Home Cleaning Solutions
It's important to know when to stop. If you've tried various methods and the yellowing persists, or if you're worried about causing damage, it's probably time to call in the professionals. Sometimes, the discoloration is a sign of deeper material degradation that requires specialized restoration techniques. Trying to force it with harsh chemicals could end up causing more harm than good to your beautiful cultured marble surfaces.
Restoring Shine and Preventing Future Yellowing
So, your cultured marble has seen better days, and that yellow tinge is really starting to bug you. Don't worry, it happens. The good news is, you can often bring back that original gleam and keep it that way with a little effort. It’s all about using the right techniques and a bit of preventative care.
Polishing Cultured Marble Surfaces
After cleaning, you might notice the surface looks a bit dull. Polishing is what brings back that lovely shine. It's not about removing material, but more about smoothing out the very top layer so it reflects light better. Think of it like buffing a car – it makes everything look brighter and newer.
Using Marble Polishing Compounds
There are specific polishing compounds made for cultured marble. These aren't harsh abrasives; they're usually fine powders or creams that gently buff the surface. You'll typically apply a small amount to a soft cloth and rub it in a circular motion. The key is to work in small sections and buff until you see the shine return. It might take a bit of elbow grease, but the results are usually worth it. You can find these compounds at most home improvement stores or online.
Applying Protective Sealants
Once your marble is clean and polished, sealing it is the next big step. Sealants create a barrier on the surface. This barrier helps prevent stains and makes cleaning easier down the road. It's like putting a clear coat on a car – it protects the paint. For cultured marble, you'll want a sealant specifically designed for non-porous surfaces, as cultured marble isn't as porous as natural stone. Applying it is usually straightforward: wipe it on, let it sit for a bit according to the product instructions, and then buff off any excess.
Understanding Sealant Longevity
Sealants don't last forever. How long they last depends on the product used and how much wear and tear the surface gets. Generally, you might need to reapply a sealant every 6 to 12 months. A good test is to sprinkle a little water on the surface. If it beads up, the sealant is likely still doing its job. If the water soaks in and darkens the marble, it's probably time to reseal. Keeping up with this is a big part of preventing future yellowing.
Regular Maintenance Routines
Consistency is your best friend here. Making a habit of wiping down your cultured marble surfaces after each use, especially in bathrooms and kitchens, makes a huge difference. This simple act prevents soap scum and water spots from building up, which can contribute to discoloration over time. A quick wipe with a soft cloth and some water is usually all it takes.
Minimizing Exposure to UV Light
Did you know sunlight can actually contribute to yellowing? Prolonged exposure to UV rays can break down the resins in cultured marble, leading to that unwanted color change. If you have a vanity or shower surround that gets a lot of direct sun, consider using window treatments like blinds or curtains to block some of the light. It’s a simple step that can help preserve the original color of your marble for longer.
Avoiding Harsh Cleaning Chemicals
This is a big one. Many common household cleaners, especially those with ammonia or bleach, can be too harsh for cultured marble. They can strip away the protective gel coat or even react with the material, causing yellowing or damage. Stick to pH-neutral cleaners or the gentle methods we’ve discussed earlier. If you're unsure about a cleaner, always test it on a small, inconspicuous spot first. For granite, a mix of rubbing alcohol, dish soap, and water is often recommended, but always check your specific material's needs.
Advanced Techniques for Severe Yellowing
When gentle cleaning and even stronger home remedies haven't quite done the trick, and your cultured marble is showing significant yellowing, it's time to consider more involved approaches. This isn't usually a quick fix, but with the right methods, you can often bring back that original brightness.
Professional Refinishing Options
For deeply set discoloration or widespread yellowing that doesn't respond to DIY efforts, professional refinishing is a solid choice. This process essentially involves restoring the surface layer of the cultured marble. It's a way to tackle issues that go beyond a simple surface stain. Think of it as giving your marble a fresh start.
Understanding Resurfacing Processes
Resurfacing cultured marble typically involves applying a new top coat or a specialized coating system over the existing surface. This new layer masks the yellowing and provides a smooth, uniform finish. Kits like Marble Dream are designed for homeowners to achieve a similar effect, but for severe cases, professional application often yields superior, longer-lasting results. The goal is to create a durable, aesthetically pleasing surface that looks new again.
When Replacement Becomes Necessary
Sometimes, despite best efforts, the damage might be too extensive. If the yellowing is accompanied by deep cracks, chips, or significant degradation of the material itself, replacement might be the more practical and cost-effective solution in the long run. It's a tough decision, but it's important to assess the overall condition of the marble.
Consulting with Marble Restoration Experts
Before committing to any major work, it's wise to get an opinion from professionals who specialize in cultured marble restoration. They can accurately assess the extent of the yellowing and recommend the most suitable course of action. They have the tools and knowledge to identify the root cause and propose effective treatments.
Evaluating the Cost-Effectiveness of Repair
It's always a good idea to weigh the cost of professional refinishing or repair against the price of replacing the entire fixture or surface. While restoration can be significantly cheaper than a full replacement, very extensive damage might tip the scales. Get quotes and compare them to understand your options fully.
The Benefits of Professional Intervention
Professionals bring a level of skill and access to specialized materials that are hard to replicate at home. They can often achieve a more uniform and durable finish, extending the life of your cultured marble. Plus, they can usually complete the work much faster than a DIY approach, minimizing disruption.
Choosing the Right Restoration Service
When selecting a service, look for companies with a proven track record specifically with cultured marble. Check reviews, ask for references, and ensure they offer a warranty on their work. A reputable service will be transparent about the process, costs, and expected outcomes.
Maintaining the Beauty of Your Cultured Marble
Keeping your cultured marble looking its best doesn't have to be a chore. A little bit of regular attention goes a long way in preventing yellowing and keeping that surface looking fresh and clean. It's all about building good habits.
Daily Wiping and Drying Habits
This is probably the easiest step, and honestly, it makes a huge difference. After each use, especially in bathrooms or kitchens where water is common, just give the surface a quick wipe down. Use a soft, dry cloth to get rid of any water spots or soap residue before it has a chance to sit and cause trouble. This simple habit prevents mineral buildup and water stains. It takes maybe thirty seconds, but it really helps keep things looking good.
Weekly Deep Cleaning Schedules
Once a week, it's a good idea to do a slightly more thorough clean. This is where you can use a mild cleaning solution. A few drops of dish soap in warm water works wonders. Dampen a soft cloth or sponge with this mixture – make sure it's not dripping wet – and gently wipe down the entire surface. Use a few drops of dish soap in warm water for this. The key is to be gentle and avoid anything harsh.
Avoiding Standing Water
Cultured marble can be sensitive to prolonged exposure to water, especially if it's hard water with lots of minerals. Try to wipe up any puddles or standing water as soon as you notice them. This is particularly important around faucets and showerheads where water tends to collect. It’s a small step that helps prevent those unsightly water spots and potential discoloration over time.
Promptly Cleaning Spills
Accidents happen, right? Whether it's toothpaste, makeup, or something else, try to clean up spills as quickly as possible. The longer a substance sits on the cultured marble, the more likely it is to stain or react with the surface. A quick wipe with a damp cloth is usually all it takes.
Using pH-Neutral Cleaning Products
When you're choosing cleaning products, always look for ones that are pH-neutral. Harsh chemicals, especially acidic or alkaline ones, can damage the protective gel coat on cultured marble, leading to dullness or yellowing. Stick to mild soaps or cleaners specifically designed for cultured marble. This protects the material's integrity.
Protecting Surfaces from Scratches
Cultured marble can scratch if you're not careful. Avoid using abrasive scrubbers, steel wool, or scouring pads. When placing items on the surface, be mindful. Using coasters for drinks or a mat in the sink can prevent minor scratches that can dull the finish over time. Think of it like protecting a nice piece of furniture.
Periodic Inspection for Wear and Tear
Take a moment every few months to really look at your cultured marble surfaces. Check for any signs of wear, like dull spots, minor scratches, or the beginnings of discoloration. Catching these issues early makes them much easier to address before they become bigger problems. It’s like a quick check-up for your marble.
Consistent care is the best defense against yellowing and surface damage. By incorporating these simple practices into your routine, you can significantly extend the life and maintain the aesthetic appeal of your cultured marble for years to come.
Understanding the Chemistry of Yellowing Agents
Cultured marble, while beautiful, can sometimes develop a yellow tint over time. It's not magic, it's chemistry! Understanding what causes this discoloration helps us tackle it effectively. Let's break down the science behind why your cultured marble might be yellowing.
The Role of Oxidation in Discoloration
Oxidation is a chemical reaction where a substance loses electrons. In cultured marble, this often happens when the resin component reacts with oxygen in the air. Over time, this process can lead to a breakdown of the material's structure, resulting in a yellow or brownish hue. Think of it like an apple turning brown after you cut it – that's oxidation at work. This is one of the most common culprits for yellowing in plastics and resins.
Impact of Mineral Deposits
Hard water is a common issue in many homes, and it's loaded with minerals like calcium and magnesium. When water evaporates from your cultured marble surfaces, these minerals are left behind. If not cleaned regularly, these deposits can build up, creating a film that traps dirt and grime. This film can appear yellow or cloudy, making the marble look discolored. It's like a thin veil that dulls the original shine.
How Certain Chemicals Interact
Not all cleaning products are created equal, and some can actually harm your cultured marble. Harsh chemicals, especially those found in abrasive cleaners or certain solvents, can react with the resin in the marble. This reaction can strip away protective layers or even break down the material itself, leading to yellowing. It's why we always recommend gentle cleaning methods first. Some cleaning products can cause chemical burns and discoloration on composite stone worktops, so it's important to be careful [5546].
The Effect of Heat on Marble Components
While cultured marble is generally durable, extreme heat can cause issues. Prolonged exposure to high temperatures, like from hot styling tools or boiling water left to sit, can degrade the resin binder. This degradation can manifest as yellowing or even warping in severe cases. It's best to use trivets or mats for hot items.
Understanding Resin Degradation
Cultured marble is made from a polyester resin mixed with marble dust and other fillers. The resin is what gives it its smooth, non-porous surface. However, resins are susceptible to degradation over time, especially when exposed to UV light, harsh chemicals, or extreme temperatures. As the resin breaks down, it can lose its clarity and start to yellow. This is a natural aging process for many polymer-based materials.
Identifying Common Household Culprits
Several everyday items can contribute to yellowing if they come into contact with your cultured marble. These include:
- Hair dyes and bleaches: These often contain strong chemicals that can stain or discolor the surface.
- Certain cosmetics and lotions: Some ingredients in these products can react with the resin over time.
- Rubber or plastic mats: Over long periods, the chemicals in some rubber or plastic items can leach into the marble and cause staining.
- Ink and permanent markers: These are notorious for staining porous surfaces.
Long-Term Effects of Environmental Factors
Beyond direct chemical interactions, the general environment plays a role. Constant exposure to sunlight (UV radiation) is a major factor in resin degradation and yellowing. High humidity can also contribute to mineral buildup and potential mold or mildew growth, which can cause discoloration. Even air pollution can contain particles that settle on surfaces and contribute to a dull, yellowed appearance over extended periods. Protecting these valuable artifacts from decay and damage is key, especially when dealing with materials that are susceptible to biodegradation [aa9a].
Safe Practices for Cleaning Cultured Marble
When it comes to keeping your cultured marble looking its best, especially when tackling yellowing, it's really important to be careful. You don't want to accidentally cause more problems while trying to fix them. Think of it like this: you wouldn't use a harsh scrub brush on a delicate painting, right? The same idea applies here.
Always Test Cleaning Solutions First
Before you go slathering any cleaning solution all over your cultured marble, do a little test run. Find a spot that's not usually seen, maybe the back corner of the sink or a less visible part of a shower surround. Apply a small amount of the cleaner you plan to use and let it sit for a bit, just like you would on the main area. Then, wipe it off and see what happens. This simple step can save you from a much bigger headache later on. If the test spot looks good, you're probably in the clear to proceed with the rest of the surface.
Ventilate Cleaning Areas Properly
Many cleaning products, even the milder ones, can release fumes. Cultured marble is often found in bathrooms and kitchens, which can sometimes be a bit enclosed. Make sure there's good airflow while you're cleaning. Open windows, turn on the exhaust fan, or even use a portable fan to keep the air moving. This isn't just about comfort; it's about safety, especially if you're sensitive to certain smells or chemicals.
Wear Protective Gloves
Your hands can take a beating from cleaning products. Wearing rubber or nitrile gloves is a good idea to protect your skin from drying out or potential irritation. It also helps prevent transferring oils from your hands onto the marble surface, which can sometimes lead to streaks or dullness.
Avoid Mixing Cleaning Chemicals
This is a big one. Never, ever mix different cleaning products together. You might think combining two cleaners will make them stronger, but you could actually create dangerous fumes or chemical reactions that can damage your cultured marble or even harm you. Stick to one product at a time, and always rinse thoroughly between using different types of cleaners if you need to.
Understand Material Sensitivity
Cultured marble, while durable, can be sensitive to certain things. It's not like granite or quartz that can handle almost anything. Harsh abrasives, strong acids (like undiluted vinegar or some toilet bowl cleaners), and even excessive heat can cause damage, like etching or discoloration. Knowing what your specific cultured marble can handle is key. If you're unsure, err on the side of caution and use the gentlest method possible.
Rinse Thoroughly After Cleaning
After you've finished cleaning, it's super important to rinse the surface really well with clean water. Leftover cleaning residue can dry on the surface, leading to streaks, dull spots, or even attracting more dirt. Use a damp microfiber cloth and wipe down the entire area to make sure all traces of the cleaner are gone. A good rinse is just as important as the cleaning itself.
Dispose of Cleaning Materials Responsibly
Once you're done cleaning, don't just leave your used cloths or sponges lying around. Rinse out your cleaning tools thoroughly and let them dry. Dispose of any paper towels or disposable wipes properly. If you used any stronger chemicals, check the product label for specific disposal instructions. Proper cleanup helps maintain a clean environment and prevents accidental contact with leftover cleaning agents.
Troubleshooting Common Cleaning Issues
Even with the best intentions, sometimes cleaning your cultured marble doesn't go quite as planned. You might end up with streaks, a hazy look, or spots that just won't budge. Don't worry, these are common hiccups, and usually, there's a fix. Let's look at some of the usual suspects and how to sort them out.
Dealing with Streaks After Cleaning
Streaks are probably the most frequent complaint after cleaning. They often happen when cleaning solution or rinse water isn't fully removed, or if you're using too much product. Sometimes, it's just the water itself leaving mineral deposits.
- Rinse thoroughly: Make sure you're rinsing the surface multiple times with clean water. A final rinse with distilled water can help prevent mineral spots.
- Dry completely: Use a clean, soft microfiber cloth to dry the surface immediately after rinsing. Don't let water air dry, as this is a prime cause of streaks.
- Use less product: Try using a bit less of your cleaning solution next time. A little often goes a long way with cultured marble.
Removing Water Spots Effectively
Water spots are those chalky or cloudy marks left behind after water evaporates. They're usually mineral deposits from hard water.
- Gentle Acid: A diluted solution of white vinegar (1 part vinegar to 3 parts water) can often dissolve these spots. Apply with a soft cloth, let it sit for a minute, then rinse and dry.
- Baking Soda Paste: For tougher spots, a paste of baking soda and water can work. Apply, gently scrub with a soft brush, rinse, and dry.
- Specialized Cleaners: If DIY methods aren't cutting it, look for a cleaner specifically designed for cultured marble that targets hard water stains.
Addressing Hazy Surfaces
A hazy appearance can result from a buildup of soap scum, cleaning product residue, or even a dulling of the marble's finish over time.
- Deep Clean: Start with a thorough cleaning using a mild soap and water solution, focusing on removing any residue.
- Baking Soda Treatment: A baking soda paste can help lift stubborn buildup. Apply, let it sit for a few minutes, then gently scrub and rinse.
- Consider Polishing: If the haze persists after cleaning, the surface itself might be dull. A marble polishing compound could restore the shine. Always test in an inconspicuous area first.
Correcting Over-Polishing Marks
It's possible to over-polish cultured marble, which can sometimes lead to a dull or uneven finish, especially if you've used an abrasive polish or too much pressure.
If you notice marks from over-polishing, the best approach is often to go back to a gentler cleaning method. Sometimes, a light application of a marble polish designed for restoring shine, used sparingly and with a soft cloth, can help even out the finish. Patience is key here; avoid aggressive scrubbing.
Handling Fading Colors
While cultured marble is generally colorfast, prolonged exposure to harsh chemicals or intense sunlight can sometimes cause colors to appear faded.
- Identify the Cause: Try to determine if a specific cleaner or environmental factor is the culprit.
- Gentle Cleaning: Stick to pH-neutral cleaners and avoid abrasive materials.
- UV Protection: If sunlight is the issue, consider using window films or blinds to reduce direct UV exposure.
- Professional Advice: For significant fading, professional restoration might be the only way to restore the original color.
Resolving Uneven Cleaning Results
Sometimes, you might clean a section, and it looks great, but other areas remain dull or streaky. This usually points to inconsistent application or rinsing.
- Work in Sections: Clean and rinse one manageable section at a time to ensure thoroughness.
- Consistent Pressure: Apply cleaning solutions and rinse with consistent pressure and technique across the entire surface.
- Final Wipe-Down: A final, uniform wipe-down with a dry microfiber cloth can help blend any slight variations.
When Cleaning Makes It Worse
Occasionally, a cleaning attempt can leave the marble looking worse than before. This often happens when using the wrong type of cleaner or abrasive tools.
- Stop Immediately: If you notice the marble getting duller, more scratched, or discolored during cleaning, stop using that product or tool right away.
- Neutralize and Rinse: If you used a harsh chemical, try to neutralize it with a mild soap and water solution, then rinse thoroughly.
- Consult Professionals: For significant damage caused by incorrect cleaning, it's best to consult with a cultured marble professional. They can assess the damage and recommend appropriate repair or restoration methods. Remember, for most projects across the U.S., quick shipping on samples and products means you can get started without long waits.
The Importance of Regular Maintenance
Keeping your cultured marble looking its best isn't a one-time job. It really comes down to a consistent routine. Think of it like taking care of a nice car; a little bit of attention regularly goes a long way in preventing bigger, more expensive problems down the road. For homeowners and renovators across the U.S., establishing good habits can mean the difference between a surface that ages gracefully and one that starts looking tired and yellowed much too soon.
Preventing Yellowing Before It Starts
Proactive care is your best defense against that dreaded yellowing. It’s much easier to keep your cultured marble bright than to try and fix it once it’s already discolored. This means being mindful of what comes into contact with the surface and cleaning up spills promptly. The goal is to create a protective barrier through consistent care.
Establishing a Cleaning Routine
Setting up a schedule makes maintenance feel less like a chore and more like a natural part of your home care. For most cultured marble surfaces, a daily wipe-down with a soft cloth and a weekly gentle cleaning is usually sufficient. This routine helps remove surface grime before it has a chance to set in and cause discoloration. Regularly clean marble and granite countertops with warm water and a mild, pH-neutral soap. Use a soft cloth for daily maintenance to preserve the beauty and longevity of your surfaces. [8b86]
The Benefits of Consistent Care
When you stick to a regular cleaning schedule, you're not just keeping your marble looking good; you're also extending its lifespan. Consistent care prevents the buildup of minerals and residues that can lead to etching and staining, which are often the precursors to yellowing. It also helps maintain the original sheen and finish of the material.
Protecting Your Investment
Cultured marble, especially the handpicked A+ top-quality stone we offer, is a significant investment in your home. Regular maintenance is key to protecting that investment. By avoiding harsh chemicals and abrasive tools, and by cleaning spills immediately, you preserve the integrity and appearance of the marble, ensuring it remains a beautiful feature for years to come. We don’t sell commercial grade — only premium materials that deserve proper care.
Enhancing Surface Longevity
Longevity is directly tied to how well you care for your cultured marble. Surfaces that are regularly cleaned and properly maintained are less likely to suffer from premature wear and tear. This includes preventing deep scratches and avoiding prolonged exposure to moisture, which can degrade the material over time. For many cultured marble surfaces, sealing them every three to six months is a good practice to help prevent stains and preserve the stone's beauty. [c41d]
Keeping Your Marble Looking New
Ultimately, regular maintenance is about preserving the aesthetic appeal of your cultured marble. It’s about ensuring that your bathroom vanity or kitchen surface continues to look as stunning as the day it was installed. This involves not just cleaning but also occasional polishing and ensuring protective sealants are up-to-date. Consult with experts for the specific recommendation for your marble. [71b7]
Reducing the Need for Harsh Treatments
When you maintain your cultured marble diligently, you significantly reduce the chances of needing aggressive cleaning methods or professional restoration. Gentle, consistent care prevents the deep-set stains and severe yellowing that often require more intensive, and potentially damaging, treatments. It’s the simplest way to keep your marble in top condition without resorting to harsh chemicals.
Choosing the Right Tools for Marble Care
When it comes to keeping your cultured marble looking its best, the tools you use really matter. It’s not just about the cleaning solution; it’s about how you apply it and what you use to do the work. Using the wrong thing can actually do more harm than good, leading to scratches or dull spots.
Selecting Appropriate Cleaning Cloths
Forget those old rags you have lying around. For cultured marble, you want soft, non-abrasive cloths. Microfiber cloths are a top choice because they are super absorbent and gentle. They pick up dirt and grime effectively without scratching the surface. Always opt for clean microfiber cloths to avoid transferring any grit that could cause damage. Having a few on hand means you can switch to a fresh one if the first gets too dirty during cleaning.
Using Soft-Bristled Brushes
For areas with a bit more texture or where grime might be clinging, a soft-bristled brush can be helpful. Think of a toothbrush-style brush for tight corners or grout lines, or a slightly larger brush with very soft bristles for general scrubbing. The key here is 'soft.' Anything too stiff will scratch the marble. Look for brushes specifically designed for delicate surfaces or bathroom cleaning.
The Value of Squeegees
A squeegee isn't just for windows or shower doors. When cleaning your cultured marble surfaces, especially vanity tops or shower walls, a good squeegee can be a lifesaver for removing excess water. This helps prevent water spots and streaks, leaving a much cleaner finish. Using a squeegee after rinsing is a simple step that makes a big difference in the final shine.
Choosing Non-Abrasive Sponges
If you prefer sponges, make sure they are non-abrasive. Many kitchen sponges have a rough, green scrubby side that is a big no-no for cultured marble. Stick to the soft side of the sponge or look for sponges made from materials like cellulose, which are gentler. You can also find sponges specifically marketed for delicate surfaces.
Understanding Applicator Pads
Applicator pads, often made of foam or microfiber, are great for applying polishes or sealants. They provide an even spread and help you work the product into the surface without leaving streaks. When using a polish, an applicator pad can help you achieve a uniform sheen across the entire area. For tougher stains, you might create a paste using baking soda and water, and an applicator pad can help spread that evenly too [96e2].
Avoiding Steel Wool and Scouring Pads
This might seem obvious, but it's worth repeating: never use steel wool, abrasive scouring pads, or any harsh scrubbing tools on cultured marble. These will scratch the surface, dulling the finish and potentially creating areas where dirt and stains can settle more easily. Once a scratch is made, it's very difficult to repair without professional help.
Maintaining Your Cleaning Equipment
Just as important as choosing the right tools is keeping them clean. Wash your microfiber cloths and sponges regularly. If you use a brush, rinse it thoroughly after each use and let it air dry. Dirty tools can spread grime and even introduce scratches. Keeping your cleaning arsenal in good shape means it's always ready to do its best work for your marble surfaces.
Recognizing When to Call a Professional
Sometimes, no matter how much you scrub or what cleaning solution you try, that yellowing on your cultured marble just won't budge. It's a frustrating situation, for sure. You might have tried the gentle soap and water, maybe even a baking soda paste, but the discoloration persists. It's at these points that you have to consider if you've reached the limits of DIY cleaning and it's time to bring in the pros.
Signs of Deep Damage
If the yellowing isn't just a surface stain but seems to be coming from within the material itself, it might be a sign of deeper issues. This can happen if the protective gel coat on the cultured marble has worn down over time, exposing the underlying resin. When this happens, the material can become more porous and susceptible to staining that's hard to remove with regular cleaning.
Extensive and Persistent Staining
We've all dealt with stubborn spots, but when the yellowing covers a large area or reappears shortly after cleaning, it's a red flag. This suggests the staining agent has deeply penetrated the surface. Trying to tackle widespread, deep-set stains yourself can sometimes make the problem worse or cause uneven cleaning results. For instance, a customer reported that their cultured marble vanity top, only a year old, had become rough and started yellowing, indicating a problem beyond simple surface dirt [6c01].
Cracks or Chips in the Marble
Any physical damage, like cracks or chips, can create entry points for moisture and dirt, leading to discoloration and making cleaning much more difficult. These aren't just aesthetic issues; they compromise the integrity of the surface. If you notice any such damage alongside the yellowing, it's definitely time to consult a professional.
Loss of Surface Integrity
Does the surface feel rough, pitted, or unusually dull even after cleaning? This could mean the gel coat is degrading or has been damaged by harsh chemicals or excessive scrubbing. Restoring this surface integrity often requires specialized tools and knowledge that most homeowners don't have.
Uncertainty About Cleaning Methods
If you're unsure about what cleaning agents are safe to use or how to apply them without causing damage, it's best to stop and seek advice. Using the wrong product or technique can lead to permanent discoloration or etching, turning a minor issue into a major repair job.
When DIY Efforts Fail
Honestly, sometimes you just have to admit defeat. You've tried everything in this guide, and the yellowing is still there, or maybe it looks even worse. That's okay! It doesn't mean you failed; it just means the problem requires a more advanced solution.
The Value of Expert Assessment
Professionals have the experience and specialized equipment to accurately diagnose the cause of the yellowing and recommend the best course of action. They can often perform repairs or refinishing that will restore your cultured marble to its former glory. Companies like American Marble can offer insights into repair options for your specific project. They can assess whether a deep cleaning, polishing, or even a full refinishing is needed, saving you time, money, and further frustration.
Long-Term Strategies for Cultured Marble Longevity
Keeping your cultured marble looking its best for years to come involves more than just occasional cleaning. It's about adopting a mindful approach to its care and understanding how to protect it from the elements and daily wear. Think of it as a long-term relationship with your surfaces.
Understanding Material Lifespan
Cultured marble, while durable, isn't indestructible. Its lifespan is influenced by how it's treated. With proper care, surfaces can maintain their appearance for decades. However, neglecting maintenance or exposing it to harsh conditions can shorten its usable life. The key is consistent, gentle care.
The Impact of Usage Patterns
How you use your cultured marble surfaces plays a big role. High-traffic areas or surfaces that see frequent contact with abrasive materials will naturally show wear faster. For instance, a bathroom vanity used daily will require more attention than a decorative accent piece. Consider using protective mats or trays in areas prone to heavy use or potential damage.
Environmental Considerations
Your home's environment can affect cultured marble. Extreme temperature fluctuations or prolonged exposure to direct sunlight can cause discoloration or even material degradation over time. Maintaining a stable indoor climate helps preserve the integrity of the marble.
Periodic Professional Inspections
Just like your car needs regular check-ups, your cultured marble can benefit from occasional professional attention. An expert can spot potential issues, like micro-cracks or sealant wear, before they become major problems. This is especially true for larger installations or surfaces in commercial settings.
Upgrading Protective Coatings
Over time, the protective sealant on your cultured marble can wear down. Reapplying a quality sealant periodically can significantly extend the life and beauty of the surface. This acts as a barrier against stains and moisture, keeping the marble looking fresh. You can find various marble care products that can help with this.
Smart Renovation Choices
When renovating, think about how new materials will interact with your existing cultured marble. Avoid using harsh chemicals or abrasive cleaners on or near marble surfaces. Choosing complementary, non-damaging materials for adjacent areas is a smart move.
Preserving the Marble's Value
Taking these long-term strategies to heart isn't just about aesthetics; it's about preserving the value of your home. Well-maintained cultured marble adds a touch of elegance and can be a selling point. It shows potential buyers that the property has been cared for.
- Daily: Wipe down surfaces with a soft, damp cloth.
- Weekly: Use a pH-neutral cleaner and dry thoroughly.
- Annually: Inspect sealant and reapply if necessary.
Consistent, gentle care is the most effective way to ensure your cultured marble remains beautiful and functional for many years. Avoid harsh chemicals and abrasive tools at all costs.
The Science Behind Yellowing Prevention
Preventing cultured marble from yellowing in the first place is always better than trying to fix it later. It’s about understanding what causes the yellowing and then taking steps to stop it before it starts. Think of it like maintaining a car – regular oil changes and tune-ups prevent major breakdowns. The same principle applies to your cultured marble surfaces.
Understanding UV Protection
Sunlight is a big culprit when it comes to yellowing. Those UV rays can break down the resins and polymers in cultured marble over time, leading to that unwanted yellow hue. The best defense is to minimize direct sun exposure. If your cultured marble vanity or shower walls get a lot of sun, consider using window treatments like blinds or curtains. For outdoor applications, or areas with intense sunlight, look for products specifically formulated with UV inhibitors. It’s a simple step, but it makes a significant difference in preserving the bright, clean look of your marble.
The Role of Antioxidants
Some cultured marble products are manufactured with antioxidants added to the resin mix. These compounds work by neutralizing free radicals that are formed during the oxidation process, which is a primary driver of yellowing. While you can't add antioxidants to existing surfaces, choosing a high-quality cultured marble from reputable manufacturers often means you're getting a product that already has these protective agents built-in. It’s one of the reasons why looking into the top cultured marble brands can save you headaches down the road.
Maintaining Surface Acidity Balance
Cultured marble can react to acidic substances, which can accelerate discoloration. This is why it’s important to be mindful of the cleaning products you use and any substances that might come into contact with the surface. Things like certain hairsprays, perfumes, or even some acidic foods can cause damage if left to sit. Wiping up spills promptly and using pH-neutral cleaners are key. Think of it as keeping the surface in a neutral, happy state where it’s less likely to react and turn yellow.
Preventing Chemical Contamination
Beyond just acidity, other chemicals can also cause cultured marble to yellow. Harsh cleaners, solvents, and even some types of makeup or hair dye can leave residues that, over time, degrade the surface. It’s not always about a single, dramatic event; often, it’s the cumulative effect of everyday products. Regularly cleaning your surfaces with mild soap and water helps remove these potential contaminants before they have a chance to cause damage. It’s a proactive approach to keeping your marble looking its best.
The Importance of Proper Ventilation
Good airflow is more important than you might think for preventing yellowing. In bathrooms, especially, poor ventilation can lead to excess moisture and humidity. This damp environment can encourage the growth of mold and mildew, which can sometimes stain the marble, and it can also contribute to the degradation of the resin over time. Using exhaust fans during and after showers, and opening windows when possible, helps keep the air circulating and reduces moisture buildup. This simple habit contributes to the longevity and appearance of your cultured marble.
Controlling Humidity Levels
Related to ventilation, controlling overall humidity is a smart move. High humidity can create a breeding ground for issues that affect cultured marble. While it might seem like a minor detail, maintaining a comfortable humidity level, ideally between 30-50%, can prevent a host of problems, including yellowing and material breakdown. Using a dehumidifier in particularly humid climates or seasons can be a worthwhile investment for protecting your surfaces.
Choosing Appropriate Sealants
While cultured marble isn't typically sealed in the same way natural stone is, some manufacturers recommend or offer protective coatings. These can act as a barrier against stains and UV damage. If your cultured marble came with a specific recommendation for a sealant or polish, using it as directed can add an extra layer of defense. Always check with the manufacturer or installer about the best products to use for your specific cultured marble to avoid any adverse reactions. It’s about finding the right protective layer for your specific material.
Cultured Marble vs. Natural Stone Yellowing
Key Differences in Material Composition
When it comes to yellowing, cultured marble and natural stone have different stories. Cultured marble is a man-made material, usually a blend of marble dust and resin. This composition gives it a more uniform look and feel. Because it's engineered, its reaction to environmental factors can be more predictable. Natural stone, on the other hand, is quarried directly from the earth. Its composition varies greatly depending on the specific type of stone, like marble, granite, or travertine. This natural variation means its susceptibility to yellowing can differ quite a bit from piece to piece. Understanding these core differences is the first step in tackling yellowing.
Variations in Porosity and Reactivity
Porosity plays a big role in how materials stain and discolor. Cultured marble is generally less porous than many natural stones. This means it's less likely to absorb liquids that can cause staining and yellowing over time. Natural stones, especially softer ones like certain types of marble, can be quite porous. This absorbency makes them more prone to soaking up oils, chemicals, or even just water, which can lead to discoloration. The resin binder in cultured marble also offers a protective layer that natural stone doesn't inherently have, making it more resistant to chemical reactions that cause yellowing.
Specific Yellowing Triggers for Each
While both can yellow, the culprits are often different. For cultured marble, yellowing is frequently linked to the breakdown of the resin binder over time, especially with prolonged exposure to UV light or certain harsh cleaning chemicals. Sometimes, a poor-quality sealant can also contribute. Natural stone yellowing can be caused by a wider range of issues. Oxidation is a common one, where minerals within the stone react with air and moisture. Iron deposits, common in many natural stones, can rust and cause yellow or brown stains. Even certain types of grout or adhesives used during installation can leach chemicals that discolor the stone over time. If you're looking for durable surfaces, consider cultured marble tub surrounds.
Cleaning Approach Differences
Because of their different compositions, cleaning methods need to be adjusted. For mild yellowing on cultured marble, gentle soap and water or a baking soda paste usually do the trick. Harsh abrasives or acidic cleaners can damage the resin. Natural stone cleaning is more nuanced. While mild soap is often safe, acidic cleaners like vinegar or lemon juice are generally a no-go for natural marble as they can etch the surface. For natural stones, specific pH-neutral cleaners are often recommended. It's always best to check the manufacturer's guidelines for both types of material. For those interested in the unique beauty of natural stone, exploring options from direct importers can be beneficial.
Durability and Maintenance Comparisons
Cultured marble is often chosen for its durability and lower maintenance needs compared to some natural stones. Its non-porous surface and uniform composition mean it's generally more resistant to stains and easier to keep clean. Natural stone, while beautiful, can require more diligent care. Regular sealing is often necessary to maintain its protective qualities and prevent staining. The upkeep for natural stone can be more involved, requiring specific products and routines to preserve its appearance and integrity over the years. This makes cultured marble a practical choice for busy households.
Aesthetic Considerations
Both cultured marble and natural stone offer distinct aesthetic appeal. Cultured marble provides a consistent, often seamless look, which can be desirable for modern designs. It can be manufactured in a wide range of colors and patterns. Natural stone, on the other hand, offers unique, one-of-a-kind beauty. Each slab of natural stone has its own veining, color variations, and characteristics, making it a statement piece. While cultured marble aims for uniformity, natural stone celebrates its inherent imperfections and variations as part of its charm.
Understanding Manufacturer Warranties
When purchasing cultured marble, you'll typically find manufacturer warranties that cover defects in material and workmanship. These warranties often address issues like delamination or manufacturing flaws, and sometimes discoloration if it's due to a product defect. Natural stone warranties can be more limited, especially if you're purchasing from a supplier who doesn't offer installation. Warranties for natural stone often focus on the quality of the material itself at the time of purchase, rather than long-term performance against environmental factors like yellowing, which can be influenced by installation and maintenance. Always review the specific warranty details for either material.
When thinking about countertops, you might wonder if cultured marble or natural stone yellows over time. While both can show some changes, natural stone often has a unique beauty that ages gracefully. If you're curious about how different materials hold up and want to find the perfect, long-lasting option for your home, explore our selection of high-quality stone surfaces on our website today!
Bringing Back the Shine
So, there you have it. Cleaning yellowed cultured marble might seem like a chore, but with the right approach, you can really bring back that nice, clean look. It’s not about magic potions, just a bit of patience and the right cleaning stuff. Remember, a little regular care goes a long way in keeping your cultured marble looking good for years. If you’re looking for top-quality natural stone for your next project, check out places that really know their stuff – they can help you pick something beautiful that will last.
Frequently Asked Questions
Why is my cultured marble turning yellow?
Cultured marble can turn yellow for a few reasons. Sometimes, it's just from age, like any material. Other times, sunlight can cause it to change color over time. Certain cleaning products or chemicals can also react with the surface and cause yellowing. It's like how some plastics get yellow if left in the sun for too long.
Is yellowing on cultured marble permanent?
For mild yellowing, often you can clean it off. Gentle cleaning methods usually work well. However, if the yellowing is very deep or has been there a long time, it might be harder to remove completely. Sometimes, it means the material itself has changed a bit.
What's the best way to clean light yellowing?
Start with the simplest things! A little bit of mild soap mixed with water and a soft cloth usually does the trick. Wipe the surface gently, then rinse it well with clean water. Make sure to dry it completely with another soft cloth so water spots don't form.
Can I use baking soda to clean my cultured marble?
Yes, baking soda is a great gentle cleaner. You can mix it with water to make a paste. Spread the paste on the yellow spots and let it sit for a bit. Then, gently rub it with a soft cloth. Rinse it off really well and buff the surface to make it shine.
Is vinegar safe for cleaning cultured marble?
White vinegar can help, but you have to be careful. Always mix it with water – never use it straight. Apply it only for a short time, then rinse it off completely with plain water. Using too much or leaving it on too long could damage the marble's finish.
How does hydrogen peroxide help with yellowing?
Hydrogen peroxide is a bit like a mild bleach and can help brighten things up. You can mix it with water and carefully apply it to the yellow areas. Let it sit for a while, then rinse and dry thoroughly. Always test it on a small, hidden spot first to be safe.
Should I use special cleaners for cultured marble?
There are cleaners made specifically for cultured marble. These are often a good choice because they are designed to be safe for the material. Always read the label and follow the instructions exactly to get the best results and avoid damage.
What if the yellow stains are really tough?
For stubborn stains, you might need to try a poultice. This is like a paste that can draw out deep stains. You can make one with baking soda or other gentle cleaning agents mixed with water. Apply it, let it dry, and then remove it. It takes patience!
How can I make my cultured marble shiny again?
After cleaning, you can polish the surface to restore its shine. There are special marble polishing compounds available. Applying a protective sealant afterward can also help keep it looking good and prevent future problems.
What's the best way to stop cultured marble from yellowing in the future?
The best defense is regular, gentle cleaning. Wipe up spills right away, dry surfaces after use, and avoid harsh chemicals or abrasive scrubbers. Limiting direct sunlight exposure can also help prevent discoloration over time.
When should I call a professional for help?
If the yellowing is very deep, widespread, or if you've tried cleaning and it didn't work, it might be time to call an expert. They have special tools and knowledge to fix more serious issues or even refinish the surface if needed.
Is cultured marble different from natural marble when it comes to yellowing?
Yes, they are different. Cultured marble is man-made, while natural marble comes from the earth. This means they can react differently to things like sunlight and chemicals. Cultured marble might yellow more easily from certain things because of how it's made.