


So, you've got these beautiful marble tiles, right? They look amazing, but then you notice the grout. It's gotten a bit dingy, maybe even a little stained. Cleaning marble tile grout isn't like cleaning regular tile grout, though. Marble is a bit sensitive, so you can't just go at it with any old cleaner. We're going to walk through how to get that grout looking fresh and clean again, without damaging your lovely marble.
Key Takeaways
- Marble tile grout needs gentle cleaning because marble itself can be easily damaged by harsh chemicals or abrasive scrubbing.
- Always test any cleaning solution on a small, hidden spot first to make sure it doesn't discolor or etch your marble tile.
- Mild soap and water, baking soda paste, or hydrogen peroxide are good starting points for cleaning marble tile grout.
- Avoid using acidic cleaners like vinegar or lemon juice directly on marble tile grout, or use them very sparingly and diluted, rinsing immediately.
- For stubborn stains on marble tile grout, consider poultices or specialized stain removers designed for natural stone.
- Properly rinsing and thoroughly drying the marble tile grout after cleaning is important to prevent water spots and residue.
- Sealing your marble tile grout after cleaning helps protect it from future stains and makes maintenance easier.
- Regular maintenance, like wiping spills immediately and using pH-neutral cleaners, is key to keeping your marble tile grout looking its best.
Understanding Your Marble Tile Grout
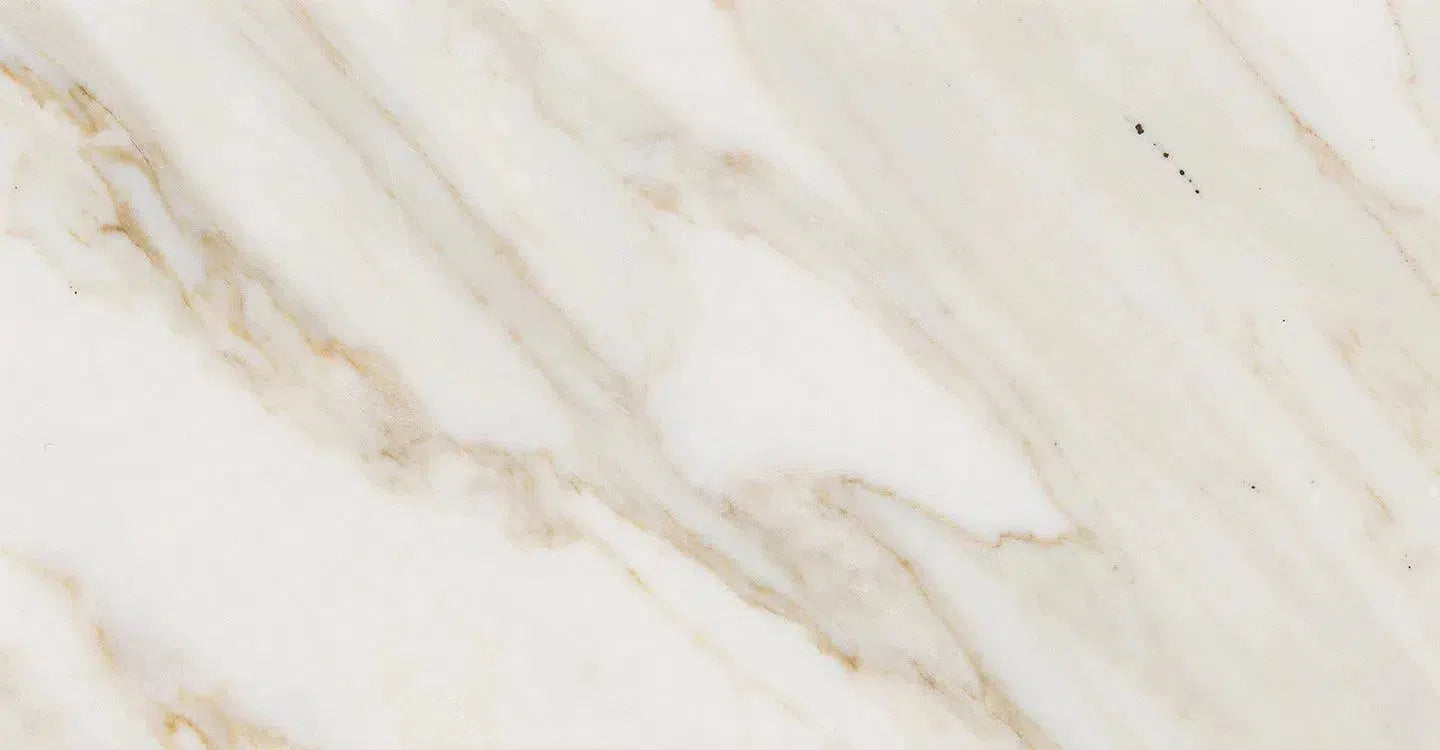
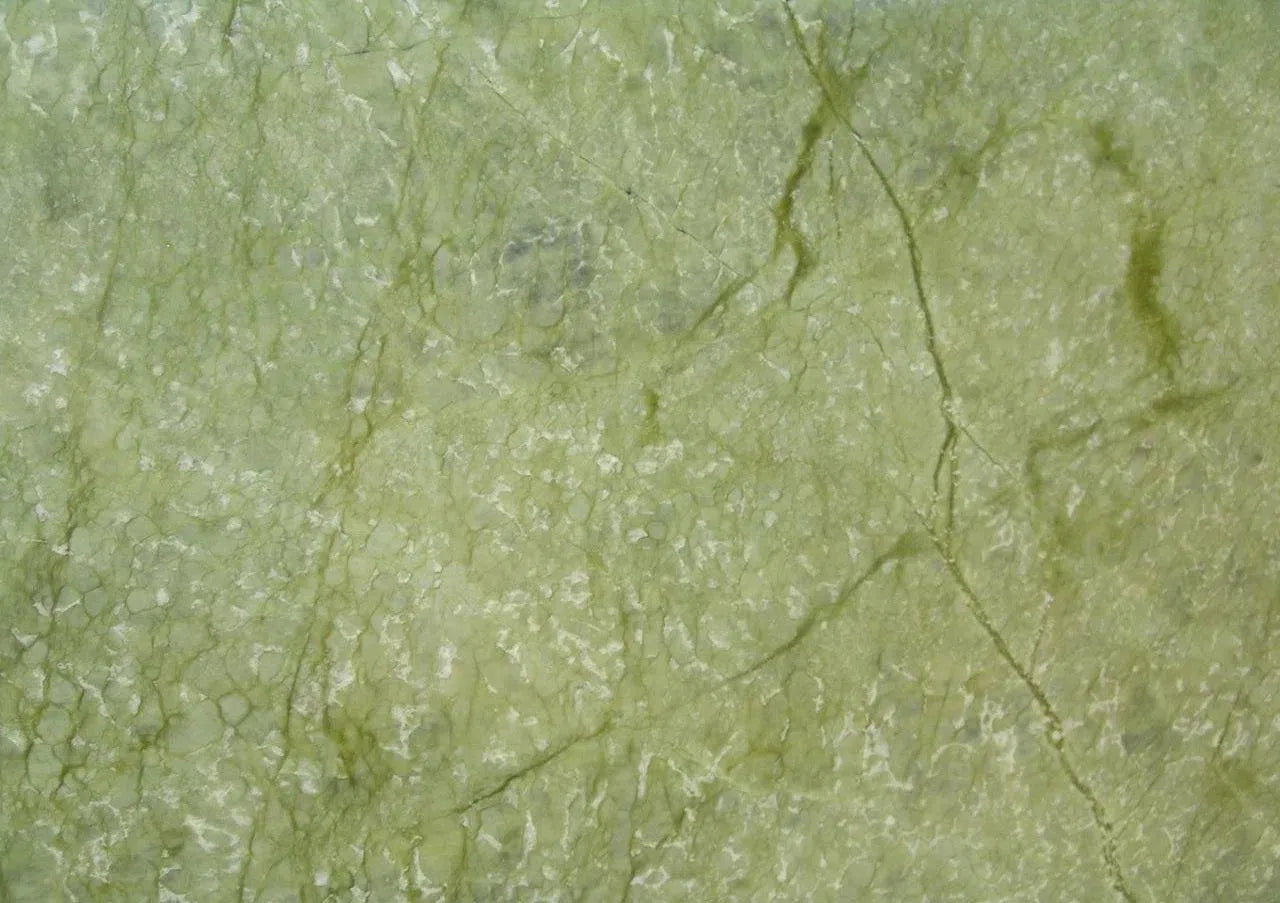
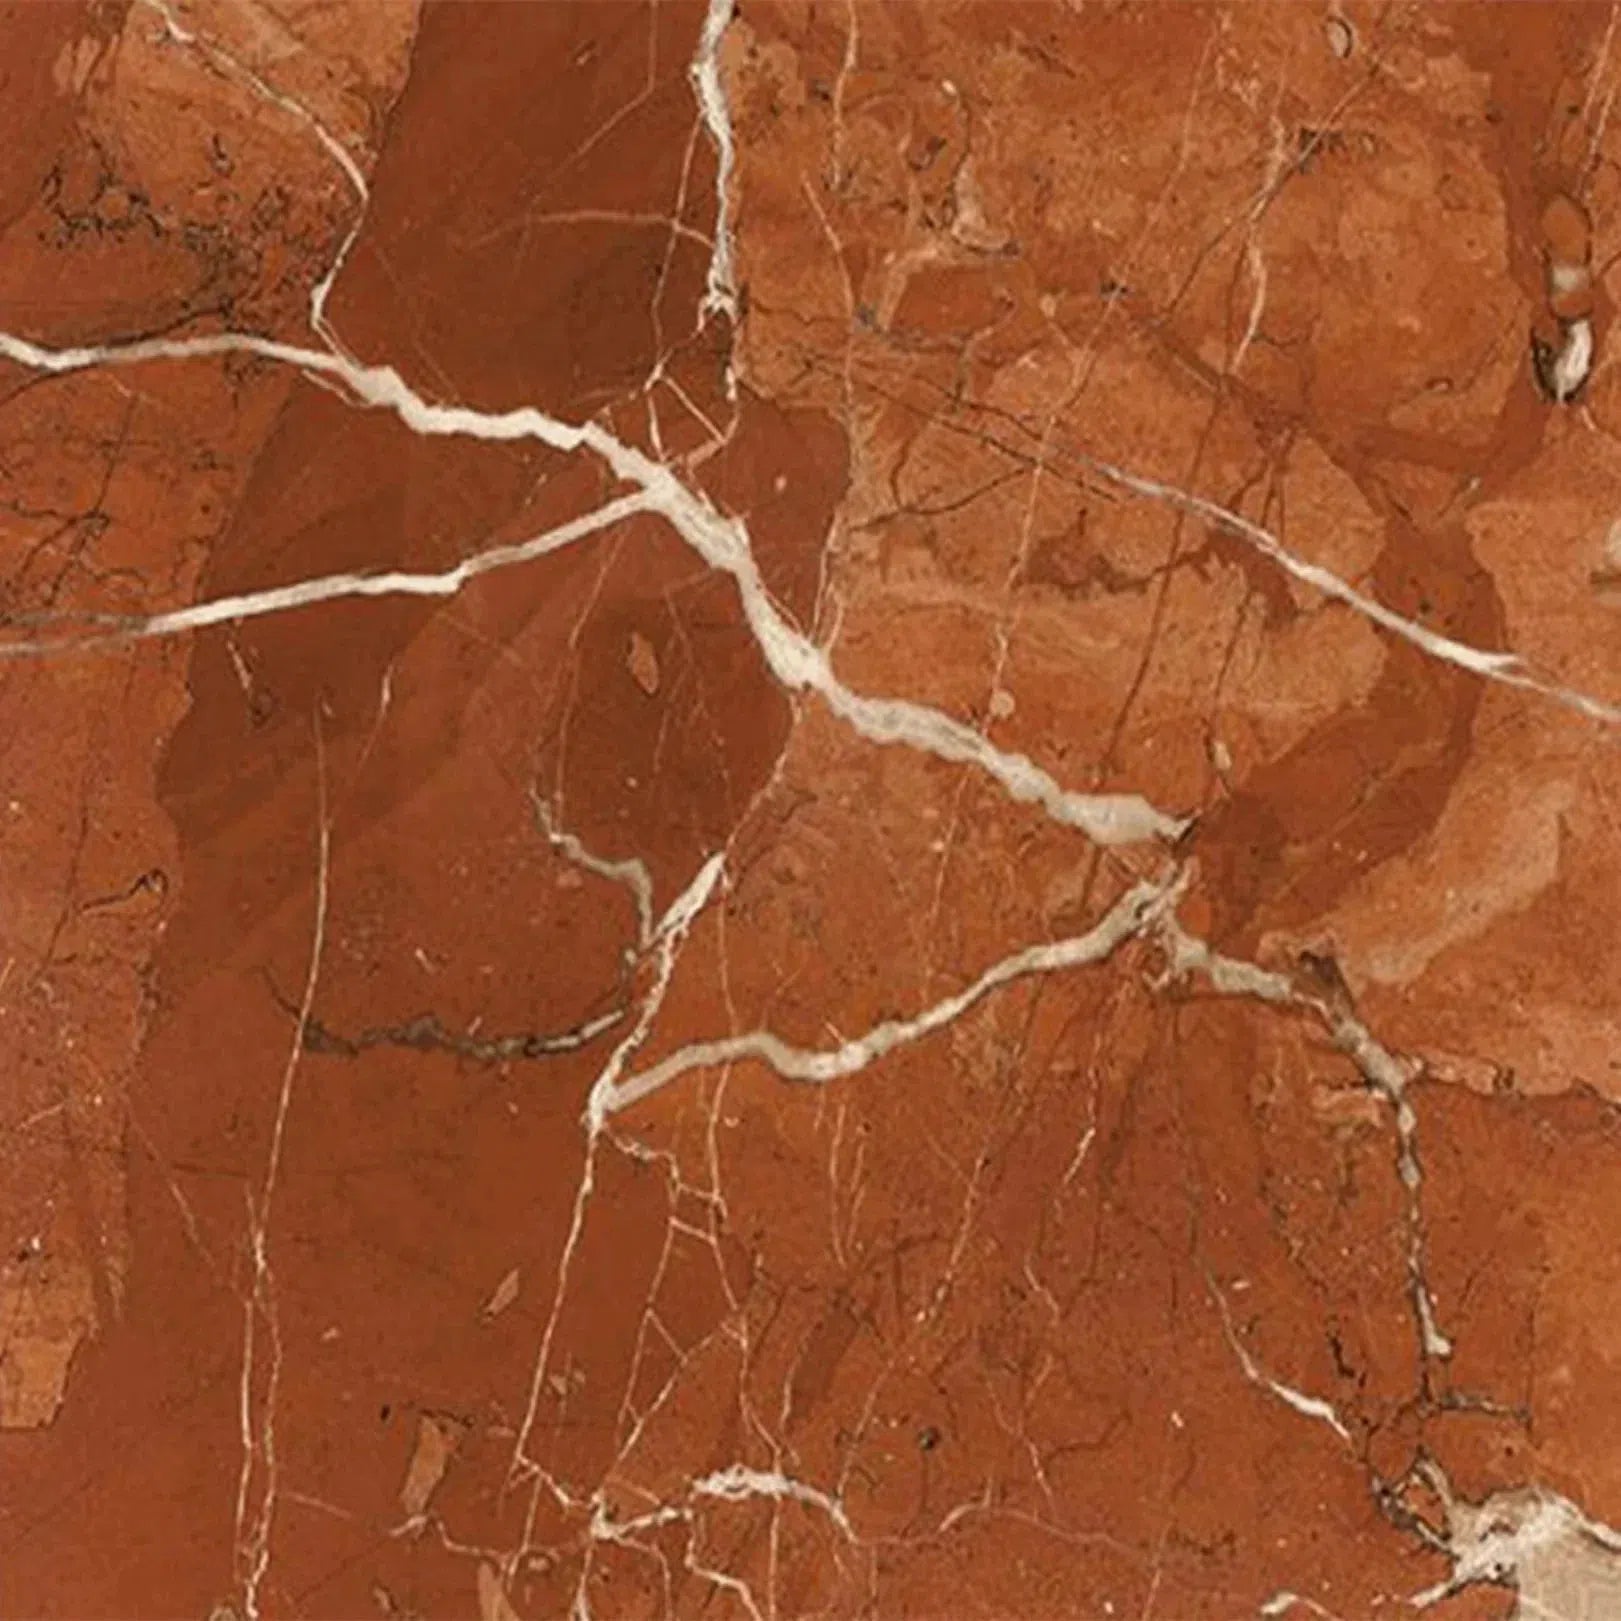
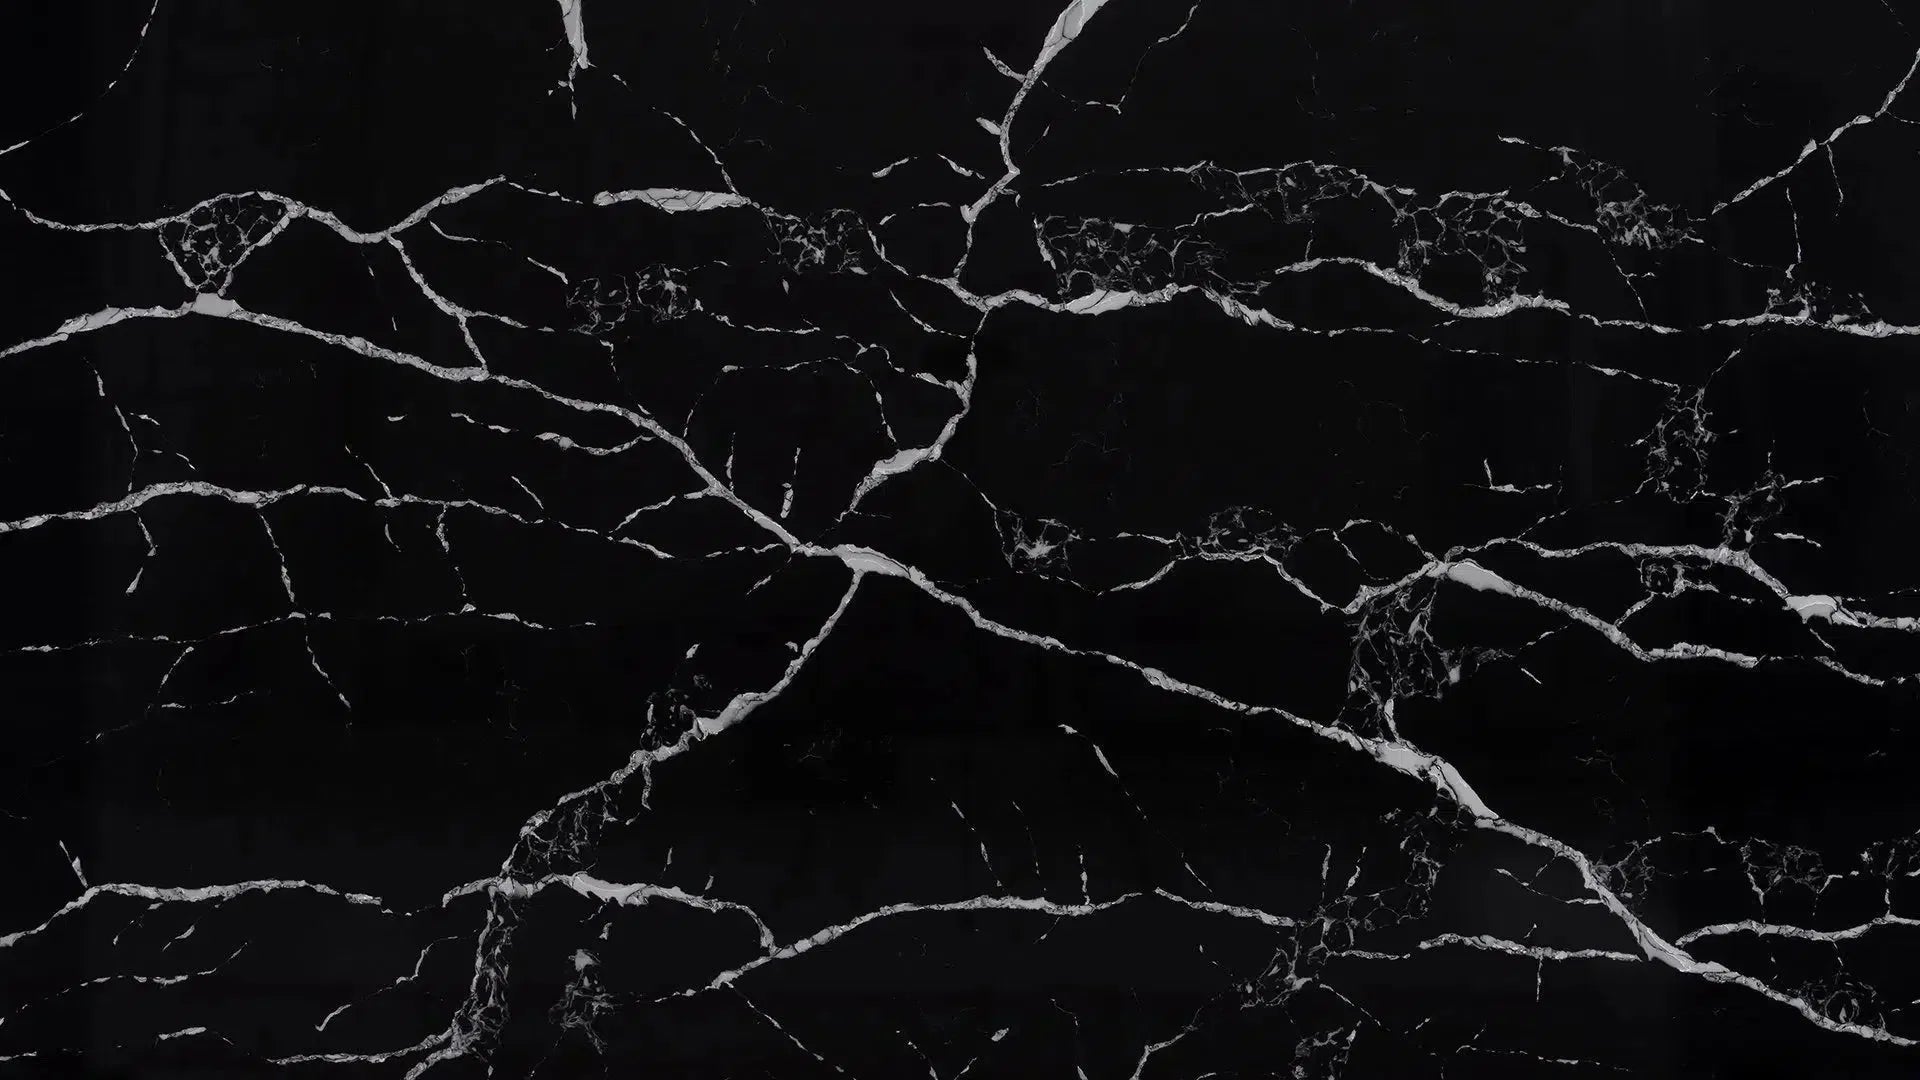
Marble tile is beautiful, no doubt about it. It brings a certain elegance to any room, whether it's a kitchen backsplash or a bathroom floor. But that grout between the tiles? It needs a little extra attention, especially if you want that sparkling finish we're all after. It’s not quite like cleaning grout on ceramic or porcelain, and knowing why is the first step.
The Unique Nature Of Marble Tile Grout
Marble itself is a natural stone, and it's softer and more porous than many other tile materials. This means it can absorb liquids and is susceptible to etching from acidic substances. The grout used with marble often shares some of these characteristics, or at least, it's placed in an environment where it's exposed to the same potential hazards as the marble. This delicate balance is why you can't just use any old cleaner.
Why Marble Tile Grout Needs Special Care
Because marble is porous, spills can seep into both the stone and the grout, leading to stains that are harder to remove. Also, harsh chemicals that might be fine for other surfaces can actually damage the marble, causing dull spots or discoloration. Think of it like this: you wouldn't use steel wool on a silk scarf, right? The same principle applies here. We want to clean the grout without harming the beautiful marble surrounding it.
Identifying Different Grout Types
Before you grab any cleaning supplies, it's helpful to know what kind of grout you're dealing with. Most commonly, you'll find:
- Cementitious Grout: This is the most common type, made from cement, sand, and water. It's porous and can stain easily.
- Epoxy Grout: This is a synthetic grout made from epoxy resins and hardeners. It's much less porous, more durable, and resistant to stains, making it easier to maintain.
- Furan Grout: Less common in homes, this is a highly chemical-resistant grout often used in industrial settings.
Knowing your grout type helps determine the best cleaning approach. For most homeowners, it's likely cementitious grout, which requires the most careful cleaning.
Common Grout Issues On Marble
Over time, grout can develop a few common problems, especially when paired with marble:
- Staining: From food spills, soap scum, or even just dirt tracked in.
- Discoloration: Grout can darken or yellow due to absorbed substances or mold and mildew.
- Cracking or Crumbling: This can happen due to age, improper installation, or excessive moisture.
- Mold and Mildew: Damp environments, like bathrooms, are prime spots for this to grow.
The Importance Of Regular Grout Maintenance
Consistent care is key to keeping your marble tile looking its best. Regular cleaning prevents dirt and grime from setting deep into the grout lines, making future cleaning much easier. It also helps maintain the overall aesthetic of your marble installation. Think of it as preventative care for your beautiful stone surfaces.
Assessing The Condition Of Your Grout
Take a good look at your grout. Is it dingy? Are there dark spots? Does it feel rough or crumbly? A quick visual inspection can tell you a lot about what kind of cleaning and care it needs. You might notice that some areas are worse than others, which can help you target your efforts. For example, grout near a shower might have more mold issues than grout in a hallway.
Recognizing Stains On Marble Tile Grout
Stains come in all shapes and sizes. You might see:
- Organic stains: From things like coffee, tea, or food.
- Grease and oil stains: Common in kitchens.
- Water spots: Especially in bathrooms.
- Mold and mildew: Dark, often black or green, patches.
Identifying the type of stain is the first step in choosing the right cleaning method. Some stains, like those from natural stone products, can be particularly stubborn if not addressed promptly.
Gathering Your Marble Tile Grout Cleaning Supplies
Before you start tackling that grout, let's make sure you have everything you need. It's like preparing for a big cooking project – having all your ingredients and tools ready makes the whole process smoother. Trust me, you don't want to be halfway through scrubbing and realize you're missing a key item.
Essential Cleaning Solutions For Grout
When it comes to cleaning marble tile grout, the key is to use gentle yet effective solutions. Harsh chemicals can damage the marble itself, so we're sticking to safer options. For everyday grime, a simple mix of mild dish soap and warm water often does the trick. If you need something a bit stronger for tougher spots, baking soda is a fantastic natural cleaner. You can make a paste with water that’s great for scrubbing. For those stubborn mold or mildew issues, a diluted solution of hydrogen peroxide can work wonders, but always test it first.
- Mild dish soap
- Baking soda
- Hydrogen peroxide (3% solution)
- Warm water
Choosing The Right Brushes For Grout
The right brush can make all the difference. You want something that can get into those grout lines without scratching the marble. Stiff-bristled nylon brushes are usually your best bet. Avoid wire brushes at all costs, as they will definitely scratch your beautiful marble. An old toothbrush can work for small areas, but for larger jobs, a dedicated grout brush or even a stiff scrub brush with a narrow head is ideal. Some brushes even have angled heads to better reach into the grout.
Protective Gear For Cleaning
Safety first, always! When you're working with cleaning solutions, even mild ones, it's a good idea to protect yourself. Rubber gloves are a must to keep your hands from drying out or getting irritated. If you're using hydrogen peroxide or anything with a bit more of a kick, consider wearing eye protection, especially if you're scrubbing overhead. Good ventilation is also key, which we'll cover more later, but having a mask can help if you're sensitive to fumes.
Soft Cloths And Sponges
Once you've scrubbed the grout, you'll need soft cloths and sponges for wiping and rinsing. Microfiber cloths are excellent because they're highly absorbent and won't leave lint behind. Have a few on hand – one for applying cleaner, one for scrubbing, and several for rinsing and drying. A soft sponge can also be useful for gently wiping down the marble surface after cleaning the grout.
Water Source Considerations
This might seem obvious, but think about your water source. You'll need a bucket or two for clean water and for mixing your cleaning solutions. Having easy access to a faucet is important for refilling buckets and for the final rinsing stages. If you're working in a large area, a hose might even be an option, but be mindful of water pressure and potential overspray onto surrounding areas. For a sparkling finish, using distilled water for your final rinse can prevent mineral spots.
Optional Tools For Tough Stains
Sometimes, regular scrubbing just won't cut it. For really stubborn stains or deeply embedded grime, you might need a few extra tools. A plastic putty knife or scraper can be helpful for carefully lifting thick residue before you start scrubbing. For very old, set-in stains, a poultice might be necessary, which involves mixing an absorbent material with a cleaning agent. You might also consider a steam cleaner designed for tile and grout, which uses heat and moisture to break down dirt.
Gathering All Items Before You Begin
So, to recap, before you get started, make sure you have:
- Your chosen cleaning solutions (mild soap, baking soda, hydrogen peroxide).
- Appropriate brushes (nylon grout brush, old toothbrush).
- Protective gear (gloves, eye protection if needed).
- Plenty of soft cloths and sponges.
- Buckets for water and cleaning solutions.
- Any optional tools for tougher jobs.
Having everything within reach means you can focus on the task at hand and achieve that sparkling finish you're after. It’s all about being prepared for your U.S. projects!
Preparing The Marble Tile Area
Before you even think about grabbing a scrub brush, taking a few minutes to prep the area around your marble tiles is a really smart move. It’s like getting your kitchen ready before you start cooking a big meal – it just makes everything go smoother and prevents a mess.
Clearing the Space Around Your Marble
First things first, move any rugs, bathmats, or decorative items that are on or near the marble tiles. You’ll need clear access to the grout lines, and you don’t want anything getting in the way or getting accidentally splashed. If you’re cleaning a bathroom floor, move the trash can and any stools. For a kitchen backsplash, clear off the countertops as much as possible.
Protecting Surrounding Surfaces
Marble is beautiful, but it can be sensitive. You want to make sure that whatever cleaning solution you use stays on the grout and doesn't drip onto adjacent flooring, cabinets, or walls. Use painter's tape or plastic sheeting to cover up any vulnerable areas. This is especially important if you're using a stronger cleaner, even one that's generally safe for grout. A little protection goes a long way in preventing accidental damage.
Testing Cleaning Solutions in an Inconspicuous Area
This is a step you absolutely cannot skip. Before applying any cleaner to your main grout lines, test it on a small, hidden spot. This could be in a corner, behind a toilet, or under a cabinet. Let the solution sit for the recommended time, then scrub and rinse. Check for any discoloration, etching, or other adverse reactions on the marble or the grout itself. This simple test can save you a lot of heartache later on.
Ensuring Proper Ventilation
Many cleaning products, even natural ones, can release fumes. Marble tile areas, especially in bathrooms or kitchens, might not have the best airflow. Open windows and doors to get fresh air circulating. If you have an exhaust fan, turn it on. Good ventilation is key for your own comfort and safety, and it helps the cleaning solutions work more effectively by allowing the area to dry faster.
Pre-Washing the Marble Tile Surface
Before you get to the grout, give the marble tiles themselves a quick wipe-down with plain water or a pH-neutral cleaner. This removes any surface dust or grime that could otherwise get worked into the grout lines during the cleaning process. Use a soft cloth or sponge and make sure not to oversaturate the marble.
Removing Loose Debris from Grout Lines
Take a moment to look closely at your grout lines. You might find little bits of dirt, hair, or other debris sitting right on top. Use a soft brush, a vacuum cleaner with a brush attachment, or even a dry microfiber cloth to gently sweep or vacuum this loose stuff away. Getting rid of this initial layer makes your main cleaning efforts much more effective.
Preparing for the Cleaning Process
Once all these steps are done, you should have a clean, prepped, and protected area ready for grout cleaning. You've moved obstacles, shielded sensitive spots, tested your cleaner, ensured good airflow, and done a preliminary clean. Now you're all set to tackle those grout lines and get that sparkling finish you're after. It's time to get to the good part!
Gentle Cleaning Methods For Marble Tile Grout
Marble tile grout can be a bit finicky, and you don't want to go in with harsh chemicals right away. The good news is that often, the simplest methods work best. We're talking about keeping that grout looking fresh without risking damage to your beautiful marble.
Using Mild Soap and Water
This is your first line of defense. For everyday grime, a little bit of pH-neutral soap mixed with warm water can do wonders. You don't need much soap; a few drops in a bucket of water is usually plenty. Dip a soft brush or a sponge into the solution, wring it out so it's not dripping, and gently scrub the grout lines. Always work in small sections. This method is safe for most marble and grout types, and it's a great way to maintain that sparkle between deeper cleans.
The Power of Baking Soda Paste
Baking soda is a fantastic natural cleaner. Mix baking soda with water to create a paste – think of the consistency of toothpaste. Apply this paste directly to the grout lines. Let it sit for about 10-15 minutes. This gives the baking soda time to work on lifting dirt and grime. After it has dwelled, use a soft-bristled brush to gently scrub the grout. Rinse thoroughly with clean water afterward. It’s a simple, effective way to tackle mild discoloration.
Vinegar Solutions for Grout (With Caution)
Vinegar is acidic, and while it's great for cleaning many things, you need to be careful with marble. Never use undiluted vinegar on marble or its grout. If you choose to use vinegar, dilute it significantly with water – a 1:1 ratio is a good starting point, but always test in an inconspicuous area first. Apply the diluted solution sparingly to the grout lines with a cloth or sponge, let it sit for only a few minutes, then scrub gently and rinse immediately and thoroughly with plenty of clean water. The risk of etching the marble is real, so proceed with extreme caution.
Hydrogen Peroxide for Disinfection
For grout that needs a bit of a refresh and some disinfecting power, hydrogen peroxide can be a good option. You can use it straight from the bottle (3% solution is common) or mix it with a little baking soda to form a paste. Apply it to the grout lines and let it sit for about 10-15 minutes. It can help lighten stains and kill mold or mildew. Scrub gently with a soft brush and then rinse thoroughly with water. It's a safer alternative to bleach for many situations.
Applying Cleaning Solutions to Grout Lines
When you're applying any of these cleaning solutions, focus on the grout itself. You don't want to saturate the marble tiles unnecessarily. Using a small brush, a sponge with a pointed edge, or even a spray bottle can help you target just the grout lines. This prevents excess moisture from sitting on the marble surface for too long.
Allowing Solutions to Dwell Appropriately
Don't rush the process. Giving the cleaning solution time to work is key. For mild cleaning with soap and water, a few minutes might be enough. For baking soda paste or hydrogen peroxide, letting them sit for 10-15 minutes can make a big difference. However, remember the caution with vinegar – it needs very little dwell time.
Gentle Scrubbing Techniques
When it's time to scrub, use a soft-bristled brush. An old toothbrush can work for small areas, or you can get grout brushes designed for this purpose. Avoid stiff-bristled brushes or abrasive pads, as these can scratch the marble and damage the grout. Work in a back-and-forth motion, applying just enough pressure to lift the dirt without being aggressive. The goal is to clean, not to wear down the grout.
Tackling Stubborn Stains On Marble Tile Grout
Even with regular care, marble tile grout can sometimes pick up stubborn stains. These aren't just unsightly; they can become deeply set if left untreated. Don't worry, though. With the right approach, you can bring back that sparkling finish. We'll look at how to deal with common tough stains that show up on your grout lines.
Targeting Mold and Mildew
Mold and mildew love damp environments, and grout lines can be a prime spot for them to grow, especially in bathrooms or kitchens. You'll usually see them as dark spots or patches.
- Identify the affected areas: Look for fuzzy or slimy dark patches.
- Use a hydrogen peroxide solution: Mix a 50/50 solution of hydrogen peroxide and water. Apply it directly to the moldy grout.
- Let it sit: Allow the solution to work for about 10-15 minutes.
- Scrub gently: Use a stiff grout brush to scrub the area.
- Rinse thoroughly: Make sure all residue is gone.
For persistent mold, a specialized mold and mildew remover designed for natural stone might be needed. Always ensure good ventilation when dealing with mold.
Removing Grease and Oil Stains
Kitchens are notorious for grease splatters, and oil can seep into porous grout. These stains often appear as dark, greasy marks.
- Blot immediately: If a spill happens, blot up as much as possible right away with a clean cloth.
- Create a baking soda paste: Mix baking soda with a little water to form a thick paste. Apply this paste directly onto the greasy stain.
- Cover and wait: Cover the paste with plastic wrap and let it sit for several hours, or even overnight. The baking soda will help draw out the oil.
- Scrub and rinse: Gently scrub the area with a grout brush and then rinse thoroughly with water.
For really tough grease, a commercial degreaser specifically made for natural stone might be your best bet. You can find products designed to remove tough tile stains that work well on grout too.
Addressing Food and Beverage Discoloration
Things like coffee, tea, wine, or even certain fruits can leave colored rings or spots on grout.
- Immediate cleanup is key: Wipe up spills as soon as they occur.
- Baking soda paste: Similar to grease, a baking soda paste can often lift these types of stains.
- Hydrogen peroxide: For darker stains, a dab of hydrogen peroxide applied directly to the spot can help lighten it.
- Gentle scrubbing: Use a soft brush to work the cleaner into the grout.
Remember to always rinse well after using any cleaning agent.
Dealing with Ink and Dye Marks
Ink spills or colored liquids can be tricky. These often require a bit more targeted treatment.
- Act fast: The sooner you address an ink stain, the better your chances of removing it completely.
- Rubbing alcohol: For fresh ink marks, try dabbing the area with a cotton ball soaked in rubbing alcohol. Be gentle to avoid spreading the stain.
- Poultice method: For set-in stains, a poultice made from baking soda and water (or a commercial stain remover mixed with an absorbent material like diatomaceous earth) can be effective. Apply the paste, cover it, let it dry, and then scrape it away.
Always test any cleaning solution in an inconspicuous spot first.
Using Poultices for Deep Stains
A poultice is a paste applied to a stain that draws it out of the porous material as it dries. It's a go-to for stubborn, deep-set stains that don't respond to surface cleaning.
How to make and use a poultice:
- Choose your absorbent material: Common options include baking soda, diatomaceous earth, kaolin clay, or even paper towels.
- Mix with a cleaning agent: Combine the absorbent material with a liquid cleaner suitable for marble and grout. For general stains, water or a mild detergent works. For tougher stains, hydrogen peroxide or a specialized stone stain remover might be used.
- Create a thick paste: The mixture should be like peanut butter – thick enough to stick to the grout without running.
- Apply to the stain: Spread the poultice over the stained grout line, extending slightly beyond the stain's edges.
- Cover and seal: Cover the poultice with plastic wrap and tape down the edges to keep it moist and allow it to work.
- Let it dry: Allow the poultice to dry completely, which can take 24-48 hours. As it dries, it pulls the stain out of the grout.
- Remove and clean: Once dry, carefully scrape away the poultice with a plastic scraper or putty knife. Rinse the area thoroughly with clean water and dry.
Poultices are incredibly effective because they give the cleaning agent time to penetrate and lift the stain from deep within the grout pores, rather than just cleaning the surface.
Specialized Stain Removers for Grout
Sometimes, DIY solutions just aren't enough. For particularly challenging stains, like rust or very old, set-in discoloration, you might need to look at commercial products. Always choose cleaners that are specifically labeled as safe for natural stone and grout. Read the product instructions carefully and test in a small area first. These products are formulated to break down specific types of stains without damaging your marble.
Patience with Persistent Stains
Dealing with stubborn grout stains often requires patience. It might take multiple applications of a cleaning solution or poultice to fully remove a deep stain. Don't get discouraged if the first attempt doesn't yield perfect results. Keep at it, use the appropriate methods for the type of stain, and you'll eventually see your grout looking much cleaner. Remember, consistent maintenance is the best way to prevent these tough stains from forming in the first place.
Rinsing And Drying Your Marble Tile Grout
After you've put in the work cleaning your marble tile grout, the next steps are super important for getting that sparkling finish. It’s not just about getting the dirt off; it’s about making sure no cleaning residue is left behind and that everything dries properly. This part really makes a difference in how your grout looks and how well it holds up.
Thoroughly Rinsing Away Cleaning Residue
Leaving soap or cleaning solution behind can actually attract more dirt later on, and it might even leave a dull film on your marble. You want to get all that gunk out of the grout lines. Think of it like rinsing shampoo out of your hair – you don't want any left in, or it gets sticky and gross.
Using Clean Water For Rinsing
This is where having a couple of buckets comes in handy. Use one bucket for your initial rinse water, and then dump that out and refill with fresh, clean water for a final rinse. This way, you're not just spreading dirty water back onto your clean grout. A good rinse is key to a truly clean finish.
Wiping Down The Marble Surface
While you're rinsing the grout, some water will inevitably get on the marble tiles themselves. It’s a good idea to wipe down the marble surfaces with a clean, damp cloth or sponge as you go. This prevents water spots from forming on the stone, especially if you have hard water.
Ensuring Grout Lines Are Completely Dry
This step is often overlooked, but it's really important, especially if you plan on sealing your grout soon. Damp grout can prevent sealers from adhering properly, and it can also lead to mold or mildew issues down the line. You want those grout lines bone dry.
Air Drying Techniques
Once you've done your final rinse and wiped down the marble, let the area air dry. Open up windows if the weather is nice, or just let it sit for a while. This is the most natural way for things to dry out.
Using Fans To Speed Drying
If you're in a hurry or the air is a bit humid, using a fan can really help speed things up. Position a fan to blow air across the tiled area. This circulates the air and helps evaporate the moisture from the grout lines much faster than just letting it sit.
Checking For Dampness Before Proceeding
Before you move on to sealing or just consider the job done, give the grout lines a good check. Run your finger along a few lines. If they feel cool or damp, they need more time. You can also use a dry cloth to press into the grout lines; if it picks up any moisture, you're not quite there yet. Patience here pays off for a long-lasting, sparkling result on your marble tiles. For more on keeping your tiles looking great, check out cleaning tile floors.
Proper rinsing and drying are not just finishing touches; they are integral parts of the cleaning process that directly impact the final appearance and longevity of your marble tile grout. Skipping these steps can undo all your hard work.
Sealing Your Marble Tile Grout For Protection
After all that hard work cleaning your marble tile grout, you want to keep it looking good, right? That's where sealing comes in. Think of it like putting a protective coat on your grout lines. It helps stop stains from soaking in and makes future cleaning a whole lot easier. It's a pretty important step if you want that sparkling finish to last.
The Importance Of Grout Sealing
Marble grout, especially, can be a bit sensitive. It's porous, meaning it can soak up liquids and stains like a sponge. Without a good seal, spills from your morning coffee or that spaghetti sauce can quickly become permanent marks. Sealing creates a barrier, giving you more time to wipe up messes before they set in. This simple step can save you a lot of headaches down the road. It also helps prevent mold and mildew from taking hold in those damp grout lines.
Choosing The Right Grout Sealer
Not all sealers are created equal, and you need one that's safe for marble. Look for a penetrating sealer specifically designed for natural stone or tile grout. These soak into the grout pores rather than just sitting on the surface. You'll find them in both water-based and solvent-based formulas. Water-based sealers are generally easier to work with and have less odor, while solvent-based ones might offer a bit more protection for really tough areas. Always check the product label to make sure it's compatible with your marble and grout type. If you're unsure, it's always a good idea to ask for advice from a stone specialist.
Applying Grout Sealer Evenly
Applying the sealer is pretty straightforward, but you need to be thorough. Make sure your grout lines are completely clean and dry before you start. You can use a small brush, a roller, or even a special applicator bottle to apply the sealer. Work in small sections, making sure to cover the entire grout line. Wipe away any excess sealer that gets on the marble tile surface immediately with a clean cloth. If the sealer dries on the marble, it can leave a dull mark that's hard to remove. The process involves four key steps: select the right sealant, prepare and clean the grout, apply the sealant, and let it dry. Learn more about sealing grout.
Allowing Adequate Drying Time For Sealant
This is super important. Once you've applied the sealer, you have to let it dry completely. The drying time can vary depending on the product and the humidity in your home, but it's usually at least a few hours, and sometimes up to 24-48 hours for a full cure. During this time, try to keep foot traffic off the area and avoid getting the grout wet. Rushing this step means the sealer won't work as well, and you'll have to do it all over again sooner than you'd like.
Understanding Sealer Lifespan
Even the best grout sealer doesn't last forever. Its lifespan depends on the type of sealer used, the amount of traffic the area gets, and how often you clean it. Generally, you might need to reapply sealer every 1-3 years. You can usually tell it's time to reseal when water stops beading up on the grout and starts to soak in. A simple test is to drip a little water onto the grout line; if it darkens quickly, it's probably time to reseal.
Reapplying Sealant As Needed
When you notice the sealer is wearing off, it's time for another application. The process is the same as the initial sealing: clean the grout thoroughly, let it dry, and apply a fresh coat of sealer. Keeping up with this maintenance will ensure your marble tile grout stays protected and looking its best for years to come. It's a small effort that makes a big difference in preserving the beauty of your natural stone surfaces.
Maintaining A Sparkling Marble Tile Grout Finish
Keeping your marble tile grout looking its best isn't a one-time job; it's about building good habits. A little consistent effort goes a long way in preserving that beautiful, clean finish you worked so hard to achieve. Think of it like keeping a fine piece of jewelry polished – regular care prevents it from losing its luster.
Establishing A Regular Cleaning Schedule
Consistency is key when it comes to grout maintenance. Without a routine, those grout lines can quickly become dingy, no matter how beautiful your marble is. Setting aside specific times for cleaning helps prevent buildup and makes each cleaning session easier.
- Weekly: A quick wipe-down of the marble surfaces and a light scrub of the grout lines in high-traffic areas.
- Monthly: A more thorough cleaning of all grout lines, addressing any minor stains or discoloration.
- Quarterly/Bi-Annually: A deep clean and inspection, especially if you notice any signs of wear or staining.
Daily Wiping Of Marble Surfaces
This might sound simple, but it makes a huge difference. After each use, especially in kitchens and bathrooms, give your marble surfaces a quick wipe with a soft, dry cloth. This removes water spots, soap scum, and any stray food particles before they have a chance to set in.
Addressing Spills Immediately
Marble and its grout are porous, meaning they can absorb liquids. If something spills, don't let it sit. Blot it up right away with a clean cloth. For colored spills, like wine or juice, a gentle blot followed by a quick wipe with a damp cloth (using pH-neutral cleaner if needed) is usually enough to prevent staining.
Avoiding Harsh Chemical Cleaners
This is a big one for marble. Harsh chemicals, especially acidic ones like vinegar or strong bleach, can etch the marble and damage the grout. Always opt for cleaners specifically designed for natural stone or mild, pH-neutral options. When in doubt, stick to soap and water.
Using pH-Neutral Cleaners
For everyday cleaning or when water and mild soap aren't quite cutting it, a pH-neutral cleaner is your best friend. These cleaners are formulated to clean effectively without stripping the sealant or damaging the marble's surface. Look for products labeled "pH-neutral" or "safe for natural stone."
Periodic Deep Cleaning Of Grout
Even with daily care, grout lines can accumulate dirt over time. Schedule a deeper clean every few months. This involves applying a gentle grout cleaner (like a baking soda paste or a specialized grout cleaner), letting it sit for a bit, and then gently scrubbing with a soft-bristled brush. Rinse thoroughly afterward.
Protecting Your Grout From Future Stains
Once your grout is clean, consider sealing it. A good quality grout sealer creates a barrier that helps prevent stains from penetrating the porous material. Reapplying the sealer periodically, as recommended by the manufacturer, is key to long-term protection and maintaining that sparkling finish. We offer a range of premium sealers perfect for U.S. projects, ensuring your marble grout stays protected and beautiful for years to come.
Advanced Techniques For Marble Tile Grout
Sometimes, the standard cleaning methods just won't cut it for your marble tile grout. When you're facing tougher challenges or want to achieve that absolute best finish, there are some more advanced techniques you can explore. These methods require a bit more care and sometimes specialized tools, but they can make a big difference in the overall look and longevity of your grout.
Steam Cleaning For Grout
Steam cleaning is a fantastic way to deep clean grout without harsh chemicals. The high heat from the steam can break down dirt, grime, and even kill mold and mildew spores. It's a gentler approach that's often very effective. You'll want to use a steam cleaner with a grout attachment. Start by moving the steam nozzle slowly along the grout lines, letting the steam penetrate. Immediately after steaming, you might want to give it a light scrub with a grout brush to lift any loosened dirt before it dries. Make sure the steam cleaner is designed for grout and follow its specific instructions.
Using A Grout Pen For Touch-Ups
If your grout has some minor discoloration or small, unsightly marks that regular cleaning can't fix, a grout pen can be a quick and easy solution. These pens contain a special grout colorant that you can apply directly to the grout lines. It's like a magic marker for your grout! Just be sure to choose a color that closely matches your existing grout. Carefully apply the colorant, wiping away any excess that gets on the marble tile itself before it dries. It's a great way to refresh the look of your grout without a full regrouting job.
Color Enhancing Sealers For Grout
Beyond just protecting your grout, some sealers are designed to actually enhance its color. If your grout has faded over time, a color-enhancing sealer can bring back some of its original depth and richness. This is especially noticeable on darker grout colors, where it can make them appear more vibrant and less washed out. When applying, ensure the grout is clean and completely dry. Apply the sealer evenly with a small brush or applicator, and wipe off any excess from the marble surface promptly.
Professional Grout Cleaning Services
For those really tough jobs or when you simply don't have the time or inclination to tackle it yourself, professional grout cleaning services are an option. These professionals have specialized equipment and cleaning solutions that can often achieve results beyond what's possible with DIY methods. They can handle deep-set stains, extensive mold issues, and can even restore grout that looks beyond repair. It's worth considering if your grout is in particularly bad shape or if you want that absolute best, sparkling finish.
When To Consider Grout Regrouting
Sometimes, the grout is just too far gone. If your grout is crumbling, has large cracks, or is missing in significant areas, it might be time to consider regrouting. This involves removing the old grout and applying a fresh layer. It's a more involved process than cleaning, but it can completely transform the look of your tiled area and prevent further damage. It's a bigger project, but the results can be dramatic, making your marble tiles look brand new again.
Repairing Damaged Grout Lines
Minor damage to grout lines, like small chips or hairline cracks, can often be repaired without a full regrouting. You can purchase grout repair compounds that allow you to fill in these damaged areas. The key is to clean the damaged area thoroughly first, then carefully apply the repair material. Once it dries, you can often sand it down gently to match the surrounding grout. This is a good way to maintain the integrity of your grout and prevent small issues from becoming bigger problems.
Restoring The Original Grout Color
Over time, grout can absorb dirt and become discolored, losing its original hue. While cleaning can help, sometimes a deeper restoration is needed. This might involve using specialized grout cleaners designed to lift deep-set stains or, in some cases, using a grout colorant (like those found in grout pens) to recolor the grout. The goal is to bring back that fresh, clean look that complements your beautiful marble tiles. Restoring the color can make a huge difference in the overall appearance of your floor or wall.
Understanding Marble's Sensitivity
Marble is a beautiful natural stone, but it's also quite sensitive. Unlike some tougher materials, marble can be easily affected by certain cleaning agents and even everyday spills. Understanding this sensitivity is key to keeping your marble tile grout looking its best.
Why Marble Requires Gentle Handling
Marble is a metamorphic rock, formed under heat and pressure. This process gives it its unique veining and beauty, but it also makes it relatively soft and porous compared to granite or quartz. Because of this, it can scratch, etch, or stain more readily if not treated with care. Think of it like a delicate piece of art – you wouldn't use harsh chemicals to clean a painting, right? The same principle applies to your marble surfaces.
The Porous Nature Of Marble
Marble's porosity means it can absorb liquids. This is why spills, especially acidic ones like wine, lemon juice, or tomato sauce, need to be wiped up quickly. If left to sit, these liquids can penetrate the stone and leave a permanent mark or cause etching, which is a dulling of the surface. This absorption is also why grout lines can become discolored over time, as they are often even more porous than the tile itself.
Acids And Their Effect On Marble
Acids are the arch-nemesis of marble. Even common household items like vinegar, lemon juice, and some bathroom cleaners contain acids that can react with the calcium carbonate in marble. This reaction causes etching, which looks like a dull, lighter-colored spot on the surface. It's not a stain that can be wiped away; it's actually a physical change to the stone itself. This is why it's so important to use only pH-neutral cleaners on your marble and grout. For safe and effective grout cleaning at home, opt for a pH-neutral cleaner paired with a soft brush. Steer clear of acidic substances such as vinegar or bleach, particularly when dealing with natural stone tiles, as these can cause damage. Always choose marble-safe cleaning products.
Abrasive Cleaners To Avoid
Beyond acids, you'll want to steer clear of abrasive cleaners and scrubbing tools. Things like scouring powders, steel wool, or stiff-bristled brushes can scratch the surface of the marble and even damage the grout. These can leave behind fine scratches that dull the shine and make the surface more susceptible to future staining. Stick to soft cloths, sponges, and brushes designed for delicate surfaces.
The Risk Of Etching Marble Surfaces
Etching is probably the most common issue homeowners face with marble. It's that dull spot that appears after an acidic substance has sat on the surface for too long. While minor etching can sometimes be buffed out with a marble polishing powder, deeper etches might require professional attention. Prevention is definitely the best strategy here – be mindful of what comes into contact with your marble.
Protecting Your Investment In Marble
Marble is a significant investment, and its beauty adds a touch of luxury to any home. Proper care and maintenance are essential to protect that investment. By understanding marble's unique properties and using the right cleaning methods and products, you can keep your marble tiles and grout looking stunning for years to come. This includes regular sealing of the grout, which acts as a barrier against stains and moisture.
Choosing Marble-Safe Cleaning Products
When selecting cleaners, always look for products specifically labeled as safe for natural stone or marble. pH-neutral cleaners are your best bet. Avoid anything with harsh chemicals, acids, or strong alkalis. If you're unsure, it's always better to err on the side of caution and stick to the simplest cleaning methods, like mild soap and water, or even just a damp cloth for daily wipe-downs. You can find excellent options for natural stone care online.
Troubleshooting Common Grout Issues
Even with the best care, grout can sometimes develop problems. Don't worry, most common issues have straightforward solutions. Understanding what you're dealing with is the first step to getting that sparkling finish back.
Dealing With Grout Cracking
Cracked grout isn't just unsightly; it can also let moisture seep behind your tiles, leading to bigger problems. Often, cracking happens because the grout wasn't mixed correctly, or the subfloor has shifted. Sometimes, it's just a sign of age.
- Assess the cause: Is it a small hairline crack or a larger, crumbling one?
- Clean the area: Remove any loose debris from the crack.
- Repair: For small cracks, you can often use a grout repair caulk or a matching grout mix. For larger issues, you might need to remove the old grout and reapply new.
Addressing Grout Discoloration
Discoloration is probably the most common grout complaint. It can range from general dinginess to specific dark spots from mold or spills. The porous nature of grout means it can absorb almost anything.
- Identify the source: Is it dirt, mold, mildew, or a specific stain?
- Gentle cleaning first: Try a baking soda paste or a pH-neutral cleaner. For tougher spots, hydrogen peroxide can work wonders.
- Consider sealing: Once clean, sealing the grout can prevent future discoloration.
Fixing Crumbling Grout
Crumbling grout usually means it's old, has been exposed to too much moisture, or was improperly installed. It's brittle and can easily break away.
- Remove loose material: Carefully scrape out all the crumbling bits.
- Clean the joint: Make sure the area is dust-free.
- Regrout: Mix and apply new grout, ensuring it's packed firmly into the joint. Allow it to cure fully before cleaning.
Managing Grout Shrinkage
Grout shrinkage can happen if it wasn't mixed with the right water-to-powder ratio or if it dried too quickly. This leaves small gaps between the grout and the tile edge.
- Check for gaps: Run your finger along the grout line to feel for any separation.
- Fill the gaps: Use a flexible grout caulk or a matching grout mix to fill these small spaces.
Sometimes, persistent grout problems point to a larger issue with the tile installation or subfloor. If you're seeing widespread cracking or crumbling, it might be time to consult a professional to avoid more costly repairs down the line.
Preventing Grout From Becoming Powdery
A powdery grout surface often indicates that the grout hasn't fully cured or has been exposed to excessive moisture before it hardened. It can also be a sign of old, deteriorating grout.
- Ensure proper curing: If you've recently regrouted, make sure you followed the curing instructions precisely.
- Check for leaks: Persistent moisture issues need to be addressed at their source.
- Consider sealing: A good quality grout sealer can help protect the surface.
Identifying the Cause of Grout Failure
When grout starts to fail – cracking, crumbling, or shrinking – it's usually a sign of underlying issues. These can include:
- Movement: The subfloor or tiles shifting due to temperature changes or structural issues.
- Moisture: Constant exposure to water, especially if the grout isn't sealed.
- Improper Installation: Incorrect mixing ratios, poor application, or using the wrong type of grout for the application.
- Age: Grout, like anything, has a lifespan and can degrade over time.
Solutions for Persistent Grout Problems
If you've tried basic fixes and the problems keep coming back, it's time to think bigger. For widespread issues or recurring problems, you might need to consider:
- Professional assessment: A tile and grout specialist can diagnose the root cause.
- Grout removal and replacement: Sometimes, the only long-term solution is to remove all the old grout and start fresh. This is especially true if the original installation was flawed. You can find resources on how to remove grout if you're considering a DIY approach for smaller areas.
- Addressing subfloor issues: If movement is the culprit, the subfloor might need repair before the grout can be successfully redone.
Choosing The Right Cleaning Tools
When you're tackling that grout on your marble tiles, having the right tools makes a world of difference. It’s not just about having something to scrub with; it’s about using the right something that won’t damage your beautiful marble or leave the grout looking worse for wear. Think of it like this: you wouldn't use a sledgehammer to hang a picture frame, right? Same idea applies here.
Selecting The Best Grout Brushes
This is probably the most important tool in your arsenal. You need something that can get into those grout lines without scratching the marble. For most jobs, a stiff-bristled nylon brush is your best bet. They’re durable enough to scrub away grime but gentle enough for marble. If your grout is really tough or you’re dealing with some serious build-up, you might consider a brush with brass bristles, but use these with extreme caution and test them in an inconspicuous spot first. They can be quite abrasive.
- Nylon Bristle Brushes: Great for everyday cleaning and general grime. Look for ones with angled bristles to better reach into the grout lines.
- Brass Bristle Brushes: Use sparingly for very stubborn stains. Always test first and use light pressure.
- Old Toothbrushes: Surprisingly effective for small areas or tight corners. They offer good control.
The Role Of Microfiber Cloths
Microfiber cloths are fantastic for cleaning marble and grout. They’re super absorbent and great at picking up dirt and moisture without leaving lint behind. You’ll want a few of these on hand for wiping down surfaces, rinsing, and drying. They’re much better than old cotton rags that can just push dirt around.
Using Soft Sponges Effectively
While brushes are for scrubbing, sponges are excellent for applying cleaning solutions and for the rinsing process. A good quality, non-abrasive sponge can help you spread your cleaner evenly and then soak up the dirty water. Just make sure the sponge isn't too rough, or it could potentially scratch the marble.
Considering Electric Cleaning Tools
For those really tough jobs or if you have a lot of grout to clean, an electric grout cleaner or an oscillating multi-tool can be a game-changer. These tools can significantly cut down on the elbow grease required. An oscillating multi-tool with the right blade can be incredibly efficient for removing old grout. Just be sure to use the appropriate attachments and settings to avoid damaging your marble. Always follow the manufacturer's instructions carefully.
The Importance Of Tool Sterilization
It might sound a bit much, but keeping your tools clean is important. If you’re using brushes or cloths that have been used for other cleaning tasks, they might transfer dirt or chemicals to your marble. A quick rinse with hot water or a soak in a mild disinfectant can help. This is especially true if you’ve used a tool on a particularly grimy area.
Matching Tools To Grout Condition
Your choice of tool really depends on what you’re dealing with. Is the grout just a bit dull, or is it covered in black mold? For light cleaning, a nylon brush and a microfiber cloth might be all you need. For tougher stains, you might need to step up to a brass brush or even an electric tool. It’s about using the right tool for the job to get the best results without causing damage.
Investing In Quality Cleaning Equipment
Look, you don’t need to spend a fortune, but buying the cheapest tools you can find might end up costing you more in the long run if they damage your marble or just don’t work. Investing in a few good quality brushes, some plush microfiber cloths, and maybe a reliable sponge will make the whole process much easier and give you that sparkling finish you’re after. It’s worth it for the peace of mind and the results you’ll get on your marble tile projects.
When selecting tools, always prioritize those that are specifically designed for delicate surfaces like natural stone. The goal is to clean effectively without introducing any risk of etching or scratching your marble.
Natural Cleaning Solutions For Grout
When it comes to cleaning the grout between your beautiful marble tiles, sometimes you want to avoid harsh chemicals. It’s a smart move, especially with natural stone like marble, which can be sensitive. Luckily, there are plenty of effective natural cleaning agents that can get the job done without damaging your surfaces. We're talking about using things you might already have in your kitchen or pantry!
The Versatility Of Baking Soda
Baking soda is a real workhorse for cleaning. It's a mild abrasive, which means it can help scrub away grime without scratching your marble or grout. Plus, it's great at absorbing odors. To make a paste, just mix baking soda with a little bit of water until it's the consistency of toothpaste. Apply this paste directly to the grout lines. Let it sit for about 10-15 minutes to work its magic. Then, use a grout brush or an old toothbrush to gently scrub the area. Rinse thoroughly with clean water afterward.
Harnessing The Power Of Hydrogen Peroxide
Hydrogen peroxide is another fantastic natural cleaner, especially for tackling mold and mildew that can sometimes creep into grout lines. It has disinfectant properties that kill off those pesky spores. You can use it straight from the bottle, applying it directly to the grout with a spray bottle or a cloth. Let it sit for about 10 minutes. You can even mix it with a bit of baking soda to create a paste for a bit more scrubbing power. Always test hydrogen peroxide in an inconspicuous spot first, as it can sometimes lighten colored grout.
Using Essential Oils For Cleaning
While not a primary cleaner on its own for tough grout grime, certain essential oils can add a nice scent and some antimicrobial properties to your cleaning solutions. Tea tree oil and lemon oil are popular choices. You can add a few drops to your baking soda paste or a water-and-vinegar solution (use vinegar with caution on marble, as noted elsewhere). Just remember, these are more for a little boost and a pleasant aroma rather than heavy-duty stain removal.
The Benefits Of Oxygen Bleach
Oxygen bleach is a gentler alternative to chlorine bleach. It works by releasing oxygen when mixed with water, which helps to lift stains and brighten surfaces. It's generally considered safer for colored grout and natural stone than chlorine bleach. Follow the product instructions carefully, usually involving mixing a powder with water to form a solution or paste. Apply it to the grout, let it sit for the recommended time, and then scrub and rinse. It's a good option for when you need a bit more power than baking soda but want to avoid the risks of chlorine bleach.
Creating DIY Grout Cleaners
Making your own grout cleaner is simple and cost-effective. Here are a couple of basic recipes:
- Baking Soda Paste: 1 part baking soda to 1 part water. Apply, let sit, scrub, and rinse.
- Hydrogen Peroxide & Baking Soda Paste: Mix baking soda with enough hydrogen peroxide to form a paste. Apply, let sit, scrub, and rinse.
- Mild Soap & Water: For light cleaning, a few drops of pH-neutral dish soap in warm water can work wonders. Wipe, scrub gently, and rinse.
Understanding Natural Cleaning Agents
Natural cleaners work by using the inherent properties of their ingredients. Baking soda's mild abrasiveness and alkalinity help break down grease and grime. Hydrogen peroxide is an oxidizer that breaks down stains and kills microbes. Vinegar (though acidic and requiring caution with marble) works by dissolving mineral deposits and soap scum. Understanding how these work helps you choose the right agent for the job.
When Natural Solutions Are Sufficient
For routine cleaning and maintenance, natural solutions are often all you need. If your grout isn't heavily stained or discolored, a simple baking soda paste or a good scrub with mild soap and water will likely restore its clean appearance. They are perfect for keeping your marble tile grout looking fresh without the worry of harsh chemical damage. For tougher, set-in stains, you might need to explore other methods, but always start with the gentlest approach first.
Commercial Cleaners For Marble Tile Grout
When your marble tile grout needs a serious refresh, you might be tempted to grab the strongest cleaner you can find. While commercial grout cleaners can be effective, it's super important to pick the right one, especially when you're dealing with delicate marble. Using the wrong product can actually damage your beautiful stone, leading to etching or discoloration. So, let's talk about how to choose and use these cleaners wisely.
Evaluating Commercial Grout Cleaners
Not all commercial cleaners are created equal, and definitely not all are safe for marble. You'll find a huge variety on the shelves, from everyday sprays to heavy-duty brighteners. The key is to look for products specifically labeled as safe for natural stone or marble. Many cleaners designed for ceramic or porcelain tile can be too harsh for marble's porous surface. Always check the product description and any warnings. If you're unsure, it's always better to err on the side of caution and opt for a milder solution or test it first.
Understanding Product Labels
Reading those tiny labels can feel like a chore, but it's really important. Look for terms like "pH-neutral," "safe for natural stone," or "marble-friendly." Avoid anything that mentions "acidic," "bleach-based," or "heavy-duty degreaser" unless it explicitly states it's safe for marble. Sometimes, a cleaner might be great for grout in a bathroom but a disaster for your kitchen marble. Pay attention to the ingredients list too; high concentrations of certain chemicals can spell trouble for your stone.
Choosing pH-Neutral Formulas
This is probably the most critical piece of advice when selecting a commercial cleaner for your marble tile grout. Marble is sensitive to acids, which can cause etching – that dull, rough spot that's hard to get rid of. A pH-neutral cleaner has a balanced pH level, meaning it's neither too acidic nor too alkaline. This makes it much safer for your marble surfaces. You can often find these types of cleaners marketed for general tile and stone care. They work by lifting dirt and grime without reacting negatively with the stone itself.
Avoiding Bleach-Based Products
Bleach might seem like a go-to for tough stains and whitening grout, but it's generally a bad idea for marble. While it can kill mold and mildew, it can also discolor your marble over time, especially if it's a darker shade. Plus, bleach is quite alkaline, and repeated exposure can weaken the grout and even affect the stone's sealant. There are much safer and equally effective ways to tackle mold and mildew on marble grout, often using oxygen-based cleaners or hydrogen peroxide.
Testing Commercial Cleaners Safely
Before you go slathering a new cleaner all over your grout lines, do a spot test. Find a small, inconspicuous area – maybe in a corner of the room or behind an appliance. Apply a small amount of the cleaner according to the product's instructions and let it sit for the recommended time. Then, rinse and dry the area thoroughly. Check for any signs of discoloration, etching, or damage to the grout or marble. If everything looks good, you can proceed with cleaning the rest of your grout. This simple step can save you a lot of heartache and potential repair costs.
Following Manufacturer Instructions
Every cleaner is different, and the manufacturer knows their product best. Always read and follow the instructions on the bottle or packaging. This includes how much product to use, how long to let it dwell on the grout, and how to rinse it off. Some cleaners might require dilution with water, while others are ready to use. Over-saturating the grout or leaving a cleaner on for too long can sometimes cause issues, even with marble-safe products. Stick to the guidelines for the best results and to protect your marble.
When Commercial Cleaners Are Necessary
Sometimes, DIY solutions just don't cut it, especially for deeply set stains or widespread discoloration. Commercial cleaners are formulated with specific agents to tackle tougher jobs. If you've tried milder methods and your grout still looks dingy or stained, a good quality commercial cleaner might be your best bet. Remember, the goal is to find a product that's effective on the grout without compromising the integrity or beauty of your marble. For a wide selection of effective cleaners, you can discover the best grout cleaners of 2025.
The Importance Of Ventilation
When you're deep into cleaning your marble tile grout, it's easy to forget about something as simple as fresh air. But honestly, good ventilation is a big deal, especially when you're working with cleaning products, even the mild ones. It's not just about making the room smell better; it's about safety and making sure your cleaning job actually works.
Why Good Airflow Matters
Think about it: cleaning solutions, whether they're store-bought or homemade, can release fumes. Some are stronger than others, and breathing them in for extended periods isn't ideal. Good airflow helps to disperse these fumes, keeping the air you breathe cleaner and safer. Plus, it helps the cleaning solutions do their job more effectively by allowing surfaces to dry properly.
Ventilating During Cleaning
Before you even start scrubbing, open up some windows. If you have exhaust fans in your kitchen or bathroom, turn them on. This is your first line of defense against lingering fumes. It creates a more pleasant working environment and helps prevent any buildup of airborne chemicals. For projects across the U.S., remember that local building codes might have specific requirements for ventilation, especially in new constructions or renovations.
Ventilating During Rinsing
After you've applied your cleaning solution and scrubbed away, the rinsing process is next. You'll be using water, and sometimes this can create a bit of humidity. Keeping the air moving helps this moisture evaporate more quickly. This is particularly important for marble, which can be sensitive to prolonged dampness. Proper ventilation during rinsing helps prevent water spots and ensures the grout starts drying right away.
Ventilating During Drying
This is perhaps the most critical stage for ventilation. You want your grout lines and the marble tiles to dry completely. Leaving them damp for too long can lead to issues like mold or mildew, especially in humid climates. Opening windows, using fans, or even a dehumidifier can speed up the drying process significantly. Ensuring your grout is thoroughly dry before sealing is key to the sealant's effectiveness.
Using Fans and Open Windows
Fans are your best friend here. A simple oscillating fan can make a huge difference in air circulation. Position them to blow air towards open windows or just to keep the air moving within the room. Combining fans with open windows creates a cross-breeze that's incredibly effective. If you're tackling a larger area, consider using multiple fans.
The Role of Exhaust Fans
Don't underestimate the power of your built-in exhaust fans. These are designed to pull air out of a room, and they're particularly useful in bathrooms and kitchens where grout cleaning is common. Make sure they're clean and functioning properly before you start your cleaning project. They are a great way to ventilate the area to ensure good air flow when using cleaning agents.
Ensuring a Safe Cleaning Environment
Ultimately, good ventilation is about creating a safe and effective cleaning environment. It protects your health, helps your cleaning products work better, and contributes to a faster, more thorough drying process. It’s a simple step that pays off big time in the final look and longevity of your sparkling marble tile grout.
Protecting Your Marble Tile Grout Long-Term
Keeping your marble tile grout looking its best isn't just about cleaning; it's about protecting it for the long haul. Think of it like maintaining a fine piece of furniture – a little ongoing care goes a long way.
Regular Sealing for Durability
Sealing your grout is probably the single most important step you can take to protect it. Unsealed grout is like a sponge, ready to soak up spills and stains. A good quality sealer creates a barrier, making it harder for liquids and dirt to penetrate. This barrier is your first line of defense against discoloration and damage. When water beads up on the surface instead of soaking in, you know your sealer is doing its job. It's a simple step that makes a huge difference in how your grout holds up over time, especially in high-traffic areas or places prone to moisture, like kitchens and bathrooms. We recommend checking out products like the Tuff Duck Granite, Grout and Marble Sealer for reliable protection.
Consistent Maintenance Practices
Beyond sealing, a routine is key. This means more than just the occasional deep clean. It involves simple habits that prevent grime from building up in the first place. Think about wiping down your marble surfaces daily, especially after cooking or showering. This removes moisture and potential staining agents before they have a chance to set into the grout.
Promptly Addressing Spills
This one is huge. If you spill something on your marble, don't just leave it there. Wine, coffee, oil – these can all leave marks if left to sit. A quick wipe-up with a soft cloth can save you a lot of scrubbing later. It’s about being proactive rather than reactive when it comes to keeping your grout pristine.
Using Protective Mats
In areas where spills are more likely, like near the kitchen sink or in the entryway, consider using mats. These can catch drips and spills, preventing them from reaching and soaking into the grout. It’s a practical way to add an extra layer of protection without much effort.
Avoiding Heavy Foot Traffic on Wet Grout
This might seem obvious, but it's worth mentioning. After cleaning or sealing, give the grout ample time to dry completely. Walking on wet grout can track dirt into it and can even damage the sealant before it fully cures. Patience here pays off in the long run.
Understanding Environmental Factors
Things like humidity levels and the general environment of your home can affect your grout. High humidity can encourage mold and mildew growth, even in sealed grout. Ensuring good ventilation in bathrooms and kitchens can help mitigate these issues. Sometimes, simple things like using exhaust fans can make a big difference.
Preserving the Beauty of Your Grout
Ultimately, protecting your grout long-term is about a combination of sealing, regular light cleaning, and being mindful of what comes into contact with it. By following these practices, you're not just maintaining your grout; you're preserving the overall look and value of your beautiful marble tile installation. It’s an investment in the longevity and appearance of your home.
Understanding Grout Porosity
Grout, especially the cementitious kind often found between marble tiles, has a porous nature. Think of it like a sponge; it has tiny little holes that can soak up liquids. This is a big deal when it comes to keeping your marble tile grout looking good.
How Grout Absorbs Stains
Because grout is porous, spills and everyday messes can easily seep into those tiny openings. Once a liquid gets in there, it can be tough to get out, leading to discoloration and those stubborn stains we all dread. The longer a spill sits, the deeper it penetrates. This is why quick cleanup is so important for marble tile installations.
The Impact Of Grout Type On Porosity
Not all grout is created equal. Some types are naturally more porous than others. For instance, standard cement-based grouts are quite absorbent. Epoxy grouts, on the other hand, are much less porous and therefore more resistant to staining. Knowing what type of grout you have helps you understand how susceptible it is to absorbing liquids and becoming stained.
Recognizing Signs Of Grout Absorption
How do you know if your grout is absorbing things? Look for darkening in the grout lines, especially after mopping or if a spill has occurred. You might also notice a general dinginess that doesn't seem to come off with regular cleaning. These are often signs that liquids are getting into the grout itself.
Preventing Stains From Penetrating
The best defense is a good offense. Preventing stains from getting into the grout in the first place is key. This means wiping up spills as soon as they happen, especially colored liquids like wine, coffee, or juice. For areas prone to frequent spills, like kitchens and bathrooms, prompt attention is even more critical.
The Role Of Sealing In Reducing Porosity
This is where sealing comes in. Applying a quality grout sealer creates a barrier over the porous surface. It fills in those tiny holes, making it much harder for liquids to penetrate. Think of it like putting a protective coating on your grout. This step is vital for maintaining the look of your marble tile and preventing deep-set stains. We offer a range of sealers perfect for your natural stone projects.
How Porosity Affects Cleaning Efforts
If your grout is highly porous and hasn't been sealed, cleaning becomes a much bigger challenge. You might find yourself scrubbing harder and using stronger cleaners, which can actually damage the marble itself. Unsealed, porous grout means more effort for less impressive results.
Maintaining Grout Integrity
Keeping your grout sealed and clean helps maintain its overall integrity. When grout is constantly absorbing moisture and stains, it can eventually start to break down. Regular maintenance, including sealing and prompt cleaning, preserves the grout's strength and appearance, ensuring your marble tile floors and walls look their best for years to come.
Achieving A Streak-Free Shine
After all that hard work cleaning your marble tile grout, the last thing you want is a dull, streaky finish. Getting that sparkling, uniform look takes a bit of attention to detail, especially when it comes to the final steps. It’s not just about getting the grout clean; it’s about making it look its absolute best.
The Art Of Proper Rinsing
This is probably the most important part of avoiding streaks. You need to get all the cleaning solution residue off the marble and out of the grout lines. If you leave soap or cleaner behind, it'll dry and create those annoying hazy marks. So, take your time here. Use a clean sponge or a microfiber cloth and plenty of clean water. Rinse the area thoroughly, going over it multiple times if needed. Don't be shy with the water; just make sure you're not letting puddles sit on the marble for too long.
Using Distilled Water For Final Rinses
For an extra touch of brilliance, consider a final rinse with distilled water. Tap water, especially in some areas, can have minerals that leave behind faint spots or a cloudy film once they dry. Distilled water is pure H2O, so it dries completely clean. It might sound like a small thing, but for that truly polished look, it can make a noticeable difference, especially on darker grout colors.
Buffing Marble Surfaces
Once the grout and tiles are rinsed, it's time to buff. Use a clean, dry microfiber cloth. Gently buff the marble surface in a circular motion. This not only helps to dry the surface completely but also brings out the natural shine of the marble. It’s like polishing a piece of jewelry – it really makes the whole area pop.
Avoiding Over-Wetting Grout
While you need water to rinse, you don't want to saturate the grout lines excessively, especially if they're not sealed yet. Too much water can weaken the grout over time or push stains deeper into unsealed grout. Focus on cleaning the surface and the immediate grout line, then move on to drying.
The Importance Of Clean Drying Cloths
This goes back to the rinsing step. If your drying cloths are dirty or have leftover cleaning solution on them, you'll just be spreading that residue around. Always start with fresh, clean microfiber cloths for drying and buffing. Have a couple on hand so you can switch to a dry one if the first one gets damp.
Achieving A Polished Look
It's all about the details. A well-rinsed, properly dried, and gently buffed marble tile area will look professionally done. The grout lines will appear crisp and clean, and the marble itself will have a beautiful sheen. This final polish is what transforms a clean space into a truly sparkling one.
Maintaining The Sparkle
Keeping that streak-free shine going means sticking to a regular maintenance routine. Quick daily wipe-downs with a dry microfiber cloth can prevent dust and light smudges from building up. Addressing spills immediately is also key. The less time liquids sit on the marble and grout, the less chance they have of causing issues or leaving marks. With consistent care, your marble tile grout will continue to look its best for years to come, a testament to the quality natural stone you've chosen for your U.S. project.
Preventing Future Grout Discoloration
Keeping your marble tile grout looking fresh and clean is a constant battle, isn't it? One of the biggest headaches is discoloration. It sneaks up on you, turning those crisp grout lines into dingy streaks. But don't worry, with a little know-how and some consistent habits, you can significantly reduce the chances of your grout looking less than its best.
Identifying Common Discoloration Sources
Before you can prevent discoloration, you need to know what causes it. Think about what happens in your home. Kitchens and bathrooms are prime spots for grout to pick up unwanted colors. Food spills, grease splatters, soap scum, and even certain cleaning products can all leave their mark. In bathrooms, mold and mildew are common culprits, thriving in damp environments and leaving behind unsightly dark spots.
The Impact of Household Products
It's not just the obvious stuff. Some everyday household products can be surprisingly harsh on grout. Think about colored soaps, certain shampoos, or even some floor cleaners. If they have strong dyes, they can seep into the porous grout material over time. Even things like coffee or wine spills, if left to sit, can start to stain.
Preventing Mold and Mildew Growth
Mold and mildew are the bane of any clean bathroom or kitchen. They love moisture and dark, undisturbed areas. The best way to fight them is to keep things dry. After showers, try to wipe down wet surfaces, especially around the shower floor and walls. Good ventilation is also key. Make sure your bathroom fan is working properly, or open a window when possible. For persistent issues, consider a mildew-resistant grout sealer.
Managing Pet Stains
If you have pets, you know they can sometimes have accidents. Pet urine can be particularly problematic for grout. The ammonia in urine can not only cause discoloration but can also break down the grout over time. Cleaning up accidents immediately is the best defense. For areas where pets frequent, consider sealing the grout more frequently.
Protecting Grout from Kitchen Spills
Kitchens are high-traffic areas where spills are inevitable. Grease from cooking, sauces, and drinks can all find their way into grout lines. Wiping up spills as soon as they happen is your first line of defense. For areas prone to heavy grease, like behind the stove, a good degreaser can be helpful, but always test it on an inconspicuous spot first. Using a quality grout sealer can make cleanup much easier.
The Role of Regular Cleaning
Honestly, the most effective way to prevent discoloration is just to keep things clean. A regular cleaning schedule, even just a quick wipe-down, can make a huge difference. This prevents spills and grime from setting in. For routine cleaning, stick to pH-neutral cleaners that won't damage your marble or grout. If you need something stronger for tougher jobs, Zep's Grout Cleaner and Brightener is a powerful option.
Maintaining Grout's Original Hue
Ultimately, preventing discoloration is about being proactive. It's about understanding what can stain your grout and taking steps to stop it before it starts. Regular maintenance, prompt spill cleanup, and using the right cleaning products will go a long way in keeping your marble tile grout looking its best for years to come. Remember, a little effort now saves a lot of scrubbing later.
When To Call A Professional
Sometimes, even with the best intentions and the right supplies, a grout situation can get a bit out of hand. If you've tried your best and the results aren't quite what you hoped for, or if the problem seems bigger than a DIY fix, it might be time to bring in the pros. They have the tools and experience to handle issues that are beyond the scope of a typical home cleaning.
Assessing Severe Grout Damage
If your grout is crumbling, has large cracks, or is missing in significant sections, it's more than just a cosmetic issue. This kind of damage can compromise the integrity of your tile installation and even lead to water getting behind your tiles, which can cause bigger problems down the line. Professionals can assess the extent of the damage and perform necessary repairs or regrouting.
Dealing With Extensive Staining
While many stains can be tackled with DIY methods, some are incredibly stubborn. Deep-set, widespread discoloration, especially from things like mold, mildew, or old spills that have really soaked in, can be tough to lift completely. If you've tried multiple cleaning solutions without success, a professional might have access to stronger, specialized products or techniques.
When DIY Methods Fail
It's frustrating when you follow all the steps, use the recommended products, and still don't see the desired results. If you've spent hours scrubbing and experimenting with different cleaners on your marble tile grout, and it's still looking dull, stained, or just not sparkling, it's a clear sign that professional help might be needed. They can often identify why your efforts aren't working and adjust their approach.
Considering Professional Restoration
Sometimes, the goal isn't just cleaning, but a full restoration. If your marble tile grout has lost its original color, is heavily worn, or you're aiming for that 'brand new' look, professional restoration services can be a great option. They can often bring tired grout back to life in ways that regular cleaning can't.
Understanding Professional Grout Services
Professional services can range from deep cleaning and stain removal to regrouting and sealing. They often use industrial-grade equipment, like powerful steam cleaners or specialized chemical treatments, that aren't available for home use. They also have a keen eye for identifying the root cause of problems, not just treating the symptoms.
The Cost-Benefit Of Professional Help
While hiring a professional is an added expense, it can save you time, frustration, and potentially the cost of more extensive repairs if DIY attempts go wrong. For projects involving valuable marble, getting it right the first time with professional help is often a wise investment.
Ensuring Expert Care For Your Marble
Marble is a sensitive material, and improper cleaning can lead to etching or damage. Professionals who specialize in natural stone know how to clean and treat marble and its grout without causing harm. They understand the specific needs of your surfaces, ensuring the job is done safely and effectively.
If you're unsure about tackling a project yourself, don't hesitate to get expert help. For tricky jobs or when you need a perfect finish, calling a professional is the best way to go. Visit our website to learn more about when to seek professional assistance and find the right solutions for your needs.
Keep That Marble Sparkling
So there you have it. Cleaning your marble grout doesn't have to be a huge chore. With the right approach and a little regular attention, you can keep those grout lines looking fresh and clean, making your whole marble tile setup shine. Remember, a little effort goes a long way in maintaining that beautiful, high-end look. If you're ever looking for more tips or even some top-notch natural stone for your next project, check out places like American Stone Center. They've got the good stuff and know their stone.
Frequently Asked Questions
Why is marble grout so special?
Marble is a beautiful but soft stone. Its grout needs gentle cleaning because harsh chemicals or rough scrubbing can scratch or damage the marble itself, making it look dull or worn out. We want to keep that sparkle!
What's the best way to start cleaning marble grout?
First, clear the area around your marble tiles. Then, test any cleaning stuff you plan to use in a hidden spot to make sure it doesn't harm the marble. Good airflow is also important, so open a window or turn on a fan.
Can I use regular soap to clean marble grout?
Yes, mild soap mixed with water is a safe bet for everyday cleaning. It's gentle enough not to hurt the marble. Just be sure to rinse well afterward to get rid of any soapiness.
Is baking soda good for cleaning grout?
Baking soda is great! You can mix it with water to make a paste. This paste is a mild abrasive that can help lift dirt and stains from the grout without being too tough on the marble.
What about using vinegar on marble grout?
Vinegar is acidic, and acids can damage marble by etching it, which means it can make the surface look dull. While it can clean grout, it's best to use it very carefully, diluted, and only if other methods don't work. Always test first!
How do I get rid of tough stains like mold or grease?
For stubborn stains, you might need something stronger. Hydrogen peroxide can help with mold and mildew. For grease, a paste of baking soda and water or a specialized stone cleaner might be needed. Poultices are also good for pulling deep stains out.
Do I need to seal my marble grout?
Absolutely! Sealing your grout is super important. It creates a barrier that helps stop stains from soaking in and makes cleaning much easier in the future. Think of it like a protective coat.
How often should I clean my marble grout?
It's good to wipe down your marble surfaces daily and address spills right away. For the grout itself, a gentle cleaning every week or two usually keeps it looking great. Deep cleaning might be needed every few months, depending on how much traffic the area gets.
What cleaning tools are best for marble grout?
You'll want soft-bristled brushes, microfiber cloths, and soft sponges. Avoid anything too stiff or wire-like, as these can scratch the marble. Sometimes a small, old toothbrush works wonders for getting right into the grout lines.
What should I avoid when cleaning marble grout?
Definitely stay away from harsh chemicals like bleach or acidic cleaners (like strong vinegar or lemon juice). Also, avoid abrasive scrub pads or steel wool. These can easily scratch, etch, or dull your beautiful marble and grout.
How can I tell if my grout needs sealing?
If water or spills soak into the grout quickly instead of beading up on top, it's probably time to reseal. You can also test by dropping a little water on the grout line; if it darkens the grout right away, it's absorbing too much.
When should I think about hiring a professional?
If you have very deep stains that won't come out, widespread mold, or if the grout is badly damaged or crumbling, it might be time to call in the pros. They have special tools and knowledge to fix serious issues without harming your marble.