


So, you've picked out some beautiful travertine tile for your project. That's great! Travertine has this natural charm that just can't be beat. But now comes the part that can seem a little daunting: grouting. If you're wondering how to grout travertine tile, you're in the right place. It's not as complicated as it might seem, and with a little care, you can get a really nice finish. We'll walk through the steps to make sure your travertine looks its best.
Key Takeaways
- When learning how to grout travertine tile, start by cleaning your tiles thoroughly and making sure they are completely dry. This is super important.
- Pick the right grout. For travertine, sanded grout is usually the way to go, but check what the tile manufacturer suggests. Color matters too, so test it first.
- Mix your grout carefully. Follow the package instructions for the right water amount. You want a smooth, lump-free mix, and it’s best to mix small batches.
- Apply the grout using a float, working it into the joints diagonally. Make sure to fill all the spaces completely and remove the excess.
- Clean up the grout gently. Wait a bit after applying, then use a damp sponge to wipe away the excess. Don't use too much water.
- Refine the grout lines for a neat look. Smooth out any uneven spots and make sure the edges are clean and sharp.
- After the grout cures, do a final cleaning to remove any haze. Then, seal both the grout and the tile to protect your work.
- If you run into problems like cracks or stains, there are ways to fix them, but sometimes calling in a pro is the best option.
Preparing Your Travertine Surface For Grouting
Before you even think about mixing grout, getting your travertine surface ready is a big deal. It’s not just about making things look neat; it’s about making sure that grout actually sticks and lasts. Travertine is a natural stone, and it has its own quirks, like being pretty porous. This means it can soak up liquids, including the water from your grout mix, which can mess with how the grout cures.
Understanding Travertine's Unique Porosity
Travertine is known for its natural holes and pits. This porosity is part of its charm, giving it that unique, earthy look. However, it also means the stone can absorb moisture. If the tiles are too dry when you grout, they'll pull water out of the grout mix too quickly, leading to a weak bond and potential cracking. On the flip side, if there's too much moisture trapped underneath, it can cause problems later on. Getting the moisture balance just right is key for a durable grout job.
Essential Tools and Materials Checklist
To get started, you'll want to have everything on hand. This saves you from stopping mid-project to hunt for something. Here’s a basic list:
- Grout (sanded or unsanded, depending on your joint width)
- Grout float
- Grout sponge
- Two buckets (one for mixing, one for rinsing)
- Clean water
- Microfiber cloths
- Painter's tape
- Drop cloths
- Safety glasses and gloves
Thoroughly Cleaning the Travertine Tiles
Any dirt, dust, or debris left on the tiles or in the grout lines will get trapped under the grout. This can lead to weak spots and an uneven appearance. Use a stiff brush or a shop vacuum to get rid of loose particles. For any stuck-on grime, a mild stone cleaner or just water and a soft cloth should do the trick. Just make sure to rinse away any cleaner residue thoroughly.
Ensuring the Tile Surface is Completely Dry
This is super important, especially with porous materials like travertine. Trapped moisture can cause all sorts of issues down the line, like efflorescence (those white powdery deposits) or even mold. Give your tiles plenty of time to dry completely after cleaning. You can speed this up with fans or by opening windows, but don't rush it. Check that the grout lines themselves are dry too. You can check out resources on keeping your tiles dry before installation for more tips.
Protecting Surrounding Areas from Grout
Grout can be messy, and it sticks to pretty much everything. Use painter's tape to protect baseboards, countertops, cabinets, or any fixtures near the tile area. Lay down drop cloths to catch any spills or stray grout. This step saves a lot of cleanup time later.
Inspecting Grout Lines for Debris
Before you mix that first batch of grout, take a close look at all the spaces between your tiles. Sometimes, small bits of tile, adhesive, or even just dust can get lodged in there. Use a utility knife or a small pick to carefully remove any obstructions. Clean grout lines mean the grout can fill them completely and bond properly.
Gathering Your Premium Grouting Supplies
Using good quality materials makes a difference. For travertine, consider a grout specifically designed for natural stone. High-quality grout will be more durable and less prone to staining. Also, make sure your tools are up to the task. A good grout float that's flexible but sturdy, and a dense grout sponge, will make the application and cleanup process much smoother. Investing in premium grouting supplies can save you headaches and lead to a much better final look for your U.S. projects.
Choosing the Right Grout for Travertine
Picking the right grout for your travertine tile project is a big deal. It's not just about filling the gaps; it's about making the whole floor or wall look its best. Think of it like choosing the frame for a beautiful painting – the wrong one can really throw things off.
Understanding Grout Types: Sanded vs. Unsanded
When you're looking at grout, you'll mostly see two main kinds: sanded and unsanded. Sanded grout has fine sand mixed in. This makes it stronger and it's better for wider grout lines, usually 1/8 inch or more. The sand helps fill those wider spaces without shrinking too much. Unsanded grout, on the other hand, is smoother. It doesn't have sand, so it's best for very thin grout lines, typically less than 1/8 inch. Using sanded grout in thin lines can actually scratch your travertine, and unsanded grout in wide lines might crack. So, for most travertine installations, especially if you have those natural variations in tile size, sanded grout is often the go-to.
Selecting a Grout Color to Complement Travertine
This is where you can really make your travertine shine. The color of your grout can totally change the look of your tile. Do you want a subtle, almost invisible look? Then pick a grout color that's very close to your travertine's natural shade. This makes the tiles blend together, giving a really smooth, high-end feel. On the flip side, a contrasting grout color can make each tile pop. A darker grout against lighter travertine, for example, can create a really dramatic and modern look. It really depends on the vibe you're going for. For a classic, warm feel, a light beige or sand color works wonders. If you want something a bit brighter, a warm white or ivory can be nice. Sometimes a greige (grey-beige) offers a sophisticated middle ground. You can check out some ideas for complementary grout colors.
Considering Epoxy Grout for Enhanced Durability
Epoxy grout is a bit different from cement-based grouts. It's made from epoxy resins and a hardener. This makes it super tough, stain-resistant, and waterproof. Because of this, it's a great choice for areas that get a lot of use or are often wet, like kitchens or bathrooms. It's also less likely to crack or shrink. The downside? It can be a bit trickier to work with and usually costs more upfront. But if you're looking for something that will last and resist just about anything, epoxy is worth thinking about.
The Benefits of Flexible Grout Formulations
Travertine is a natural stone, and like all natural stones, it can expand and contract a little with temperature changes. Flexible grout formulations are designed to handle this movement. They contain additives that give them more give, preventing the grout from cracking or crumbling over time. This is especially important for floors that might experience some flexing, or in areas with significant temperature swings. It adds an extra layer of protection and longevity to your installation.
Matching Grout to Your Travertine's Finish
Think about the finish of your travertine tiles. Are they polished, honed, tumbled, or natural? Polished travertine has a smooth, shiny surface, and a grout that matches its sheen can look really luxurious. Honed travertine has a matte finish, and a grout with a similar low sheen will look natural. Tumbled travertine has a worn, rustic look, and a grout with a bit of texture or a matte finish will fit right in. The goal is to have the grout work with the tile's finish, not against it.
Testing Grout Colors in an Inconspicuous Area
Before you mix up a big batch of grout and start applying it everywhere, do yourself a favor and test it out. Find a small, hidden spot – maybe behind a toilet or in a closet corner – and apply a bit of the grout there. Let it dry completely. This way, you can see exactly how the color looks in your home's lighting and next to your specific travertine. It’s a small step that can save you from a big regret later on.
Where to Source High-Quality Travertine Grout
Getting good quality grout is important. You don't want something that's going to break down or stain easily. Look for reputable tile supply stores or specialized natural stone suppliers. Sometimes, the place where you bought your travertine might also have recommendations or sell grout specifically suited for their products. If you're ordering your stone online, check if the supplier also offers premium grouting supplies to ensure compatibility and quality. It's often worth paying a little extra for a grout that's made for natural stone and will hold up well over time.
Mixing Your Travertine Grout to Perfection
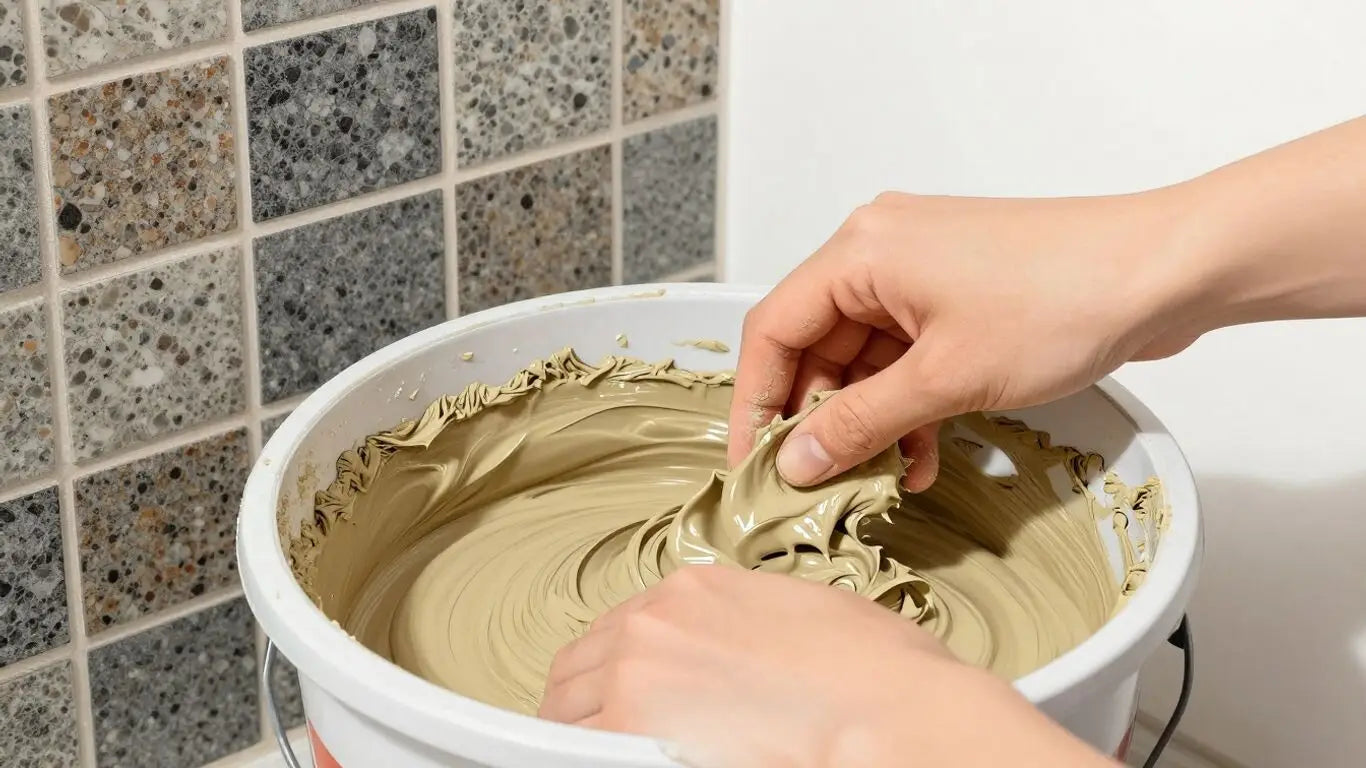
Getting the grout mix just right is a big part of making your travertine tile project look good. It's not just about dumping powder and water together; there's a bit of a knack to it. If you get it wrong, you might end up with grout that's too crumbly, too runny, or just doesn't set properly. We want that perfect consistency, something like thick peanut butter, so it stays put in the joints without falling out. This is where you really want to pay attention to the manufacturer's directions. They know their product best, and following their lead is the easiest way to avoid problems.
Reading the Grout Manufacturer's Instructions
Seriously, don't skip this step. Every grout product is a little different. Some need more water, some less, and the mixing times can vary. The instructions are your roadmap to success. They'll tell you exactly how much water to add per bag of grout and how long to mix it. Ignoring them is like trying to bake a cake without a recipe – you might get something edible, but it's probably not going to turn out as planned.
Achieving the Ideal Grout Consistency
What are we aiming for here? Think of something that holds its shape but is still workable. Too stiff, and it's hard to spread and might leave air pockets. Too wet, and it'll run out of the joints and won't fill them properly. A good test is to scoop some up with your margin trowel; it should mound up slightly and not immediately slump off. This consistency is key for getting full grout coverage in joints.
The Importance of Proper Water-to-Grout Ratio
This is where many DIYers stumble. Adding too much water weakens the grout and can lead to shrinkage and cracking later on. Too little water, and it'll be lumpy and hard to work with. Always measure your water. It's better to start with the recommended amount and add a tiny bit more if needed, rather than dumping in too much at once. Getting this ratio right is a big deal for the grout's strength and appearance.
Mixing in Small, Manageable Batches
Unless you're tiling a gymnasium, mix only what you can use within about 20-30 minutes. Grout starts to set once mixed with water, and you don't want to be working with hardened material. Mixing smaller batches also helps you maintain that perfect consistency throughout the job. It's way easier to mix a second small batch than to try and fix a huge tub of grout that's already gone off.
Allowing the Grout to Slake Properly
This is a fancy term for letting the mixed grout sit for a few minutes. After you've mixed it up, let it rest for about 5-10 minutes. This allows the chemicals in the grout to fully absorb the water. Then, give it a quick second mix. This slaking process makes the grout smoother, more workable, and helps prevent it from shrinking too much later. It's a small step that makes a noticeable difference.
Ensuring a Lump-Free, Uniform Mixture
Use a clean mixing paddle or margin trowel. Scrape the sides and bottom of the bucket frequently to make sure all the powder is incorporated. You're looking for a smooth, creamy texture with no dry pockets or hard lumps. A consistent mixture means consistent color and strength across all your grout lines.
Tips for Consistent Grout Mixing
- Use a clean bucket and tools: Old grout residue can mess with your new mix.
- Start with water, then add grout: This often helps prevent clumping.
- Mix thoroughly: Don't rush this part. Get into all the corners of the bucket.
- Check consistency often: Feel it, look at it. Does it seem right?
Remember, the goal is a workable, uniform paste that will fill your travertine tile joints completely and cure to a durable finish. Patience during the mixing stage pays off big time in the final look of your project.
This careful approach to mixing is just one part of the process. For more on getting your tiles ready, check out our section on preparing your travertine surface. It's all about setting yourself up for a beautiful, lasting result.
The Art of Applying Travertine Grout
Alright, so you've prepped your travertine, picked out the perfect grout, and mixed it up just right. Now comes the part where you actually get to see your hard work start to take shape: applying the grout. It might seem straightforward, but there's a bit of a knack to it if you want that really polished look.
Loading the Grout Float Effectively
Think of your grout float like a trowel, but wider and with a softer rubber base. You want to load it up, but not so much that it's overflowing. Scoop a good amount of grout onto the float, usually from the side of your mixing bucket. The goal is to have enough to spread, but not so much that it’s a messy disaster from the get-go. A well-loaded float makes the spreading process much smoother.
Spreading Grout Diagonally Across the Tiles
This is a big one. You don't want to spread the grout parallel to the tile edges. Instead, hold your float at about a 45-degree angle to the tile surface. Then, spread the grout diagonally across the tiles. This helps push the grout down into the joints and also helps to keep the tile faces cleaner. It takes a little practice, but it’s worth it for a good fill. You can find more tips on this technique in our guide to DIY travertine tiling.
Ensuring Full Grout Coverage in Joints
As you spread, keep an eye on those grout lines. You need to make sure they're completely filled. If you see any low spots or areas where the grout didn't quite make it in, go back over them. The diagonal spreading method helps a lot with this, but sometimes a second pass is needed. You want every single joint packed tight with grout.
Working in Small, Achievable Sections
Don't try to grout your entire floor all at once. It's just not practical. Work in sections that you can comfortably manage. This way, you can focus on getting the grout applied properly and start the cleanup process before the grout starts to set too much. A good rule of thumb is to work in areas of about 3x3 feet, depending on the temperature and humidity.
Removing Excess Grout with the Float
Once you've spread the grout into the joints, you need to get rid of the excess that's sitting on the tile faces. Hold your float at a steeper angle, almost perpendicular to the tile, and scrape off the excess. Again, work diagonally. This step is key to minimizing the amount of grout haze you'll have to deal with later. It's all about being efficient with your tool.
Maintaining Consistent Grout Line Width
This is where that steady hand comes in. As you spread and remove excess, try to keep the width of your grout lines uniform. This gives the finished job a really professional and clean appearance. If you notice some lines are wider than others, try to gently fill them in or scrape down the wider ones as you go. It’s the little details that make a big difference.
Mastering the Technique for a Seamless Look
Applying grout is definitely a skill that improves with practice. The key is to be methodical. Load your float, spread diagonally, fill the joints completely, remove the excess, and keep an eye on your line consistency. If you're working on a large project, consider ordering a sample of your chosen grout to get a feel for the application process. This approach helps in achieving a truly flawless finish, making your travertine tiles look their absolute best.
Initial Grout Cleanup Techniques
Alright, so you've just finished slathering that grout into all those travertine tile joints. It looks… well, it looks like you just grouted. Now comes the part where you turn that messy job into something that actually looks good. This is where the initial cleanup really matters. Get it wrong, and you'll be dealing with a hazy mess for days. Get it right, and you're well on your way to that flawless finish.
Timing is Crucial: The Waiting Period
Don't just jump in there the second the last bit of grout is applied. You need to let it set up a bit. This isn't a race. Give it about 10 to 20 minutes, depending on your room's temperature and humidity. You want the grout to firm up enough so it doesn't pull out of the joints when you wipe, but not so long that it becomes rock hard. It should feel firm to the touch, not wet or sticky. This waiting period is key to avoiding a streaky disaster. This waiting period is critical for success.
Using a Damp Grout Sponge Correctly
This is your main tool for this stage. Grab a good quality grout sponge – they're denser and hold more water without getting waterlogged too quickly. Dip it in your clean rinse water, then wring it out really well. You want it damp, not soaking wet. Too much water here can weaken the grout or cause discoloration, especially with natural stone like travertine.
Wiping in a Circular Motion
Start gently wiping the tile surfaces. Use light, circular motions. This helps lift the excess grout off the tile face without digging into the grout lines themselves. Think of it as polishing the tile surface, not scrubbing it. As you wipe, you'll see grout start to accumulate on your sponge.
Rinsing the Sponge Frequently
This is probably the most important part of the whole cleanup process. You need to rinse your sponge very often. Like, after every one or two passes over the tiles. Dump the dirty water in one bucket and get fresh, clean water in your second bucket. Rinse the sponge thoroughly in the clean water, then wring it out well before going back to the tiles. A clean sponge is your best friend for a clean tile surface. If you keep using a dirty sponge, you're just smearing grout everywhere.
Avoiding Excessive Water on the Surface
Remember that damp sponge? Stick to that. If you're leaving puddles of water on the tiles, you're using too much. Excess water can seep into the grout, making it weaker and potentially changing its color. It can also lead to a chalky residue, known as grout haze, later on. Keep the water usage minimal and controlled.
Removing Grout Haze Before It Sets
As the grout continues to cure, a light haze might start to form on the tiles. This is normal. The goal of this initial cleanup is to remove as much of the bulk grout as possible. If you do notice a light haze forming, you can do a final, very light pass with your well-wrung-out sponge. Don't scrub hard; just a gentle wipe should do. The real haze removal comes later, but getting the bulk off now makes that final step much easier.
Achieving a Clean Tile Surface
By the end of this stage, your tiles should look noticeably cleaner. Most of the excess grout should be gone, and the grout lines should be relatively smooth and filled. There might still be a slight film or a few smudges, but the main layer of grout residue should be off the tile faces. This sets you up perfectly for the next stage of refining the grout lines and the final cleaning.
Refining the Grout Lines
Detailing Edges and Corners
Once the initial cleanup is done, it’s time to really make those grout lines pop. This is where you pay attention to the small stuff, like the edges where the tile meets the wall or any tricky corners. You want these areas to look just as clean and sharp as the main field of tiles. Sometimes, a bit of excess grout can get stuck in these tight spots. A damp sponge or even a soft brush can help coax it out without disturbing the main grout line. The goal here is crispness and definition.
Smoothing Uneven Grout Lines
It’s pretty common to have some grout lines that are a little higher or lower than others after the initial application. Don't worry, this is fixable. If a line is too high, you can gently shave off the excess with the edge of your grout float or a putty knife before it fully hardens. If a line is too low, you might need to carefully add a tiny bit more grout to fill it in. This step requires a steady hand and a bit of patience. You're essentially giving each grout line a final touch-up to make sure it's all on the same level.
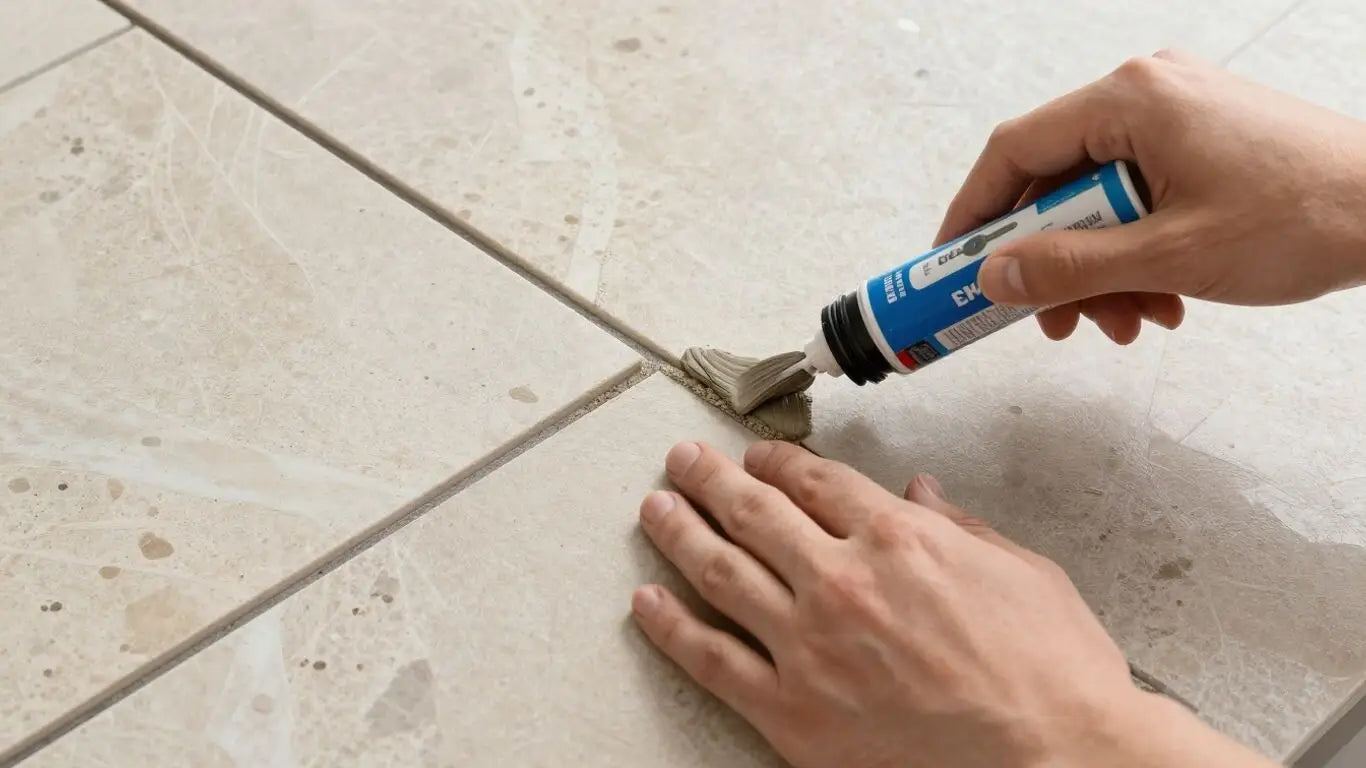
Addressing Any Gaps or Low Spots
Sometimes, despite your best efforts, you might find small gaps or areas where the grout didn't quite fill in completely. These can be weak spots and also just don't look great. You can use a small grout bag or even a plastic bag with a corner snipped off to apply a small amount of grout directly into these low spots. Then, use a small trowel or even your finger (wearing a glove, of course!) to smooth it out and blend it with the surrounding grout. It’s all about making sure every single joint is fully packed and looks solid.
Using a Grout Finishing Tool
For that truly professional look, a grout finishing tool can be a game-changer. These tools, often made of rubber or silicone, have a specific edge designed to create a perfectly smooth and slightly concave surface on the grout line. Running this tool along the wet grout, at a consistent angle, can really clean up any rough edges and give your grout lines a uniform appearance. It’s like using a squeegee for your grout. You can find these at most home improvement stores, and they’re pretty inexpensive.
Ensuring Sharp, Defined Grout Joints
Sharp grout joints make a big difference in the overall appearance of your tiled surface. This means the grout line should have clean, straight edges where it meets the tile. If you notice any smudging or rounding of these edges during the cleanup process, you can use a utility knife or a specialized grout saw to carefully score a clean line. This takes a delicate touch, so go slow and steady. It’s these fine details that separate a good job from a great one.
Checking for Consistency Across the Area
As you work through refining the grout lines, take a step back frequently to look at the entire area. Are the grout lines consistent in width and depth? Do they all have that same smooth finish? It’s much easier to spot and correct inconsistencies when you can see the bigger picture. This is also a good time to check for any stray grout crumbs or smudges on the tile faces that you might have missed earlier. A clean, consistent look is the ultimate aim.
The Importance of Precision in Finishing
Finishing is where you really bring it all together. It’s not just about getting the grout in the joints; it’s about making those joints look intentional and well-executed. Precision here means taking the time to smooth, define, and clean every inch of the grout. This final attention to detail is what transforms a DIY project into something that looks like it was done by a seasoned pro. It’s the difference between a tiled surface that’s just okay and one that truly wows.
The Final Grout Cleaning Stage
After all that hard work applying the grout, the final cleaning is where your travertine tile project really starts to shine. This stage is all about removing any lingering haze or residue left behind from the grouting process. It’s not just about making it look clean; it’s about revealing the true beauty of your stone.
Allowing Sufficient Curing Time
Before you even think about the final clean, you need to let the grout do its thing. Grout needs time to set and harden properly. Rushing this step can undo all your efforts. Check the manufacturer's instructions, but generally, you'll want to wait at least 24 to 72 hours after the initial cleanup. This allows the grout to develop some strength, making it less susceptible to being pulled out or smudged during the final cleaning.
Preparing Your Final Cleaning Solution
For this final clean, you don't need anything too harsh. In fact, harsh chemicals can actually damage your travertine or the grout itself. A simple solution of warm water is often enough. If you do need a bit more cleaning power, opt for a pH-neutral cleaner specifically designed for natural stone. You can find these at most home improvement stores. Always test your cleaning solution in an inconspicuous area first to make sure it doesn't discolor or etch the tile.
Using a Clean Microfiber Cloth
When it's time to clean, grab some fresh, clean microfiber cloths. These are great because they're soft, absorbent, and won't scratch your travertine. Avoid using old rags that might have dirt or cleaning residues trapped in them. You want a clean slate for this final polish.
Buffing Away Lingering Grout Haze
This is where the magic happens. Lightly dampen a microfiber cloth (don't soak it!) and start buffing the tile surface in a circular motion. You're essentially polishing the stone and removing any faint haze that might have settled. Work in small sections, and as the cloth picks up haze, switch to a clean, dry section or a new cloth. You'll see the grout lines become crisper and the stone's natural color deepen.
Addressing Stubborn Grout Residue
Sometimes, despite your best efforts, a bit of grout residue might be more stubborn. If you notice any thicker patches or dried-on bits, you might need to use a plastic grout scraper or a soft-bristle brush very gently. Be careful not to scratch the travertine. For really tough spots, a specialized grout haze remover might be necessary, but use it sparingly and follow the product instructions precisely.
Ensuring a Polished Travertine Finish
Once you've buffed away all the haze, take a step back and admire your work. The goal is a clean, uniform look across the entire surface. The grout lines should be smooth and consistent, and the travertine tiles should have a natural, polished sheen. This final buffing step really brings out the stone's inherent beauty and gives your project that professional, finished look.
The Importance of Patience in Final Cleaning
This last cleaning stage might seem simple, but it requires patience. Don't rush through it. Taking your time to buff thoroughly will make a huge difference in the final appearance. It’s the difference between a good job and a truly flawless finish that you’ll be proud of for years to come. A clean workspace is key here, just like when you're preparing hardwood floors for sealant adhesion.
Sealing Your Newly Grouted Travertine
Alright, so you've just finished the messy but rewarding job of grouting your travertine. It looks pretty good, right? But hold on, there's one more step that's super important if you want it to stay looking good for years to come. We're talking about sealing.
Understanding the Need for Travertine Sealing
Travertine, as beautiful as it is, is a natural stone, and that means it's porous. Think of it like a sponge. If you don't seal it, spills, dirt, and even just regular moisture can soak right in. This can lead to stains that are really hard to get out, discoloration, and generally just a duller appearance over time. Sealing creates a protective barrier. It's the best way to keep your travertine looking its best.
Choosing the Right Grout and Tile Sealer
Not all sealers are created equal, and you need one that's right for natural stone. You'll find penetrating sealers, which soak into the stone and grout to protect it from within, and topical sealers, which form a protective layer on the surface. For most travertine tile projects, a good quality penetrating sealer is the way to go. Look for ones specifically designed for natural stone and grout. Some sealers can also add a bit of sheen, so consider if you want a matte, satin, or gloss finish. We recommend sealers that are specifically formulated for natural stone, as they won't alter the stone's natural look too much.
Applying Sealer Evenly and Consistently
This is where you can't really rush. Make sure your grout is completely dry – and I mean completely dry. Give it at least 24-48 hours after grouting, maybe longer if it's humid. Then, grab your sealer and a clean applicator. A brush, a roller, or even a clean cloth can work. Work in small sections, applying a thin, even coat. Don't let it pool up. You want to cover the tile and the grout lines thoroughly. If you're using a penetrating sealer, you might need to wipe off any excess that doesn't soak in after a few minutes. Check the product instructions, as they can vary.
Allowing Adequate Drying Time Between Coats
Most sealers recommend at least two coats for good protection. After you apply the first coat and wipe off any excess, you'll need to let it dry. Again, check the manufacturer's instructions, but usually, you'll wait a few hours before applying the second coat. Rushing this step means the sealer might not cure properly, and you won't get the full protection you're looking for. Patience here really pays off.
Wiping Off Excess Sealer Promptly
This is a big one, especially with penetrating sealers. If you leave too much sealer sitting on the surface of the travertine or grout, it can dry to a hazy or sticky film. That's not the look you want! So, after you've applied a coat and let it sit for the recommended time (usually 5-15 minutes), use a clean, lint-free cloth to wipe away any sealer that hasn't soaked in. This step is key to a clean, natural finish. You can find great microfiber cloths for this purpose that won't leave lint behind.
The Benefits of a Properly Sealed Surface
So, why go through all this? A sealed surface is much easier to clean. Spills bead up on top instead of soaking in, giving you time to wipe them away. It helps prevent staining from things like wine, coffee, or oil. It also protects against general wear and tear, keeping your grout lines from crumbling or discoloring as quickly. Basically, sealing your travertine is like giving it a shield against everyday life. It helps maintain the natural beauty of your stone for years to come.
Maintaining the Beauty of Your Travertine
Sealing isn't a one-and-done deal. Depending on the sealer you use and how much traffic your floor gets, you'll need to reapply it periodically. Usually, this is every 1-3 years. You can test if it's time by dripping a little water on the surface. If it beads up, you're good. If it soaks in, it's time to reseal. Regular cleaning with pH-neutral cleaners will also help maintain the sealer and the overall look of your travertine.
Troubleshooting Common Grouting Issues
Even with the best preparation, sometimes things don't go exactly as planned when grouting travertine. Don't worry, most common issues have straightforward fixes. Let's look at what might pop up and how to deal with it.
Dealing with Grout Shrinkage
Grout can sometimes shrink slightly as it dries, leaving small gaps along the edges of the tiles. This is more common with cement-based grouts if they're mixed too wet or applied too thickly. The best way to avoid this is to mix your grout to the manufacturer's recommended consistency and avoid adding extra water. If you notice minor shrinkage, you can often fix it by applying a small amount of matching grout into the gap with a putty knife or a grout bag. For larger areas, you might need to re-grout the affected sections.
Correcting Cracks in Grout Lines
Cracks can appear for a few reasons, like movement in the subfloor or if the grout was forced into the joints too aggressively. If you see small cracks, you can carefully remove the loose material with a utility knife or a grout saw. Then, mix a small batch of grout and apply it to the crack, smoothing it with a putty knife. For bigger cracks or if the grout is crumbling, you might need to remove the entire grout line and re-grout it. This is a good time to check out how to repair travertine tile at home for more detailed steps on removing old grout.
Removing Stains from Fresh Grout
Fresh grout is porous and can pick up stains easily. If you spill something on it, try to clean it up immediately with a damp sponge. For tougher stains, a specialized grout cleaner might be needed, but always test it in an inconspicuous spot first. Always use pH-neutral cleaners on travertine to avoid damaging the stone.
Addressing Grout Discoloration
Discoloration can happen if different batches of grout were mixed or if water with high mineral content was used. If the color difference is slight, sometimes a good cleaning or a grout colorant can help. If it's significant, you might have to remove the affected grout and re-grout the area using a consistent mix. This is why mixing enough grout for the entire job in one go is so important.
Fixing Unevenly Cured Grout
Sometimes, grout might cure unevenly, leading to soft spots or areas that feel chalky. This can be due to improper mixing or inconsistent drying conditions. If the grout is still soft, you might be able to scrape it out and re-grout the area. If it's hardened but still weak, you may need to remove it and start over. Proper mixing and allowing adequate drying time are key here.
Repairing Damaged Grout Joints
Damaged grout joints, whether chipped, cracked, or crumbling, need attention. Start by carefully removing all the damaged grout. You can use a grout saw or a sharp utility knife for this. Once the joint is clean, apply new grout, making sure it's packed in well. Let it cure fully before cleaning the tile surface.
When to Call a Professional
While many grout issues are DIY-friendly, some problems might be beyond a simple fix. If you're dealing with widespread cracking, significant discoloration that you can't correct, or if you suspect underlying issues like subfloor movement, it might be time to consult a professional. They have the tools and experience to diagnose and fix more complex problems, especially when dealing with delicate travertine flooring issues.
Dealing with grout problems can be frustrating, but with the right approach, you can usually get your travertine looking great again. Patience and the right materials are your best friends here.
Maintaining Your Grouted Travertine's Appearance
So, you've put in the work, and your newly grouted travertine looks fantastic. Now comes the part that keeps it that way: maintenance. It's not complicated, but it does require a little attention to detail. Think of it like caring for any other beautiful natural material – a bit of regular upkeep goes a long way.
Regular Cleaning Practices for Travertine
Daily sweeping or vacuuming is your first line of defense. This gets rid of any grit or dust that can scratch the surface over time. You know, those tiny particles that seem to appear out of nowhere? They can really do a number on your tile if left unchecked. For a more thorough clean, a light mopping with a pH-neutral cleaner is your best bet. This simple routine cleaning is key to preserving the natural beauty and longevity of your travertine surfaces. It's about being consistent, not about scrubbing until your arms ache.
Using pH-Neutral Cleaning Products
When it comes to cleaning travertine, stick to products that are gentle. Harsh chemicals, especially acidic ones, can etch the stone, leaving dull spots or even damaging the surface. A pH-neutral cleaner is specifically designed for natural stone, meaning it cleans effectively without stripping away the stone's natural luster or reacting negatively with the grout. You can find these at most home improvement stores, or even online. It's worth the small investment to protect your beautiful tile.
Avoiding Harsh Chemicals and Abrasives
This one's a biggie. Things like bleach, ammonia, or abrasive scrub pads are a big no-no for travertine. They can break down the grout, discolor the stone, and generally just make a mess. Imagine using steel wool on a delicate painting – it's that kind of damage we're trying to avoid. Stick to soft cloths, sponges, and those pH-neutral cleaners we just talked about. Your travertine will thank you for it.
The Role of Prompt Spill Cleanup
Accidents happen, right? Someone spills a glass of wine, or maybe the dog tracks in some mud. The important thing is to clean it up quickly. The longer a spill sits on travertine, the more likely it is to soak in and potentially stain. Grab a soft cloth or paper towel and blot up the mess immediately. If there's any residue, a little water and a gentle cleaner should do the trick. Don't let spills linger.
Reapplying Sealer Periodically
Remember when you first sealed your grout and tile? That sealer creates a protective barrier, but it doesn't last forever. Depending on the type of sealer used and the amount of traffic your floor gets, you'll need to reapply it every year or two. You can usually tell it's time when water stops beading up on the surface and starts to soak in. It's a good idea to test a small, inconspicuous area first. This step is really important for preventing stains down the line.
Protecting Travertine from Heavy Traffic
If you have areas that get a lot of foot traffic, like entryways or main hallways, consider using area rugs or mats. These act as a buffer, catching dirt and grit before it can reach your travertine. Just make sure the backing of the rug isn't something that could scratch the stone – felt or natural fiber backings are usually a safe bet. It's a simple way to add an extra layer of protection where you need it most.
Preserving the Natural Elegance of Your Tile
Ultimately, maintaining your grouted travertine is about respecting its natural qualities. It's a beautiful, porous stone, and treating it with care will ensure it stays that way for years to come. By following these simple steps, you're not just cleaning your floors; you're preserving the unique character and elegance that only natural travertine can bring to your home. Consistent care makes a difference.
Achieving a Professional Travertine Grout Finish
Getting that perfect grout line on your travertine can feel like a big deal, right? It’s the detail that really makes the whole tile job look polished. It’s not just about slapping grout in there; it’s about taking your time and being a bit careful.
The Pursuit of Perfect Uniformity
When you're looking at your newly grouted travertine, the first thing you'll probably notice is how the grout lines look. Are they all the same width? Do they look neat and tidy? Aiming for grout lines that are consistently the same width is key to a professional look. It makes the whole pattern of the tile stand out, rather than drawing attention to uneven gaps. Think of it like drawing straight lines with a ruler versus freehand – the ruler always looks cleaner.
Smoothing Out Imperfections
Sometimes, even with the best intentions, you might end up with a few spots where the grout isn't perfectly smooth. Maybe there's a little dip, or a tiny bump. You can usually fix these small issues before the grout fully hardens. A damp sponge, used gently, can help smooth these areas. Just be careful not to use too much water, as that can weaken the grout. It’s a bit like smoothing out clay – you want it even, but not too wet.
Ensuring Sharp, Clean Edges
Clean edges make a big difference. This means making sure the grout doesn't smear onto the face of the travertine tiles. It's easier to wipe away excess grout when it's still wet, but sometimes a little bit gets left behind. A clean, damp sponge is your best friend here. You'll want to rinse it often to avoid just spreading the grout around. Getting these edges clean really makes the tile color pop.
The Role of a Steady Hand
Honestly, a lot of this comes down to just being steady. When you're spreading the grout, try to keep your float at a consistent angle. When you're cleaning up with the sponge, use gentle, deliberate strokes. It’s not a race. Taking your time means you’re less likely to make mistakes that you’ll have to fix later. Think about how a painter carefully strokes their brush – it’s that kind of focus.
Detailing Around Fixtures and Edges
Don't forget the tricky spots! Around sinks, tubs, or where the tile meets a wall, you need to be extra careful. Sometimes a smaller tool, like a grout finishing tool or even a damp cloth wrapped around your finger, works better than a big grout float. Getting these areas neat shows you've paid attention to every detail. It's these small areas that can make or break the final look of your project.
Creating a Visually Appealing Finish
Ultimately, you want the grout to look like it belongs there, complementing the natural beauty of the travertine. The right color and a clean application make the stone itself look its best. It’s about making the whole floor or wall look intentional and well-done. A good grout job doesn't shout; it whispers quality. You can find some great grout options for natural stone projects online, often with fast shipping for your U.S. projects.
The Satisfaction of a Meticulous Job
There's a real sense of accomplishment when you step back and look at a perfectly grouted travertine surface. It means you put in the effort, paid attention to the details, and ended up with something that looks fantastic. It’s a job well done, and it makes the whole space feel more complete. This kind of finish really shows off the unique character of travertine tiles.
Selecting Premium Materials for Travertine
When you're aiming for that truly flawless finish on your travertine tile project, the materials you choose make a big difference. It’s not just about the tile itself, but also the grout, the sealer, and even the tools you use. Think of it like cooking – you can have the best recipe, but if your ingredients aren't top-notch, the final dish just won't sing.
Why Top-Quality Grout Matters
Let's talk grout. This isn't the stuff you just grab from any hardware store shelf. For travertine, which has those beautiful, natural pores, you need a grout that's going to fill those spaces properly without causing issues down the line. Using a high-quality grout means better adhesion, less cracking, and a more uniform color that lasts. Cheaper grouts can be inconsistent, leading to color variations or crumbling over time. We don't sell commercial grade grout; we focus on premium options that are designed to work with natural stone. For projects where durability is key, like kitchens or bathrooms, consider an epoxy grout. It's non-porous and stain-proof, meaning less maintenance and a cleaner look for years to come. Epoxy grout is a fantastic choice for demanding environments.
The Advantages of Handpicked Travertine
Of course, the travertine itself is the star. We believe in offering only handpicked A+ top-quality natural stone products. This means we bypass the standard or commercial-grade materials you might find elsewhere. Every piece we carry is selected for its beauty, consistency, and durability. When you're sourcing materials for U.S. projects, knowing you're getting authentic, premium travertine makes all the difference. It’s about the natural color variations, the unique textures, and the overall elegance that only genuine stone can provide.
Choosing Sealers Designed for Natural Stone
Once your travertine is grouted, sealing is non-negotiable. Travertine is porous, and without a good sealer, it's susceptible to stains and moisture damage. You need a sealer specifically formulated for natural stone. These products penetrate the stone and grout, creating a protective barrier without altering the natural look and feel. Applying it evenly is key, and allowing adequate drying time between coats will give you the best protection. A properly sealed surface means your beautiful travertine will stay that way.
Investing in Durable Grouting Tools
Don't underestimate the power of good tools. A cheap grout float can leave an uneven finish, and a worn-out sponge won't clean effectively. Investing in durable, professional-grade grouting tools ensures a smoother application and cleaner results. This includes sturdy grout floats, high-quality sponges, and reliable buckets for mixing and rinsing. Good tools make the job easier and, frankly, more enjoyable. They help you achieve that meticulous, professional look you're after.
The Direct Importer Advantage for Materials
Being a direct importer means we cut out the middlemen. We source our stone directly from quarries around the world. This direct connection allows us to maintain consistent quality control and offer authentic products at better prices. It’s the direct importer advantage that lets us bring you luxury natural stone you can trust, often with fast, reliable shipping. We dedicate our entire business to providing the best in marble and travertine, so you know you're getting quality.
Ensuring Authenticity in Your Selections
When you're choosing materials, authenticity matters. You want to be sure you're getting genuine travertine, not a look-alike. We pride ourselves on offering only natural stone products. This commitment means you can be confident in the quality and origin of your materials. It’s about embracing the natural variations and unique characteristics that make travertine so special.
Where to Find Luxury Natural Stone Products
Finding the right supplier for luxury natural stone can feel overwhelming. We aim to make it simple. By focusing exclusively on premium, handpicked stone and offering direct-from-quarry sourcing, we provide a reliable source for your projects. Whether you're a designer, architect, or homeowner undertaking a renovation, you can trust that our materials meet the highest standards. We're here to help you find the ideal marble or travertine for your space.
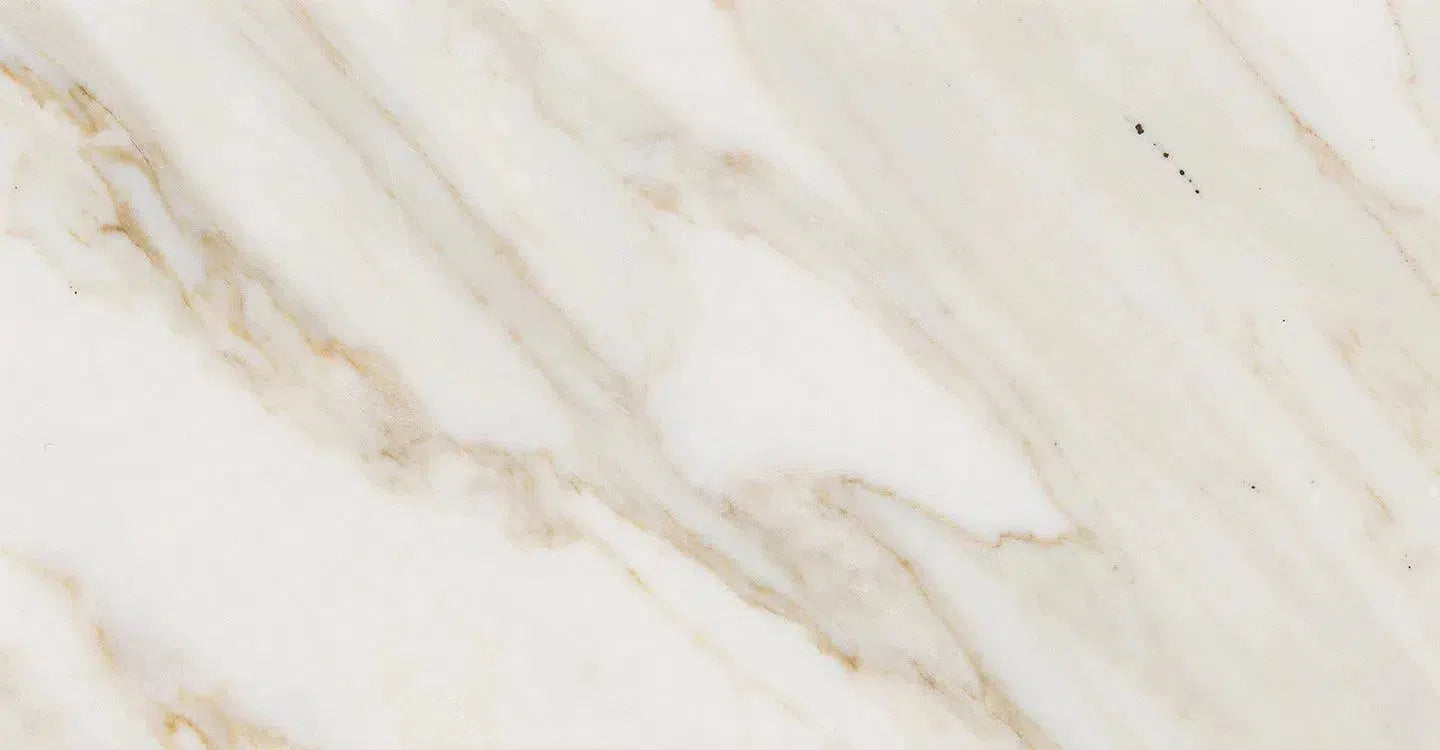
Understanding Travertine's Natural Characteristics
Travertine is a beautiful natural stone, and like any natural material, it has its own quirks. Understanding these characteristics is key to working with it, especially when it comes to grouting. It's not like a manufactured tile; it has a history etched into its very being.
The Beauty of Travertine's Pores
One of the most distinctive features of travertine is its porous nature. You'll notice these little holes and pits, which give it a unique texture and visual appeal. These pores are natural voids left by gas bubbles or water as the stone formed. When you're grouting, these pores can sometimes trap excess grout, so it's important to be mindful during the cleaning process. Proper sealing after grouting is vital to protect these pores from absorbing stains.
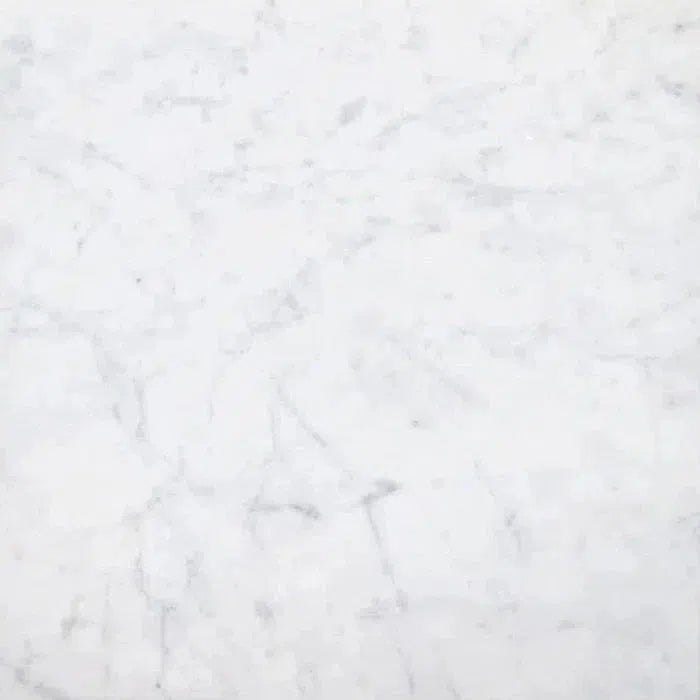
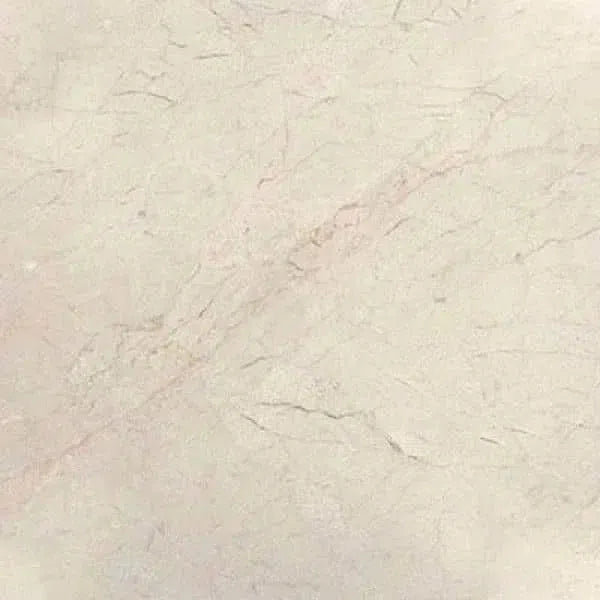
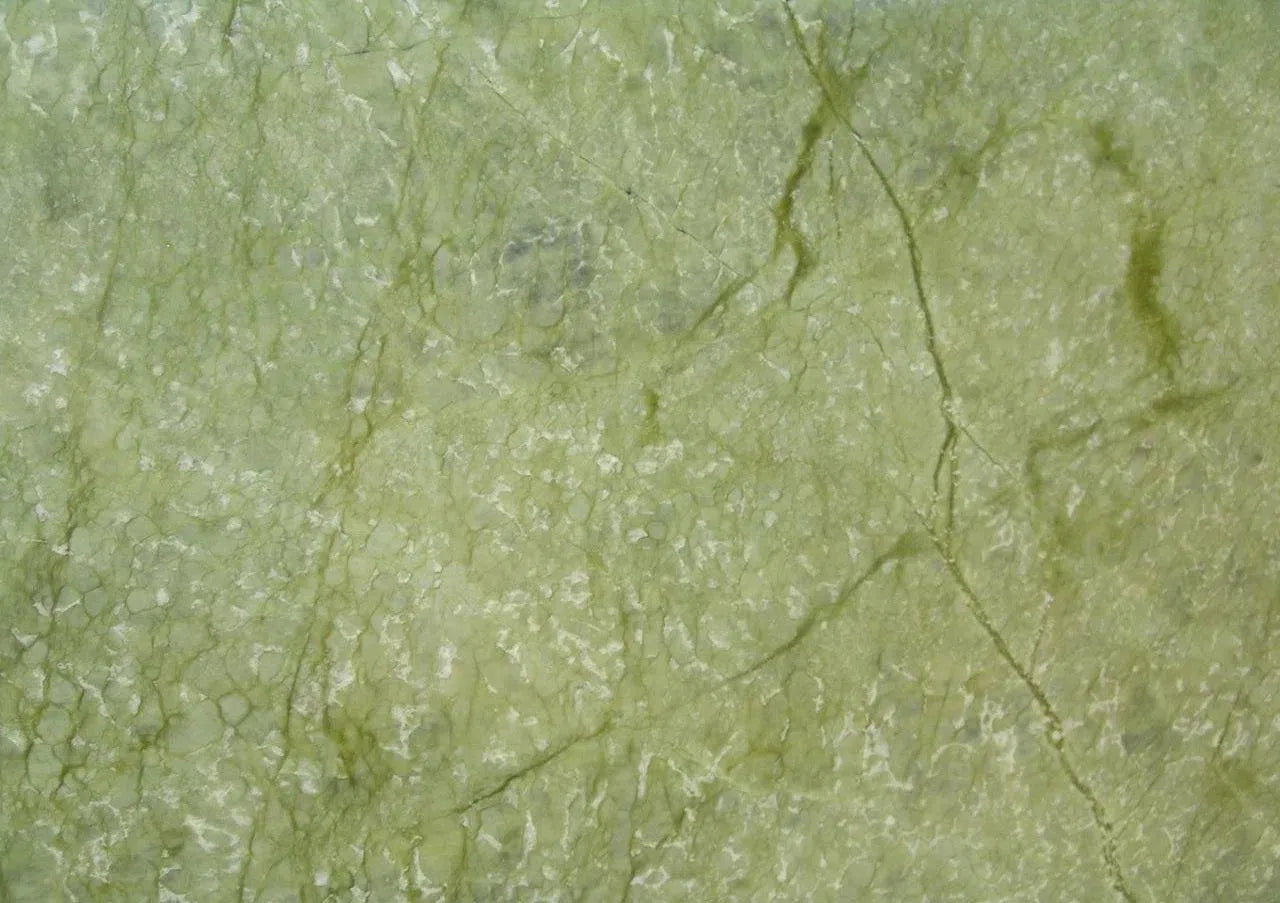
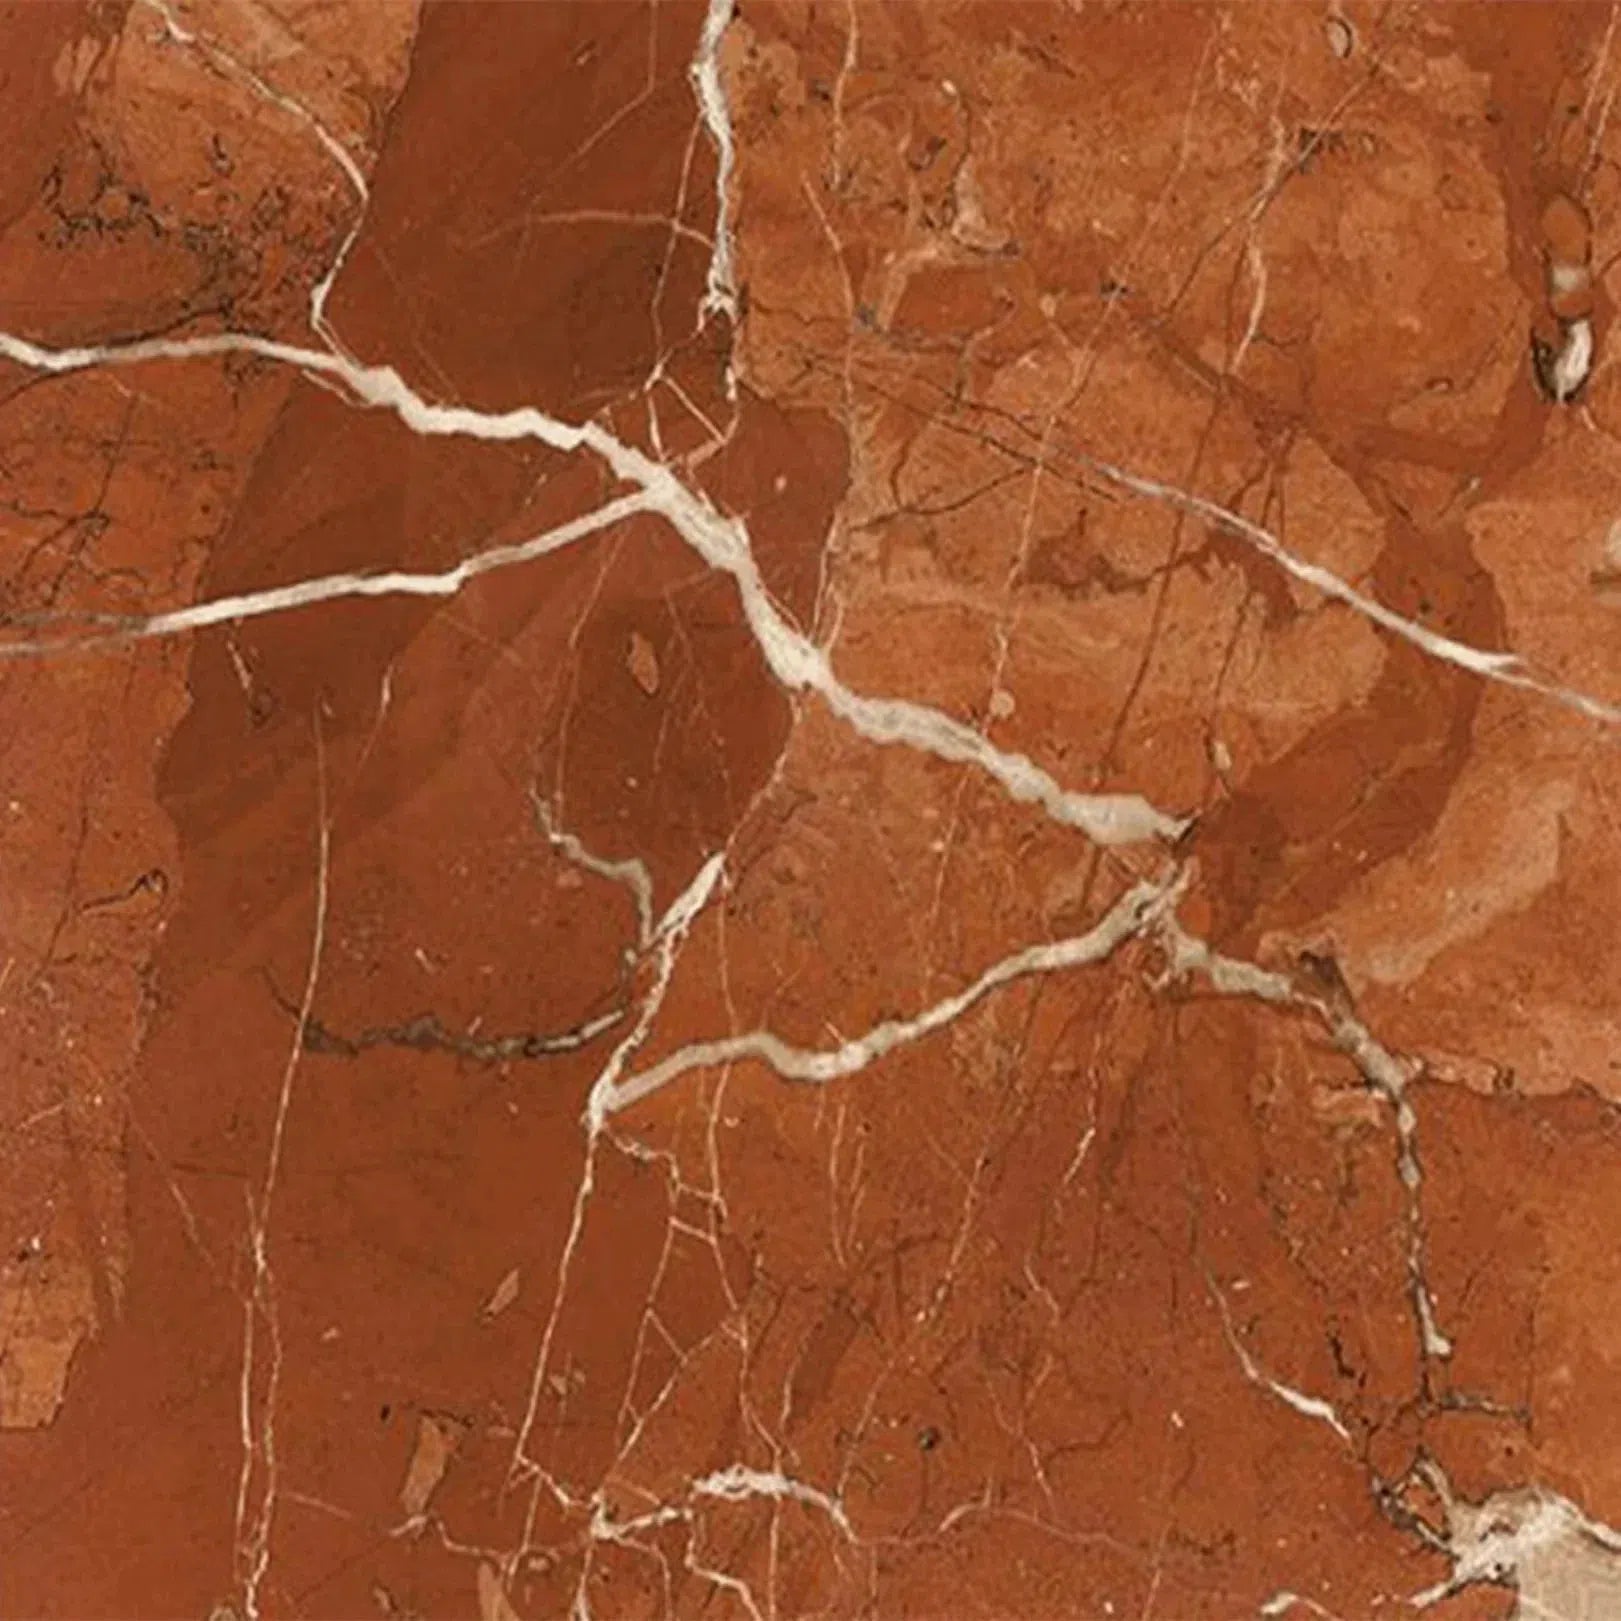
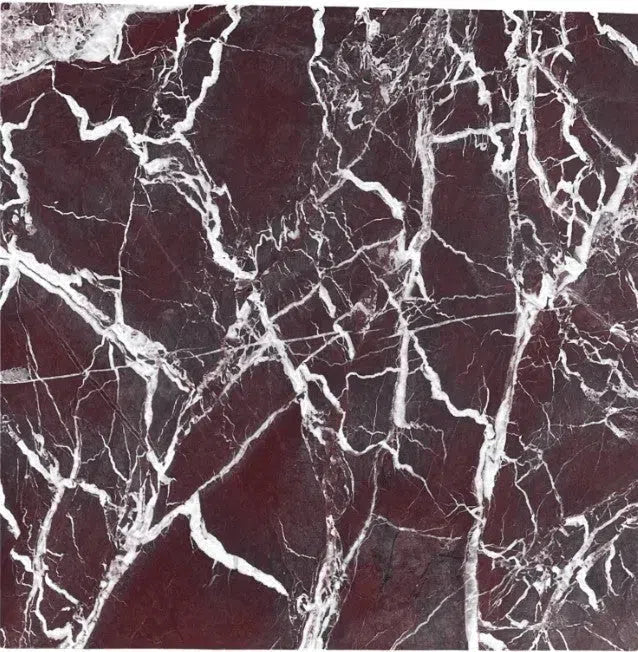
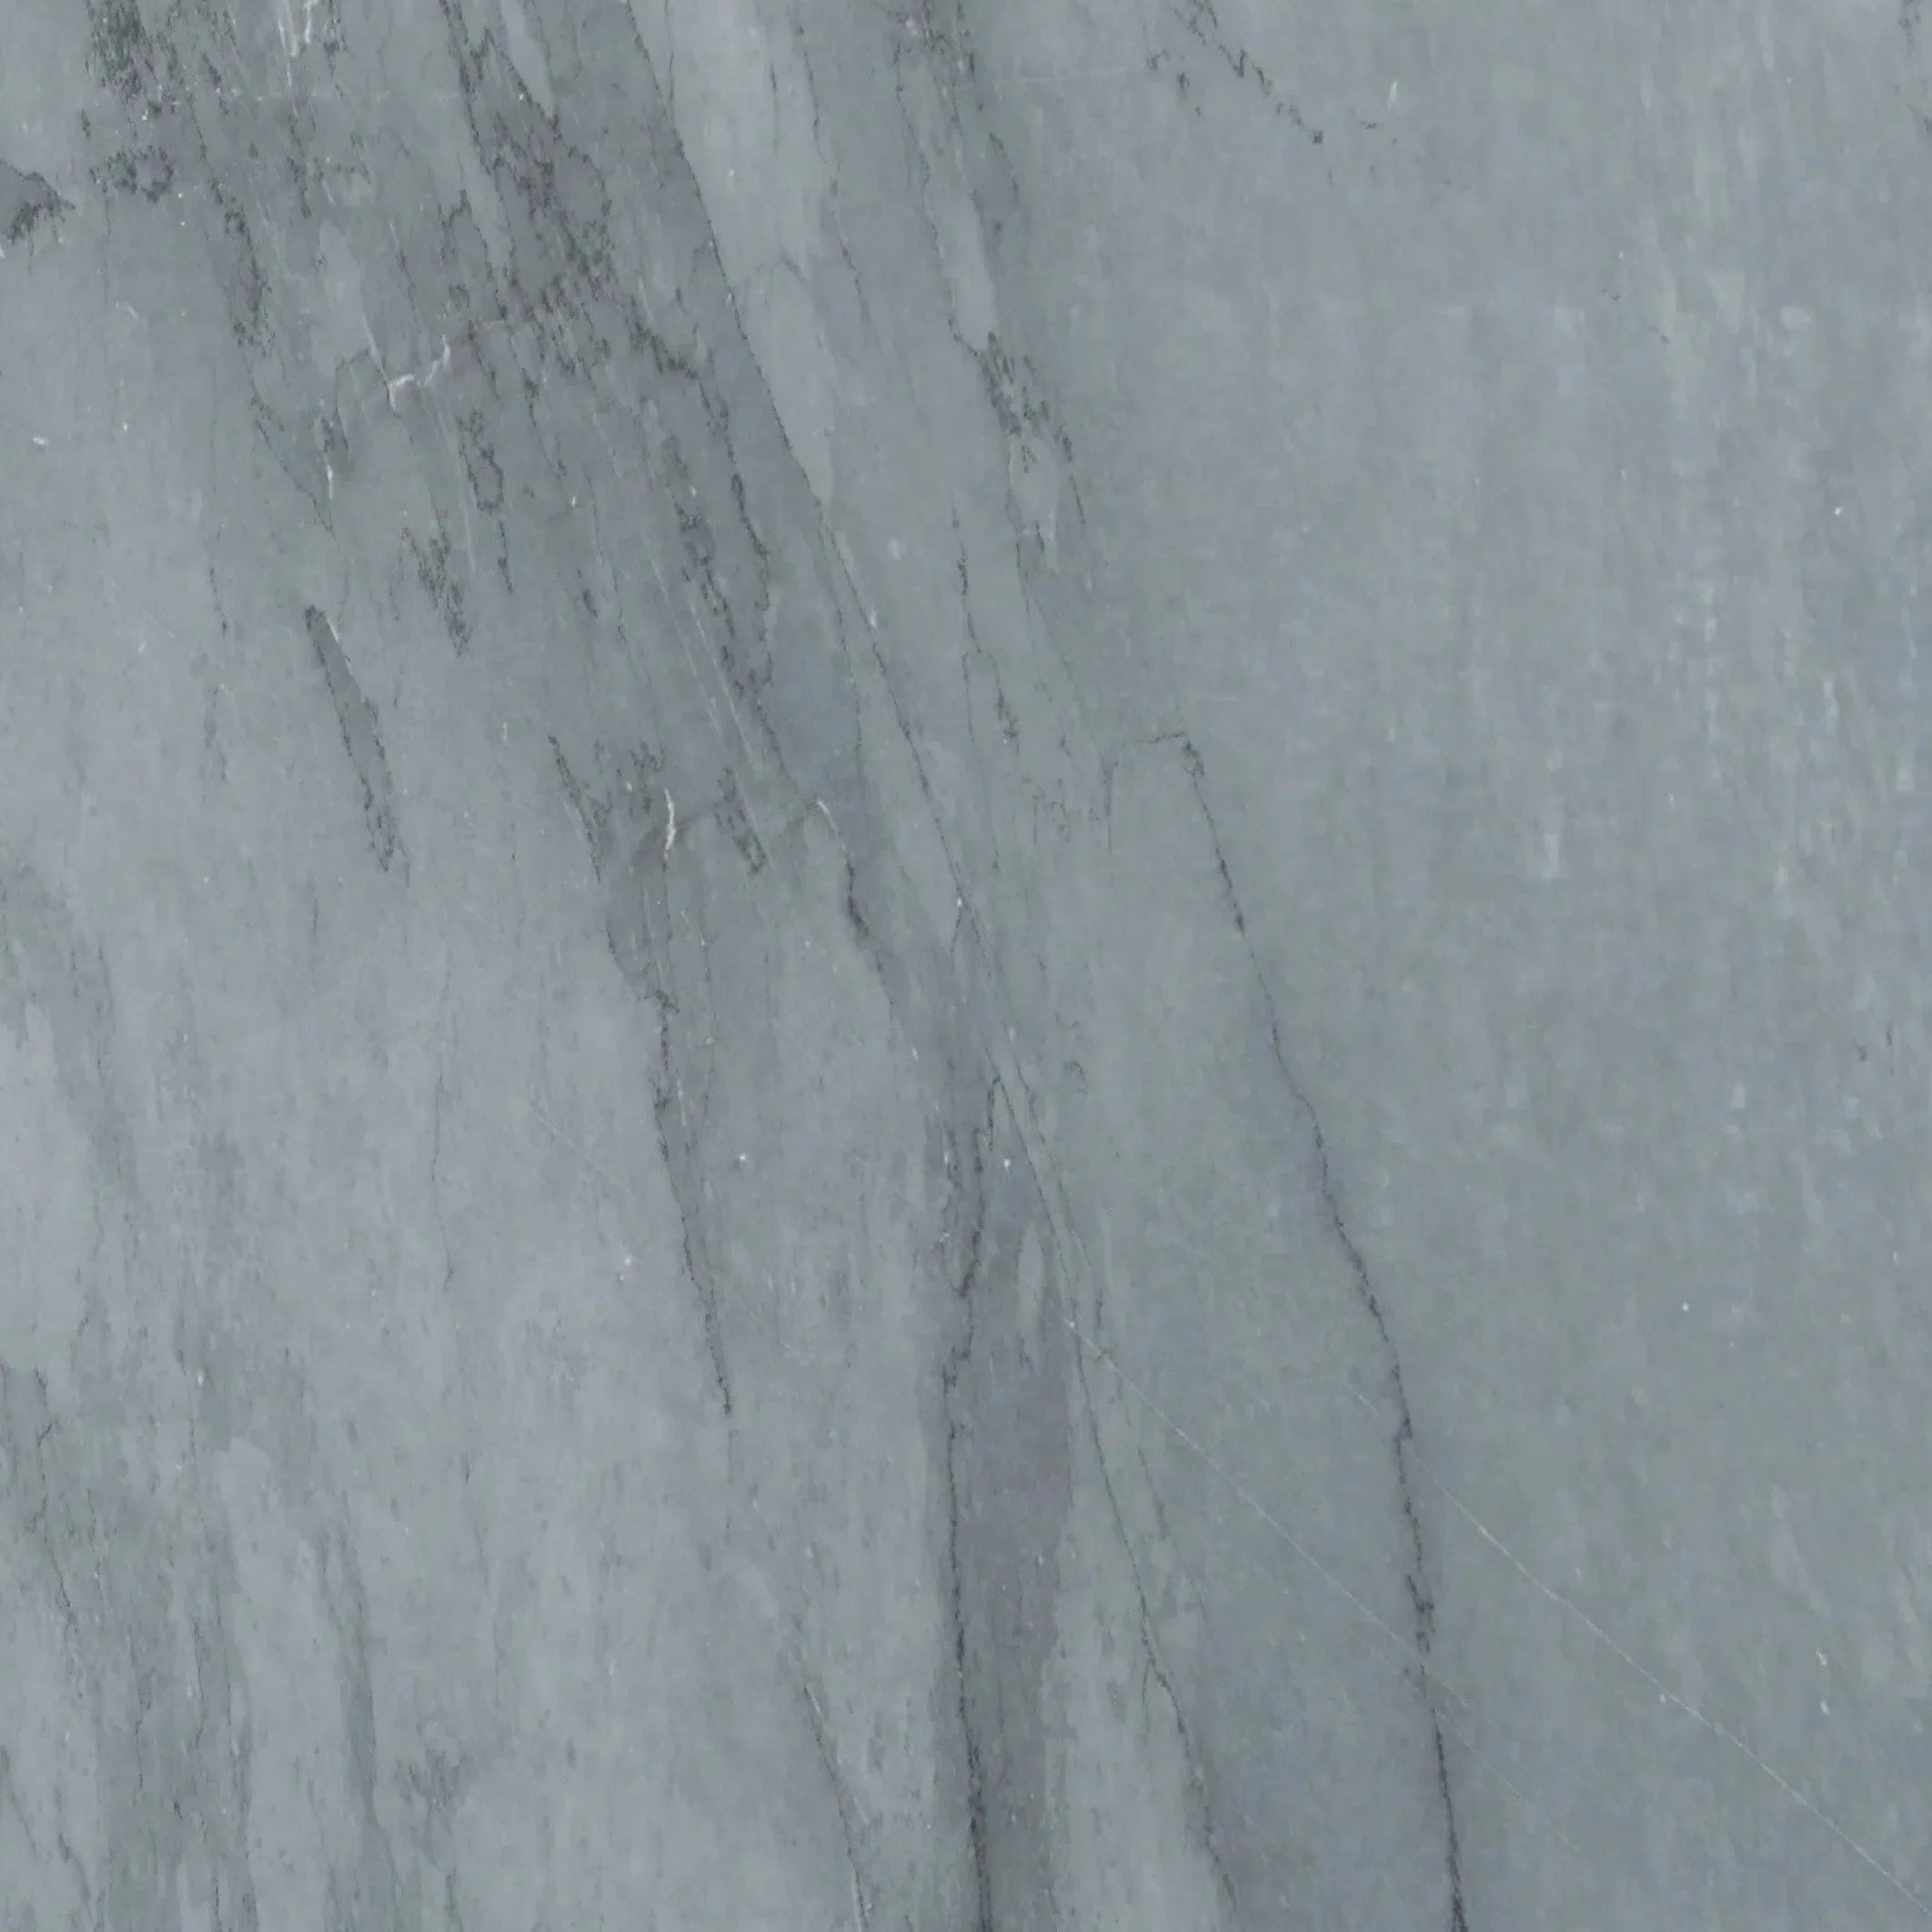
Recognizing Natural Color Variations
Travertine isn't a one-color-fits-all kind of stone. It comes in a range of earthy tones, from creamy whites and beiges to richer tans and even some reddish hues. These variations are part of its charm and make each installation unique. When selecting grout, keep these natural color shifts in mind. You might want a grout color that either blends in or provides a subtle contrast to the range of tones in your specific travertine tiles.
How Travertine Responds to Moisture
Because of its porous structure, travertine can absorb liquids. This means it's more susceptible to staining than denser stones if not properly sealed. When you're grouting, you'll be using water, so it's important to manage moisture levels. Don't let water sit on the surface for too long, especially before the grout has cured. This is why sealing travertine is so important – it creates a barrier against moisture and stains.
The Importance of Air Circulation
Good air circulation around travertine can help it dry out if it gets wet, which is beneficial for its longevity. While this is more of a long-term maintenance point, it's good to be aware of. It also means that when you're working with grout, ensuring the area is well-ventilated can aid in the drying and curing process.
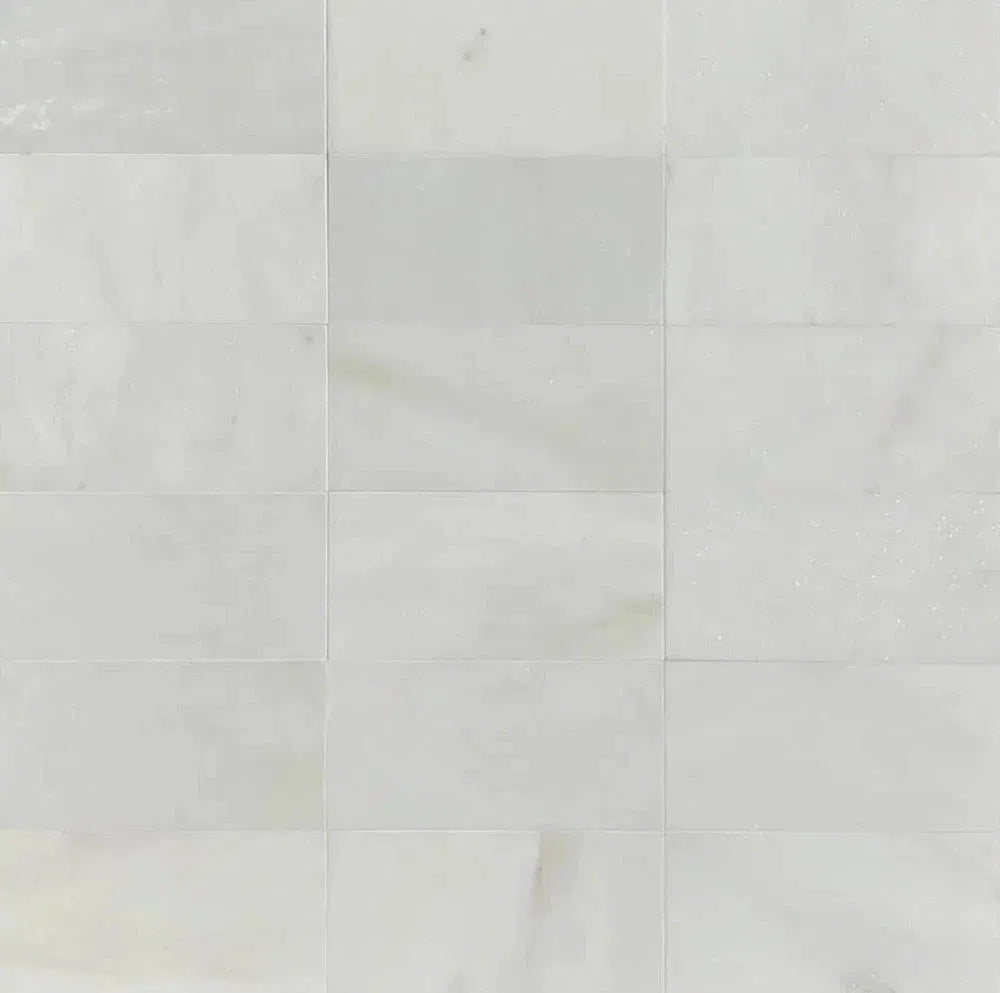
Travertine's Unique Textural Qualities
Beyond the pores, travertine can have a range of textures, from smooth and polished to more rugged and tumbled finishes. The texture affects how grout adheres and how easy it is to clean. A tumbled finish, for example, might have more nooks and crannies where grout can settle, requiring a bit more attention during cleanup.
Considering the Stone's Origin
Where your travertine comes from can influence its specific characteristics, like color and pore density. Different quarries produce stone with slightly different looks. This is part of the appeal of natural stone – it tells a story of its origin. When you're choosing materials, knowing you're getting handpicked A+ top-quality stone means you're getting the best of what nature has to offer.
Embracing the Imperfections of Natural Stone
Ultimately, travertine's beauty lies in its natural variations and imperfections. Unlike manufactured tiles that aim for uniformity, travertine celebrates its unique patterns, color shifts, and textures. When grouting, aim for a clean and professional finish, but remember that a perfectly uniform, machine-made look isn't the goal. The slight variations are what give your travertine installation its character and timeless appeal.
Essential Tools for Grouting Travertine
Alright, so you've prepped your travertine, picked out the perfect grout, and you're ready to mix it up. But hold on a sec – before you dive in, let's talk about the gear. Having the right tools makes a world of difference, turning a potentially messy job into something you can actually handle. It’s not just about having stuff, it’s about having the right stuff.
The Indispensable Grout Float
This is your main workhorse for getting the grout into those joints. Think of it like a squeegee, but for grout. You want one with a firm, yet flexible rubber base. The idea is to press the grout firmly into the gaps between your tiles. A good grout float will help you spread the grout evenly and push it deep into the lines, preventing air pockets. When you're done spreading, you'll use the edge of the float to scrape off the excess, but more on that later.
Choosing the Right Grout Sponge
After the grout has had a little time to set, you'll need a sponge for the initial cleanup. Not just any sponge will do, though. You need a dense, grout-specific sponge. These are usually larger and have a finer, more uniform cell structure than your average kitchen sponge. This helps you wipe away the excess grout without pulling too much out of the joints. You'll be rinsing this thing constantly, so make sure it's durable.
Essential Buckets for Mixing and Rinsing
You'll need at least two buckets. One is for mixing your grout – you want it big enough to comfortably mix a manageable batch without spilling. The second bucket is for rinsing your sponge. Keeping a dedicated rinse bucket is key to avoiding muddy water that just smears grout residue all over your beautiful tiles. You'll be amazed how quickly that rinse water turns into a grout soup!
Utility Knife for Grout Line Prep
Before you even think about mixing grout, take a moment to inspect your tile lines. Sometimes, dried adhesive or small bits of debris can get stuck in there. A simple utility knife is perfect for carefully scraping out any obstructions. This ensures a clean, consistent grout line. It’s a small step, but it really pays off in the final look.
Trowels for Precise Application
While the grout float does the heavy lifting, sometimes you need a smaller tool for more precise application, especially in tight corners or around intricate tile patterns. A small margin trowel or even a putty knife can be surprisingly useful for carefully placing grout where the float can't quite reach. It’s all about getting that grout into every nook and cranny.
Protective Gear for Safety
Don't forget your personal safety! Grout can be harsh on your skin and lungs. Always wear gloves – nitrile or rubber ones work best – to protect your hands from irritation. If you're sensitive to dust, or if you're working in a poorly ventilated area, a simple dust mask is a good idea when mixing the dry grout powder. Safety first, always.
Microfiber Cloths for Final Buffing
Once the grout has cured and you've done your main cleanup, you'll likely have a slight haze on the tile surface. This is where clean microfiber cloths come in. They're perfect for buffing away that final haze and bringing out the natural sheen of your travertine. They don't leave lint behind, which is exactly what you want for that polished finish. You can find great toolkits that include many of these items for your tile installation needs.
Mastering Grout Application Techniques
Applying grout to travertine tile might seem straightforward, but getting it right makes a huge difference in the final look. It’s not just about filling the gaps; it’s about creating clean, consistent lines that highlight the natural beauty of your stone. Think of it like painting – a steady hand and the right approach lead to a much better result.
The Diagonal Spread Method
When you're ready to get the grout onto the tiles, the way you hold your grout float matters. Instead of pushing straight ahead, try working at a diagonal angle to the grout lines. This helps push the grout deep into the joints without scraping too much off the tile surface. It’s a technique that takes a little practice, but it’s worth it for a solid fill.
Filling Grout Joints Completely
Your main goal here is to make sure every single gap between the tiles is packed full of grout. Don't be shy with it. Use your grout float to press the material in, going over each joint multiple times if needed. You want to avoid any air pockets or low spots, as these can become weak points later on. A fully packed joint is a strong joint.
Avoiding Air Bubbles in the Grout
Air bubbles are the enemy of a good grout job. They weaken the grout and can create little voids that trap dirt. As you spread the grout, keep an eye out for them. If you see any, go over that area again with the float to press them out. It’s all about getting that dense, solid fill.
Consistent Pressure for Uniformity
Applying even pressure with your grout float is key to achieving uniform grout lines. If you press too hard in one spot and too light in another, your lines will look uneven. Try to maintain a steady, firm pressure as you move across the tiles. This consistency is what gives a professional look to your project.
Working Efficiently Without Rushing
It’s a balancing act – you need to work fast enough so the grout doesn't start to set up before you're done with a section, but not so fast that you make mistakes. Break your project down into smaller areas. This way, you can focus on applying and smoothing the grout properly in each section before moving on. It helps keep things manageable.
The Art of the Second Pass
After you've spread the grout and removed the excess with your float, a second, lighter pass can really clean things up. Use the edge of the float held at a steeper angle to skim off any remaining high spots and further refine the grout lines. This step helps create those sharp, clean edges that make a big difference.
Ensuring Edge Adhesion
Pay special attention to the edges of the tiles, especially where they meet walls or fixtures. You want to make sure the grout is pressed firmly against these edges. Good adhesion here prevents future problems like grout pulling away from the tile. It’s a detail that really matters for the longevity of your installation. For narrow joints (1/8" or smaller) and polished or honed travertine, unsanded grout is typically recommended. Unsanded grout is smooth and won't scratch the surface of the tile.
Effective Grout Removal Strategies
After all that hard work applying the grout, the next step is cleaning up. This part is pretty important for making sure your travertine looks good. You don't want to leave a bunch of grout haze or smudges all over your beautiful new tile. It takes a bit of care, but it's totally doable.
The Initial Damp Wipe Technique
This is where you start the cleanup process. You've let the grout set for a bit, usually about 15-30 minutes, depending on the temperature and humidity. The grout should be firm but not rock hard. You'll need a grout sponge and two buckets of clean water. One bucket is for rinsing your sponge, and the other is for fresh water. The goal here is to remove the bulk of the excess grout without disturbing the lines themselves.
Gentle Circular Motions for Cleaning
When you wipe the tile surface, use a light touch and move the sponge in a circular motion. This helps lift the grout residue off the tile face. Don't press down too hard, or you might pull grout out of the joints. Think of it as a gentle buffing rather than scrubbing. It’s a bit of an art, really.
Frequent Rinsing of Your Sponge
This is probably the most critical part of the initial cleanup. You need to rinse your sponge very often. After just one or two passes over the tile, dunk the sponge in your rinse bucket and squeeze out all the dirty water. Then, rinse it in the clean water bucket before picking up more grout residue. If you don't rinse enough, you'll just spread the grout around, making more work for yourself later.
Managing Water Usage Wisely
While you need water to clean, too much can be a problem. You don't want to saturate the grout lines, especially in the early stages. Excessive water can weaken the grout or cause it to wash out. So, wring out that sponge well! It should be damp, not dripping wet. This helps prevent issues down the line.
Addressing Grout Smears on Tile Faces
Sometimes, despite your best efforts, you'll get grout smears on the tile itself. The damp sponge method usually takes care of most of this. If you see any stubborn spots, you might need to go over them again with a clean, damp sponge. For really tough residue, you might have to wait a bit longer for it to dry slightly and then use a plastic scraper to gently lift it off. Remember, softening dried grout with warm water can make removal easier.
The Importance of Timing for Cleanup
Timing is everything with grout cleanup. If you try to wipe too soon, you'll smear the grout and make a mess. If you wait too long, the grout will harden, and it becomes much harder to remove. That 15-30 minute window is a good starting point, but you'll learn to read the grout based on your specific conditions. It's a feel thing.
Achieving a Spotless Surface Post-Grouting
After the initial wipe-down, step back and look at your work. You should see clean tile surfaces with grout lines that are mostly free of excess material. There might be a slight haze, which is normal and will be addressed in the final cleaning stages. The main goal here is to get the bulk of the grout off the tile faces. If you've done this step well, the rest of the cleanup will be much simpler. For any remaining dried grout, a plastic scraper can be very helpful.
Achieving a Flawless Travertine Grout Line
So, you've mixed your grout, applied it, and done the initial wipe-down. Now comes the part where you really make it look professional. Getting those grout lines just right is what separates a good job from a great one, especially with travertine. It's all about the details here.
The Pursuit of Perfect Uniformity
Uniformity is key. You want each grout line to look like it was made with a ruler, even though you're working with natural stone that has its own quirks. This means paying attention to how much grout you're leaving in each joint and how you're smoothing it.
Smoothing Out Imperfections
Sometimes, even with the best efforts, a grout line might look a little uneven. Maybe one spot is slightly lower than the rest, or there's a small ridge. This is where you gently go back over it. A damp sponge, used with a light touch, can help smooth these out. The goal is a consistent depth and width across all your grout lines. It’s not about forcing it, but coaxing it into place.
Ensuring Sharp, Clean Edges
Clean edges make a big difference. As you're doing your final cleanup passes, pay attention to the edges of the tile. You don't want any grout smudging onto the face of the travertine. A clean edge makes the tile itself pop and gives the whole installation a crisp look. It’s like framing a picture – the frame matters.
The Role of a Steady Hand
Honestly, a lot of this comes down to having a steady hand. When you're doing the final smoothing and edge cleaning, take your time. Rushing this stage is how mistakes happen. Think about it like drawing – you wouldn't scribble if you wanted a clean line, right? You'd draw carefully. The same applies here. For projects across the U.S., this attention to detail is what clients notice.
Detailing Around Fixtures and Edges
Don't forget the tricky spots. Around faucets, drains, or where the tile meets a wall or cabinet, you need to be extra careful. Use a smaller tool, maybe even a damp cloth wrapped around your finger, to get into these tight areas. It takes a bit more effort, but it's worth it for that finished look. You can find some great tools for this kind of detail work online.
Creating a Visually Appealing Finish
Ultimately, you're aiming for a look that’s pleasing to the eye. This means consistency in your grout lines, clean tile surfaces, and sharp edges. When everything lines up and looks clean, the whole floor or wall just looks better. It’s the difference between something that looks DIY and something that looks like it was done by a pro. This is especially true when working with the natural beauty of travertine tile.
The Satisfaction of a Meticulous Job
There's a real sense of accomplishment when you nail this part. Seeing those perfectly finished grout lines, knowing you put in the care and attention to detail – it feels good. It shows you didn't just slap it in; you took the time to make it look its best. It’s a small detail that has a big impact on the final appearance of your project.
Protecting Your Investment: Sealing Travertine
After all that hard work grouting your beautiful travertine tiles, you're probably eager to admire the finished product. But hold on just a second! Before you start using the space, there's one more really important step: sealing. Think of it like putting a protective coat on your favorite piece of furniture. It keeps it looking good for longer and prevents damage. For natural stone like travertine, sealing is pretty much non-negotiable if you want it to last and keep its charm.
Why Sealing is Non-Negotiable
Travertine, with its natural beauty, also comes with a bit of a porous personality. This means it can soak up liquids, which can lead to stains and discoloration over time. Sealing creates a barrier that helps prevent spills from penetrating the stone and grout. This barrier is your first line of defense against everyday messes and potential damage. Without it, your gorgeous new tile could end up looking dull or stained much sooner than you'd like.
Selecting the Ideal Sealer Type
Not all sealers are created equal, and the type you choose can make a difference. For travertine, you'll generally want to look for a penetrating sealer. These soak into the stone and grout, offering protection from within without changing the look or feel of the surface too much. Some sealers can also add a bit of sheen, if that's something you're going for. It's a good idea to check if the sealer is specifically recommended for natural stone and grout. If you're unsure, our experts can help you find the perfect match for your specific project. Chat with us now to discuss your options.
Application Methods for Maximum Coverage
Getting the sealer on evenly is key. You don't want to miss spots, or you'll end up with uneven protection. Most penetrating sealers can be applied with a clean cloth, a brush, or even a sprayer. The trick is to work in small sections, making sure you cover the tile and grout thoroughly. Don't let the sealer pool up on the surface; wipe away any excess promptly. This ensures the sealer penetrates properly and doesn't leave a sticky residue.
Understanding Sealer Curing Times
After you apply the sealer, it needs time to do its job and cure. This isn't just about drying to the touch; it's about the sealer fully bonding with the stone and grout. Manufacturer instructions will give you specific times, but generally, you'll want to avoid heavy foot traffic or exposing the area to moisture for at least 24-72 hours. Rushing this step can compromise the sealer's effectiveness, so patience here really pays off.
The Protective Barrier Created by Sealers
Once cured, the sealer forms a shield. This barrier makes it harder for liquids like wine, coffee, or oil to seep into the travertine and grout. It also makes cleaning much easier. Spills can often be wiped away without leaving a trace. This protection is especially important in high-traffic areas or places prone to spills, like kitchens and bathrooms. It helps maintain the natural beauty of your stone for years to come.
Maintaining the Sealer's Effectiveness
Sealers don't last forever. Depending on the type of sealer used and the amount of wear and tear the area gets, you'll need to reapply it periodically. A good rule of thumb is to check the sealer's performance every year or two. You can do a simple water test: sprinkle some water on the surface. If it beads up, the sealer is still working. If it soaks in and darkens the stone, it's time to reseal. Regular cleaning with pH-neutral cleaners will also help preserve the sealer.
Long-Term Protection Against Stains
By following these steps – choosing the right sealer, applying it correctly, and maintaining it over time – you're giving your travertine the best possible chance to stay beautiful. It's an investment in protecting your investment, keeping your floors or walls looking pristine and adding lasting value to your home. Think of it as an ongoing commitment to preserving that luxurious natural stone look you worked so hard to achieve.
Long-Term Care for Grouted Travertine
So, you've put in the work, grouted your travertine, and it looks fantastic. Now what? Keeping that beautiful finish looking fresh for years to come is all about a little bit of regular attention. It’s not complicated, but it does require a consistent approach. Think of it like maintaining a classic car – a little polish now and then keeps it running smoothly and looking sharp.
Daily Maintenance Routines
For everyday upkeep, the goal is simple: keep the surface clean and dry. This means sweeping or vacuuming regularly to pick up any loose dirt or grit that could scratch the stone over time. If you spill something, don't let it sit. Wipe up spills promptly with a soft cloth or paper towel. This is especially important for acidic liquids like wine or citrus juice, which can etch natural stone if left unattended.
Deep Cleaning Strategies
Once a week, or whenever you feel it needs a more thorough clean, grab your stone-safe cleaner. You don't need anything fancy. A pH-neutral cleaner specifically made for natural stone is your best bet. You can find these at most home improvement stores. Use a soft mop or a microfiber cloth, and avoid scrubbing too hard. The idea is to lift dirt, not to scour the surface. Always rinse the mop or cloth frequently in clean water to avoid spreading dirty water around.
Identifying and Addressing Wear and Tear
Keep an eye on your grout lines. Over time, especially in high-traffic areas, you might notice some minor wear. This could be anything from a bit of discoloration to small cracks. If you see a small crack, it's usually best to address it sooner rather than later. You can often repair small issues yourself with a grout repair pen or a small amount of matching grout. For larger problems, it might be time to think about a professional touch.
The Importance of Regular Inspections
Make it a habit to just look over your tiled areas every few months. Check the grout lines for any signs of damage, discoloration, or areas where the sealer might be wearing thin. Pay attention to areas around sinks or showers, as these can be more prone to moisture issues. Catching small problems early can save you a lot of hassle down the road. It’s like checking the tire pressure on your car – a quick look can prevent bigger issues.
When to Consider Re-Grouting
Re-grouting isn't something you'll do often, but it's part of the long-term picture. If your grout is significantly cracked, crumbling, stained beyond repair, or has developed mold or mildew that won't come out, it might be time for a full re-grout. This is a bigger job, but it can completely refresh the look of your travertine installation. If you're not comfortable doing this yourself, it's definitely a task for a professional tile installer. They can get it done right, ensuring a durable and attractive finish.
Preserving the Natural Beauty Over Time
Travertine is a beautiful natural stone, and its unique character is part of its appeal. The pores and natural color variations are what make it special. By following these simple care steps, you're not just cleaning your tile; you're preserving that natural elegance. Consistent, gentle care is the key to enjoying your grouted travertine for decades. Remember, using the right products, like those designed for natural stone surfaces, makes all the difference in protecting your investment and keeping it looking its best.
Keeping your grouted travertine looking great for a long time is important. Proper care ensures its beauty lasts for years. Want to learn the best ways to maintain your travertine? Visit our website for expert tips and advice on keeping your stone floors stunning.
Your Travertine, Perfected
So, there you have it. Grouting travertine might seem like a big job, but with a little patience and the right steps, you can get that beautiful, finished look. It’s really about taking your time, not rushing the process, and paying attention to the details. When you see that clean grout line against the natural beauty of the stone, you’ll know it was worth the effort. If you’re looking for top-quality travertine for your next project, remember that American Stone Center is a great place to start. They’ve got a good selection and know their stuff about natural stone. Happy tiling!
Frequently Asked Questions
What's the best way to get my travertine ready for grout?
First, make sure your travertine tiles are super clean. Wipe away any dust or dirt. Then, let them dry completely. It’s also smart to cover up anything nearby, like walls or cabinets, so they don’t get messy with grout. Check the spaces between the tiles to make sure they’re clear of any gunk or old stuff.
What kind of grout works best with travertine?
For travertine, you'll often use sanded grout because it's a bit rougher and fills the wider gaps well. Unsanded grout is for very thin lines. Think about the color too – a shade that matches or slightly contrasts your stone looks great. Some people like epoxy grout for extra toughness, especially in busy areas.
How do I mix the grout so it's just right?
Always read the instructions on the grout package! Usually, you add water slowly to the powder until it looks like thick peanut butter or toothpaste. Mix it well until there are no lumps. It's best to mix only what you can use in about 30 minutes so it doesn't dry out.
How should I put the grout on the tiles?
Use a grout float, which is like a big rubber spatula. Scoop some grout onto it and spread it across the tiles, pushing it into the gaps between them. Work at an angle to the tiles, making sure every space is filled. Scrape off the extra grout with the float as you go.
When do I start cleaning up the grout?
You need to wait a little bit after applying the grout, usually about 15-30 minutes, until it starts to get a bit firm. Then, use a damp (not soaking wet!) sponge to gently wipe away the extra grout from the tile surfaces. Rinse your sponge often in clean water.
What's the best way to clean off the grout haze?
After the first wipe-down, a light haze might appear on the tiles as they dry. Once the grout is pretty firm, use a clean, dry microfiber cloth to buff this haze away. You might need to do this a couple of times. Don't use too much water, or you'll wash away the grout.
Do I need to seal my travertine after grouting?
Yes, absolutely! Sealing protects both the travertine and the grout from stains and moisture. It’s like putting a shield on your beautiful stone. Apply a good quality sealer made for natural stone, following the product's instructions carefully.
What if my grout lines look uneven?
If some spots are lower than others, you can carefully add a little more grout to those areas. For lines that are too high or messy, you might need to gently scrape them down with a putty knife or a grout finishing tool once the grout is partly set but still workable. Precision is key here.
How do I keep my grouted travertine looking good?
Clean it regularly with mild soap and water or cleaners made for natural stone. Avoid harsh chemicals. Wipe up spills right away. You'll also need to reapply the sealer every year or two, depending on how much traffic the area gets.
Can I fix cracked grout?
Yes, small cracks can often be fixed. You'll need to carefully remove the cracked grout with a special tool or utility knife, then reapply new grout to the damaged area. Make sure the new grout matches the old color as closely as possible.
What are the best tools for grouting travertine?
You'll definitely need a grout float for spreading. A grout sponge is essential for the cleanup. Have at least two buckets – one for mixing and one for rinsing your sponge. Safety glasses and gloves are a must, and some clean microfiber cloths for the final buffing.
Why is it important to use quality grout and sealers?
Using good materials means your grout job will last longer and look better. High-quality grout is less likely to crack or shrink. The right sealer will protect your stone and grout from stains and water damage, keeping your beautiful travertine looking new for years to come.