


So, you've got some beautiful marble tile and you're ready to get it installed. That's great! But then comes the part where you actually have to cut it. It can seem a little intimidating, right? Marble isn't like cutting regular tile; it's a natural stone and has its own quirks. This guide is here to walk you through everything you need to know about cutting marble tile, from picking the right tools to making those tricky cuts look like a pro did them. We'll cover the basics and then get into some more advanced stuff too, so you can tackle your project with confidence.
Key Takeaways
- Understand marble's unique properties, like its hardness and veining, before you start cutting marble tile.
- Gather the right tools, especially a good wet saw and the correct diamond blade, for cutting marble tile safely and effectively.
- Prepare your marble tile by cleaning and marking it accurately, and always secure it properly before cutting marble tile.
- Master straight cuts by setting up your saw correctly and guiding the tile smoothly for clean edges when cutting marble tile.
- Learn techniques for intricate cuts, such as angles and curves, to fit marble tile around obstacles and create custom designs.
- Focus on finishing the edges after cutting marble tile, using hand pads or beveling for a smooth, professional look.
- Prioritize safety by using protective gear and understanding the risks associated with cutting marble tile, especially with power tools.
- Troubleshoot common problems like chipping or uneven cuts to ensure your finished project looks its best when cutting marble tile.
Understanding Marble Tile Before Cutting
Before you even think about making a cut, it's super important to really get to know the marble tile you're working with. It’s not like cutting ceramic or porcelain; marble is a natural stone, and that means it has its own personality, quirks, and needs. Understanding these things upfront can save you a lot of headaches and prevent costly mistakes down the line. Think of it like getting to know someone before you ask them to do a big favor – you want to know what makes them tick.
The Unique Characteristics of Marble
Marble is a metamorphic rock, formed over millions of years under intense heat and pressure. This process gives it a unique crystalline structure and often results in those beautiful, swirling veins that make each piece so distinct. Unlike manufactured tiles, no two marble tiles are exactly alike. This natural variation is part of its charm, but it also means you need to pay attention to how those veins run and how the color might shift from one tile to the next. This natural beauty is what draws many to marble, but it also demands a more thoughtful approach to cutting.
Assessing Marble Tile Thickness and Hardness
Marble tiles can vary quite a bit in thickness and hardness. You'll find softer marbles that are easier to cut but more prone to chipping, and harder varieties that require more effort and the right blade. Before you start, gently tap the tile or try to scratch a small, inconspicuous area with a harder object (like a piece of quartz, if you have one handy). This gives you a rough idea of its density. Knowing the thickness is also key for setting up your saw correctly. A tile that's too thin might flex and crack, while a thicker one will need a blade with enough depth to cut through cleanly. You can often find the tile's specifications from the manufacturer, which is always a good place to start.
Recognizing Veining Patterns for Precise Cuts
Those gorgeous veins in marble aren't just for looks; they can actually guide your cuts. When you're planning a cut, especially a straight one, try to align the blade with the direction of the main veins. This often helps the blade move more smoothly and can reduce the risk of chipping along the edge. For intricate cuts or when you need a perfect fit, studying the veining pattern helps you anticipate how the stone might break. It's like reading a map of the stone's internal structure.
Identifying Potential Flaws in Marble
Because marble is natural, it can sometimes have hidden flaws. Look closely for hairline cracks, fissures, or areas where the stone is naturally weaker. These might not be obvious until you put pressure on the tile during cutting. Sometimes, a slight discoloration or a patch of different density can indicate a weak spot. If you spot any potential issues, it's best to either avoid cutting through that area or proceed with extreme caution. It's often better to sacrifice a small part of the tile or use a different piece altogether than to risk a major break.
The Importance of Ambient Temperature
This might sound a bit odd, but the temperature of the room where you're cutting can actually make a difference. Extremely cold tiles can be more brittle, increasing the chance of chipping. Conversely, very hot conditions might affect the water in your wet saw more quickly. While it's not usually a major factor for most DIY projects, if you're working in a very cold garage or a scorching hot environment, letting the tiles acclimate to a more moderate temperature for a while before cutting can be beneficial. It helps the material behave more predictably.
Choosing the Right Marble for Your Project
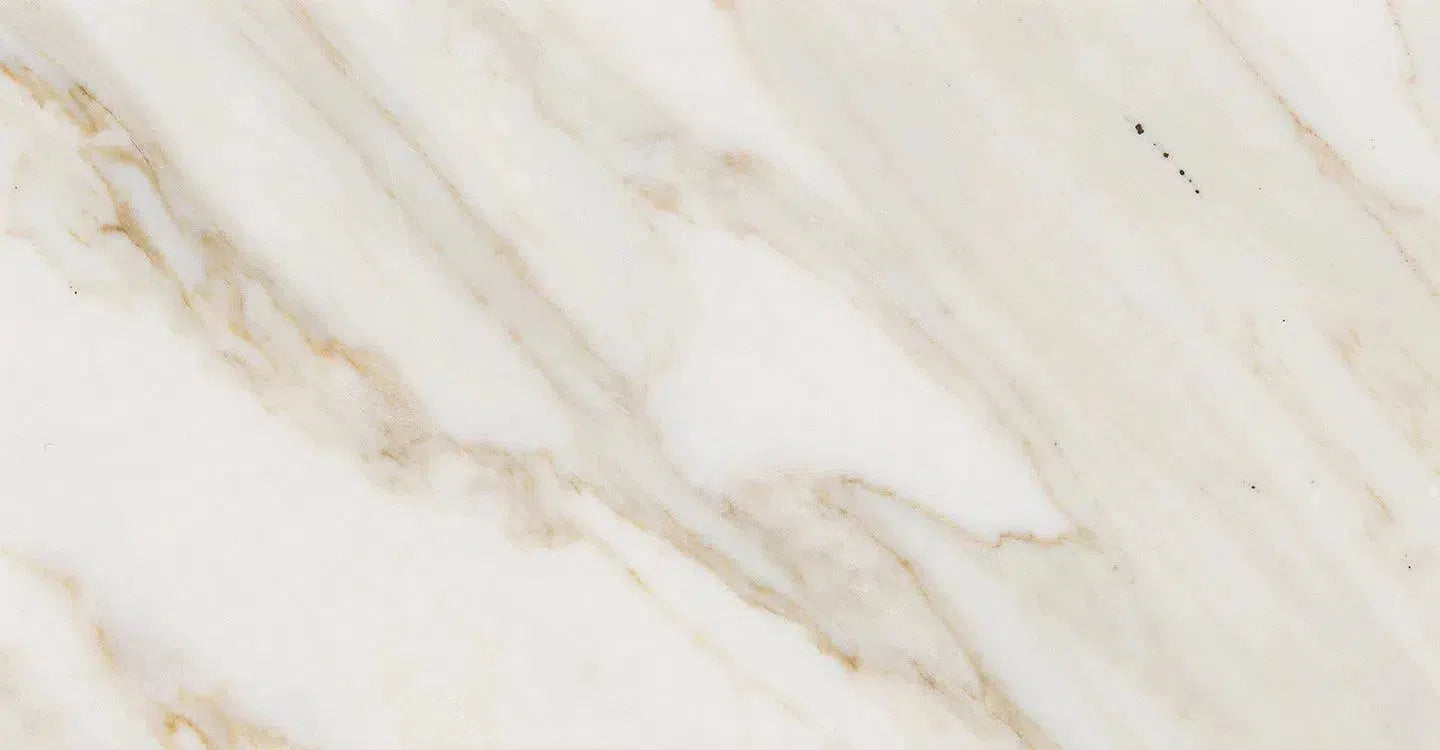
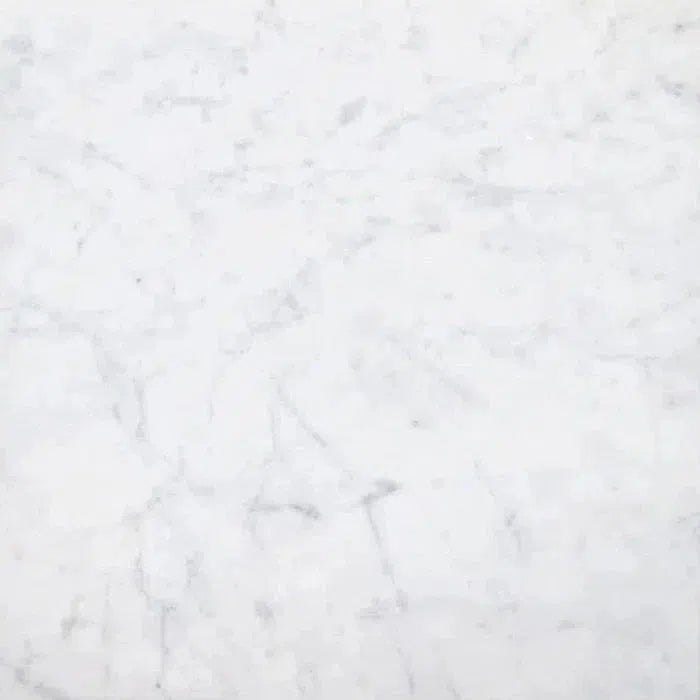
Different types of marble have different cutting characteristics. For instance, Carrara marble is generally softer and easier to cut than Calacatta, which can be denser and more prone to chipping. If you're planning a lot of intricate cuts, you might want to opt for a marble known for its workability. If you're just doing simple straight cuts and prioritizing durability, a harder marble might be suitable. Always ask your supplier about the specific properties of the marble you're considering for your project. Understanding the stone's origin and type can give you clues about how it will behave when cut. For example, knowing if you're working with a marble that's known for its veining patterns can help you plan your cuts more effectively.
Marble's Natural Beauty and Durability
Marble is prized for its timeless elegance and the unique character it brings to any space. Its natural patterns and subtle color variations create a luxurious feel that manufactured materials often struggle to replicate. While it's a durable stone, it's also softer than granite or quartz, meaning it can scratch or etch if not properly cared for. This inherent characteristic is why understanding its cutting properties is so important. Treating marble with respect from the start, including during the cutting process, is key to preserving its beauty and ensuring a long-lasting installation. When you're selecting materials for your U.S. projects, remember that the quality of the marble itself plays a big role in how easy or difficult it will be to cut. We pride ourselves on offering handpicked A+ top-quality stone, ensuring you start with the best possible material for your needs.
Essential Tools for Cutting Marble Tile
Cutting marble tile might seem straightforward, but getting those clean, precise edges requires the right gear. You can't just grab any old saw and expect a perfect result, especially with natural stone. It’s a bit like trying to carve a sculpture with a butter knife – it just won’t work well.
Selecting the Ideal Wet Saw
A wet saw is pretty much non-negotiable for cutting marble. These saws use a continuous stream of water to cool the blade and reduce dust, which is super important for both the blade's life and your health. For marble, you'll want a saw with a sturdy frame and a powerful enough motor to handle the stone's density. Look for models that can accommodate the size of tiles you'll be working with. Some saws have tilting tables, which are handy for making bevel cuts later on.
Choosing the Correct Diamond Blade
The blade is where the magic happens, and for marble, it has to be a diamond blade. The type of diamond blade you choose will significantly impact the quality of your cuts. There are a few main types:
- Continuous Rim Blades: These are best for very clean, chip-free cuts, especially on delicate materials like marble. They have a smooth, unbroken edge.
- Segmented Blades: These have gaps along the rim, which helps with cooling and dust removal. They're generally faster but can lead to a rougher edge, so they might not be the first choice for pristine marble.
- Turbo Blades: A good middle ground, offering a balance between speed and a clean cut.
Always match the blade to the material. Using the wrong blade is a recipe for frustration and damaged tiles. For marble, a continuous rim blade is often the top pick for a professional finish.
Essential Safety Gear for Protection
Safety first, always. When cutting marble, you're dealing with spinning blades, water, and fine dust. You absolutely need:
- Safety Glasses or Goggles: To protect your eyes from flying debris and water spray.
- Hearing Protection: Wet saws can be loud.
- Waterproof Gloves: To keep your hands dry and provide a better grip.
- Dust Mask or Respirator: Even with a wet saw, some dust is inevitable. A good respirator is key for protecting your lungs from silica dust.
- Closed-toe Shoes: Protect your feet from dropped tiles or tools.
Measuring and Marking Tools
Precision starts with accurate measurements. You'll need:
- Tape Measure: A reliable, sturdy tape measure.
- Pencil or Marker: A grease pencil or a permanent marker that won't easily wipe off with water.
- Speed Square or Combination Square: For marking straight lines and 90-degree angles.
Clamps and Securing Devices
Keeping the tile stable while cutting is vital. While a wet saw has a table, sometimes extra security is needed, especially for larger or irregularly shaped pieces. Clamps can help hold the tile in place, preventing movement that could lead to a bad cut. Some setups might involve jigs or guides for repetitive cuts.
Water Supply and Management
Your wet saw needs a consistent water supply. Make sure you have a way to refill the water reservoir easily. Some setups might connect directly to a hose. Managing the water spray is also important; you don't want water splashing everywhere. Splash guards on the saw help, and positioning the saw correctly can minimize mess. Proper water management is key to keeping your saw running smoothly.
Dust Collection Systems
While wet saws drastically reduce dust compared to dry cutting, some airborne particles can still occur. For larger projects or if you're particularly sensitive, consider a dust collection system designed for tile saws. This helps maintain a cleaner work environment and improves air quality. It's all about creating a safe and efficient workspace for your U.S. projects.
Preparing Your Marble Tile for Cutting
Before you even think about firing up that wet saw, taking a few minutes to properly prepare your marble tiles can save you a lot of headaches down the line. It’s like prepping ingredients before cooking – you wouldn’t just toss everything into the pan, right? Same idea here. Getting your tiles ready means cleaner cuts, fewer mistakes, and a much better final look for your project. We're talking about making sure your marble is in the best shape possible before it meets the blade.
Thoroughly Inspecting Each Tile
This is your first line of defense against problems. Grab each tile and give it a good once-over. Look for any cracks, chips, or imperfections that might not be obvious at first glance. Sometimes, these flaws are hidden on the edges or corners. A quick inspection can prevent a tile from shattering during the cutting process. It’s also a good time to check if the tile is warped, which can make guiding it through the saw much trickier.
Cleaning Marble Surfaces
Marble can pick up dust and debris during shipping and handling. You want to start with a clean surface. A simple wipe-down with a damp cloth is usually enough. For tougher grime, a mild stone cleaner can be used, but make sure to rinse it off completely and let the tile dry. Any grit left on the surface can get ground into the blade, potentially causing damage or affecting the cut quality. Plus, a clean tile makes for more accurate marking.
Marking Cut Lines Accurately
This is where precision really matters. Use a sharp pencil or a fine-tip marker designed for stone. For lighter colored marble, a white or silver pencil works best. For darker stones, a contrasting color is key. Always measure twice and mark once. Double-check your measurements before you make your mark. If you're making multiple cuts, consider using a template or a jig for consistency, especially if you're working on a larger project across the U.S.
Securing the Tile for Stability
Once marked, you need to make sure the tile stays put while you cut. This usually involves using the clamps or securing devices that come with your wet saw. The goal is to prevent any movement during the cut. Even a slight shift can lead to a crooked cut or a chipped edge. Make sure the tile is resting flat on the saw's table and is held firmly against the fence or guide.
Understanding Grain Direction
Marble, like wood, has a natural grain or veining pattern. While it's not as pronounced as in wood, paying attention to it can help you achieve a cleaner cut. Generally, it's best to cut with the grain where possible, or at least be aware of how the blade will interact with the veining. Cutting against a strong vein can sometimes lead to chipping or splintering on the exit side of the blade. Observe the pattern and plan your cut accordingly.
Pre-Wetting Techniques
While your wet saw handles the primary water supply, some people like to pre-wet the tile. This can help reduce dust even further and can sometimes make the marble slightly less brittle. A quick spray of water over the tile and the cut line before you start can be beneficial. Just don't soak it to the point where your markings become invisible.
Planning Complex Cuts
If you're not just doing straight cuts, take a moment to visualize the entire process. For notches or curves, it might be helpful to sketch out the cut on paper first. Think about the order of operations. Sometimes, it's easier to make a series of smaller cuts to achieve a complex shape rather than trying to do it all in one go. This planning stage is where you can really think about how to achieve those perfect marble flooring installation cuts.
Proper preparation isn't just about making the cutting process easier; it's about respecting the natural material you're working with and ensuring the longevity and aesthetic appeal of your finished project. A little extra time spent here pays dividends in the end.
Mastering Straight Cuts on Marble
Getting a perfectly straight cut on marble tile might seem tricky, but with the right setup and a bit of practice, it's totally doable. This is where you'll spend a lot of your time, especially on larger projects across the U.S. where clean lines really make a difference. We're talking about those clean, crisp edges that make your installation look professional.
Setting Up Your Wet Saw for Straight Cuts
First things first, make sure your wet saw is on a stable, level surface. You don't want any wobbling while you're cutting. Check that the water reservoir is full – this is super important for keeping the blade cool and reducing dust. A good water level also helps lubricate the blade, making the cut smoother. A stable saw is the foundation of a straight cut.
Guiding the Tile Through the Blade
This is the part that takes a little feel. You want to push the tile through the blade at a steady, consistent pace. Don't force it. Let the blade do the work. If you push too hard, you risk chipping the marble or, worse, bending the blade. Think of it as a gentle, controlled glide. Most wet saws have a sliding table or a rip fence that helps you keep the tile moving in a straight line. Use these guides! They're there for a reason.
Achieving Clean, Chip-Free Edges
Chipping is the enemy of a good marble cut. To minimize it, make sure you're using the right diamond blade for marble – a continuous rim blade is usually best for clean edges. Also, consider how you're feeding the tile. Sometimes, a slower feed rate helps. If you're still getting chips, try scoring the cut line lightly with the blade first, then making the full cut. Some pros even use a bit of painter's tape along the cut line to help prevent chipping.
Making Multiple Straight Cuts Efficiently
If you've got a lot of tiles to cut, efficiency matters. Set up your saw so you can easily repeat the same cut. Use your rip fence or a jig to ensure each cut is identical. Batching your cuts – doing all the straight cuts for one section at a time – can save a lot of setup and adjustment time. Just remember to keep an eye on your water level and blade condition.
Handling Larger Marble Tiles
Larger tiles can be unwieldy. For these, you might need an extension table for your wet saw to support the weight. Make sure the tile is fully supported before you start the cut. If the tile is too big for your saw's table, you might need a helper to guide the unsupported end. Always prioritize safety and stability when dealing with bigger pieces.
The Art of the Perfect 90-Degree Cut
This is all about your setup. Use a reliable square to mark your lines and ensure your rip fence or guide is set precisely at 90 degrees to the blade. Double-check your alignment before you start cutting. A slight misalignment here will be obvious in the finished installation. It’s worth taking that extra minute to get it right.
Troubleshooting Common Straight Cut Issues
- Chipping: Check your blade, feed rate, and consider tape. Sometimes, it's just the nature of the specific marble.
- Uneven Cuts: Ensure the tile is stable and guided properly. Check your saw's alignment.
- Blade Wander: This usually means the blade isn't running true or you're pushing too hard. Realign the blade or adjust your feed pressure.
Remember, patience is key. Rushing a straight cut on marble will almost always lead to a less-than-perfect result. Take your time, use the right tools, and focus on a steady hand.
Executing Intricate Marble Tile Cuts
Cutting marble tile isn't always about straight lines. Sometimes, you need to get a bit more creative to make your design work. This is where intricate cuts come into play, turning a standard tile job into something special.
Creating Precise Angle Cuts
Angle cuts, often called miter cuts, are key for creating clean corners where two tiles meet at an angle, like around a room's perimeter or a countertop edge. Getting these angles just right makes a huge difference in the final look. You'll typically use your wet saw for this, adjusting the blade's angle to match your desired degree – usually 45 degrees for a standard corner. It takes practice to get them perfect, so don't be discouraged if your first few aren't spot on. It's all about steady hands and a well-calibrated saw.
Notching Marble for Obstructions
Sometimes, you'll run into things like pipes or cabinets that stick out from the wall. You'll need to cut a "notch" out of the tile to fit around these. This usually involves making two straight cuts that meet at a right angle. Measure carefully where the obstruction is, mark your tile, and make those cuts. It's a bit like doing a puzzle piece. You want the notch to be snug but not so tight that it stresses the tile.
Cutting Around Outlets and Fixtures
Similar to notching, cutting around electrical outlets or plumbing fixtures requires precision. You'll often need to make L-shaped or U-shaped cuts. Sometimes, you can make a series of straight cuts to create the opening. For more complex shapes, a specialized blade or even a grinder might be needed, but for most standard outlets, a wet saw can do the job with careful planning. Always turn off the power before cutting near electrical boxes.
The Technique for Curved Cuts
Curved cuts are probably the most challenging. They're often needed for things like rounded countertops or decorative elements. While a standard wet saw isn't designed for smooth curves, you can achieve them by making a series of very short, straight cuts along your marked line. It's a slow process. Another option is using a grinder with a diamond blade, which gives you more freedom for freehand curves. For really smooth, consistent curves, some pros use specialized jigs or even waterjet cutting services for large projects.
Making Small, Detailed Cuts
Sometimes you need to trim off just a tiny sliver of tile, or make a very specific small cut. This is where a steady hand and a good quality blade are paramount. You might need to use a smaller, more maneuverable saw or even a handheld grinder for these delicate tasks. The key is to support the tile well and let the blade do the work. Forcing it can easily lead to chips or breaks, ruining your piece. It's often helpful to have a scrap piece of marble underneath to support the area you're cutting.
Achieving Perfect Fitment
No matter the type of intricate cut, the goal is always perfect fitment. This means the tile should sit flush against the wall or fixture, with minimal gaps. It requires accurate measurements, careful marking, and precise cutting. Don't be afraid to test-fit your cut pieces before applying adhesive. Sometimes, a slight adjustment with a hand pad can make all the difference between a good fit and a great one. This attention to detail is what separates a professional installation from a DIY job.
Advanced Cutting Strategies
For really complex jobs, like fitting tiles around irregular shapes or creating intricate mosaics, you might need to combine several techniques. This could involve angle cuts, notches, and curves all on the same tile. Planning is everything here. Lay out your cuts on paper first, or even use a template. Sometimes, it's better to make a slightly larger cut and then trim it down than to make a cut that's too small and have to start over. Remember, you can always take more off, but you can't add it back on. Working with natural stone tile requires patience and a methodical approach to achieve the best results.
Achieving Flawless Edges After Cutting
So, you've made your cuts, and now it's time to look at the edges. This is where a project can really go from looking 'okay' to 'wow.' Getting those edges just right makes a big difference, especially when the tile is visible. It's not just about the cut itself, but what you do after the cut that counts.
The Role of the Wet Saw's Water System
The water system on your wet saw isn't just there to keep the blade cool; it also helps wash away fine dust and debris as you cut. This means the edges are cleaner right off the bat, reducing the amount of work you'll need to do later. A good water flow prevents the blade from overheating, which can cause chipping and rough edges. Keeping that water reservoir full and the pump working is key to a good cut edge.
Using Diamond Hand Pads for Smoothing
Once the cutting is done, you'll likely have some slight roughness or sharp bits on the edges. This is where diamond hand pads come in handy. They work like sandpaper, but with diamond grit, making them tough enough for marble. You can get them in different grits, from coarse to fine. Start with a coarser grit to knock down any high spots or sharp edges, then move to a finer grit to smooth things out. It takes a bit of elbow grease, but it really makes the edges feel nice and safe to the touch.
Beveling Edges for a Professional Finish
For a really polished look, consider beveling the edges. This means cutting a slight angle along the edge of the tile. It not only looks good, especially on exposed edges, but it also helps prevent chipping down the line. You can achieve this with a specific beveling blade on your wet saw or by using a diamond hand pad at a consistent angle. It adds a subtle detail that professionals often use to make their installations stand out.
Removing Sharp Edges Safely
Even after smoothing with a hand pad, some edges might still feel a bit too sharp, especially if they'll be handled frequently. A quick pass with a fine-grit diamond hand pad or even a specialized edge-profiling tool can take off that final sharpness. The goal is to make the edge smooth and safe without significantly altering the tile's profile.
Polishing Cut Marble Edges
If you're aiming for a truly high-end finish, polishing the cut edges is the way to go. This is usually done after beveling and smoothing. You can use progressively finer diamond hand pads, working your way up to a very high grit. Some professionals even use specialized polishing machines for this. Polished edges reflect light beautifully and give the marble a luxurious, finished appearance.
Ensuring Consistent Edge Quality
Consistency is vital. Whether you're smoothing, beveling, or polishing, try to maintain the same pressure and angle across all your cut edges. This uniformity makes the finished installation look deliberate and well-executed. It's easy to get a little sloppy when you're tired, but taking that extra moment to be precise here pays off.
Addressing Minor Chipping
Sometimes, despite your best efforts, a tiny chip might appear. Don't panic! For very small chips, you can often use a fine-grit diamond hand pad to gently blend the area. In some cases, a bit of marble repair epoxy, carefully applied and colored to match, can fill in minor imperfections. Always test any repair method on a scrap piece first if possible.
Advanced Techniques for Cutting Marble
Cutting Thicker Marble Slabs
Working with thicker marble slabs, say over 3/4 inch, requires a bit more attention. You can't just rush through it. The key is to make multiple passes with your wet saw. Don't try to cut all the way through in one go. Instead, make a shallow pass, then another slightly deeper one, and so on. This prevents the blade from binding and reduces the risk of chipping the marble. Always ensure your blade is sharp and suited for thicker material. A good quality diamond blade designed for stone will make a world of difference here.
Creating Mitered Joints
Mitered joints are those clean, angled cuts that make two pieces of marble meet at a perfect corner, like on a countertop edge or a shower corner. To achieve this, you'll need to set your wet saw's blade to a precise 45-degree angle. It's tricky business, and you'll want to practice on scrap pieces first. Accurate angle setting on your saw is non-negotiable for a tight, professional-looking seam. You might also need a specialized blade for miter cuts, as a standard blade can sometimes chip the edges when cutting at an angle.
Cutting Marble for Radiant Heating Systems
If you're installing radiant heating under marble floors, you'll need to cut channels or specific shapes for the heating elements. This is where a plunge cut feature on your wet saw comes in handy, if you have one. Otherwise, you'll need to drill pilot holes and carefully cut out the sections. Be mindful of the marble's thickness and the depth of the channels required. Always double-check the heating system's installation guide for specific cutting requirements.
Working with Delicate Marble Varieties
Some marble types are just more fragile than others. Think of certain types of Onyx or very soft marbles. For these, you need to be extra gentle. Use a continuous rim blade, which offers a smoother cut than segmented blades. Go slow, let the saw do the work, and avoid any sudden movements. Sometimes, reinforcing the back of the tile with a temporary adhesive or mesh can help prevent cracks during cutting.
The Importance of Blade Speed
Blade speed, often measured in RPM (revolutions per minute), plays a big role. Too fast, and you risk overheating the marble and the blade, leading to chips and cracks. Too slow, and you might not cut efficiently, potentially causing the blade to bind. Most wet saws have a recommended speed range for different materials. Consult your saw's manual and the blade manufacturer's recommendations for optimal performance.
Minimizing Dust and Water Spray
While wet saws are designed to control dust and water, some spray is inevitable. To minimize it, ensure your saw's water reservoir is full and the pump is working correctly. Some saws have adjustable splash guards that can help contain the water. If you're working indoors or in a sensitive area, consider using a water containment system or additional tarps to protect surrounding surfaces. Proper ventilation is still key, even with a wet saw.
Advanced Wet Saw Adjustments
Beyond the basic angle settings, some wet saws offer more advanced adjustments. This might include adjusting the blade height relative to the cutting surface or fine-tuning the water flow. Understanding these adjustments can help you achieve cleaner cuts and prolong the life of your blade. For instance, slightly raising the blade can sometimes help prevent it from digging too deep into softer stones. Always refer to your specific saw's manual for its unique features and adjustments.
Maintaining Your Cutting Equipment
Keeping your tools in good shape is just as important as knowing how to cut marble. If your wet saw or blades aren't working right, you're going to have a rough time. Plus, it's a safety issue. Let's talk about how to keep everything running smoothly.
Regular Wet Saw Blade Cleaning
After you're done cutting, give that blade a good rinse. Marble dust and water can mix into a slurry that really cakes onto the blade. A clean blade cuts better and lasts longer. Use a stiff brush and some water to get all that gunk off. Don't let it dry on there; it's way harder to remove later.
Ensuring Proper Water Flow
The water system on your wet saw is there for a reason – it cools the blade and keeps dust down. If you notice the water isn't flowing like it should, check the pump and the water lines. Make sure there are no clogs. A weak water flow means your blade can overheat, which is bad for the blade and can cause the marble to chip. You can find replacement pumps and parts for most saws online.
Checking Saw Alignment
Over time, especially with a lot of use, your saw might get a little out of alignment. This means the blade might not be perfectly perpendicular to the table. This can lead to uneven cuts. Most saws have adjustment screws. Check your saw's manual to see how to check and adjust the alignment. It’s a good idea to do this periodically, especially if you're noticing your cuts aren't straight.
Lubricating Moving Parts
Like any machine, your wet saw has parts that move. The rails the cutting head slides on, for example. A little bit of water-resistant grease or oil on these parts can make a big difference in how smoothly the saw operates. Check your manual for specific recommendations on what to use and where to apply it. Don't overdo it, though; you don't want grease getting all over your marble.
Replacing Worn Blades Promptly
Diamond blades don't last forever. You'll know a blade is getting worn out when it starts taking more effort to cut, or the cuts aren't as clean. Don't push a dull blade. It's better to replace it than to risk damaging your marble or having an accident. Look for a quality diamond blade that's suited for natural stone. A good blade makes all the difference.
Storing Your Cutting Tools
When you're not using your wet saw, store it somewhere clean and dry. If you can, cover it to protect it from dust and debris. Blades should be stored so they don't get damaged. Keeping your equipment clean and protected when not in use will help it last much longer.
Troubleshooting Saw Malfunctions
Sometimes, things just go wrong. If your saw stops working, or is making strange noises, don't just ignore it. First, unplug it – safety first! Then, consult your saw's manual. Many common issues have simple fixes. If you can't figure it out, it might be time to contact the manufacturer or a repair service. Regular maintenance can prevent a lot of these problems before they start.
Safety First When Cutting Marble
Cutting marble tile, while rewarding, comes with its own set of safety considerations. It’s not just about getting a clean cut; it’s about making sure you get through the job without any mishaps. Think of it like any other home improvement project – preparation and caution are key. Always prioritize your well-being over speed.
Wearing Appropriate Personal Protective Equipment
This is non-negotiable. When you're working with power tools and stone, the right gear protects you from dust, debris, and potential injuries. It might seem like a hassle, but trust me, it’s worth it.
- Eye Protection: Safety glasses or goggles are a must. Marble dust can get everywhere, and you don't want any of it in your eyes. Look for ones that offer a good seal around your eyes.
- Hearing Protection: Wet saws can be loud. Earplugs or earmuffs will save your hearing in the long run. You'll thank yourself later.
- Dust Mask/Respirator: Marble dust isn't just annoying; it can be harmful if inhaled. A good quality dust mask or respirator will filter out those fine particles.
- Gloves: Protect your hands from sharp edges and the general mess. Work gloves are usually a good choice.
- Sturdy Footwear: Closed-toe shoes are important to protect your feet from dropped tiles or tools.
Understanding Electrical Safety with Wet Saws
Wet saws use electricity and water, which is a combination that demands respect. A simple mistake can lead to a shock.
- GFCI Protection: Always plug your wet saw into a Ground Fault Circuit Interrupter (GFCI) outlet. These outlets are designed to shut off power quickly if they detect a fault, preventing electrocution.
- Inspect Cords: Before you plug anything in, check the power cord for any nicks, cuts, or damage. A frayed cord is a serious hazard.
- Keep Connections Dry: Ensure all electrical connections, including the plug and extension cord (if used), stay dry. Don't let them sit in puddles of water.
Managing Water and Electrical Hazards
This ties into electrical safety but is worth its own point. Water is what makes a wet saw work, but it also introduces risks.
Be mindful of where water is splashing. It can create slippery surfaces and also pose a risk to electrical components if not managed properly. Keep the work area as dry as possible, apart from the immediate cutting zone.
Preventing Slips and Falls
Water, marble dust, and tools can make your workspace a hazard zone for slips and falls. A fall, especially when you're holding a tile or near equipment, can be serious.
- Clean Up Spills Immediately: Don't let water or slurry sit on the floor. Mop it up as soon as you notice it.
- Manage Cords and Hoses: Keep power cords and water hoses tidy and out of walkways to avoid tripping.
- Clear Clutter: A tidy workspace is a safer workspace. Put away tools and materials when you're not using them.
Proper Ventilation for Marble Dust
Even with a dust mask, good ventilation helps clear the air. If you're working indoors, open windows and doors. If you can, set up a fan to help move air away from your breathing zone. This is especially important for long cutting sessions.
Safe Handling of Heavy Tiles
Marble tiles can be surprisingly heavy. Dropping one can damage the tile, your floor, or worse, your foot.
- Use Two Hands: Whenever possible, use both hands to lift and carry tiles.
- Get Help: If you're dealing with very large or heavy pieces, don't be a hero. Ask someone to help you.
- Proper Lifting Techniques: Bend your knees and lift with your legs, not your back.
Emergency Procedures
It's always wise to have a plan. Know where your first-aid kit is and how to shut off power to the saw quickly in an emergency. If you're working alone, make sure someone knows what you're doing and when you expect to finish.
Troubleshooting Common Cutting Problems
Even with the best preparation and tools, sometimes things don't go exactly as planned when cutting marble tile. Don't get discouraged! Most common issues have straightforward solutions. Let's look at how to fix them.
Dealing with Chipped Edges
Chipped edges are probably the most frequent headache. They can happen if the blade is too dull, if you're pushing the tile too fast, or if the marble itself has internal fissures. The key is a sharp blade and a steady hand.
- Blade Check: Make sure your diamond blade is sharp and clean. A dull blade will snag and chip the marble.
- Speed Control: Don't rush the cut. A consistent, moderate pace is better than forcing the tile.
- Support: Ensure the tile is well-supported on both sides of the cut, especially near the end.
- Repair: For minor chips, you can sometimes use a fine-grit diamond hand pad to gently smooth the edge. For more significant chips, you might need to use a marble repair epoxy, though this is best avoided by preventing the chips in the first place.
Addressing Uneven Cuts
An uneven cut means your line isn't straight, or the blade wandered. This often comes down to how you're guiding the tile.
- Guide Consistency: Use a fence or guide if your wet saw has one for straight cuts. If cutting freehand, try to keep the tile moving in a perfectly straight line.
- Blade Wobble: Check if the blade is securely mounted and not warped. A wobbly blade will produce an uneven cut.
- Tile Stability: Make sure the tile isn't shifting or vibrating excessively during the cut. Secure it firmly.
Preventing Blade Wander
Blade wander is when the saw blade doesn't follow a straight path, often veering off course. This is frustrating and leads to wasted tile.
- Blade Condition: Again, a sharp, true blade is vital. A blade that's slightly bent or damaged will wander.
- Cutting Pressure: Applying uneven pressure can cause the blade to drift. Try to maintain consistent, light pressure.
- Tile Alignment: Ensure the tile is perfectly aligned with the blade's intended path before you start cutting.
Managing Overheating During Cuts
While wet saws are designed to cool the blade, sometimes the tile or blade can still get too hot, especially with very hard marble or prolonged cutting.
- Water Flow: Double-check that your water reservoir is full and the pump is working correctly. Adequate water is the primary coolant.
- Breaks: If you're cutting a lot of tile, take short breaks to let the blade and tile cool down.
- Blade Speed: Ensure your blade is spinning at the correct RPM for the type of marble you're cutting. Too slow can cause friction, too fast can cause issues too.
Resolving Water Splashing Issues
Water splashing everywhere is messy and can be a safety hazard. Most wet saws have splash guards, but sometimes they aren't enough.
- Splash Guards: Make sure all splash guards are properly attached and intact.
- Cutting Speed: Cutting too quickly can force water out from under the blade.
- Water Level: An overly full reservoir can sometimes contribute to splashing.
Correcting Incorrect Measurements
Measure twice, cut once is the old adage for a reason! If you've measured incorrectly, you'll need to salvage the tile if possible.
- Re-measure: Always double-check your measurements before making the cut.
- Small Adjustments: If the cut is slightly off, you might be able to make a very small, careful adjustment with a diamond hand pad or a grinder. For significant errors, the tile may need to be replaced. Consider ordering a few extra tiles for your project to account for mistakes, especially when working on larger U.S. projects.
Salvaging Slightly Damaged Tiles
Sometimes, a tile might have a small chip or a slightly imperfect cut that you can still use.
- Strategic Placement: Can the damaged area be placed against a wall, in a corner, or under a fixture where it won't be noticeable?
- Creative Cuts: Sometimes, a slightly imperfect cut can be hidden by grout lines or used in less visible areas.
- Acceptance: For very minor imperfections, especially in areas with busy patterns, it might be best to just accept it and move on. The natural beauty of marble often masks small flaws.
Dealing with these common problems is part of the process. With a little patience and the right approach, you can overcome most cutting challenges and achieve a professional finish for your marble tile installation. If you're looking for high-quality marble for your next project, explore our premium natural stone products that are sourced directly from quarries.
The Art of Precision in Marble Cutting
Cutting marble tile isn't just about making a straight line; it's about achieving a perfect fit and a flawless finish. This level of precision separates a good job from a great one, especially when working with a material as beautiful and sometimes unforgiving as marble. It takes practice, the right tools, and a good understanding of the stone itself.
The Impact of Blade Quality on Precision
The blade you choose is probably the single most important factor in getting clean, precise cuts. A worn-out or incorrect blade will chip the marble, wander off your line, or even crack the tile. For marble, you generally want a continuous rim diamond blade. These blades have a smooth edge, which is ideal for cutting brittle materials like natural stone without causing excessive chipping. Think of it like using a sharp knife versus a dull one – the sharp knife makes a clean cut, while the dull one tears. Using a high-quality diamond blade designed for natural stone is non-negotiable for precision work.
Calibrating Your Measuring Tools
Before you even think about cutting, make sure your measuring tools are accurate. A tape measure that's off by even a millimeter can lead to tiles that don't fit correctly, especially in tight spaces or complex layouts. Always double-check your measurements, and if you're using a speed square or a combination square, ensure its edges are clean and its markings are clear. It sounds simple, but this step prevents a lot of headaches down the line.
The Importance of a Stable Cutting Surface
Your tile needs to be stable while you're cutting it. If the tile shifts or vibrates during the cut, you're going to get an uneven edge or a chip. This is where a good wet saw with a sturdy table and rollers comes in handy. For smaller cuts or when using a handheld grinder, you might need to use clamps or a jig to hold the tile firmly in place. A wobbly tile is a recipe for disaster.
Practicing Patience for Perfect Cuts
This is a big one. Rushing the cut is the quickest way to make a mistake. Let the saw do the work. Guide the tile smoothly and steadily through the blade. Don't force it. If you're cutting a particularly hard or veined piece of marble, slow down even more. Patience is truly a virtue when cutting natural stone.
Understanding Marble's Natural Inconsistencies
Marble is a natural material, and no two pieces are exactly alike. Veining patterns can change direction, thickness can vary slightly, and sometimes there are hidden fissures. You need to look at each tile before cutting and anticipate how these natural variations might affect your cut. Sometimes, a beautiful vein might run right where you need to make a cut, and you'll have to decide if you want to cut through it or try to work around it. This is part of the challenge and beauty of working with natural stone.
Achieving Seamless Transitions
Precision cutting is key to achieving those beautiful, almost invisible transitions between tiles. This means making sure your cuts are perfectly straight and that adjacent tiles meet up without any awkward gaps or overlaps. It's the small details, like perfectly cut corners or edges that line up exactly, that make a professional installation stand out. For projects across the U.S., getting these details right is what makes a space truly shine.
The Pursuit of Perfection in Every Cut
Ultimately, the pursuit of perfection in marble cutting is about respecting the material and the final installation. It's about taking the time to measure twice, cut once, and use the best tools and techniques available. When you achieve that perfect cut, it shows. It makes the installation easier, the finished product look better, and it gives you a real sense of accomplishment. Remember, proper stabilizing setups are crucial for making precise cuts and preventing expensive errors when cutting natural stone tile.
Cutting Marble for Specific Applications
Cutting marble tile for different parts of your home project requires a bit of thought. It's not just about making a straight line; you have to consider how the cut piece will fit and look in its final spot. We're talking about everything from bathroom walls to kitchen backsplashes and even decorative accents.
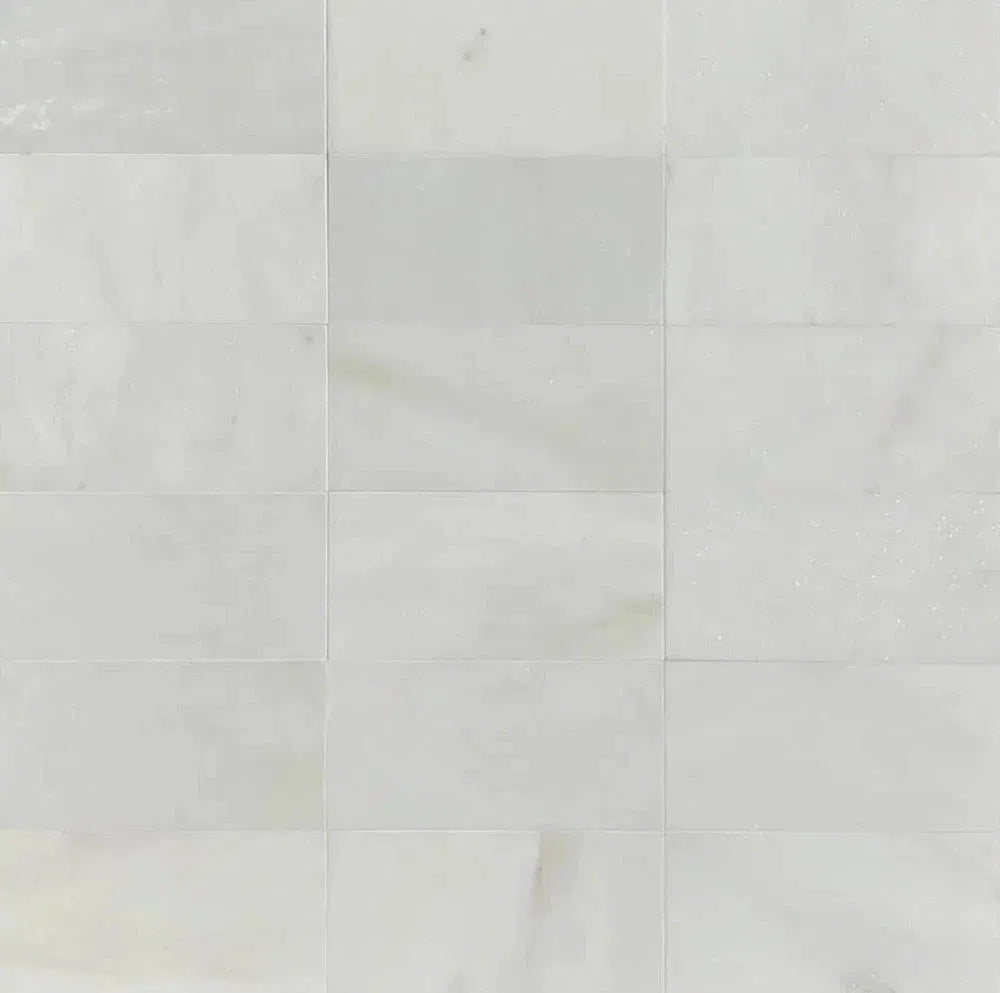
Marble Tile for Bathroom Walls
When you're working on bathroom walls, especially in shower areas, precision is key. You'll often need to cut tiles to fit around plumbing fixtures, corners, and shower niches. Making clean cuts here prevents water from seeping behind the tiles, which is a big deal for preventing mold and damage. Using a good wet saw with the right blade is pretty much a must for this. You want edges that fit snugly against each other or the fixture.
Cutting for Kitchen Backsplashes
Kitchen backsplashes often involve more intricate cuts. Think about outlets, windowsills, and the edges where the backsplash meets the countertop or cabinets. You might need to make L-shaped cuts or notches to get a perfect fit. The goal is a polished look that protects your walls from splashes while adding a touch of elegance. A steady hand and accurate measurements are super important here.
Marble Flooring Installation Cuts
For marble floors, you'll be cutting tiles to fit the perimeter of the room, around doorways, and any irregular shapes. Straight cuts are common, but you might also need to cut tiles into smaller pieces for borders or patterns. Ensuring the cut edges are smooth and uniform helps create tight grout lines, which makes the finished floor look professional and easier to clean. A good manual tile cutter can sometimes be useful for simpler floor cuts, but for marble, a wet saw is generally preferred.
Creating Decorative Marble Accents
This is where you can get creative. Cutting marble for decorative accents might involve creating specific shapes, mosaics, or custom inlays. You might need to cut small, detailed pieces or even bevel edges for a unique look. This often requires a lot of patience and a very precise cutting tool. The results can be stunning, turning a simple wall or floor into a work of art.
Cutting Marble for Outdoor Patios
When cutting marble for outdoor patios, consider the elements. The cuts need to be robust and fit well to prevent shifting or water pooling. You'll likely be dealing with larger tiles and potentially more cuts to fit around irregular patio shapes or landscaping features. Durability and a good fit are the main concerns here to ensure a long-lasting, beautiful outdoor space.
Adapting Cuts for Unique Layouts
Sometimes, the space you're tiling just isn't standard. You might have curved walls, angled corners, or unusual architectural features. Adapting your cutting techniques to these unique layouts is part of the challenge. This could involve freehand cutting with a wet saw or using templates to get the exact shape needed. It’s all about making the marble fit the space perfectly, no matter how odd the shape.
Marble Tile for Shower Niches
Shower niches are a prime example of where precise cuts are absolutely necessary. You'll need to cut tiles to fit the sides, top, and bottom of the niche opening, often with tight tolerances. A perfect fit here not only looks good but also helps create a waterproof seal, protecting the underlying structure from moisture. This application really tests your cutting skills and attention to detail.
Understanding Marble's Reaction to Cutting
Cutting marble tile isn't quite like cutting, say, ceramic. This natural stone has its own personality, and it reacts to the cutting process in specific ways. Understanding these reactions helps you avoid problems and get cleaner cuts. It’s all about working with the material, not against it.
Heat Generation During the Cutting Process
When a diamond blade spins at high speed against marble, friction is created. This friction generates heat. If this heat isn't managed, it can cause problems. The marble can get too hot, leading to thermal shock, which might cause cracks. The blade itself can also overheat, reducing its effectiveness and lifespan. This is why water is so important in wet saws – it cools both the blade and the tile.
The Role of Water in Cooling
Water is your best friend when cutting marble. The water system on a wet saw does more than just lubricate the blade; its primary job is to carry away the heat generated by the cutting action. As the water splashes onto the blade and the tile, it absorbs the heat, preventing both from reaching damaging temperatures. Keeping the water reservoir full and ensuring the pump is working correctly is non-negotiable for successful marble cutting. Without adequate water, you're asking for trouble, like chipped edges or even a cracked tile.
How Blade Speed Affects Marble
Blade speed matters. Too slow, and you might not cut efficiently, potentially causing the blade to bind or skip. Too fast, and you can generate excessive heat and vibration, which can lead to chipping or cracking, especially on more delicate marble types. Most wet saws have a recommended RPM range for their blades, and it's usually set to work well with natural stones like marble. It’s about finding that sweet spot where the blade cuts cleanly without stressing the material.
Potential for Cracking Under Pressure
Marble, being a natural stone, has inherent weaknesses. Applying too much force or pressure while cutting can easily cause it to crack, especially along the veining. It’s a common mistake for beginners to push the tile too hard, thinking it will speed up the process. Instead, let the blade do the work. A steady, consistent feed rate is key. You want to guide the tile smoothly through the blade, not force it.
The Impact of Marble's Density
Different types of marble have different densities. Denser marbles might require a bit more effort to cut, but they are often less prone to chipping. Softer marbles, on the other hand, can be easier to cut but are more susceptible to chipping and cracking if you're not careful. Knowing the density of the marble you're working with helps you adjust your approach. For denser stones, you might need a blade with a slightly more aggressive cut, while for softer ones, a gentler touch is advisable.
Recognizing Signs of Stress on the Tile
Pay attention to what the tile is telling you as you cut. If you hear a grinding noise that sounds rougher than usual, or if you see excessive vibration, these are signs that something might be wrong. It could be the blade is dull, you're applying too much pressure, or the tile isn't properly supported. Stopping to assess the situation can save a tile from being ruined. Look for any visible cracks starting to form, especially near the cut line.
Adapting Techniques for Different Marble Types
Marble isn't monolithic; it varies greatly. Some marbles are hard and dense, while others are softer and more porous. The veining patterns can also differ significantly, affecting how the stone behaves under the blade. For instance, a marble with bold, prominent veins might require a slower, more controlled cut to prevent the blade from following the vein and causing an uneven break. Always inspect your tile and adjust your cutting speed and pressure accordingly. It’s about respecting the unique characteristics of each piece you work with.
Achieving Professional Results with Marble
The Difference Between DIY and Professional Cuts
Look, cutting marble tile can seem straightforward, but getting those clean, precise edges that scream 'professional' takes practice. It’s not just about making a cut; it’s about understanding the material and using the right techniques. A DIY cut might look okay from a distance, but up close, you might see small chips or uneven lines. Professionals, on the other hand, have honed their skills to make these cuts look almost invisible, like the tile was made that way.
Mastering the Art of the Reveal
The 'reveal' is what happens after the cut, when you see the edge. For a pro, this reveal is smooth, consistent, and free of any jagged bits. It’s about making sure the cut edge looks as good as the factory edge. This often involves using the right blade, maintaining a steady hand, and sometimes, a bit of post-cut finishing. The goal is for the cut edge to blend in perfectly with the rest of the tile.
Ensuring Consistent Spacing and Grouting Lines
When you're laying tile, those grout lines are like the frame around a picture. If they're uneven, the whole job looks off. Professionals pay close attention to making sure every cut tile fits perfectly with its neighbors, maintaining uniform spacing. This means accurate measurements and cuts every single time. It’s this attention to detail that separates a good job from a great one.
The Importance of Cleanliness Throughout
Working with marble can get messy, especially with the water and dust from cutting. A professional workspace is kept clean. This isn't just for looks; it helps prevent accidents and ensures you can see your marks and measurements clearly. Wiping down surfaces and managing water spray are part of the process.
Final Inspection of Cut Edges
Before any tile is set, a professional will give those cut edges a good look. They're checking for any small imperfections, chips, or rough spots that might have been missed. Sometimes, a quick pass with a diamond hand pad can fix minor issues. It’s that final check that guarantees quality.
Achieving a Seamless Installation
Ultimately, professional results mean the finished tile job looks like it was meant to be. The cuts are so good, you barely notice them. The tiles fit together perfectly, and the grout lines are consistent. It’s about making the marble look its absolute best in your space, whether it's a kitchen backsplash or a bathroom floor. We only offer handpicked A+ top-quality natural stone products, ensuring your project starts with the best materials.
Elevating Your Project with Expert Cuts
When you invest in marble, you want it to look its best. Expert cuts make a huge difference. They show care and skill, and they contribute to a finished look that’s truly impressive. It’s the difference between a tile job that’s just okay and one that truly wows.
Choosing the Right Blade for Marble
When you're cutting marble tile for your U.S. projects, the blade you choose is a really big deal. It's not just about getting the job done; it's about getting it done right, with clean edges and no wasted material. Think of it like using the right tool for any job – a dull knife won't slice bread well, and the wrong blade will make cutting marble a real headache.
Diamond Blade Types Explained
Most blades designed for cutting stone, including marble, use diamonds. These aren't your typical gemstones; they're industrial-grade diamonds embedded into the edge of the blade. They're super hard, which is why they can grind through tough materials like marble. The way these diamonds are arranged and the type of blade they're on makes a big difference.
Continuous Rim vs. Segmented Blades
This is a key distinction. Continuous rim blades have a smooth, unbroken edge. They're your go-to for the cleanest, smoothest cuts, especially on delicate materials like marble. Because there are no gaps, they produce very little chipping. Segmented blades, on the other hand, have notches or segments along the edge. These segments help to cool the blade and clear out debris more effectively, making them better for faster, rougher cuts on harder materials like concrete or granite. For marble, you generally want to stick with continuous rim blades for that polished finish.
The Significance of Blade Thickness
Blade thickness matters more than you might think. A thinner blade will create a narrower kerf (the width of the cut), meaning less material is lost. This is especially important when you're working with expensive marble or cutting many tiles. However, a very thin blade might be more prone to warping or breaking if you apply too much pressure. You'll find blades designed for specific tasks, and some are thinner than others. For instance, a blade like this 7-inch premium diamond blade is engineered for accuracy.
Matching Blade to Marble Hardness
Marble isn't all the same. Some types are softer and more porous, while others are denser and harder. You need a blade that can handle the specific marble you're working with. A blade that's too aggressive might chip a softer marble, while a blade that's not tough enough will wear out quickly on a denser stone. Generally, for marble, you're looking for blades that offer a balance of cutting speed and a smooth finish. Blades designed for both granite and marble often work well, as they can handle a range of stone densities.
Blade Speed Recommendations
The speed at which your wet saw spins the blade (measured in RPMs) is critical. Too fast, and you risk overheating the blade and the marble, leading to chips or cracks. Too slow, and you won't cut efficiently, and the blade might get bogged down. Your saw will have a recommended RPM range, and you should match that to what the blade manufacturer suggests. A good rule of thumb is that harder materials often benefit from slightly slower speeds to prevent excessive heat buildup.
When to Consider a Specialized Marble Blade
While many general-purpose diamond blades can cut marble, a blade specifically designed for marble or natural stone will often give you superior results. These blades are engineered with the right diamond grit and bond to minimize chipping and maximize smoothness. If you're doing a high-end project or working with particularly beautiful or delicate marble, investing in a specialized blade is a smart move. You can find excellent options, like those in the Bluestone collection, that offer continuous rim blades for the smoothest cuts.
The Lifespan of a Diamond Blade
Diamond blades don't last forever. Their lifespan depends on the quality of the blade, the type of material being cut, and how you use it. Cutting harder materials, applying too much pressure, or letting the blade overheat will all shorten its life. You'll know it's time for a new blade when you notice cuts becoming rougher, slower, or more prone to chipping. Keeping your blade clean and using the water system properly on your wet saw will help it last longer. For a good balance of speed and clean cuts, a turbo rim blade can be a versatile choice.
Choosing the right blade is more than just picking one off the shelf; it's about understanding the material you're cutting and the tool's capabilities. A little research upfront can save you a lot of frustration and ensure your marble project looks its absolute best.
Advanced Wet Saw Techniques
Alright, so you've got your marble tile, your trusty wet saw, and you're ready to make some cuts. But just pushing the tile through isn't always the best way to get that perfect finish. There are a few tricks to using your wet saw that can really make a difference, especially with tricky materials like marble.
Adjusting the Cutting Depth
This is a big one. Most wet saws let you adjust how deep the blade cuts. For marble, you don't want to just plunge the blade all the way in at once. It's better to make a shallower first pass, then go a little deeper on a second pass. This helps prevent chipping and puts less stress on the blade and the tile. Think of it like easing into a cold pool instead of diving headfirst. It’s a small adjustment, but it really helps keep the edges clean.
Using the Miter Gauge Effectively
If you need to make angled cuts, the miter gauge is your friend. Make sure it's set precisely to the angle you need. Some people just eyeball it, but for marble, precision matters. A wobbly miter gauge means a wobbly cut. Double-check your angle before you start cutting, and hold the tile firmly against it as you feed it through. This is key for getting those perfect angled cuts for corners or decorative patterns.
The Importance of Blade Alignment
This might sound technical, but it's pretty straightforward. You want to make sure the blade is running straight and true. If the blade is wobbling or leaning, you're going to get uneven cuts and potentially damage the tile. Most saws have a way to check and adjust this. It’s worth taking a few minutes to check before you start a big job.
Maintaining a Consistent Feed Rate
Pushing the tile too fast or too slow can both cause problems. Too fast, and you risk chipping or the blade getting bogged down. Too slow, and you might overheat the blade or the tile, which can also lead to cracks. Find a steady, consistent pace. You'll get a feel for it as you cut more marble. It should feel controlled, not rushed.
Cutting Multiple Tiles Simultaneously
Sometimes, you might have several identical cuts to make. If the tiles are small enough and your saw can handle it, you might be able to stack and cut them together. This saves a lot of time. However, be extra careful with alignment and stability when doing this. It’s a time-saver, but only if done safely and accurately.
Utilizing Different Saw Attachments
Depending on your saw model, there might be different attachments available. Some help with rip cuts, others with making plunge cuts. Familiarize yourself with what your saw can do and if any attachments would make your specific marble cutting tasks easier or more precise.
Maximizing Saw Efficiency
Ultimately, these techniques are all about working smarter, not harder. By paying attention to depth, alignment, and speed, you're not just cutting marble; you're mastering the tool. This leads to fewer mistakes, less wasted material, and a much better final result for your project. It’s about respecting the material and the process.
Post-Cut Marble Tile Care
So, you've made all those precise cuts on your marble tiles. Great job! But don't just toss them aside. Taking a little extra time for post-cut care makes a big difference in the final look and longevity of your project. It's not complicated, but it's definitely important.
Rinsing Cut Tiles Thoroughly
After cutting, your tiles will have fine marble dust and residue from the cutting process. You need to get rid of that. Use clean water and a soft cloth or sponge to gently wipe down each cut edge and surface. This removes any lingering particles that could interfere with adhesion or grout later on. Make sure to rinse away all the slurry.
Allowing Tiles to Dry Completely
This might seem obvious, but it's worth mentioning. Don't try to install or seal tiles that are still wet. Water trapped beneath the tile can cause adhesion problems or even lead to efflorescence (those white powdery deposits) later. Let them air dry in a well-ventilated area, or use a clean, dry towel. For thicker tiles, this might take a few hours.
Inspecting for Any Imperfections
Now's the time for a close look. Check each cut edge for any minor chips or rough spots you might have missed. It's much easier to address these small issues now than after installation. A quick visual inspection can save you headaches down the line.
Preparing Edges for Grouting
Depending on your installation method and the look you're going for, you might need to do a little more edge prep. If you're using a specific type of adhesive or grout, ensure the edges are clean and free of any dust or debris that could affect the bond. Sometimes, a light sanding with a fine-grit sandpaper can help create a perfectly smooth surface.
Sealing Cut Edges
Marble is porous, and the cut edges are particularly susceptible to absorbing liquids. Applying a quality stone sealer to the cut edges after they've dried is a smart move. This helps prevent staining and moisture penetration, especially in areas like kitchens or bathrooms. Follow the sealer manufacturer's instructions for application and drying times.
Handling Cut Tiles During Installation
Be careful when moving and placing your cut tiles. Even though they're sturdy, sharp edges can sometimes be brittle. Use gloves if the edges feel rough. Avoid dropping or banging them against hard surfaces. Proper handling ensures those clean cuts stay that way.
Storing Cut Marble Pieces
If you have leftover cut pieces, store them properly. Lay them flat on a protected surface, perhaps on a piece of cardboard or a drop cloth, to prevent scratching. Keep them away from high-traffic areas where they could get damaged before you need them for the final touches or future projects. This careful approach to post-cut care ensures your marble installation looks its absolute best.
The Nuances of Cutting Natural Stone
Cutting natural stone, like marble, isn't quite like cutting manufactured tile. Each piece is unique, a product of geological processes over millennia. This means you're not just cutting a material; you're working with a piece of Earth's history, and that requires a different approach.
Distinguishing Marble from Other Stones
Marble is a metamorphic rock, formed when limestone is subjected to heat and pressure. This gives it a distinct crystalline structure and often beautiful veining. Unlike granite, which is igneous and much harder, or travertine, which is sedimentary and often has more holes, marble has its own set of characteristics. Understanding these differences is key to choosing the right blade and cutting technique. For instance, marble is softer than granite, meaning it can chip more easily. This is why a continuous rim blade is often preferred for marble to get cleaner edges.
Understanding Variations in Natural Stone
No two pieces of natural stone are exactly alike. Even within the same quarry, you'll find variations in color, veining, and density. This is part of its charm, but it also means you need to be adaptable. A cut that works perfectly on one tile might need a slight adjustment on the next. Always inspect each piece before you start cutting. You might find a hidden fissure or a particularly dense area that requires a slower feed rate or a different blade.
Adapting Cutting for Travertine
Travertine, another popular natural stone, often has a more porous structure with natural holes. When cutting travertine, you need to be mindful of these voids. Sometimes, these holes can cause the blade to catch or chip the edges. Using a blade with a slightly wider gullet can help clear debris more effectively. You might also consider filling these holes with epoxy before cutting if you want a perfectly smooth edge, though many prefer to leave them as a natural feature.
Working with Granite Tile
Granite is significantly harder than marble. This means you'll need a more aggressive diamond blade, typically a segmented blade, to cut through it effectively. The higher hardness also means more heat is generated during cutting, so a good water supply for your wet saw is absolutely critical. Don't rush the process; let the saw do the work. Trying to force granite through the blade will only lead to blade damage and poor cuts.
The Unique Challenges of Onyx
Onyx is a semi-precious gemstone known for its stunning translucence and dramatic veining. Because it's so beautiful, it's also often quite delicate. The translucence means that any imperfections or chips will be very noticeable. When cutting onyx, a very fine-toothed, continuous rim blade is usually best. Go slow, use plenty of water, and be extra careful when handling the cut pieces. Some installers even use a specialized angle grinder for very precise, small adjustments on onyx where a full wet saw might be overkill or too risky.
Cutting Limestone Tiles
Limestone is another sedimentary stone, often softer than marble. Like travertine, it can be prone to chipping. The key with limestone is to use a blade that provides a clean cut without excessive force. A good quality continuous rim blade, used with a steady hand and adequate water, will give you the best results. Be aware that some limestones can be quite brittle, so handling the cut pieces with care is important.
Respecting the Natural Material
Ultimately, cutting natural stone is about respecting the material. It's not a uniform product; it's a natural wonder. Take your time, observe each piece, and adjust your technique as needed. This mindful approach will not only lead to better cuts but also a more beautiful final installation. Remember, we offer a wide selection of premium natural stone tiles, perfect for any project across the U.S. projects.
Optimizing Your Cutting Workflow
Cutting marble tile can feel like a big job, especially when you've got a lot of pieces to get through. Making sure you're set up right from the start can save you a ton of time and frustration. It’s all about working smarter, not just harder, to get those perfect cuts for your U.S. projects.
Planning Your Cuts Strategically
Before you even touch a tile, take a moment to look at your layout. Think about where each cut needs to go and how many you'll need. Grouping similar cuts together can make a big difference. For example, if you have a whole row of tiles that need the same angle cut, do them all at once. This minimizes the back-and-forth of adjusting your saw or changing blades.
Batching Similar Cuts Together
This ties right into planning. If you've got a dozen tiles needing a 45-degree miter, set up your saw for that specific angle and power through them. Then, switch to the next type of cut. It’s way more efficient than cutting one tile, then another with a different requirement, then going back to the first type. This approach helps maintain blade consistency and reduces setup time.
Minimizing Tile Movement
Every time you pick up and reposition a tile, you risk a slight shift. This can throw off your measurements and lead to inaccurate cuts. Secure your tile firmly before each cut. Use clamps or guides on your wet saw to keep the marble from sliding. The less you have to move the tile, the more consistent your results will be. For intricate cuts, consider using a jig or template to guide the tile accurately.
Efficiently Managing Water and Debris
Wet saws create a slurry of water and marble dust. Keeping this under control is key to safety and a clean workspace. Make sure your saw's water system is working properly and that the reservoir is adequately filled. Periodically clean out the excess slurry to prevent it from clogging the blade or pump. A good dust collection system, if available for your saw, can also help manage airborne particles.
Streamlining the Marking Process
Accurate marking is non-negotiable. Use a sharp pencil or a fine-tip marker that won't easily wipe off. For complex layouts, consider using painter's tape on the tile surface where you'll mark your lines. This can help prevent the marker from bleeding into the marble's natural veining and provides a clearer line to follow. Double-check your measurements before marking.
Setting Up a Dedicated Cutting Area
If possible, set up your cutting station in a well-ventilated area, ideally outdoors or in a garage. This keeps the dust and water contained and away from your main living spaces. Ensure you have good lighting and easy access to power and water. Having everything you need within reach—tools, spare blades, water—makes the process much smoother. This is especially important when working with delicate marble for bathroom walls.
The Importance of Breaks
Don't underestimate the power of a short break. Cutting marble can be physically demanding and requires a lot of focus. Stepping away for a few minutes can help you reset, prevent fatigue, and avoid mistakes. When you return, you'll likely have a clearer head and be ready to tackle the next set of cuts with renewed precision.
Want to make your cutting work faster and smoother? We've got tips to help you speed things up. Learn how to get more done in less time. Visit our website today to discover how you can improve your cutting process!
Finishing Touches and Beyond
So, you've learned the ins and outs of cutting marble tile. It might seem a bit daunting at first, but with the right tools and a bit of patience, you can achieve really nice results. Remember, practice makes perfect, and don't be afraid to take your time. If you're looking for top-notch marble for your projects, check out places that really know their stone. They can help you find exactly what you need to make your space look amazing. Happy tiling!
Frequently Asked Questions
What makes marble tiles special for cutting?
Marble is a natural stone, meaning each piece is unique. It can be beautiful but also a bit tricky to cut because it's not as uniform as manufactured tiles. Knowing its natural quirks helps a lot.
What tools do I absolutely need to cut marble?
You'll want a wet saw, which uses water to keep dust down and the blade cool. A good diamond blade is a must, along with safety gear like goggles and gloves. Don't forget measuring tape and a marker!
How do I prepare the marble tile before making a cut?
First, check the tile for any cracks or weak spots. Then, clean it up. Mark your cut line clearly and make sure the tile is held steady on the saw so it doesn't move during the cut.
What's the best way to make a straight cut in marble?
Set up your wet saw carefully. Guide the tile smoothly and steadily through the blade. The goal is a clean line without any chips or rough spots on the edge.
How can I cut marble for tricky shapes or around obstacles?
For curves or odd shapes, you'll need to go slower and make smaller cuts. Sometimes, you might need to make a series of straight cuts to create a curve. It takes patience and a steady hand.
My cut edges look rough. How can I fix them?
After cutting, you can use special sanding pads designed for stone to smooth out the edges. You can also gently round them off a bit to make them look more finished and less sharp.
Is it harder to cut thicker marble tiles?
Yes, thicker marble needs a more powerful saw and a blade that can handle the depth. You might also need to adjust how fast you push the tile through the blade to avoid overheating or chipping.
How often should I clean my wet saw and blade?
It's best to clean your saw and blade after each use. This keeps the water flowing well and prevents buildup that can make cutting harder and wear out the blade faster.
What safety precautions are most important when cutting marble?
Always wear safety glasses to protect your eyes from flying debris. Gloves are good too. Be mindful of the water and electricity with the wet saw, and make sure you have good ventilation to avoid breathing in dust.
What if my marble tile chips when I cut it?
Small chips can sometimes be smoothed out with sanding pads. For bigger chips, you might need to try making a slightly different cut or, if possible, use that piece where the chip won't be noticeable.
Does the type of diamond blade matter a lot?
Absolutely! Different blades are made for different types of stone. Using the right blade for marble ensures cleaner cuts and makes the job much easier and safer.
Can I cut marble tiles for my bathroom or kitchen project?
Yes, marble is great for bathrooms and kitchens! You'll just need to be careful when cutting around things like sinks or outlets, using the right techniques to get a perfect fit.