





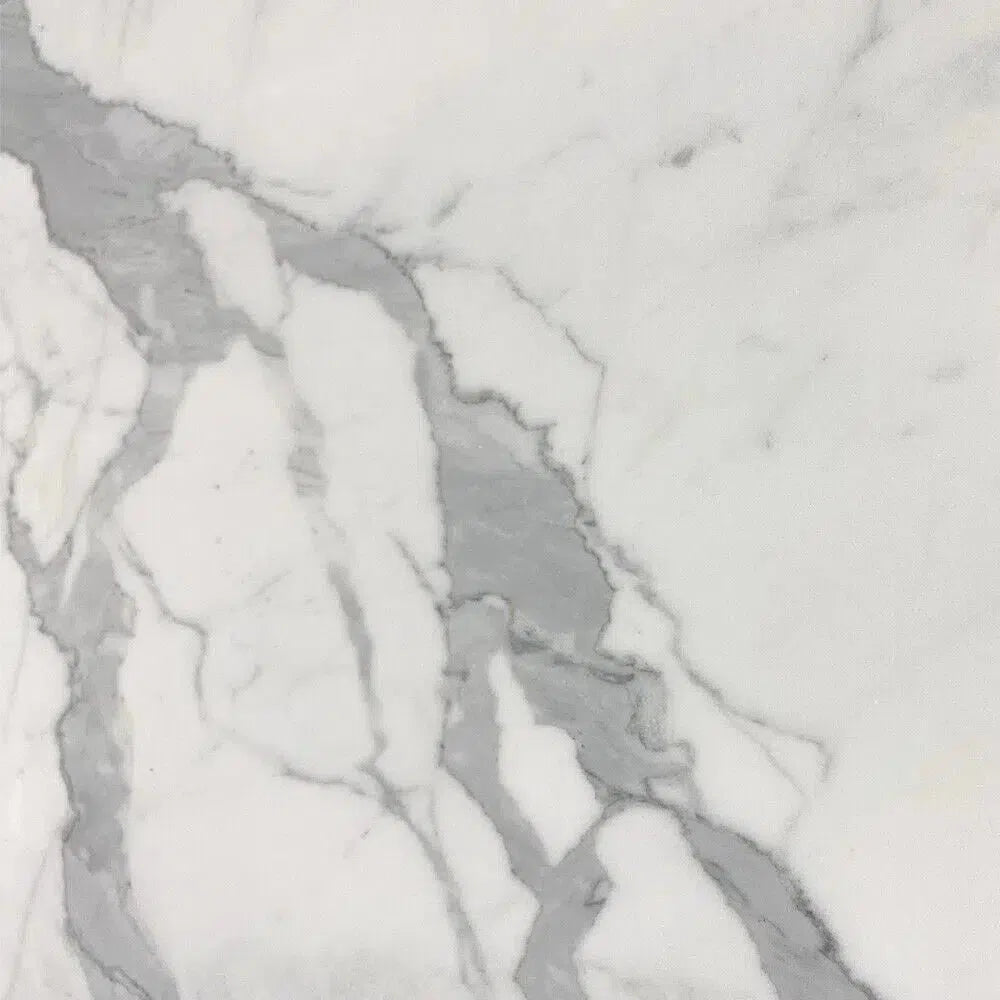

Cutting natural stone tile might seem a little intimidating at first, but with the right approach, you can get really clean, professional-looking results. This guide is all about how to cut natural stone tile, breaking down the process step-by-step. We'll cover everything from picking out your tools to making those tricky cuts, so you can tackle your project with confidence.
Key Takeaways
- Understand the stone's hardness, veining, and thickness before you start cutting.
- Use the right tools, especially a wet saw with a proper diamond blade, and always wear safety gear.
- Prepare your workspace for safety and efficiency, including a stable area and good ventilation.
- Master straight cuts by marking accurately and maintaining a steady hand.
- Learn techniques for angle cuts and beveling edges for professional finishes.
- Explore methods for intricate shapes and cutouts using specialized tools.
- Troubleshoot common issues like chipping and cracking to salvage your tiles.
- Properly maintain your equipment to ensure it works well and lasts longer.
Understanding Your Natural Stone Tile
Before you even think about cutting, it's super important to get to know the material you're working with. Natural stone isn't like ceramic or porcelain; it's a product of the earth, and that means it has its own quirks and personality. Understanding these traits will save you a lot of headaches and help you get the best results for your U.S. projects.
The Unique Characteristics of Natural Stone
Every piece of natural stone is one-of-a-kind. Unlike manufactured tiles, which are made to be uniform, natural stone tiles have variations in color, pattern, and texture. This is part of their charm, but it also means you need to pay attention. Some stones are harder than others, some are more porous, and some have natural fissures or inclusions that can affect how they cut. Knowing these characteristics is the first step to a successful cut. Think of it like getting to know a new friend – you wouldn't just jump into a big project with them without understanding their personality, right?
Identifying Different Stone Types for Cutting
There are several common types of natural stone used for tiles, and they all behave differently when cut. You've got marble, which is relatively soft and can chip easily. Then there's granite, which is very hard and requires a good blade. Travertine has those natural holes, and slate has a distinct layering. Knowing if you're working with marble, travertine, slate, or granite will dictate the tools and techniques you need. For instance, cutting granite requires a different approach than cutting marble.
Assessing Stone Hardness and Brittleness
This is a big one. Hardness relates to how much force it takes to cut the stone, while brittleness tells you how likely it is to crack or chip. Granite is hard but not overly brittle. Marble is softer but can be quite brittle, especially if it has a lot of veining. Travertine's porosity can sometimes make it seem more brittle. You'll want to match your diamond blade to the stone's hardness. A blade that's too soft for granite will wear out fast, and a blade that's too aggressive for marble might cause chipping.
Recognizing Veining and Grain Patterns
Natural stone often has visible veins or grain patterns. These aren't just for looks; they indicate the natural lines of weakness within the stone. Cutting with the grain is usually easier and less likely to cause chipping than cutting against it. Sometimes, a strong vein can even guide the blade off course if you're not careful. Pay attention to these patterns before you make your mark. It’s like reading the wood grain before you start woodworking.
The Importance of Stone Thickness
Stone tiles come in various thicknesses, and this really matters for cutting. Thicker tiles, especially those over 3/4 inch, can be more challenging to cut cleanly. They require a more robust saw and blade, and you might need to make multiple passes. Thinner tiles are easier to cut but can be more prone to chipping if not handled carefully. Always check the thickness of your tiles before you start cutting, and make sure your wet saw can handle it. We offer a wide range of natural stone tiles suitable for various projects.
Evaluating Stone Quality for Cutting Projects
Not all natural stone is created equal. When you're selecting stone for a project, especially if you plan on doing a lot of cuts, look for high-quality material. Premium, handpicked A+ top-quality stone is less likely to have hidden flaws like internal cracks or voids that can cause unexpected breakage during cutting. While it might cost a bit more upfront, avoiding the frustration and waste of cutting lower-quality stone is often worth it. We pride ourselves on sourcing only the best, so you can trust the quality of our natural stone for your installations nationwide.
Essential Tools for Cutting Natural Stone
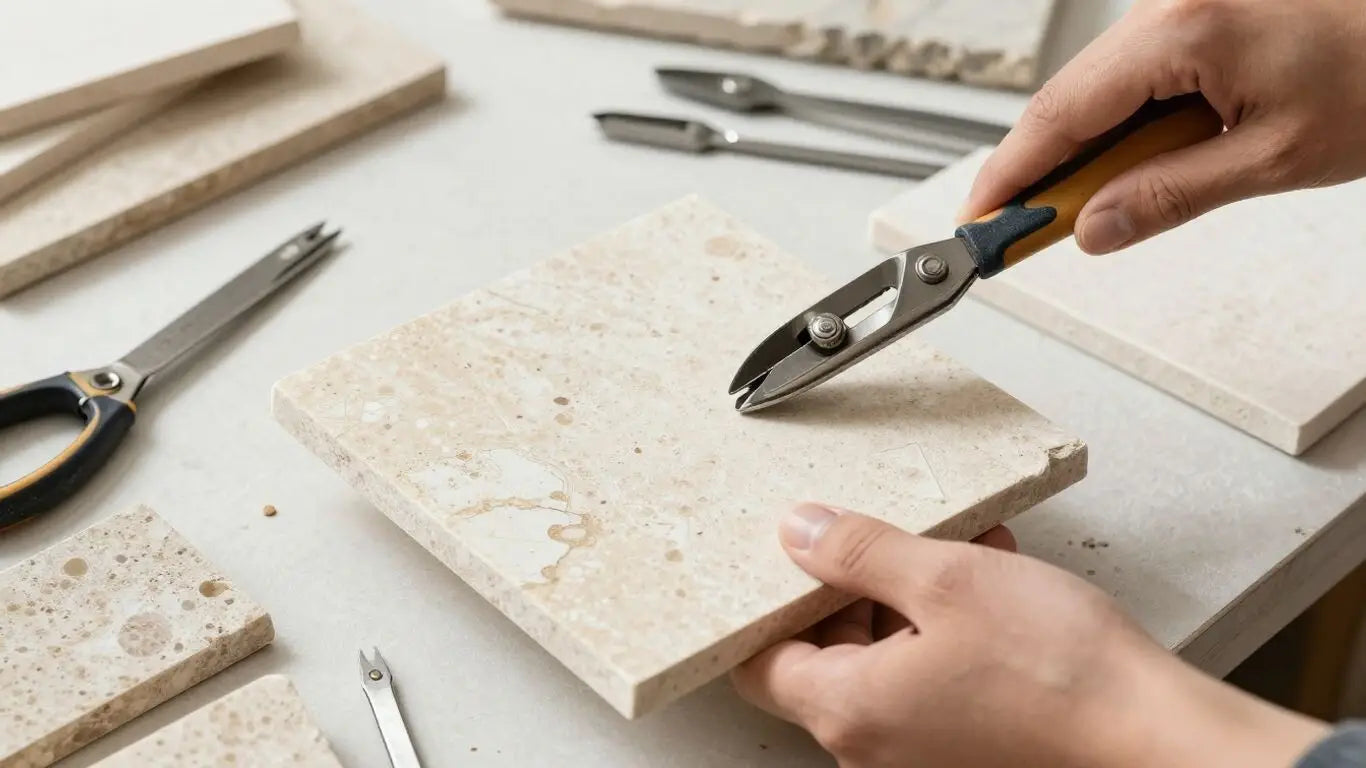
Cutting natural stone tile for your U.S. projects might seem daunting, but having the right tools makes all the difference. It's not just about having any tools; it's about having the correct ones that are up to the task. Think of it like a chef needing sharp knives – you can't get clean cuts with a dull blade, and the same applies here. Investing in quality equipment means fewer headaches and a much better final look for your floors or walls.
Choosing the Right Wet Saw
A wet saw is pretty much non-negotiable for cutting natural stone. These saws use a continuous stream of water to cool the blade and reduce dust, which is a big deal when you're working with hard materials like granite or marble. There are different sizes and power levels, so you'll want to pick one that fits the scale of your project. For most home renovations, a portable wet saw will do the trick. For serious projects or if you're cutting a lot of tile, a more robust, professional-grade wet saw is a smart investment.
Selecting Appropriate Diamond Blades
The blade is what actually does the cutting, and for natural stone, you absolutely need a diamond blade. These blades are designed to handle the hardness of stone. You'll see different types: continuous rim blades are great for very smooth, clean cuts, especially on softer stones like marble. Segmented blades have gaps and are better for faster cutting and harder materials like granite, as they help with cooling. For intricate cuts or very hard stone, a turbo blade might be your best bet. Always match the blade to the type of stone you're cutting; using the wrong one can lead to chipping, slow cuts, or even damage to the blade itself. Professional-grade wet saws and diamond blades are key to accuracy.
Essential Safety Gear for Stone Cutting
Safety first, always. Cutting stone creates fine dust that you really don't want to breathe in. You'll need safety glasses to protect your eyes from flying debris, hearing protection because these saws can be loud, and a dust mask or respirator. Gloves are also a good idea to protect your hands. Don't skimp on this stuff; it's there to keep you safe.
Measuring and Marking Tools
Accuracy starts with good measurements. You'll need a reliable tape measure, a pencil or marker that shows up on your stone (a wax pencil or a fine-tip permanent marker works well), and a speed square or a combination square for marking straight lines and 90-degree angles. For more complex cuts, a template might be helpful.
Clamps and Securing Devices
Keeping the tile stable while you cut is super important for safety and precision. Clamps can help secure the tile to a workbench or the saw's cutting surface. Some wet saws have built-in clamping mechanisms, which are really handy. You want to make sure the stone isn't going to shift or vibrate excessively during the cut.
Water Supply and Management for Wet Saws
Your wet saw needs a water source, obviously. This could be a hose connected to a faucet or simply filling the water reservoir. You'll need to keep an eye on the water level and refill it as needed. Managing the water spray is also part of the process; some saws have attachments to help control the splashback. Proper water management is key to keeping the blade cool and dust down.
Dust Collection Systems for Dry Cutting
While wet saws are preferred, sometimes you might need to do a dry cut, especially with certain types of saws or for specific situations. If you're dry cutting, a dust collection system is absolutely vital. This usually involves a shop vac hooked up to the saw or a handheld grinder to suck up the dust as it's created. Breathing in stone dust is a serious health hazard, so never dry cut without effective dust control.
Preparing Your Workspace for Stone Cutting
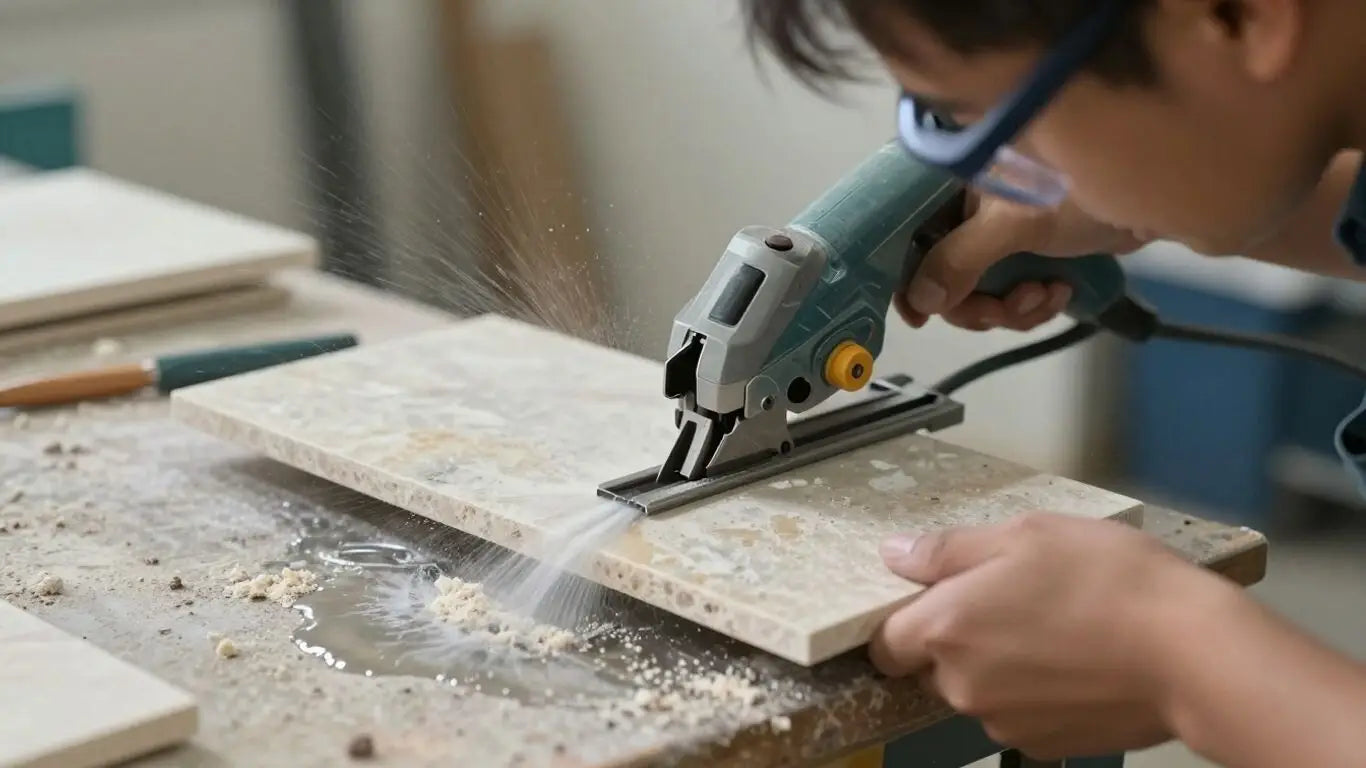
Before you even think about firing up that saw, getting your cutting area set up right is super important. It's not just about making the job easier; it's about staying safe and making sure your project turns out looking good. Think of it like prepping your kitchen before you start cooking a big meal – you wouldn't just dump ingredients on the floor, right?
Setting Up a Stable Cutting Area
First things first, you need a solid spot to work. Natural stone can be heavy, and when you're cutting, you don't want anything wobbling around. A sturdy workbench or a couple of sawhorses with a strong piece of plywood on top works well. Make sure the surface is level so your tile doesn't shift while you're cutting. If you're using a wet saw, check that it's sitting firmly and won't vibrate itself off the table. A wobbly saw is a recipe for disaster, trust me.
Ensuring Adequate Ventilation
This is a big one, especially if you're cutting dry or if your wet saw's water system isn't perfect. Stone dust, even from natural stone, isn't great to breathe in. If you're working indoors, open up windows and doors. If you can, set up a fan to blow the dust away from you and out of the area. For serious projects, a dust collection system is a good idea. It really makes a difference in keeping the air cleaner. For any project involving cutting stone tile, prioritizing safety precautions, including setting up dust control systems, is key [2494].
Protecting Surrounding Surfaces
Cutting stone, especially with a wet saw, can get messy. Water splashes, and dust can settle everywhere. Lay down some drop cloths, old newspapers, or cardboard around your cutting area. This will save you a lot of cleanup time later. Pay attention to walls, floors, and any furniture nearby. You don't want to be scrubbing stone dust off your favorite rug for days.
Organizing Your Tools and Materials
Having your tools and the stone tiles you need within easy reach makes the whole process smoother. Keep your measuring tape, marking pencil, safety glasses, and any other small tools close by. Stack your tiles neatly so they're easy to grab one at a time. A cluttered workspace is not only inefficient but also a safety hazard. When using a tile saw, maintaining a clean and organized workspace helps prevent accidents [1c22].
Water Source and Drainage Considerations
If you're using a wet saw, you'll need a reliable water source. A hose connected to a faucet or a bucket of water will do. Think about where the water will go after it's used. You'll have a mix of water and stone slurry. Make sure you have a plan for drainage or a way to collect the wastewater. Don't just let it run all over your workspace or into storm drains.
Electrical Safety Precautions
This is non-negotiable, especially when water is involved. Make sure your saw is plugged into a GFCI (Ground Fault Circuit Interrupter) outlet. These outlets are designed to shut off power quickly if they detect a problem, which is a lifesaver when working with electricity and water. Keep all electrical cords away from puddles and wet areas. Double-check that your saw and any extension cords are in good condition, with no frayed wires.
Preparing the Stone Tile Itself
Before you cut, give your stone tiles a quick look-over. Make sure they're clean and free of any loose debris. Sometimes, natural stone can have a bit of dust or packing material on it. Wiping them down ensures a cleaner cut and prevents any gunk from getting into your saw's water system. Also, check for any obvious cracks or flaws that might affect how the stone cuts.
Mastering Straight Cuts on Natural Stone
Getting a perfectly straight cut on natural stone tile might seem simple, but it requires a bit of know-how and the right approach. Whether you're working on a new backsplash for your kitchen or a full floor renovation across the U.S., clean, straight cuts make all the difference in the final look. This section will walk you through the steps to achieve those crisp lines.
Marking Your Cut Line Accurately
Before you even think about firing up the saw, you need a clear, precise line to follow. A faint pencil mark can easily disappear or get smudged during the cutting process. For natural stone, it's best to use a fine-tip permanent marker or a sharp pencil. Always measure twice and mark once. Double-checking your measurements is key to avoiding costly mistakes. Remember to account for the width of your blade, known as the 'kerf,' so your cut lands exactly where you want it.
Securing the Tile for a Straight Cut
Loose tiles are a recipe for disaster when cutting. They can shift during the cut, leading to jagged edges or even a broken tile. For wet saws, the tile should rest firmly on the saw's table. If you're using a different tool, like a snap cutter, make sure the tile is stable and won't move. Some pros use clamps for extra security, especially on larger or more delicate pieces. A stable base means a more controlled cut.
Initiating the Cut with Your Wet Saw
When using a wet saw, the initial contact with the blade is important. Don't just jam the tile into the spinning blade. Instead, gently lower the tile onto the blade or slowly guide the tile into the blade's path. Let the blade do the work. Applying too much pressure at the start can cause chipping or damage the blade. For most natural stones, a steady, consistent feed rate is better than trying to rush the cut. If you're cutting something like marble, which can be softer, you'll want to be extra gentle.
Maintaining a Steady Hand for Precision
This is where practice really pays off. Keep your hands steady and your body balanced. Avoid jerky movements. If your saw has a sliding table, use it smoothly. If you're hand-feeding the tile, keep a firm but relaxed grip. The goal is to guide the tile consistently through the blade without forcing it. Think of it as a slow, controlled glide rather than a push. This steady approach helps prevent blade wander and ensures a clean edge.
Completing the Cut Without Chipping
Chipping is a common problem with natural stone, especially along the exit point of the cut. To minimize this, try not to stop the cut mid-way. Complete the cut in one smooth pass if possible. Some people find that placing a piece of painter's tape along the cut line on the exit side can help reduce chipping. Another trick is to support the tile right up to the point where the blade exits. A clean exit is just as important as a clean entry.
Tips for Cutting Larger Format Tiles
Cutting large format tiles (those over 12x12 inches) presents its own set of challenges. They can be heavy and unwieldy. Make sure your saw's table is large enough to support the tile fully. You might need an assistant to help guide the tile safely. For very large tiles, consider using a specialized cutting system or a larger, more robust wet saw. Always prioritize safety and stability when dealing with bigger pieces.
Achieving Clean Edges on Straight Cuts
Once the cut is complete, take a moment to inspect the edge. Ideally, it should be smooth and free of significant chips. If there are minor imperfections, they can often be cleaned up with a diamond hand pad or a rubbing stone. For a truly professional finish, you might want to lightly sand or hone the cut edge. This step is particularly important if the cut edge will be visible, like on a countertop or a shower niche. A clean edge makes the entire installation look much more polished.
Executing Precise Angle Cuts
Cutting natural stone at an angle, like for a mitered edge or a corner transition, takes a bit more finesse than a straight cut. It’s where you really start to see the difference between a DIY job and a professional finish. Getting these angles just right is key to making your project look polished and intentional, especially when you're working with premium materials for your U.S. projects.
Setting the Miter Angle on Your Saw
Most wet saws have a tilting blade mechanism that allows you to set the angle. You'll usually find a scale or a locking mechanism on the saw's frame. It's important to set this accurately. Even a degree or two off can make a noticeable gap when two pieces meet.
- Check the angle scale: Make sure it's clean and easy to read.
- Lock it down: Secure the blade assembly firmly at your desired angle. A loose lock can shift during the cut.
- Test on scrap: Before cutting your actual tile, make a test cut on a scrap piece to confirm the angle is correct.
Marking Angles on Stone Surfaces
Marking your cut line clearly on the stone is just as important for angled cuts as it is for straight ones. You can use a pencil, a marker, or even a scribe, depending on the stone's surface. For darker stones, a white or silver marker works best. Remember, you're often marking the outside edge of your cut, so plan accordingly.
Clamping Techniques for Angled Cuts
Securing the tile properly is even more critical when cutting at an angle. The blade can exert sideways pressure, potentially shifting the stone. Use clamps to hold the tile firmly against the saw's fence or any guides you're using. Don't rely solely on gravity to hold the stone in place.
The Art of Beveling Stone Edges
Beveling an edge means cutting it at an angle, usually to soften a sharp corner or to create a specific decorative profile. This is often done with a specialized blade or by tilting the saw's blade. It's a technique that adds a touch of elegance, particularly with marble and travertine.
Cutting Miters for Corner Transitions
Mitering is essential for creating clean inside and outside corners where two pieces of stone meet at a 90-degree angle. Each piece needs to be cut at a 45-degree angle. This requires precise setup of your saw and careful alignment of the stone. A slight error here will result in a visible gap.
Achieving Consistent Angle Cuts
Consistency is the name of the game. If you're cutting multiple tiles for the same corner or edge, they need to be identical. This means:
- Using the same angle setting for all related cuts.
- Ensuring the stone is positioned identically against the fence or guides for each cut.
- Maintaining a steady feed rate as the blade moves through the stone.
Troubleshooting Common Angle Cutting Issues
- Gaps: Usually caused by an inaccurate angle setting or the stone shifting during the cut. Double-check your saw's angle and secure the stone firmly.
- Chipping: Can happen if you try to cut too fast or if the blade is dull. Slow down and ensure you're using the right diamond blade for your stone type.
- Uneven Angles: Often a result of inconsistent pressure or a blade that isn't perfectly aligned. Make sure your saw is properly maintained.
Getting these angled cuts right can make a huge difference in the final look of your project. It’s worth taking the extra time to set up carefully and make test cuts. For those looking for the finest in marble, precision in cuts is non-negotiable.
Creating Intricate Cuts and Shapes
Sometimes, a simple straight cut just won't do. For those unique design elements, you'll need to get a bit more creative with your stone cutting. This is where things get interesting, allowing you to really personalize your project. Whether you're working around pipes, creating decorative borders, or just want to add a special touch, mastering these techniques is key.
Using Jigs for Complex Shapes
Jigs are your best friend when you need to repeat a specific, complex cut. Think of them as templates that guide your saw. You can buy pre-made jigs, or for really custom shapes, you might need to make your own. A good jig will help you make identical cuts over and over, which is super helpful if you have a lot of similar pieces to cut. This saves a ton of time and makes sure everything looks consistent. A well-made jig is the secret to professional-looking intricate cuts.
The Role of Angle Grinders in Detail Work
While a wet saw is great for big, straight cuts, an angle grinder is the tool for the finer details. You can use it for shaping edges, making small notches, or even cutting out small sections. It's a bit more hands-on than a wet saw, and you'll want to take your time. Using the right diamond blade on your grinder is important here, just like with the saw. It gives you more control for those tricky spots.
Cutting Curves and Circles with Precision
Cutting curves and circles in natural stone can be challenging, but it's definitely doable. For larger curves, you might use a wet saw with a special blade, making a series of small, straight cuts that approximate the curve. For smaller, tighter curves or full circles, a grinder with a diamond blade or even a specialized stone router might be necessary. It takes patience and a steady hand. You'll want to practice on scrap pieces first. For projects across the U.S., getting these details right makes a big difference.
Notch Cuts for Obstructions
Need to cut a piece to fit around a pipe or a cabinet leg? That's a notch cut. You'll typically make two straight cuts to form the 'L' or 'U' shape needed. Sometimes, you might need to make a third cut to remove the small piece in the corner. This is where a wet saw is really useful, as it can handle these types of cuts cleanly. Just be sure to measure carefully so the notch fits perfectly.
Making Cutouts for Fixtures
Similar to notch cuts, cutouts are needed for things like electrical outlets or plumbing fixtures. These often require more precise shapes, sometimes even curves. You might start with a series of straight cuts from the edge of the tile to create the opening, or use a grinder for more complex shapes. Again, measuring twice and cutting once is the motto here. A precise cutout makes for a much cleaner installation.
Working with Smaller Stone Pieces
Cutting small pieces of natural stone can be tricky because they're harder to hold securely. You might need to use specialized jigs or even glue the small piece to a larger backing board temporarily to make the cut safely. Always make sure your hands are well away from the blade. If you're working on a project nationwide, remember that consistent small cuts are just as important as large ones.
Achieving Smooth Curves and Shapes
After making your initial cuts for curves or intricate shapes, the edges might be a bit rough. This is where finishing tools come in. Diamond hand pads or a grinder with a fine grit diamond blade can smooth out these edges. You want the final result to look as good as the rest of your tile. Taking the time to smooth these areas makes a huge difference in the overall appearance of your project. It's these little details that really make natural stone shine.
Advanced Techniques for Natural Stone
Cutting natural stone can sometimes feel like a puzzle, especially when you're dealing with thicker pieces or stones that have a lot of character. It's not always a simple straight line. Let's look at some ways to tackle those trickier cuts.
Cutting Thicker Stone Slabs
When you've got a really thick slab of natural stone, like a substantial piece of granite or marble, your standard wet saw might struggle. You'll likely need a more powerful saw, maybe one with a larger blade capacity. The key here is patience. Don't try to force the blade through. Let the diamond blade do the work, and make sure you're keeping it well-watered to prevent overheating. Slow and steady wins the race when cutting thick slabs. You might also find that a plunge cut, where you lower the blade into the stone partway and then make your cut, can be helpful. This gives the blade a better starting point and reduces stress.
Dealing with Highly Veined or Fragile Stone
Some stones, like certain types of marble or travertine, have prominent veining or are just naturally more brittle. These can be tricky because the blade can follow the path of least resistance, which might not be where you want to cut. For these, it's often best to cut with the grain if possible, rather than against it. If you have to cut against it, go extra slow and make sure the stone is well-supported on both sides of the cut line. Sometimes, using a blade with a finer grit can help provide a smoother cut and reduce the chance of the stone fracturing along a weak line. If a piece is particularly fragile, consider using a specialized blade designed for delicate materials.
The Importance of Blade Speed and Feed Rate
Blade speed and how fast you push the stone through the blade (feed rate) are super important. Too fast a blade speed on a soft stone can cause it to chip. Too slow, and you might get a rough cut or overheat the blade. Pushing the stone too fast into the blade can cause the blade to bind, chip the stone, or even damage the blade itself. Conversely, pushing too slowly can lead to the blade overheating and potentially burning out. Finding that sweet spot is key. It often comes down to the type of stone and the blade you're using. For harder stones, you might need a faster blade speed and a steady, moderate feed rate. For softer or more fragile stones, a slower feed rate is usually better.
Cooling Strategies for Extended Cuts
When you're making a long cut, or cutting through a thick slab, the blade and the stone generate a lot of heat. Overheating is bad news – it can warp your blade, dull it faster, and even cause the stone to crack from thermal shock. Water is your best friend here. Make sure your wet saw's water reservoir is full and the pump is working well to keep a constant stream of water on the blade. If you're doing a really long cut, you might need to pause periodically to let everything cool down. Some pros even use a secondary water source, like a hose, to keep the blade extra cool during demanding cuts. For projects across the U.S., having a reliable water source is always a top priority.
Minimizing Dust During the Cutting Process
Even with a wet saw, some dust is inevitable, and if you're dry cutting, it's a major concern. The silica dust from stone is really harmful to breathe. With a wet saw, try to keep the water flow consistent. If you're dry cutting, a good dust collection system attached to your saw is non-negotiable. Some blades are also designed to reduce dust. Always wear a respirator rated for silica dust, even when using a wet saw, just to be safe. It's better to be overcautious with dust.
Techniques for Cutting Against the Grain
Cutting against the natural grain or veining of a stone can be challenging. The stone is more likely to chip or break along these lines. To minimize this, use a blade designed for precision, like a continuous rim blade, and go very slowly. Support the stone well on both sides of the cut. Sometimes, scoring the line first with a light pass can help guide the blade and reduce the risk of it wandering. If the stone is particularly prone to splitting, you might consider making multiple shallow passes instead of one deep cut. This gives the stone less chance to fracture.
Achieving a Polished Edge After Cutting
Once you've made your cut, the edge might be a bit rough. To get that finished look, you'll want to polish it. This can be done with diamond hand pads, starting with a coarser grit and moving to finer ones. You can also use an angle grinder with a polishing pad. The goal is to smooth out any imperfections left by the blade and match the finish of the tile's surface. For a truly high-end look, especially with marble or granite, a polished edge makes a big difference. It not only looks good but also feels smooth and safe to the touch. We offer handpicked A+ top-quality stone that deserves a perfect finish.
Working with natural stone requires a blend of the right tools, a bit of patience, and an understanding of how the material behaves. Don't be afraid to experiment on scrap pieces first to get a feel for how a particular stone cuts. Every piece of natural stone is unique, and that's part of its beauty.
For those undertaking ambitious projects nationwide, remember that the quality of your stone and the precision of your cuts will define the final result. We pride ourselves on providing premium natural stone that stands up to the most demanding applications.
Troubleshooting Common Cutting Challenges
Even with the best tools and preparation, cutting natural stone can sometimes throw a curveball. Don't get discouraged if you run into issues; most problems have straightforward solutions. It's all part of the learning process when working with these beautiful, yet sometimes tricky, materials.
Preventing Chipping and Cracking
Chipping, especially on the edges, is a common headache. It often happens when the blade is dull, the feed rate is too fast, or the stone is simply too brittle for the technique being used. For softer stones like marble or travertine, a slower, more controlled approach is key. Always ensure your diamond blade is sharp and appropriate for the stone type. Sometimes, scoring the line lightly before making the full cut can help prevent larger chips. If you're cutting a particularly fragile piece, consider using a wet saw with a continuous rim blade, which offers a smoother cut than segmented blades.
Addressing Blade Wander and Uneven Cuts
If your blade isn't cutting straight, it could be a few things. First, check if the tile is properly secured. Any movement during the cut will lead to an uneven line. Make sure your saw's guide is aligned correctly. A wobbly blade, perhaps due to a damaged bearing or a bent blade, will also cause problems. Sometimes, the issue is simply trying to push the stone too quickly through the blade. Let the blade do the work at its own pace. For precise cuts, double-checking your measurements before you start is also a good idea, as an inaccurate starting point can make the cut seem uneven. Accurate measurements are vital.
Managing Overheating During Cuts
Overheating is a big no-no for both your blade and the stone. It can cause the blade to dull faster, warp, and even crack the stone. The primary culprit is usually insufficient water flow in a wet saw. Make sure the water reservoir is full and the pump is working correctly to keep the blade cool and lubricated. If you're dry cutting, take frequent breaks to let the blade and stone cool down. Don't force the material; a steady, consistent feed rate is much better than a rushed, hot cut. Consider using a blade designed for extended use if you have a lot of cutting to do.
Dealing with Difficult Stone Textures
Some natural stones have unique textures or inclusions that make them harder to cut. For instance, stones with large voids or fissures might chip more easily along these lines. You might need to adjust your cutting speed or use a different type of blade. A continuous rim blade is often better for very porous stones like travertine to avoid snagging. For stones with strong veining, try to cut perpendicular to the main grain if possible, as cutting along a weak vein can lead to breakage. Patience is really the name of the game here.
Correcting Misaligned Cuts
Mistakes happen, and sometimes a cut isn't quite where it should be. If the misalignment is minor, you might be able to fix it with some careful grinding. Use a diamond hand pad or a small angle grinder with a diamond wheel to gently shave down the excess material. Always work slowly and check your progress frequently. If the piece is significantly off, it might be best to cut a new tile if you have extras. For complex layouts, dry fitting pieces before making final cuts can help prevent these errors.
Tips for Salvaging Slightly Damaged Tiles
Don't toss a tile just because of a small chip or crack. Often, these imperfections can be hidden or repaired. Minor chips on edges can sometimes be smoothed out with a diamond hand pad. If a tile is cracked but still in two usable pieces, you might be able to join them with a strong adhesive, especially if the crack is in an area that won't be highly visible or subjected to heavy wear. For cuts that are slightly off, a bit of careful grinding can often bring them back into spec. Remember, even slight imperfections can sometimes be worked into a unique design.
When to Seek Professional Assistance
While many natural stone cutting tasks are manageable for DIYers, there are times when calling in a pro makes sense. If you're working with extremely expensive or rare stone, the risk of a mistake might outweigh the savings. Large format tiles or very thick slabs can also be challenging to handle and cut accurately without specialized equipment. If you're unsure about a particular cut or technique, or if you've already made a significant error, it's often wise to consult with a professional stone fabricator. They have the experience and tools to handle difficult jobs efficiently and safely.
Finishing Touches for Cut Stone Edges
So, you've made your cuts, and they look pretty good. But wait, there's a bit more to do to make those edges really pop. It’s not just about getting the tile to fit; it’s about how it looks and feels when it’s all done. Think of it like framing a picture – the frame matters, right? The same goes for your natural stone tiles. We're talking about making those cut edges look as good as the main surface.
Sanding and Smoothing Cut Edges
After cutting, the edges might feel a little rough. You'll want to smooth them out. A simple sanding block with some medium-grit sandpaper can do the trick for many stones. Just work back and forth along the edge. For harder stones, you might need something a bit more aggressive to start, but always finish with a finer grit. The goal is to remove any sharp bits and create a surface that feels nice to the touch. This step is pretty straightforward, but it makes a big difference in the final feel of the tile.
Using Diamond Hand Pads for Refinement
For a really polished look, especially on marble or travertine, diamond hand pads are your best friend. They come in different grits, just like sandpaper, but they’re designed specifically for stone. Start with a coarser grit pad and work your way up to the finer ones. You’ll be amazed at how smooth you can get the edges. This is where you really bring out the natural beauty of the stone. It takes a little patience, but the results are worth it for that luxury feel.
Achieving a Professional Edge Profile
Sometimes, a simple smooth edge isn't quite enough. You might want a specific profile, like a beveled edge or a bullnose. This is where specialized tools come in, like edge profilers or routers with specific bits. For most DIY projects, though, a simple eased or slightly rounded edge achieved through sanding is usually sufficient. If you're aiming for a high-end look, consider what kind of edge profile best suits the overall design of your project. It’s about matching the finish to the stone and the space.
Sealing Cut Edges to Prevent Stains
Don't forget that cut edges can be more porous than the factory-finished surface. This means they can absorb spills more easily. After you've sanded and smoothed everything, it's a good idea to apply a stone sealer to these cut edges. This helps protect them from stains and moisture, keeping your beautiful natural stone looking its best for years to come. Make sure to use a sealer that's compatible with your specific type of stone.
Matching Edge Finish to Tile Surface
Try to get the finish on your cut edges as close as possible to the finish of the tile's surface. If you have a polished marble tile, you'll want a polished edge. If it's a honed or tumbled finish, aim for something similar. This consistency makes the tile look like it was made that way, rather than having a cut edge that stands out. It’s all about that cohesive, high-quality appearance that makes a project shine.
The Importance of Edge Treatment
Proper edge treatment isn't just about looks; it's also about durability and safety. Smooth, well-finished edges are less likely to chip over time. They're also safer to handle during installation and for anyone who might come into contact with them later. Think about high-traffic areas or places where children might be around – a smooth edge is always a better choice. It’s a detail that really matters for the longevity and safety of your installation.
Creating a Seamless Look with Cut Tiles
Ultimately, the goal of finishing your cut edges is to make them blend in. You want the cut pieces to look like they belong there, not like an afterthought. By taking the time to sand, smooth, and perhaps seal the edges, you contribute to a professional, high-end finish. This attention to detail is what separates a good job from a great one, especially when working with premium materials like handpicked A+ top-quality stone. For projects across the U.S., this level of care shows in the final result.
Maintaining Your Cutting Equipment
Keeping your cutting tools in good shape is pretty important if you want them to work well and last a long time. It’s not just about making sure your cuts are clean; it’s also about staying safe. Think of it like taking care of a good chef’s knife – you wouldn’t just toss it in a drawer, right? Your wet saw and diamond blades deserve the same kind of attention.
Cleaning Your Wet Saw Regularly
After you're done cutting, the first thing you should do is clean out your wet saw. Water and stone dust don't mix well with the saw's parts over time. They can cause rust and clog up the works. Most saws have a reservoir for water; you'll want to drain this, scrape out any sludge, and rinse it thoroughly. A clean saw is a happy saw, and a happy saw makes for easier cutting. Don't forget to wipe down the exterior too. It doesn't take long, but it makes a big difference.
Inspecting and Replacing Diamond Blades
Diamond blades are the heart of your cutting operation. You need to check them regularly. Look for signs of wear, like uneven diamond segments or a blade that seems to be wobbling. If you notice the blade isn't cutting as cleanly as it used to, or if it's taking a lot more effort, it might be time for a new one. Trying to cut with a worn-out blade can lead to chipped tiles and a lot of frustration. For projects across the U.S., having reliable blades is key to getting the job done right.
Lubrication and Maintenance of Saw Parts
Some parts of your saw might need a little lubrication now and then. Check your saw's manual to see what it recommends. Usually, it's just a few points that need a drop of oil to keep things moving smoothly. This helps prevent wear and tear on the motor and other moving components. It’s a small step that can prevent bigger problems down the road.
Proper Storage of Cutting Tools
When you're not using your saw or blades, store them properly. Keep them in a dry place, away from moisture and extreme temperatures. If you have the original packaging or a dedicated case, use it. This protects them from damage and keeps everything organized. A well-stored tool is ready for its next job.
Troubleshooting Saw Malfunctions
Sometimes, things just don't work as they should. If your saw starts making weird noises, or if the motor seems weak, don't just ignore it. Check the power cord, make sure the water pump is working, and that there are no obvious blockages. If you can't figure it out, it might be time to consult the manual or even call a professional. Trying to fix complex issues without knowing what you're doing can sometimes make things worse.
Ensuring Water Pump Efficiency
The water pump is what keeps your blade cool and dust down. If you notice the water flow is weak, check the intake for debris. Sometimes, small bits of stone or other gunk can get sucked in and block the pump. Cleaning this out regularly will keep the water flowing strong, which is vital for a good cut and for the life of your blade.
Extending the Lifespan of Your Equipment
Taking good care of your cutting equipment isn't just about saving money on replacements; it's about making sure you can get those precise cuts needed for any tiling project. Consistent maintenance means your tools will perform better and last longer. This attention to detail helps ensure you get professional results, whether you're working on a small bathroom or a large commercial space. Investing a little time in upkeep pays off big time in the long run, helping you achieve those clean edges and perfect fits for your natural stone tile projects nationwide.
Safety First: Cutting Natural Stone Responsibly
Cutting natural stone tile can be a rewarding part of a home renovation or design project, but it's not without its risks. Working with power tools and stone dust means you need to be smart about safety. It’s about making sure you get the job done right without any unnecessary accidents. Think of it like preparing a fancy meal – you need the right ingredients, the right tools, and a clean, safe kitchen. Cutting stone is similar, just with a bit more grit involved.
Understanding the Risks of Stone Dust
This is a big one. When you cut stone, especially with a wet saw, you create dust. Some of this dust is silica, and breathing it in over time can cause serious lung problems. It’s not something you’ll notice right away, but it’s a long-term risk that’s easy to avoid with a little effort. Always treat stone dust as a hazard.
- Silica Dust: This is the main concern. It’s a natural component of many stones.
- Irritation: Dust can irritate your eyes, skin, and respiratory system.
- Long-Term Effects: Chronic exposure can lead to silicosis, a lung disease.
Proper Use of Personal Protective Equipment (PPE)
This is your first line of defense. Don't skip this part, no matter how quick the cut seems. It’s like wearing a seatbelt – you hope you never need it, but you’re glad it’s there if you do.
- Eye Protection: Safety glasses or goggles are a must. Stone chips can fly unexpectedly.
- Hearing Protection: Wet saws can be loud. Earplugs or earmuffs will save your hearing.
- Respiratory Protection: A good quality dust mask (N95 or better) is vital when cutting, especially if you're dry cutting or if your wet saw's water system isn't perfect. Check out our guide on blade selection to minimize dust creation.
- Gloves: Protect your hands from sharp edges and potential cuts.
- Sturdy Footwear: Keep your feet safe from dropped materials or tools.
Safe Handling of Power Tools
Power tools are great for getting the job done, but they demand respect. Read the manuals, understand how your tools work, and always keep them in good condition.
- Keep Guards in Place: Don't remove safety guards from your saw.
- Secure Your Work: Make sure the tile is stable before you start cutting. A loose tile can shift and cause a dangerous situation.
- Disconnect Power: Always unplug tools before making adjustments or changing blades.
Electrical Safety Around Water
Wet saws, by definition, use water. This means you have electricity and water in close proximity, which is a recipe for disaster if you're not careful. Never mix electricity and water carelessly.
- GFCI Outlets: Always plug your wet saw into a Ground Fault Circuit Interrupter (GFCI) protected outlet. These cut power quickly if they detect a fault.
- Inspect Cords: Check power cords for any damage before use. Don't use frayed or damaged cords.
- Keep Connections Dry: Ensure all electrical connections are kept away from water spray.
Securing Your Work Area
Think about the space you’re working in. Is it cluttered? Is there good lighting? Is it stable?
- Clear Clutter: Remove anything that could be a tripping hazard.
- Stable Surface: Set up your saw on a level, sturdy surface. A wobbly saw is a dangerous saw.
- Good Lighting: You need to see what you're doing clearly.
Emergency Procedures for Accidents
It's always wise to have a plan, even if you hope you'll never need it. Know where your first-aid kit is and how to use it. If you're working alone, let someone know where you are and when you expect to finish. For any serious cuts or injuries, seek professional medical help immediately.
Working with natural stone is a craft that requires patience and attention to detail. Safety should always be the top priority, not an afterthought. By taking the right precautions, you can protect yourself and ensure your project is a success from start to finish. Remember to inspect your tiles carefully before you begin cutting.
Creating a Safe Cutting Environment
This ties everything together. A safe environment is one where you feel comfortable and confident. It means having all your safety gear ready, your tools in good shape, and your workspace organized. It’s about being prepared for the task at hand, respecting the materials you're working with, and making smart choices every step of the way. This approach helps ensure you can enjoy the process of transforming beautiful natural stone into a stunning feature for any U.S. project.
Choosing the Right Blade for Your Stone
Picking the right diamond blade for cutting natural stone tile is a big deal. It's not just about grabbing any blade; it's about matching the blade to the specific stone you're working with and the type of cut you need to make. Using the wrong blade can lead to chipped edges, slow cuts, or even a ruined tile. We only work with handpicked A+ top-quality natural stone, and getting the cut right starts with the right blade.
Understanding Blade Types: Continuous vs. Segmented
Diamond blades come in a couple of main styles: continuous rim and segmented. Continuous rim blades have a smooth edge. They're generally quieter and produce a cleaner cut, which is great for delicate materials like marble or softer stones where chipping is a concern. Segmented blades, on the other hand, have notches or segments along the edge. These notches help clear debris and cool the blade, making them better for harder, denser materials like granite or travertine. They cut faster but can be a bit rougher.
Matching Blade Grit to Stone Hardness
Think of grit like sandpaper. A finer grit blade has smaller diamond particles and is good for softer stones, giving you a smoother finish. A coarser grit blade has larger diamond particles and is better for cutting through tough, hard stones more quickly. For most natural stone projects across the U.S., you'll find yourself reaching for blades designed for a range of hardnesses, but it's always good to know if your specific stone leans towards the softer or harder end of the spectrum.
The Impact of Blade Diameter
Blade diameter matters, especially with wet saws. Larger diameter blades can typically cut deeper. Most standard wet saws for tile work use blades around 7 or 10 inches. Make sure the blade you choose is compatible with your saw's arbor size and that its diameter allows you to make the depth of cut you need. A 10-inch blade, for instance, can handle thicker tiles than a 7-inch one.
Blade Thickness and Kerf Considerations
The kerf is the width of the cut the blade makes. A thinner kerf blade removes less material, which is good for conserving expensive stone and reducing dust. However, thinner blades can sometimes be less stable. A thicker blade might be more durable but will create a wider cut. For precise cuts on premium natural stone, a blade with a controlled kerf is often preferred.
Specialty Blades for Specific Stone Types
While general-purpose blades work for many jobs, some stones benefit from specialized blades. For instance, some blades are designed specifically for cutting very hard materials, while others are optimized for softer, veined stones to minimize chipping. If you're working with particularly challenging materials, looking for a blade marketed for that specific stone type can save you a lot of headaches.
When to Use a Turbo Blade
Turbo blades are a kind of hybrid, often featuring a slightly segmented edge that's not as aggressive as a fully segmented blade but still offers good cooling and debris removal. They're a good middle-ground option, often performing well on a variety of natural stones, including marble and granite, providing a balance between speed and finish quality. They're a popular choice for many U.S. tiling projects.
Ensuring Blade Compatibility with Your Saw
This might seem obvious, but always double-check that the blade's arbor hole size matches your saw's spindle. Also, consider the maximum RPM (revolutions per minute) rating of the blade versus your saw. Using a blade that's not rated for your saw's speed can be dangerous. Most tile saws are designed for standard blade sizes, but it's worth a quick look before you buy. Choosing the right diamond blade is key to a professional finish.
Achieving Perfect Fit and Layout
Getting your natural stone tiles to fit just right is a big part of making your project look professional. It’s not just about cutting them; it’s about planning how they’ll all come together. Think of it like putting together a puzzle, but with stone.
Planning Your Tile Layout Before Cutting
Before you even think about firing up the saw, take some time to map out your tile placement. This is where you figure out where each tile will go, especially around edges, corners, and any tricky spots like doorways or cabinets. Laying out your tiles dry, if possible, can show you potential issues before you make any cuts. This step saves a lot of headaches later on.
Accounting for Grout Lines
Don't forget about the grout! The space between your tiles matters. You need to factor in the width of your grout lines when you're measuring and cutting. If you're aiming for a specific pattern, like a subway tile or a herringbone, the grout lines become even more important for the overall look. Consistent grout spacing makes a huge difference in the final appearance.
Dry Fitting Cut Pieces
This is a really useful step, especially for more complex layouts or when you're working with custom cuts. After you make a cut, place the piece back in its intended spot without any adhesive. This lets you see exactly how it fits and if any minor adjustments are needed. It’s much easier to trim a little more off a tile now than to try and fix a gap or an awkward fit later.
Measuring and Marking for Complex Layouts
When your project has lots of angles, curves, or irregular shapes, precise measuring and marking are key. Use a good quality tape measure and a reliable marking tool, like a pencil or a china marker. For really complex areas, consider using templates made from cardboard or thin plywood. Transferring these measurements accurately to your stone tile is half the battle.
Ensuring Consistent Spacing
Whether you're using spacers or just eyeballing it, try to keep the space between your tiles as uniform as possible. This consistency makes the grout lines look clean and intentional. If you're working on a large area, it might be helpful to have a few tiles laid out and spaced correctly as a reference.
Cutting Tiles for Perimeter and Obstructions
This is where many cuts happen. You'll need to cut tiles to fit along walls, around cabinets, or to fit against fixtures. Measure carefully, remembering to account for any slight imperfections in the walls or cabinets themselves. Sometimes, a slightly angled cut or a small notch is needed to get a snug fit. Cutting natural stone tile requires a combination of techniques.
Visualizing the Final Installation
Try to picture the finished floor or wall as you're cutting and laying out your tiles. This mental image helps you make better decisions about where to place cuts, especially those that will be visible. Thinking about the overall pattern and flow can guide your cutting strategy and lead to a much more pleasing result. Remember, cutting natural stone tile requires a combination of techniques.
Working with Different Natural Stone Varieties
Natural stone is beautiful because it's, well, natural. That means no two pieces are exactly alike, and different types of stone behave differently when you cut them. Understanding these quirks is key to getting a clean cut without a lot of hassle. We're talking about everything from how hard the stone is to how its internal patterns, like veins, might affect your blade.
Cutting Marble: Softness and Veining
Marble is known for its elegant look, but it's also one of the softer natural stones. This means it cuts more easily than, say, granite. However, marble often has prominent veining. These veins can be areas of weakness. If you cut directly across a thick vein, you might find the stone chips or even cracks along that line. It's often best to try and cut with the grain or veining where possible, or at least be extra gentle when cutting across it. Always go slow and steady with marble.
Cutting Travertine: Porosity and Strength
Travertine has a distinctive, natural pitted look. This porosity means it's a bit more brittle than some other stones. When cutting, you'll want to make sure your blade is sharp and that you're not forcing the cut. The holes in travertine can sometimes catch the blade or cause small chips around the edges. Some people like to fill these holes with a matching grout or epoxy before cutting to give the stone more stability, but this isn't always necessary if you're careful.
Cutting Slate: Layering and Cleavage
Slate is a bit different because it's a sedimentary rock, meaning it's formed in layers. This gives it a natural cleavage plane, which is how it's often split into thinner pieces. When cutting slate, you need to be aware of these layers. Cutting perpendicular to the layers can sometimes cause the stone to split unevenly or flake. It's often easier to cut parallel to the layers. You might also notice that slate can be a bit dusty when cut.
Cutting Granite: Hardness and Durability
Granite is famously hard and durable, which is great for floors and countertops, but it means it's tougher to cut. You'll need a good quality diamond blade, and it will likely wear down faster than when cutting softer stones. Because it's so hard, overheating can be an issue, so keeping the blade cool with plenty of water is really important. Don't rush the cut; let the blade do the work. A sharp, appropriate blade is your best friend here.
Cutting Limestone: Porosity and Fragility
Limestone, like travertine, can be quite porous. It's generally a softer stone, making it easier to cut than granite, but it can also be more fragile. Some limestones are quite dense, while others are softer and more crumbly. Pay attention to the specific type of limestone you're working with. Like marble, it can chip along natural lines or weaker points. Gentle handling and a steady hand are key.
Adapting Techniques for Each Stone Type
So, what's the takeaway? You can't just use the same approach for every stone. For harder stones like granite, focus on blade quality and cooling. For softer, more veined stones like marble, pay attention to the grain and go slow to prevent chipping. Porous stones like travertine and limestone need careful handling to avoid breakage. Always assess the stone's characteristics before you start cutting. It's about working with the stone, not against it.
Recognizing Stone-Specific Cutting Challenges
Every stone type has its own personality. You might encounter unexpected inclusions, variations in density within a single tile, or even hairline fractures that weren't visible before cutting. The best way to handle these is to be observant. If you see a crack forming, stop. If the blade starts to bind, ease up. Learning to read the stone as you cut will save you a lot of headaches and broken tiles. For U.S. projects, understanding these nuances helps achieve a professional finish on any natural stone tile.
The Role of Water in Wet Saw Cutting
When you're cutting natural stone tile, especially with a wet saw, water plays a pretty big part. It's not just there to make things wet; it actually does a few important jobs that make the whole process work better and safer.
Why Water is Crucial for Wet Saw Operation
Think of water as the coolant and lubricant for your diamond blade. As the blade spins at high speed, it grinds away at the stone. This creates a lot of friction, and friction means heat. Without water, that heat would build up fast, potentially damaging the blade and making it less effective. The water absorbs this heat, keeping the blade cool. It also helps to wash away the stone dust and debris created during the cut. This keeps the blade from getting clogged and allows it to cut more smoothly. This lubrication and cooling action is what allows the diamond blade to do its job efficiently and last longer. It’s also a big part of why wet saws are generally safer than dry cutting methods, as it helps control the dust. You can find more about how wet saws work on our wet saws page.
Maintaining Optimal Water Levels
Keeping the right amount of water in your wet saw's reservoir is key. Too little water, and the blade won't stay cool or clean, leading to poor cuts and a shorter blade life. Too much water, and you might end up with excessive splashing, making a mess and potentially creating a safety hazard. Most saws have a water level indicator or a pump intake that needs to be submerged. Always check the water level before you start cutting and top it up as needed. It's a simple step, but it makes a big difference in performance.
Preventing Blade Overheating with Water
Overheating is the enemy of a diamond blade. When a blade gets too hot, the bond holding the diamonds can weaken, and the diamonds themselves can lose their cutting ability. Water acts as a heat sink, drawing the heat away from the blade as it cuts. This keeps the blade at a more stable temperature, allowing it to maintain its sharpness and cutting power. If you notice your blade seems to be struggling or not cutting as cleanly, check your water supply first. A consistent flow of cool water is your best defense against overheating.
Managing Water Spray and Splashback
Wet saws, by their nature, create a bit of a splash. Water sprays out from the blade as it cuts through the stone. While some spray is unavoidable, good water management can help minimize it. Make sure the blade guard is properly in place, and consider using a splash guard if your saw didn't come with one. Keeping the water level appropriate also helps; too much water can lead to more aggressive splashing. This isn't just about keeping your workspace clean; it's also about safety, reducing the amount of water you're exposed to and preventing slips.
Water Filtration and Recycling Systems
Many modern wet saws come with or can be fitted with water filtration systems. These systems help to remove the stone dust and debris from the water, allowing you to reuse it. This is good for a couple of reasons. First, it means you don't have to refill the reservoir as often, which is convenient, especially on longer projects. Second, it's more environmentally friendly, as you're not constantly draining and refilling with fresh water. The filtered water is still effective at cooling and lubricating the blade. If you're doing a lot of cutting, investing in a saw with a good filtration system or adding one can save you time and hassle. You can find great options for tile cutting tools that include these features.
The Impact of Water Quality on Cutting
While most tap water will work fine for wet saws, the quality can sometimes have a minor impact. Very hard water, for instance, might leave mineral deposits over time, which could potentially affect the pump or the blade if not cleaned regularly. For most home projects, this isn't a major concern. However, if you're working on a large commercial project or have particularly hard water, you might consider using distilled water or a water softener additive. The main thing is to have a consistent supply of something to cool and lubricate the blade.
Cleaning Up After Wet Saw Use
Once you're done cutting, cleaning up the water and slurry is important. Drain the reservoir and rinse out any accumulated stone dust and debris. This prevents the sludge from hardening and makes it easier to clean next time. It also helps maintain the pump and other parts of the saw. A good rinse down of the saw itself and the surrounding area will prevent dust from drying out and becoming airborne later. Proper cleanup ensures your saw stays in good working order for your next project.
Dry Cutting Techniques and Considerations
While a wet saw is generally preferred for cutting natural stone tile due to its cooling and dust-suppressing abilities, there are times when dry cutting becomes necessary. This might be due to limitations in water access, the specific type of stone, or the nature of the cut. Dry cutting requires a different approach and heightened awareness of safety, particularly concerning dust. It's not a method to jump into without understanding the implications.
When Dry Cutting is Necessary
Sometimes, you just can't get water to your cutting area, or maybe you're working on a project where water could cause issues. For instance, some very porous stones might absorb too much water, or you might be in a situation where water runoff is a problem. In these cases, dry cutting is your only option. It's also sometimes used for quick touch-ups or very small cuts where setting up a wet saw feels like overkill.
Choosing the Right Dry Cutting Blade
This is where things get specific. You can't just grab any old blade. For dry cutting, you'll want a diamond blade designed specifically for this purpose. These blades often have a continuous rim or a segmented rim with special cooling vents. The continuous rim is generally better for cleaner cuts on harder materials, while segmented blades can help with heat dissipation. Always check the blade's packaging for its intended use – natural stone and dry cutting. Using the wrong blade can lead to overheating, premature wear, and poor cut quality.
The Critical Importance of Dust Extraction
This is the big one. When you dry cut stone, you create a lot of fine dust. This dust isn't just messy; it's a health hazard. Inhaling silica dust can lead to serious respiratory problems over time. That's why a good dust collection system is non-negotiable. Ideally, your dry cutting tool should have a dust shroud that connects directly to a vacuum. This captures the dust right at the source before it has a chance to spread. If your tool doesn't have this feature, you'll need to be extra diligent about using a respirator and cleaning the area thoroughly.
Minimizing Heat Generation During Dry Cuts
Heat is the enemy of both your blade and your stone when dry cutting. Without water to cool things down, the friction generated can quickly overheat the blade, causing it to warp or lose its diamond segments. It can also cause the stone to scorch or crack. To combat this:
- Take frequent breaks: Let the blade and the stone cool down between cuts. Don't try to rush the process.
- Use a light touch: Don't force the blade through the material. Let the diamond do the work.
- Consider the stone's thickness: Thicker tiles will generate more heat. You might need to make multiple shallow passes rather than one deep cut.
Potential Risks of Dry Cutting Stone
Beyond the dust, dry cutting carries other risks. The lack of lubrication means the blade can bind more easily, leading to kickback. This is when the blade suddenly stops and jerks the tool back towards you. It's dangerous and can cause injury. Also, the heat can stress the stone, making it more prone to chipping or cracking, especially along natural fault lines or veins. You might find that achieving a clean edge, like those needed for precise edge profiles, is much harder with dry cutting.
Suitable Applications for Dry Cutting
Dry cutting is best suited for smaller, less demanding tasks. Think about cutting small accent pieces, making minor adjustments to tile edges, or working with thinner, less dense stones. It can also be useful for quick cuts on a job site where water isn't readily available. For larger projects or when you need very clean, precise cuts, especially on harder stones like granite, a wet saw is almost always the better choice. If you're unsure, it's always safer to err on the side of caution and use a wet saw if possible.
Post-Cut Cleaning for Dry Cut Tiles
Once you're done dry cutting, cleaning up is a big part of the process. You'll want to vacuum the cutting area thoroughly to remove all residual dust. A shop vac with a HEPA filter is ideal for this. Wipe down the cut tiles to remove any dust film. If you're planning to seal the edges later, it's important to ensure they are completely clean and dust-free first. This thorough cleaning is key to a professional finish and a safe environment. For advice on achieving clean cuts, check out these tips on cutting natural stone tile cleanly.
Precision Measurement for Accurate Cuts
Getting your measurements right is the first step to a professional-looking natural stone tile installation. It might seem obvious, but taking your time here saves a lot of headaches later on. Accurate measurements prevent costly mistakes and ensure your tiles fit perfectly.
Using Tape Measures and Rulers Effectively
Your trusty tape measure and a good quality ruler are your best friends for this job. Make sure your tape measure has clear markings and isn't bent or damaged. For longer runs, a metal ruler can add extra stability. Always measure twice, cut once – it’s a cliché for a reason. When measuring a tile for cutting, extend the tape measure right to the edge of the tile. Don't eyeball it; use the markings for precision.
Employing Digital Measuring Devices
For those who like a bit more tech, digital measuring devices can be a great option. They offer high precision and easy-to-read displays. Some even have memory functions, which can be handy if you're taking a lot of measurements. These tools can be particularly useful for complex layouts or when working with very large format tiles where slight inaccuracies can become magnified.
Transferring Measurements to the Stone
Once you have your measurements, you need to mark them clearly on the stone. A sharp pencil or a fine-tip marker works well for most stones. For darker stones, a wax pencil or a chalk line can be more visible. Always mark your cut line on the side of the tile that will be less visible after installation, usually the top surface. Remember to account for the blade kerf – the width of the cut itself. If you're cutting a 12-inch piece from a larger tile, you need to mark 12 inches plus the width of the blade's cut from your starting point.
Accounting for Blade Kerf in Measurements
This is a detail that often trips people up. Every time you make a cut with a wet saw, the diamond blade removes a small amount of material. This is called the kerf. If you're cutting a tile to fit a specific space, you need to factor this in. For example, if you need a piece that measures exactly 10 inches, and your blade's kerf is 1/8 inch, you'll need to mark your cut line 10 inches plus 1/8 inch from your reference edge. It’s a small detail, but it makes a big difference in achieving a perfect fit.
Double-Checking Measurements Before Cutting
Seriously, do it. Before you even power up the saw, take a moment to look at your marks and compare them to your plan or the space you're fitting the tile into. Does it look right? Does it match the dimensions you intended? This simple step can save you from ruining a perfectly good tile. For critical cuts, like those around doorways or fixtures, it's worth measuring the opening and then measuring your tile multiple times.
Marking Techniques for Visibility
How you mark your cut line matters. A thin, dark line is usually best. If you're using a pencil, make sure it's sharp. For very smooth stones, a light scratch with a carbide scribe can create a visible line without damaging the surface. Some professionals use painter's tape along the cut line to help prevent chipping and provide a clearer surface to mark on. This is especially helpful when cutting against the grain of certain stones.
Ensuring Consistency Across Multiple Tiles
If you're cutting multiple tiles to the same size, consistency is key. Use a jig or a stop block on your saw to ensure each cut is identical. Mark your first tile carefully, make the cut, and then use that cut tile as a template for marking the subsequent ones. This method helps maintain uniformity across your entire project, which is vital for a professional finish. When you're working on larger projects across the U.S., this consistency is what makes the final installation look so polished. You can find great resources for planning your tile layout before cutting to help with this.
Post-Cut Inspection and Quality Control
Examining Cut Edges for Imperfections
Once you've finished cutting, take a good look at the edges. You're looking for any little chips or rough spots that might have happened during the cut. Sometimes, even with the best tools, a small chip can occur, especially on more delicate stones. A quick visual check can save you headaches later on.
Checking for Cracks or Chips
This is super important. Run your fingers gently along the cut edge. Do you feel any tiny cracks or larger chips? These can weaken the tile and make it prone to breaking during installation or even later. If you find any, you might need to re-cut the piece or use a specialized filler if it's minor. It's better to catch these issues now than when the tile is already in place.
Verifying Dimensions and Angles
Did you cut exactly what you intended? Grab your tape measure and check the length and width of the cut tile. If it was an angle cut, use a protractor or angle finder to make sure it's precise. Even a millimeter off can throw off your whole layout. This is where having good measuring tools really pays off.
Comparing Cut Tiles to Layout Plans
Lay out your cut pieces, even if it's just a dry fit on the floor. See how they look together. Do they match the plan you had in mind? Are the angles fitting together as they should? This step helps you catch any layout mistakes before you start setting the tile with adhesive.
Identifying Any Surface Damage
Sometimes, the cutting process can cause minor scratches or scuffs on the tile's surface, especially if the saw's water system wasn't quite right or if debris got dragged across it. Give the whole tile a good look, not just the edges. You want that surface to be as pristine as it was before you started cutting.
Ensuring Consistency Between Cut Pieces
If you're cutting multiple tiles for the same area, make sure they are as identical as possible. This is especially true for patterns or if you're trying to achieve a specific look. Consistency is key to a professional-looking finish. You don't want one tile looking noticeably different from its neighbors.
Acceptance Criteria for Cut Stone Tiles
What makes a cut tile acceptable for installation? Generally, it means:
- Clean, sharp edges with minimal chipping.
- Accurate dimensions and angles as per the project plan.
- No visible cracks or structural damage.
- Undamaged surface finish.
- Consistency with other cut tiles for the same area.
If a tile doesn't meet these standards, it's usually best to set it aside. You might be able to use it in a less visible spot, or it might need to be replaced. Remember, we only offer handpicked A+ top-quality natural stone products, so you're starting with the best material, and maintaining that quality through cutting is vital.
This final inspection isn't just about finding flaws; it's about confirming the quality of your work and the material. It's the last chance to catch issues before they become permanent parts of your project. Taking a few extra minutes here can prevent much bigger problems down the line.
Optimizing Your Cutting Workflow
Cutting natural stone tile can feel like a big job, especially when you have a lot of pieces to get through. If you want to make the process smoother and faster, thinking about how you organize your cuts can really help. It’s not just about making the cuts themselves, but how you set things up beforehand and manage the flow of work.
Batching Similar Cuts Together
One of the smartest ways to speed things up is to group your cuts. Instead of cutting one tile, then another, then going back to cut a few more of the first type, try to do all the same cuts at once. This means you won't have to keep stopping to adjust your saw or change your setup. If you need to make ten straight cuts on one size of tile, do all ten before you move on to a different size or a different type of cut. This saves a lot of time fiddling with equipment.
Organizing Tiles by Cutting Requirement
Before you even start cutting, take some time to sort your tiles. Lay them out and figure out which ones need straight cuts, which need angles, and which might need special shapes. You can even group them by size or by the room they're going into. Having them organized means you can grab the right tile for the next cut without searching through a big pile. This makes the whole process feel less chaotic.
Minimizing Tool Changes
Every time you switch tools or blades, it eats up time. Try to plan your cuts so that you use the same blade and setup for as long as possible. If you're doing a lot of straight cuts, stick with that setup. If you need to switch to an angle cut, do all your angle cuts before going back to a different blade or setup. This focus on minimizing transitions is key to efficiency.
Efficiently Managing Water and Debris
When you're using a wet saw, water management is a big part of the workflow. Make sure you have a good water supply ready and a plan for where the water and slurry will go. Keeping the water reservoir topped up and cleaning out the debris regularly will prevent your saw from overheating and keep the cutting smooth. A clean workspace is a faster workspace.
Streamlining the Marking and Cutting Process
Accurate marking is super important. Before you cut, double-check your measurements. Use a good marking tool that shows up well on the stone. Once marked, secure the tile properly. A wobbly tile leads to bad cuts and wasted time. Think about how you can make marking and securing the tile a quick, repeatable step. For projects across the U.S., getting these steps right the first time saves headaches later.
Setting Up for Repeatable Cuts
If you have multiple tiles that need the exact same cut, like for a border or a specific pattern, set up your saw to make those cuts repeatable. Use a fence or a jig to guide the tile. This way, you don't have to measure and mark each tile individually. You just set it against the guide and cut. This is a huge time-saver for larger projects.
Maximizing Productivity Without Sacrificing Quality
Ultimately, optimizing your workflow is about working smarter, not just faster. It’s about setting up your space and your process so that each step flows logically into the next. By batching cuts, organizing your materials, and minimizing interruptions, you can get through your stone cutting tasks more efficiently. Remember, even with the best workflow, taking your time to ensure quality is always worth it. If you're working with delicate materials like marble, understanding the specific steps for cutting marble tile can help prevent mistakes.
Understanding Stone Behavior During Cutting
Natural stone isn't like tile you might be used to; it's a product of nature, and that means it has its own quirks. Understanding how these stones act when you cut them is half the battle. It's not just about the tool, but about respecting the material itself.
How Veining Affects Cutting Direction
Veins in natural stone are essentially lines of different minerals or fissures. When you're cutting, these veins can act like weak points. Cutting across a strong vein might be fine, but cutting along a weak, parallel vein can cause the stone to split or chip more easily. It's like trying to cut through a piece of wood with knots; you have to pay attention to the grain. For projects across the U.S., knowing this helps prevent costly mistakes.
The Impact of Natural Inclusions
Sometimes, you'll find little pockets of other minerals, fossils, or even air bubbles within your stone. These inclusions can behave unpredictably under the pressure of a diamond blade. They might cause the blade to deflect slightly, or worse, create a fracture point radiating outwards. Always inspect your tile for any obvious inclusions before you start cutting.
Predicting Breakage Points
Think of your stone tile like a natural structure. Areas with significant veining, large inclusions, or thin sections are more prone to breaking. If you're cutting a large format tile, be extra careful around these spots. Sometimes, a partial cut might be better than trying to snap a piece off, especially with materials like travertine. For intricate cuts, consider using angle grinders for detail work if the stone seems particularly fragile.
Recognizing Stress Fractures
Sometimes, a stone might already have tiny, almost invisible cracks from its formation or transport. The vibration and pressure from cutting can make these stress fractures open up. This is why a steady hand and a good quality diamond blade are so important. You don't want to introduce new problems.
Adapting to Variations Within a Single Tile
No two pieces of natural stone are exactly alike. Even within a single tile, you might find areas of varying density or hardness due to the natural formation process. This means you might need to adjust your cutting speed or pressure slightly as you move across the tile. It’s a bit of an art form, really.
The Science Behind Stone Fracture
At its core, cutting stone involves overcoming its tensile strength. When the force applied by the blade exceeds the stone's ability to hold itself together, it fractures. Understanding that stone breaks along its weakest points, often influenced by its internal structure (like veins and inclusions), helps you anticipate where a break might occur. This knowledge is key for any serious stone project.
Always remember that natural stone is a unique material. Treat each piece with respect, observe its patterns, and adjust your cutting approach accordingly. Patience and careful observation will save you time and material in the long run.
When cutting stone, it's important to know how it will act. Different stones break and chip in unique ways. Understanding these behaviors helps you cut them cleanly and safely. Want to learn more about how different stones react when you cut them? Visit our website for expert tips and guides.
Your Stone Project, Perfected
So, you've learned the ins and outs of cutting natural stone tile. It might seem like a lot at first, but with the right tools and a bit of practice, you can get those clean, precise cuts needed for a really professional look. Remember, taking your time is key, and safety always comes first. Whether you're working with marble, travertine, or another beautiful stone, getting those edges just right makes a huge difference in the final result. If you're looking for top-quality stone for your project, check out American Stone Center. They're direct importers of handpicked A+ stone, meaning you get premium quality without the middleman markup. They ship fast, too, so you can get started on your dream space sooner rather than later. Happy tiling!
Frequently Asked Questions
What kind of natural stone tiles are best for cutting?
The best stone for cutting often depends on its hardness and how it's layered. Softer stones like marble might chip more easily, while harder stones like granite need special blades. Always check the stone's toughness before you start cutting.
What tools do I absolutely need to cut stone tiles?
You'll need a wet saw with a good diamond blade for most jobs. Safety gear like goggles and gloves are super important. You'll also want a way to measure and mark your lines, and maybe some clamps to hold the tile steady.
How do I make sure my cuts are straight?
First, mark your line really well. Then, make sure the tile is held firmly on the saw's table. Go slow and steady with the saw, letting the blade do the work. Don't force it, or you might get a wobbly cut or chip the edge.
Can I cut stone tiles at an angle?
Yes, you can! Most wet saws let you tilt the blade or the table to make angle cuts, often called miter cuts. You just need to set the angle correctly and be extra careful when clamping and cutting.
What's the best way to cut curves or shapes in stone?
For tricky shapes, you might need a different tool like an angle grinder with a diamond blade, or even a special jigsaw with a stone-cutting blade. Sometimes, using a template or jig helps guide the blade for more complex designs.
What should I do if my stone tile chips or cracks while cutting?
Chipping often happens if you cut too fast or the blade is dull. Try slowing down or using a different blade. If it cracks, it might be due to a weak spot in the stone or too much pressure. Sometimes, you can hide small chips with grout, or you might need a new tile.
How important is water when using a wet saw?
Water is super important! It cools down the diamond blade, which stops it from getting too hot and getting damaged. It also keeps the stone from overheating and reduces the amount of dust flying around, making it safer to breathe.
Is dry cutting stone a good idea?
Dry cutting is sometimes needed, but it creates a lot of fine dust, which can be harmful to breathe. If you must dry cut, use a saw with a good dust collection system and wear a respirator mask. It's usually better to use a wet saw if possible.
How do I get a clean, smooth edge after cutting?
After cutting, you can smooth the edges with sandpaper or special diamond hand pads. This makes the edge look finished and professional. You might also want to seal the cut edge to protect it from stains.
What safety gear should I wear when cutting stone?
Always wear safety glasses to protect your eyes from flying debris. Gloves are a good idea to protect your hands. If you're dry cutting or there's a lot of dust, a dust mask or respirator is a must. Hearing protection is also recommended for noisy saws.
How do I measure accurately for my cuts?
Use a reliable tape measure or ruler. Mark your cut line clearly with a pencil or marker. Remember to account for the width of the blade's cut (called the kerf) so your measurements are exact. Double-checking your marks before you cut is always a smart move.
What's the difference between cutting marble and granite?
Marble is generally softer and has more prominent veins, which can affect how it cuts – you need to be gentler. Granite is much harder and denser, requiring a more aggressive diamond blade and a sturdy saw. Each stone type behaves differently.