


So, you're thinking about using a tile french pattern layout for your next project? It's a classic look, for sure. It's got these different tile sizes mixed together, making it look kind of old-school but still really good. People have been using this kind of pattern for ages, and it's still popular today because it just looks nice. It can make a room feel more interesting without being too much. We're going to go over how to pick your tiles, get ready to lay them, and actually put them down so they look great. It's not as hard as it sounds, really.
Key Takeaways
- The tile french pattern layout uses a mix of tile shapes and sizes for a classic, appealing look.
- Natural stones like marble and travertine work well for this pattern, adding elegance and warmth.
- Proper preparation, including a clean substrate and dry laying, is important before you start tiling.
- Laying the pattern involves careful placement of different tile sizes to create a balanced arrangement.
- Advanced techniques can help adapt the pattern to different room shapes and add unique touches.
- Grouting and sealing are necessary steps to protect the tiles and finish the look.
- Regular cleaning and maintenance will keep your tile french pattern layout looking its best.
- Troubleshooting common issues like uneven tiles or grout inconsistencies can save your project.
Understanding the Allure of the Tile French Pattern Layout
The Timeless Appeal of Geometric Design
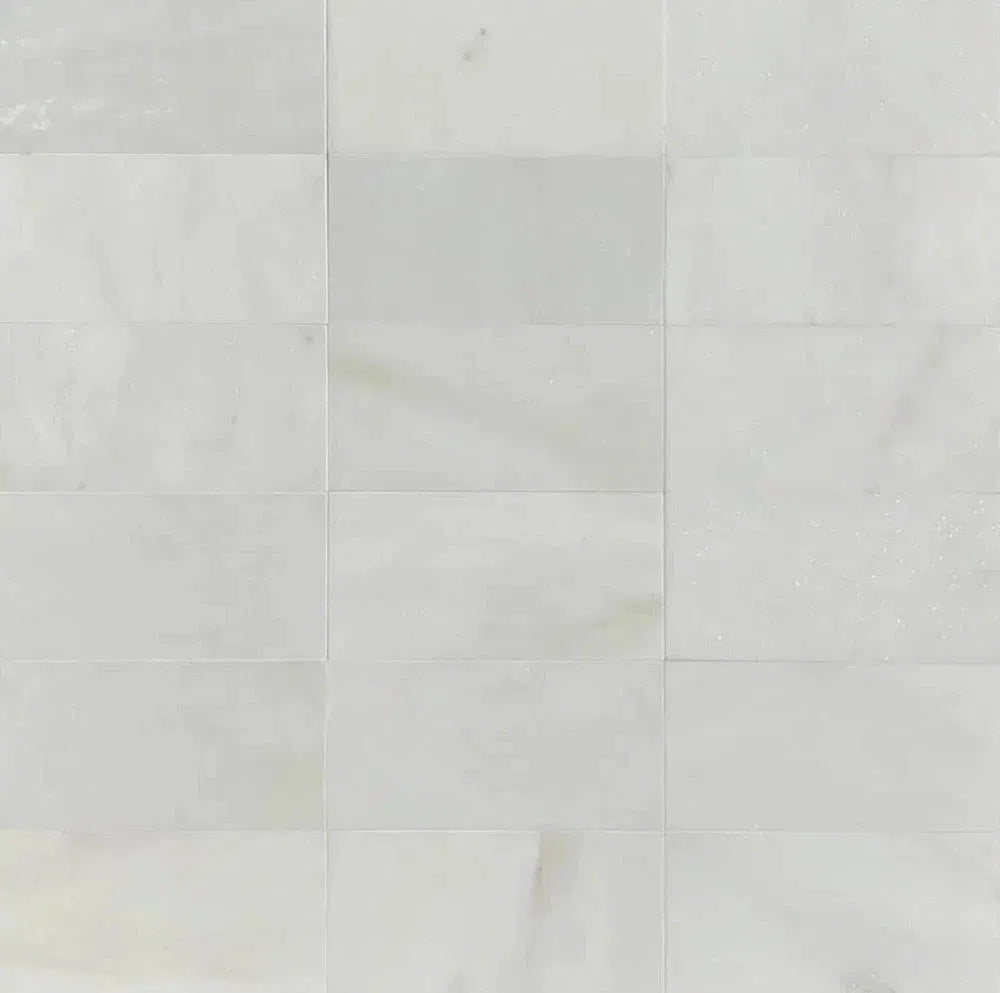
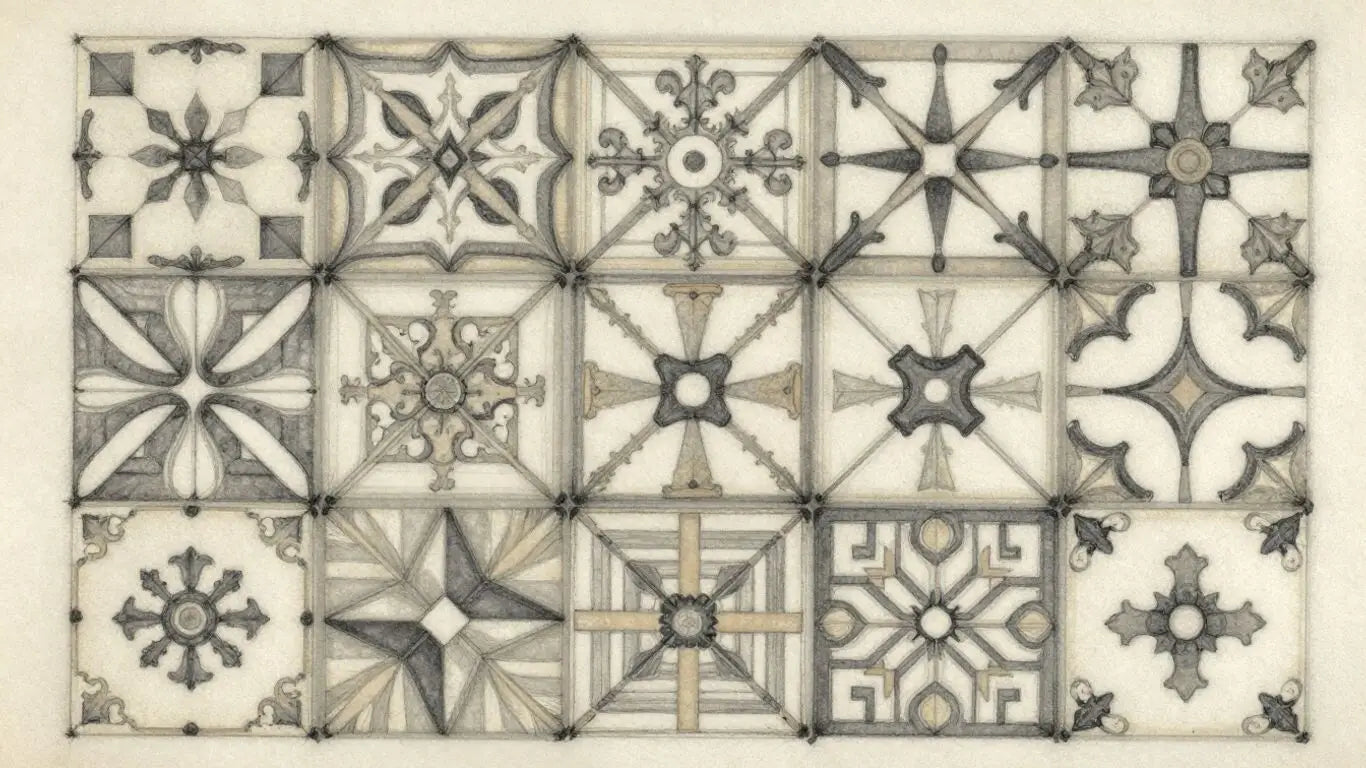
There's something about a well-executed geometric pattern that just draws the eye, isn't there? It's not just about looking pretty; it's about order and balance. The French pattern, also known as Versailles or randombleau, is a prime example of this. It uses a mix of different sized rectangular and square tiles to create a complex, yet harmonious, visual effect. This intricate arrangement has a way of making any space feel more sophisticated and thoughtfully designed. It’s a pattern that doesn't shout for attention but rather whispers elegance, making it a favorite for those who appreciate subtle beauty.
Why the French Pattern Captivates
What makes this particular layout so captivating? It’s likely the dynamic interplay of shapes and sizes. Unlike simpler patterns, the French pattern offers a sense of movement and depth. It breaks away from the monotony of uniform tiles, introducing a natural, almost organic flow across the floor or wall. This visual richness is what draws many designers and homeowners to it. It feels both classic and surprisingly modern, fitting into a wide range of interior styles. It’s a choice that speaks to a discerning taste for detail and a desire for a space that feels truly unique.
A Symphony of Shapes and Sizes
The magic of the French pattern lies in its specific composition. Typically, it involves four different sizes of rectangular tiles and one square tile, all arranged in a repeating sequence. This deliberate mix prevents the layout from feeling too rigid or predictable. The larger pieces anchor the design, while the smaller ones fill in the gaps, creating a cohesive whole. It’s like a puzzle, but one that results in a beautiful mosaic. This thoughtful combination of dimensions is key to its enduring appeal.
Historical Roots and Modern Relevance
This pattern isn't new; its roots go back centuries, often seen in grand European estates and historic buildings. It carries with it a sense of history and tradition. Yet, somehow, it feels perfectly at home in contemporary settings. Designers are finding new ways to use it, pairing it with modern furniture and minimalist decor to create striking contrasts. The French pattern proves that classic design principles can transcend time. It’s a testament to the fact that well-crafted aesthetics never truly go out of style. You can find similar historical charm in French reclaimed terra cotta tiles.
The Artistry Behind the Arrangement
Laying a French pattern isn't just about placing tiles; it's an art form. It requires careful planning and a good eye for balance. The way the different tile sizes are combined can significantly impact the overall look. A skilled installer can manipulate the pattern to emphasize certain areas or create a specific mood. It’s this level of detail and intentionality that separates a good installation from a great one. The result is a floor that feels less like a surface and more like a piece of art.
Elevating Spaces with Classic Charm
When you choose a French pattern, you're not just tiling a floor; you're adding a layer of timeless elegance. It has a way of making even the most ordinary room feel special. Think of entryways that make a grand first impression, or bathrooms that feel like a private spa. The pattern adds a sense of luxury and permanence. It’s a design choice that adds character and value to your home, creating a welcoming and beautiful environment.
Beyond Trends: A Lasting Aesthetic
Trends come and go, but the French pattern has stood the test of time. Its appeal isn't based on fleeting fads but on fundamental design principles. The balance of shapes, the natural flow, and the inherent sophistication make it a choice that remains stylish year after year. It’s an investment in a look that you won’t tire of. For homeowners and designers looking for a design that offers both beauty and longevity, the French pattern is a solid, reliable choice that consistently delivers a high-end finish.
Selecting the Perfect Materials for Your Tile French Pattern Layout
Choosing the right materials is where the magic of a French pattern truly begins. It’s not just about picking pretty tiles; it’s about selecting stones that will stand the test of time and look good doing it. We’re talking about natural stone here, the kind that brings a unique character to any room.
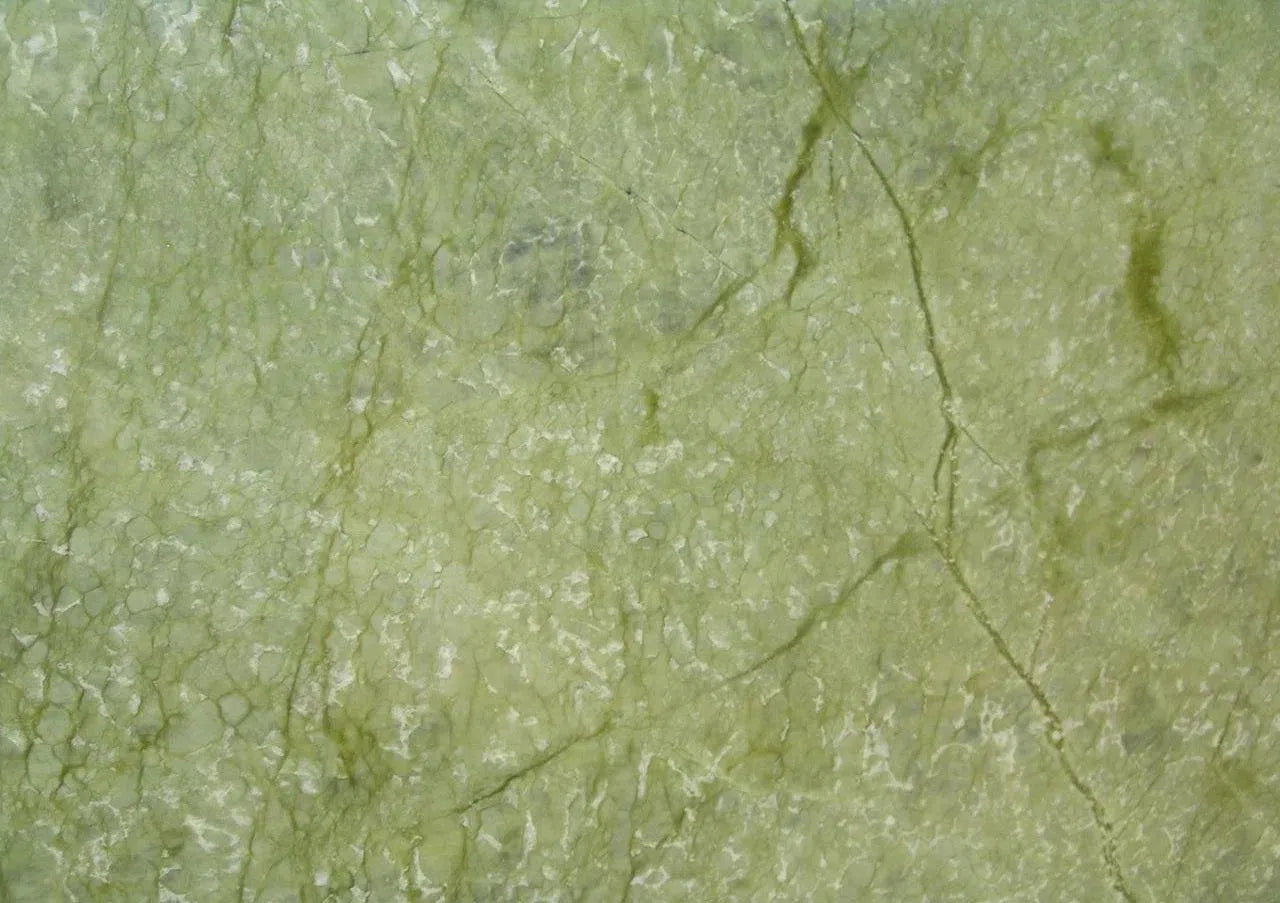
The Beauty of Natural Stone
Natural stone offers a depth and variation you just can't get with manufactured materials. Each piece has its own story, its own subtle shifts in color and veining. This makes every French pattern layout a one-of-a-kind creation. Think about the earthy tones of travertine or the classic elegance of marble – these stones bring a sense of permanence and luxury.
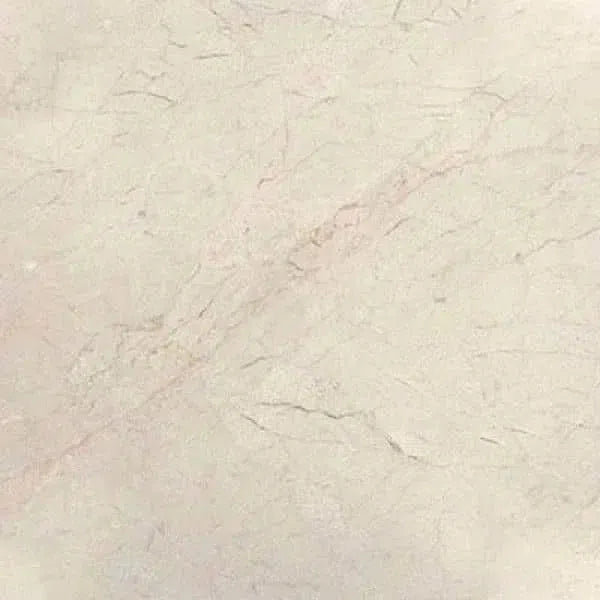
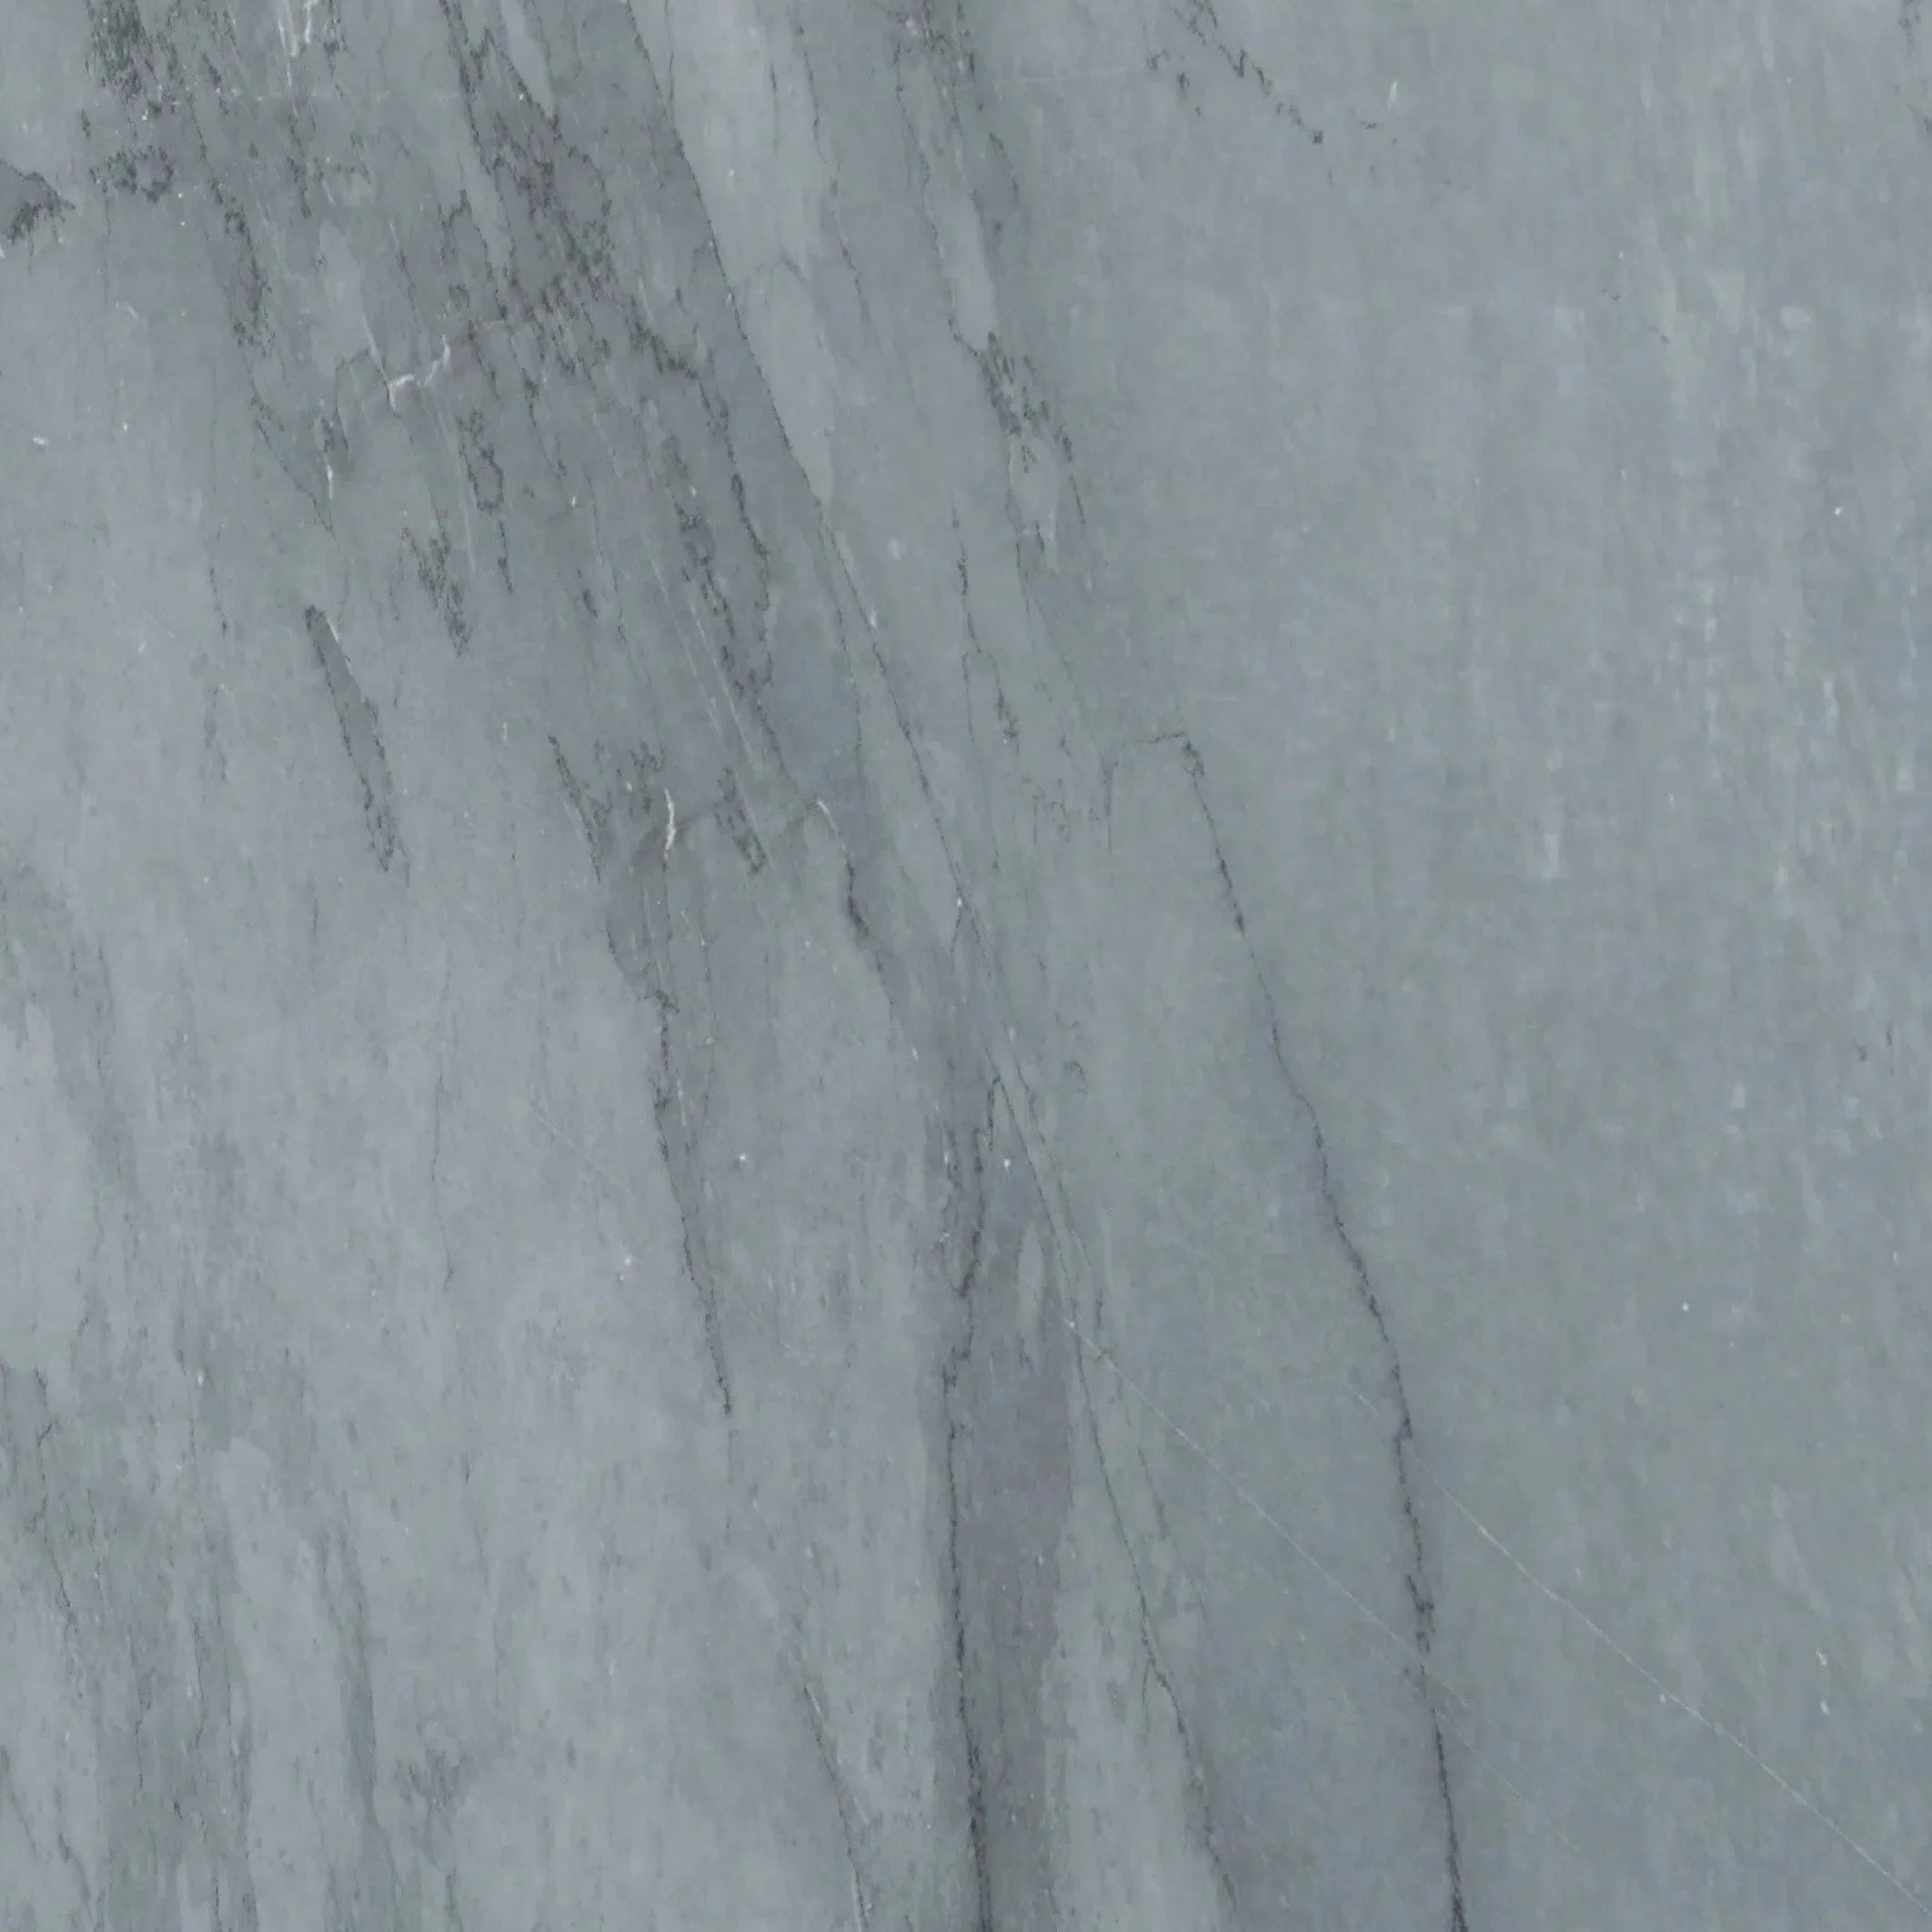
Marble: Elegance Personified
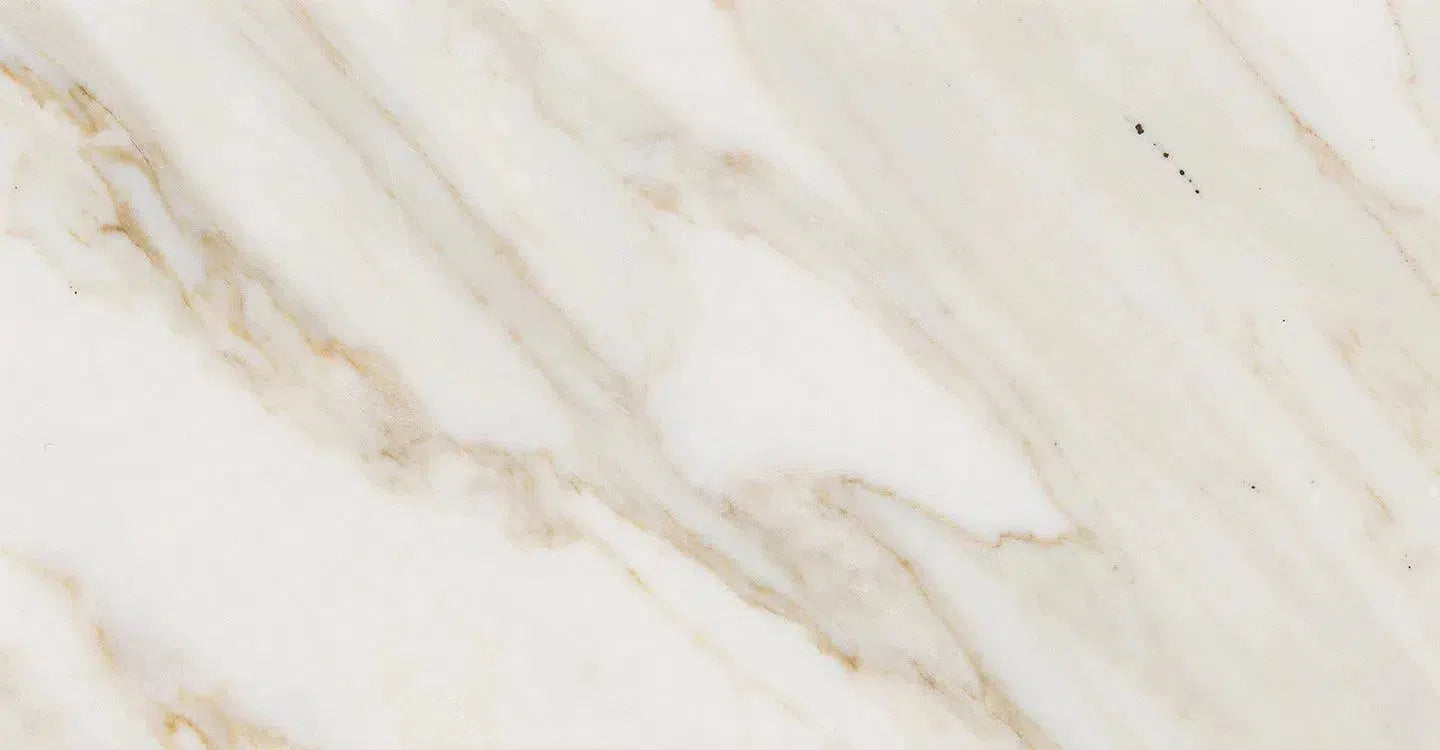
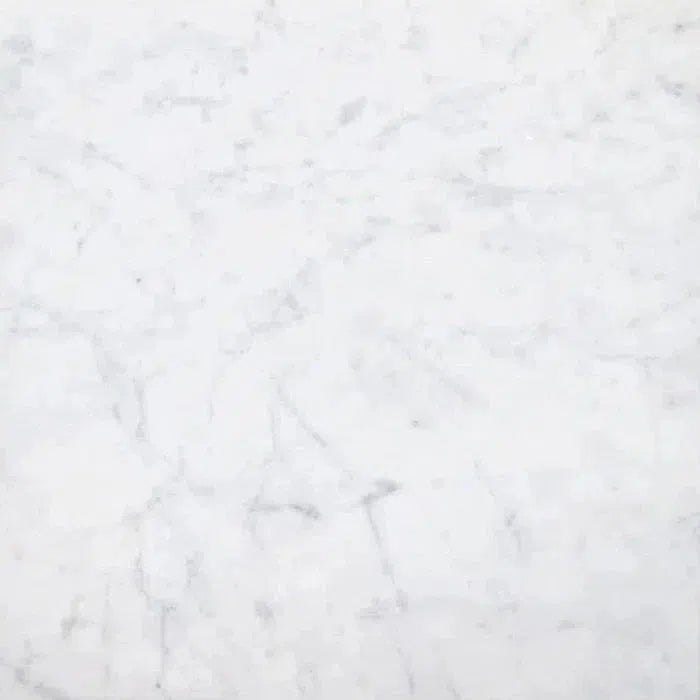
Marble is often the go-to for a high-end look. Its smooth surface and distinctive veining can make a space feel instantly more sophisticated. Whether you choose a classic white Carrara with subtle grey lines or a bolder Calacatta with dramatic veining, marble brings a timeless appeal. It’s a material that whispers luxury.
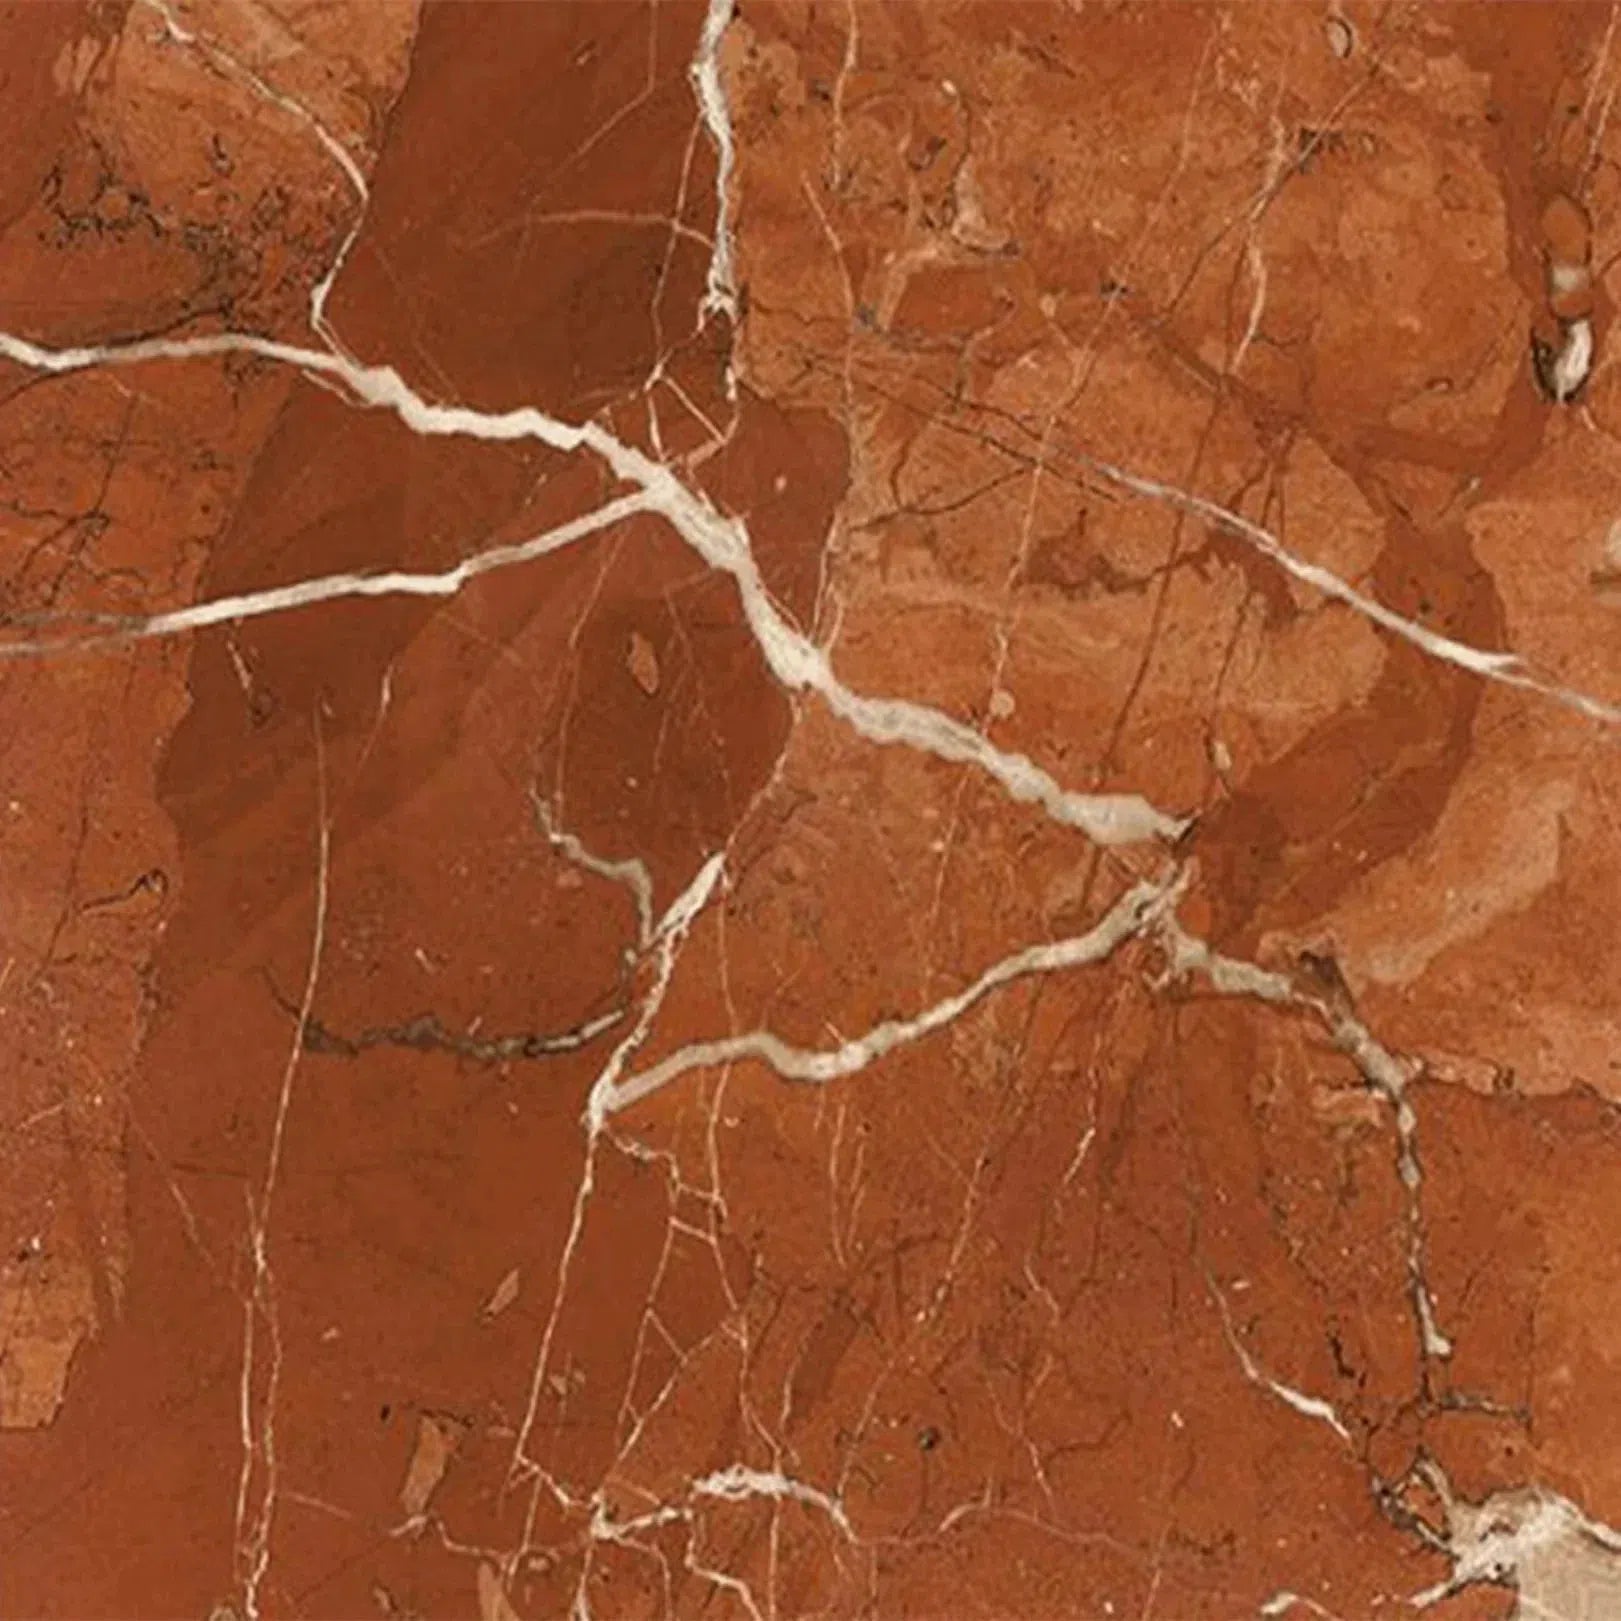
Travertine: Warmth and Texture
Travertine offers a different kind of beauty. It has a more rustic, warm feel, often with natural pits and voids that add to its character. This texture can be particularly appealing in areas where you want a cozy, inviting atmosphere. It’s also quite durable, making it a practical choice for busy homes.
Considering Durability and Application
When you're picking your stone, think about where it's going. A high-traffic entryway might need something tougher than a guest bathroom. Marble can be a bit more delicate, prone to etching from acids, while travertine is generally quite resilient. We only offer handpicked A+ top-quality natural stone products, so you know you're getting the best for your project, whether it's for a U.S. home or a commercial space nationwide.
Color Palettes to Complement Your Space
The color of your stone will set the mood. Lighter marbles can make a room feel larger and brighter, perfect for smaller spaces or areas with less natural light. Darker stones, like a deep-hued travertine or a dramatic marble, can add a sense of drama and intimacy. Consider the existing colors in your room – the walls, furniture, and decor – to find a stone that harmonizes beautifully.
Texture and Finish Considerations
Beyond color, the finish of the stone matters. A polished finish will reflect light and give a very sleek, formal look. A honed finish is more matte, offering a softer appearance and better grip. Tumbled finishes give a worn, antique look. Each finish changes how the stone feels and looks, so think about the overall style you're aiming for.
Sourcing Premium Quality Tiles
As a direct importer, we source stone directly from quarries worldwide. This means we can guarantee unmatched quality and authenticity. We don’t sell commercial grade – only premium, handpicked A+ top-quality stone. This direct advantage allows us to offer competitive pricing without compromising on the luxury natural stone you can trust for your projects across the U.S.
Essential Tools and Preparation for a Flawless Tile French Pattern Layout
Getting ready for your French pattern tile project is almost as important as laying the tiles themselves. A little bit of planning and having the right stuff on hand makes a huge difference. It's not just about grabbing some tiles and sticking them down; there's a bit more to it if you want it to look good and last.
Gathering Your Laying Toolkit
Before you even think about mixing thin-set, make sure you have your tools ready. It’s like a chef getting their knives sharpened before cooking. Having everything within reach means you won’t be stopping mid-job to find something.
- Tile saw: Wet saws are best for clean cuts, especially with natural stone. Make sure you have the right blade for your tile type.
- Notched trowels: Different sizes are needed for different tile backings and adhesive types. Check the adhesive manufacturer's recommendation.
- Level: A good spirit level is key to spotting any high or low spots.
- Spacers: While the French pattern is irregular, you still need consistent spacing between tiles for grout lines.
- Rubber mallet: For gently tapping tiles into place and setting them level.
- Measuring tape and pencil: For marking cuts and layout lines.
- Buckets: For water, mixing adhesive, and cleaning.
- Utility knife: Handy for trimming things or cleaning up edges.
Ensuring a Pristine Substrate
This is the foundation of your whole project. If the surface you're tiling on isn't right, nothing else will be either. Think of it like building a house – a shaky foundation means trouble later.
- Cleanliness: The subfloor needs to be free of dust, grease, paint, or anything else that could stop the adhesive from sticking properly.
- Flatness: Any bumps or dips will show through the tiles, especially with larger formats. You might need to use a self-leveling compound if it's really bad.
- Stability: The floor shouldn't flex or move. If it feels soft or bouncy, you'll need to reinforce it before tiling.
The Importance of Dry Laying
This step is often skipped, but it's a game-changer for the French pattern. Dry laying means placing your tiles on the floor without any adhesive, just to see how they fit and look. It lets you:
- Visualize the final pattern and flow.
- Figure out where your cuts will be, especially around edges and obstacles.
- Adjust the placement of different tile sizes to get the best distribution.
- Identify any tiles that might have manufacturing defects before they're permanently installed.
This pre-installation layout is your chance to catch potential problems and make sure the pattern repeats nicely across the entire area. It saves a lot of headaches down the line.
Planning Your Layout Strategy
With the French pattern, there isn't one single way to start. You need a plan. Most people start from the center of the room or a prominent feature wall and work outwards. This helps keep the pattern balanced. Think about:
- Starting point: Where will the pattern begin? The center of the room is common, but a focal point like a fireplace might be better.
- Direction: Which way should the main lines of the pattern run? Consider the room's shape and traffic flow.
- Cut tiles: Try to keep cut tiles to the edges of the room, not in the middle where they'll be most noticeable.
Calculating Material Needs Accurately
It’s better to have a little extra than to run short. For a French pattern, you’ll need a specific mix of tile sizes. Always add about 10-15% extra to account for cuts, breakage, and future repairs. This is especially true for natural stone, as dye lots can vary.
Preparing Your Adhesive and Grout
Follow the manufacturer's instructions precisely. Mix only what you can use within the pot life – the time before the adhesive starts to set. For grout, mix it to a smooth, peanut-butter-like consistency. Too wet and it will be messy; too dry and it won't fill the joints properly.
Safety First: Protective Gear Essentials
Don't skip this! Tiling can be dusty, and you'll be working with sharp tools.
- Safety glasses: Protect your eyes from dust and flying debris.
- Gloves: Keep your hands from getting cut or irritated by adhesives and grout.
- Knee pads: Your knees will thank you after a long day on the floor.
- Dust mask: Especially important when cutting tiles.
Mastering the Tile French Pattern Layout: Step-by-Step Execution
Getting the French pattern right takes a bit of focus, but it's totally doable. It’s all about placing those different tile shapes in the correct sequence. Think of it like putting together a puzzle, but one that ends up looking fantastic on your floor or wall. We'll walk you through how to start and keep things looking good.
Initiating the Pattern with Precision
Starting is key. You want to set a clear line to follow. Most people begin in a corner or along a main wall. This gives you a solid reference point. Make sure your starting line is perfectly straight; any wobble here will show up later. It’s a good idea to use a chalk line or a laser level for this. This initial step sets the stage for the entire layout, so don't rush it. Getting this right makes the rest of the process much smoother.
Placing the Larger Tiles Strategically
Once you have your starting point, you'll begin with the larger rectangular tiles. These often form the main structure of the pattern. Place them along your guide line, leaving the correct space for grout. It’s important to keep them parallel to your starting line. You'll want to check that they are level as you go. This is where you start to see the pattern take shape. Think about how these larger pieces will influence the placement of the smaller ones that follow.
Integrating the Smaller Square Tiles
Next come the square tiles. These fit in between the larger rectangular pieces. You'll typically place one square tile centered between two larger tiles. Again, pay close attention to the grout spacing. Consistency here is what makes the pattern look intentional and professional. It’s these smaller pieces that really fill out the design and give it that characteristic French pattern look. You can see how different floor tile layout patterns can change a room's feel.
Fitting the Rectangular Pieces Seamlessly
After the squares, you'll add more of the smaller rectangular tiles. These usually go at the ends of the rows, fitting snugly against the larger tiles. The goal is to create a repeating rhythm. Each section should mirror the one before it. This is where you really start to see the beauty of the French pattern emerge. It’s a dance of shapes, and these pieces are a vital part of that choreography.
Achieving Consistent Grout Lines
This is super important for the final look. Use tile spacers to keep the gaps between all tiles uniform. Whether it's between large rectangles, squares, or smaller rectangles, the space should be the same. This uniformity makes the pattern look clean and polished. Uneven grout lines can make even the most beautiful tiles look messy. It’s worth taking the extra time to get this right. You can find great advice on tile installation that covers this.
Navigating Edges and Corners
As you work your way out from the center or along walls, you'll need to cut tiles to fit. Measure carefully before cutting. For edges, you might end up with partial tiles. Try to make these cuts look balanced if possible. In corners, you'll need to cut tiles to fit snugly. This often involves making angled cuts. Take your time here; precise cuts make a big difference in the finished appearance.
The Art of Cutting for Perfect Fits
Cutting tiles for a French pattern can be tricky because you have different sizes and shapes. You'll need a good tile saw or a wet saw for clean cuts. For straight cuts, just measure and cut. For corners or irregular shapes, you might need to make multiple cuts or use a template. Always measure twice and cut once. Accurate cuts are the secret to a professional-looking finish. This is where having the right tools really pays off.
Advanced Techniques for the Tile French Pattern Layout
Working with Irregular Shapes
Sometimes, the French pattern needs a little extra thought when you run into oddly shaped tiles or areas. It's not always about perfect rectangles and squares. You might find yourself needing to cut pieces to fit around curves or into tight, irregular corners. This is where patience and a good eye come in. Don't be afraid to make custom cuts to get a clean fit. It might take a bit longer, but the result is worth it. Think of it like a puzzle; you're just making the pieces fit just right.
Creating Visual Flow and Movement
The way you lay out the French pattern can actually guide the eye through a room. By strategically placing the different tile sizes and shapes, you can make a space feel larger or direct attention to a specific feature. For example, running the pattern parallel to a long wall can make that wall seem even longer. It’s a subtle trick, but it makes a big difference in how a room feels. Think about where you want people to look and how you want them to move within the space.
Incorporating Accent Pieces
While the classic French pattern is beautiful on its own, adding accent tiles can really make it pop. This could be a different color, a contrasting material, or even a unique mosaic piece placed strategically. It breaks up the repetition and adds a personal touch. You could use a few accent tiles in a corner or along an edge to draw attention. Just be careful not to overdo it; a little accent goes a long way.
Adapting the Pattern to Room Dimensions
Not every room is a perfect rectangle. When you have an L-shaped room or a space with lots of nooks and crannies, you'll need to adjust the pattern. Sometimes this means starting the pattern in the center of the room and working outwards, or adapting the sequence of tiles to fit the available space. It’s about making the pattern work for the room, not forcing the room to fit the pattern. You might need to slightly alter the spacing or the number of tiles in certain sections.
Maintaining Symmetry and Balance
Even with the inherent variation in the French pattern, keeping a sense of symmetry and balance is key. This means ensuring that the distribution of different tile sizes feels even across the floor. You don't want one area to be overloaded with small tiles while another is dominated by large ones. Step back often to check the overall look. It helps to have a plan for how you'll distribute the different shapes as you go.
The Role of Scale in Pattern Design
Consider the size of your room when deciding on the scale of the French pattern. A very large pattern with big tiles might overwhelm a small bathroom, while a tiny pattern could get lost in a large living area. The French pattern itself has a natural scale due to the mix of sizes, but you can influence it further by the actual dimensions of the tiles you choose. Think about how the pattern will look from different viewpoints within the room.
Achieving a Professional, High-End Finish
Getting that high-end look with a French pattern comes down to the details. This includes precise cuts, consistent grout lines, and careful attention to the edges. A perfectly executed French pattern looks intentional and sophisticated. It’s the kind of detail that designers and architects notice. Using quality materials and taking your time with each step is what separates a good job from a great one. It’s all about that final polish.
Grouting and Sealing Your Tile French Pattern Layout
After all that careful tile placement, the grout and sealing steps are where your French pattern truly comes to life and gets protected. It’s not just about filling the gaps; it’s about making the whole floor look finished and keeping it looking good for years. Let's get into it.
Choosing the Right Grout Color
The color of your grout can really change the look of your French pattern. Think about what you want to highlight. A grout color that closely matches your tiles will make the pattern look more blended and subtle. On the other hand, a contrasting grout color will make each tile shape and the overall pattern pop. For natural stone like marble or travertine, a neutral grout color like beige, gray, or off-white often works best to let the stone's natural beauty shine. Consider the overall color scheme of your room when making this choice.
The Grouting Process Explained
Getting the grout in properly is key. First, make sure your tiles are clean and any excess adhesive has been scraped away. You'll want to mix your grout according to the manufacturer's instructions – it should have a consistency like peanut butter. Use a grout float to spread the grout over the tiles, pressing it firmly into the joints. Work in small sections so the grout doesn't dry out too quickly. Go diagonally across the tiles to help fill the gaps without pulling grout out.
Cleaning Excess Grout Effectively
This is where patience pays off. Once you've filled the joints in a section, wait about 15-30 minutes for the grout to set up a bit. Then, using a damp (not wet!) grout sponge, gently wipe away the excess grout from the tile surfaces. Rinse your sponge frequently in a clean bucket of water. You'll likely need to do a few passes, changing your water often, to get all the grout haze off. The goal is to clean the tile faces without digging grout out of the joints.
Allowing Adequate Curing Time
Don't rush this part. Grout needs time to harden properly. Most grouts will be walkable within 24-48 hours, but they can take up to a week or even longer to fully cure. During this time, try to keep foot traffic to a minimum and avoid getting the floor excessively wet. Check the grout manufacturer's recommendations for specific curing times.
The Crucial Step of Sealing
Sealing your grout and natural stone tiles is non-negotiable, especially with materials like marble and travertine. Grout is porous and can easily absorb spills, leading to stains. Natural stone itself can also be susceptible to staining and etching. A good sealer acts as a barrier, giving you more time to clean up spills before they penetrate the material.
Selecting the Appropriate Sealer
There are different types of sealers. For natural stone and grout, a penetrating sealer is usually recommended. These sealers soak into the pores of the material without leaving a film on the surface, which helps maintain the natural look and feel of your stone. Always choose a sealer specifically designed for natural stone and grout. Some sealers can alter the color or finish of your stone, so it's a good idea to test a small, inconspicuous area first.
Maintaining the Grout's Integrity
Regular sealing is key to long-term protection. Depending on the type of sealer used and the amount of traffic your floor gets, you'll need to reapply sealer periodically. For most residential applications, resealing every 1-3 years is a good rule of thumb. Keep an eye on how water beads up on the surface; if it starts to soak in, it's probably time to reseal. This simple step will help keep your beautiful French pattern looking its best for years to come.
Maintaining the Beauty of Your Tile French Pattern Layout
So, you've got this gorgeous French pattern tile floor, maybe in marble or travertine, and it looks amazing. But how do you keep it that way? It's not rocket science, but it does take a little attention. Think of it like taking care of a nice piece of furniture; you wouldn't just ignore it, right?
Daily Cleaning Practices
For everyday upkeep, the goal is to get rid of loose stuff before it can scratch the surface. Dust bunnies and grit are the silent enemies of polished stone. A quick sweep or a pass with a good vacuum cleaner (make sure it has a soft brush attachment, not those aggressive ones!) is usually all that's needed. This simple step prevents tiny particles from grinding into the stone over time.
Deep Cleaning Techniques
Once in a while, you'll want to do a more thorough clean. This is where you'll use a pH-neutral cleaner specifically made for natural stone. Avoid anything harsh, like ammonia or bleach, as these can really damage the finish. You want to gently lift any grime that's built up. For marble flooring, starting with dust removal and then using a safe cleaning solution is key. After cleaning, it's important to dry and buff the marble carefully. This helps prevent water spots and keeps that shine.
Addressing Stains and Spills Promptly
This is a big one, especially with natural stone. Spills happen, but the longer they sit, the more likely they are to cause a problem. For most spills, blot them up immediately with a clean cloth. If you have a tougher stain, you might need a poultice, which is a paste that draws the stain out of the stone. Different stones react differently, so knowing your material helps.
Protecting Your Stone from Damage
Think about what's going on your floor. Heavy furniture can scratch, and dragging things across the surface is a definite no-no. Using felt pads on the legs of furniture is a simple trick that makes a huge difference. Also, be mindful of things like doormats. A good quality mat at entrances can trap a lot of dirt and moisture before it even gets onto your beautiful tiles.
The Importance of Regular Sealing
Sealing is your stone's first line of defense. It fills the tiny pores in the stone, making it harder for liquids and stains to penetrate. How often you need to reseal depends on the type of stone, the sealer used, and how much traffic the area gets. A good rule of thumb is to test a small, inconspicuous area by dripping a little water on it. If the water beads up, your sealer is still doing its job. If it soaks in, it's probably time to reseal.
Revitalizing Worn Grout
Sometimes, the grout lines can start to look a bit tired before the tiles themselves do. You can clean grout with specialized grout cleaners, or sometimes a stiff brush and a bit of baking soda paste can work wonders. If the grout is really beyond cleaning, you might consider having it re-grouted. It's a bit more work, but it can make the whole floor look new again.
Preserving the Pattern's Original Charm
Ultimately, keeping your French pattern layout looking its best is about consistent, gentle care. It's not about harsh chemicals or aggressive scrubbing. It's about understanding the material and treating it with respect. By following these simple steps, you can maintain the timeless elegance of your tile work for years to come. If you're looking for the finest in marble and travertine, exploring options from a direct importer can be a great way to start.
Troubleshooting Common Issues in Tile French Pattern Layouts
Even with the best planning, sometimes things don't go exactly as expected when laying tiles. Don't worry, most problems have solutions. Let's look at some common hiccups and how to fix them.
Dealing with Uneven Tiles
Sometimes, tiles aren't perfectly flat. This can lead to a bumpy floor, known as lippage, where one tile edge sits higher than another. If you notice this during installation, try to swap out the uneven tile if possible. If it's already set, you might be able to gently tap it down with a rubber mallet. For minor differences, a good quality leveling system used during installation can help a lot. The goal is a smooth, even surface.
Correcting Grout Line Inconsistencies
Keeping grout lines the same width is key to the French pattern's look. If you see lines that are too wide or too narrow, it's usually because the tiles weren't spaced evenly. Using tile spacers is really important here. If you've already grouted, it's tough to fix without redoing the tiles. For future projects, pay close attention to spacing as you lay each tile.
Addressing Lippage and Leveling
Lippage is that uneven edge situation we talked about. It's not just about looks; it can be a tripping hazard. The best way to avoid it is through careful subfloor preparation and using a tile leveling system during installation. These systems use clips and wedges to hold tiles at the same height while the adhesive cures. If you have significant lippage after the fact, you might need to have a professional look at it.
Repairing Chipped or Cracked Tiles
Accidents happen. If a tile gets chipped or cracked, you can often repair it. For small chips, a color-matched epoxy filler can work wonders. If a tile is badly damaged, it's best to replace it. Carefully remove the old tile (you might need a chisel and hammer, but be gentle with surrounding tiles), clean the area, and set a new tile. Make sure the new tile matches the color and finish of the others.
Managing Adhesive Issues
Problems with adhesive can lead to tiles not sticking properly or shifting. If you're using too much adhesive, it can squeeze up between the tiles and make a mess. Too little, and the tiles won't bond well. Always follow the adhesive manufacturer's instructions for mixing and application. If tiles are loose, you may need to remove them, clean off the old adhesive, and re-adhere them.
Preventing Future Problems
Many issues can be avoided with good preparation and careful installation. This includes:
- Proper Subfloor Prep: A clean, level, and stable subfloor is the foundation for any tile job.
- Dry Laying: Always dry lay your pattern first to visualize the layout and catch any potential problems.
- Consistent Spacing: Use tile spacers religiously to maintain uniform grout lines.
- Quality Materials: Use good quality tiles, adhesive, and grout.
When to Call a Professional
If you're facing major issues like widespread lippage, significant subfloor damage, or if you're just not comfortable tackling a repair, it's always best to call in a professional tile installer. They have the tools and experience to fix complex problems and can save you time and frustration. For nationwide projects, finding a reputable installer is key.
Design Inspiration for Your Tile French Pattern Layout
The French pattern, also known as the Versailles pattern, is a classic for a reason. It brings a sense of history and sophistication to any room. But how can you make it your own? Let's look at some ideas to get you started.
Creating a Timeless Entryway
Your entryway is the first impression guests have of your home. Using a French pattern here sets a tone of elegance right away. Think about using a light-colored marble or travertine for a welcoming feel. It's a great way to add value and sophistication to your home's entrance.
Transforming Kitchens with Elegance
Kitchens see a lot of action, so durability is key. Natural stone tiles in a French pattern can handle the daily grind while looking fantastic. A honed finish on travertine can add warmth and texture, making your kitchen feel cozy yet refined. This pattern works well even in high-traffic areas.
Luxurious Bathroom Floor Designs
Bathrooms are a place for relaxation, and the French pattern can contribute to that spa-like atmosphere. Marble tiles, with their unique veining, add a touch of luxury. Just be sure to choose a stone with a good slip-resistant finish for safety, especially in wet areas. You can explore 14 stunning tile layout patterns for more ideas.
Inviting Living Area Aesthetics
In living areas, the French pattern can create a warm and inviting focal point. It pairs well with various decor styles, from traditional to modern. Consider a consistent color palette for a cohesive look, or use subtle variations in the stone to add depth.
Stylish Patio and Outdoor Spaces
While often used indoors, the French pattern can also make an appearance outdoors. Select durable, weather-resistant stones like certain types of travertine. This adds a touch of class to patios and outdoor living areas, making them feel like an extension of your home.
Incorporating the Pattern in Smaller Rooms
Don't shy away from using the French pattern in smaller spaces like powder rooms or hallways. Lighter colored stones can make the area feel larger and more open. The intricate pattern itself can become a statement piece, adding character without overwhelming the space.
Modern Interpretations of Classic Design
Who says classic has to be old-fashioned? You can update the French pattern by using stones with bolder colors or more dramatic veining. Mixing finishes, like a polished accent piece with a honed main field, can also give it a contemporary twist. It’s all about finding the right balance for your specific project.
The Advantages of a Direct Importer for Your Tile French Pattern Layout
When you're planning a beautiful French pattern tile layout, especially with natural stone, where you source your materials makes a big difference. Going with a direct importer can really change your project for the better. It’s not just about getting tiles; it’s about the whole experience and the quality you end up with.
Access to Premium, Handpicked Stone
Direct importers cut out the middlemen. This means they can focus on getting you the best of the best. We're talking about handpicked A+ top-quality stone, not just anything. They work directly with quarries, so they know exactly what they're getting. This direct relationship is key to ensuring you get stone that's truly exceptional. You won't find commercial-grade stuff here; it's all about premium quality that makes your French pattern layout stand out.
Ensuring Unmatched Quality and Authenticity
Because they're sourcing directly, importers can guarantee the authenticity and quality of their natural stone. They're not just selling tiles; they're selling a piece of the earth, carefully selected. This means you get genuine marble and travertine with all their unique character. It’s a level of quality you can see and feel, adding real value to your U.S. projects.
The Benefit of Competitive Pricing
Cutting out distributors and wholesalers means fewer markups. Direct importers can often offer more competitive pricing on their premium stone. You get access to luxury materials without the inflated costs you might find elsewhere. It’s a smart way to get that high-end look for your home or commercial space.
Consistent Material Availability
Working directly with quarries also helps ensure a more consistent supply. If you need more tiles for a larger project or for future repairs, a direct importer is more likely to have them in stock or be able to source them reliably. This avoids the headache of trying to match discontinued or hard-to-find stones later on.
Expert Guidance from Sourcing to Selection
Direct importers are stone specialists. They know their products inside and out. You can get expert advice on which types of marble or travertine would work best for your specific French pattern layout, considering durability, color, and style. They can help you choose the perfect materials for any room, from kitchens to bathrooms.
Reliable and Efficient Shipping Promises
Many direct importers pride themselves on fast shipping. Some even offer same-day shipping for a large percentage of orders. This means your project can keep moving forward without long delays. Plus, shipments are typically insured, giving you peace of mind that your beautiful new tiles will arrive safely. You can trust that your order will be handled with care.
Building Trust Through Transparency
When you buy from a direct importer, there's often a greater sense of transparency. You know where the stone is coming from and how it's selected. This builds trust, and you can feel confident about the investment you're making in your home's aesthetic. It’s about building a relationship with a supplier who is committed to quality and customer satisfaction for your tile edging needs and beyond.
Achieving a Luxurious Finish with Premium Stone
When you're aiming for that truly high-end look in your home, the choice of materials makes all the difference. For a Tile French Pattern layout, nothing quite compares to the feel and look of premium natural stone. We're talking about stone that's been handpicked, not just pulled from a big pile. This isn't your average commercial-grade stuff you find everywhere; it's something special.
Understanding A+ Top-Quality Stone
What exactly makes stone "A+ top-quality"? It comes down to the source and the selection process. Think of it like choosing a fine wine or a perfectly cut gem. We're talking about stones with fewer natural imperfections, consistent veining, and a depth of color that commercial grades just can't match. This level of quality is what transforms a floor from merely functional to a genuine statement piece. It’s about investing in materials that have character and a story.
Why Commercial Grade Falls Short
Commercial-grade stone is often selected for mass production. This means it might have more variations, color inconsistencies, or even structural weaknesses that aren't ideal for a detailed pattern like the French layout. While it might be cheaper upfront, it often lacks the visual appeal and long-term durability that premium stone provides. For a project where the pattern itself is a key design element, using lower-grade material can really detract from the overall effect. You want your pattern to shine, and that requires a stone that's up to the task.
The Craftsmanship in Every Piece
Premium stone isn't just about the raw material; it's also about how it's processed. The cutting, finishing, and inspection are all done with a much higher standard. This attention to detail means your tiles will fit together better, the grout lines will be more consistent, and the final surface will be smoother and more refined. It’s this level of craftsmanship that you can see and feel, contributing to that luxurious finish.
Elevating Spaces with Exclusive Materials
Using exclusive, top-tier natural stone in your French pattern layout does more than just make a room look good. It adds a sense of permanence and sophistication that’s hard to replicate. Whether it's a grand entryway, a spa-like bathroom, or an elegant living area, premium stone brings an inherent warmth and beauty. It’s a choice that speaks to discerning taste and an appreciation for the finer things. You can explore the best natural stones for luxury homes in 2026 to get a feel for these options nationwide shipping.
The Enduring Value of Natural Stone
Natural stone, especially when it's top-quality, is an investment. Unlike trends that come and go, the beauty of marble, travertine, or other premium stones is timeless. It doesn't just look good; it adds tangible value to your property. Over the years, it holds its appeal and can even become more admired as its natural patina develops. This is a material that ages gracefully, unlike many synthetic alternatives.
Creating a Statement with Luxury Tiles
Your Tile French Pattern layout is already a design choice that stands out. Pairing it with luxury tiles takes it to another level. Imagine the rich veining of marble or the earthy tones of travertine, precisely arranged in that classic pattern. It creates a focal point that draws the eye and sets the tone for the entire space. It’s about making a deliberate choice for beauty and quality that guests will notice and admire.
Trusting Your Investment in Quality
When you choose premium stone, you're not just buying tiles; you're investing in a piece of the earth, carefully selected and prepared for your home. It’s a decision that pays off in aesthetics, durability, and long-term satisfaction. We believe in offering only the best, so you can be confident that your project will have that luxurious finish you're aiming for, built to last for years to come.
Optimizing Your Tile French Pattern Layout with Strategic Planning
Before you even think about mixing thin-set, a little bit of planning goes a long way. Getting the layout right from the start saves a lot of headaches later on. It’s all about making sure the pattern looks good and fits the space without awkward cuts or weird gaps.
Visualizing the Final Look
Take some time to really picture how the French pattern will look in your room. Think about the scale of the tiles and how they'll repeat. This isn't just about aesthetics; it's about how the room will feel once it's done. A well-planned layout can make a small room feel bigger or add a cozy touch to a large one. Consider the overall style you're going for – are you aiming for a rustic feel, or something more modern and clean? The pattern itself has a lot of character, so let it guide your vision.
Mapping Out Tile Placement
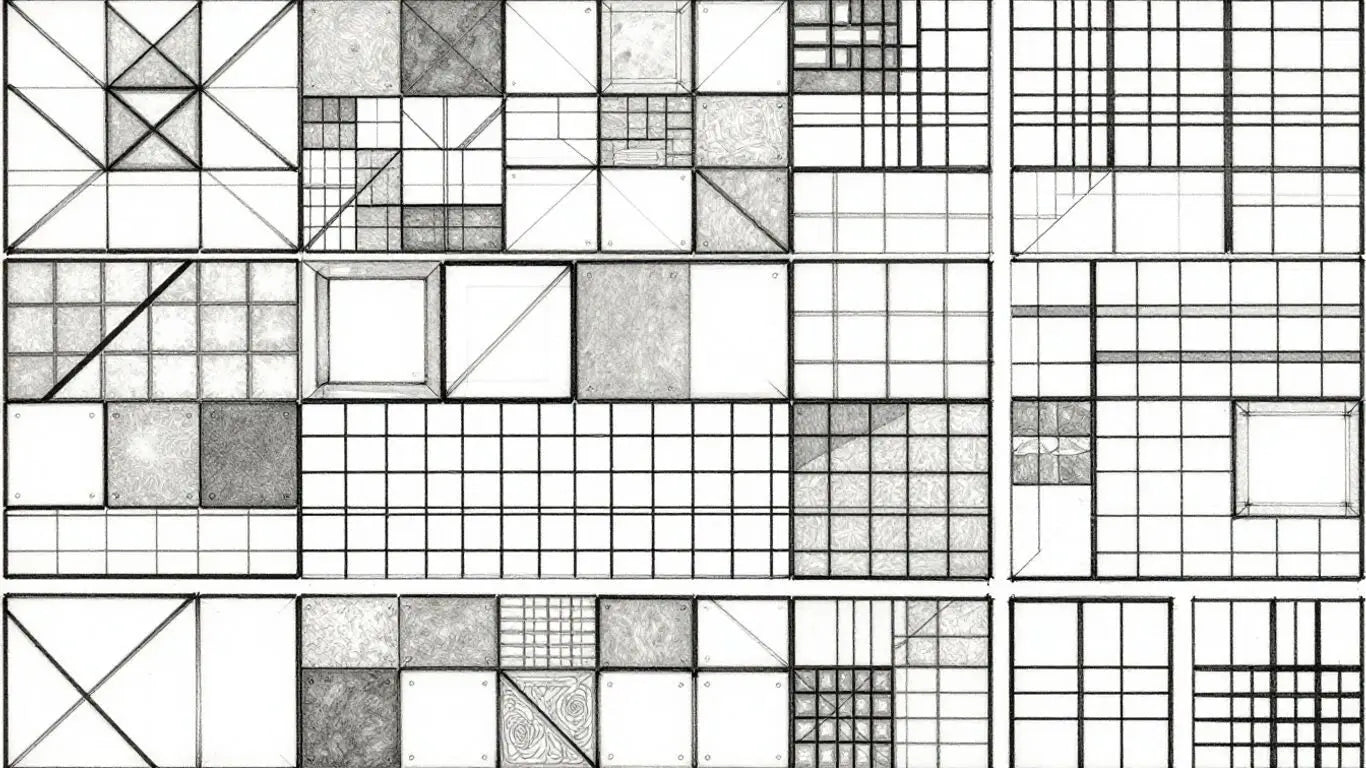
This is where the rubber meets the road, so to speak. You'll want to sketch out your room and start placing tiles on paper, or even better, do a dry lay. A dry lay means placing the tiles on the floor without any adhesive, just to see how they fit and how the pattern flows. This is your chance to move things around and figure out the best starting point. It’s much easier to rearrange tiles before they’re permanently set.
Considering Room Traffic Flow
Think about how people will actually use the space. Are there high-traffic areas where you need to be extra careful about tile placement? You don't want the most visually striking part of the pattern to be right where the most foot traffic occurs, or worse, have a lot of awkward cuts in a main walkway. Planning for traffic flow helps make sure the floor is not only beautiful but also practical for daily life.
Balancing Visual Weight
Every tile has a certain visual weight. When you're laying out a French pattern, you're mixing different sizes and shapes. It’s important to distribute these elements evenly so the pattern doesn't feel lopsided. You don't want one corner to be overloaded with large tiles while another is crammed with small ones. A balanced layout feels more harmonious and pleasing to the eye.
Planning for Obstacles and Fixtures
Rooms aren't just empty boxes; they have doors, cabinets, islands, and other things that get in the way. You need to plan how the tile pattern will meet these obstacles. Will you have a full tile at the edge of a cabinet, or will it be a cut piece? Thinking about this ahead of time helps avoid surprises and ensures a clean finish around these fixed elements. This is also where you might need to consider different tile edging types for a professional look.
The Importance of a Detailed Blueprint
For larger or more complex projects, a detailed blueprint or layout plan can be incredibly helpful. This doesn't have to be a professional architectural drawing, but a clear sketch showing where each tile size will go, where cuts will be made, and your starting point. It acts as a roadmap for the installation process, reducing guesswork and improving accuracy.
Ensuring Aesthetic Harmony
Ultimately, strategic planning is about making sure everything works together. The tile pattern should complement the rest of the room's design, not fight against it. By carefully planning your layout, you create a space that feels cohesive and intentional. This thoughtful approach is what separates a good tile job from a truly great one, resulting in a floor that you’ll love for years to come.
The Role of Texture and Finish in Your Tile French Pattern Layout
The French pattern, with its mix of shapes, already brings a lot of visual interest. But the texture and finish of the tiles you choose can really make it sing. It’s not just about the look; it’s about how the surface feels and how it interacts with light. Getting this right can totally change the mood of a room.
Exploring Polished Surfaces
Polished tiles have a high shine, almost like a mirror. They reflect a lot of light, which can make a space feel bigger and brighter. This finish is super smooth and can look really elegant, especially with marble. It’s a classic choice for a luxurious feel. However, polished surfaces can also be more slippery when wet, so you might want to think twice about using them in areas like bathrooms or entryways where water is common. They also show smudges and water spots more easily, meaning a bit more upkeep.
The Appeal of Honed Finishes
Honed tiles have a smoother, matte look compared to polished ones. They don't have that high shine, so they reflect light more softly. This gives a more understated, sophisticated vibe. Honed finishes are generally less slippery than polished ones, making them a safer bet for busy areas. They also tend to hide minor imperfections and water spots better, which is a nice bonus for homeowners. If you like a natural stone look without the glare, honed is a great way to go.
Understanding Tumbled Textures
Tumbled tiles have a worn, aged look. The edges are softened, and the surface has a slightly rough, matte texture. This is often achieved by putting the tiles in a machine with other materials to knock them around. It gives a very rustic, old-world charm. Think of old farmhouses or Mediterranean villas. This texture is great for hiding dirt and wear, making it practical for high-traffic zones. It adds a lot of character and a tactile quality to the floor.
Choosing Slip-Resistant Options
Safety is a big deal, especially in areas prone to moisture. Many tiles come with specific slip-resistant finishes. These surfaces have a bit more grip, reducing the chance of accidents. This is super important for patios, pool decks, and bathrooms. Even within the French pattern, you can find options that offer peace of mind without sacrificing style. Look for tiles specifically rated for slip resistance if this is a concern for your project.
How Finish Affects Light Reflection
Different finishes bounce light around in distinct ways. A polished finish acts like a mirror, bouncing light directly back. This can brighten a room but might also create glare. A honed or tumbled finish diffuses light, creating a softer, more ambient glow. This can make a space feel cozier and more relaxed. When planning your French pattern, consider the natural light in the room and how the tile finish will play with it. A well-chosen finish can really make the pattern pop.
Matching Texture to Room Function
Think about where the tiles will go. A busy kitchen or entryway might benefit from a more durable, less slippery texture like honed or tumbled. A master bathroom or a formal living room might be a good place for a more elegant, polished finish. The French pattern itself is quite versatile, and the right texture and finish will help it fit perfectly into the intended use of the space. It’s about balancing aesthetics with practicality for your U.S. projects.
Creating Tactile Interest
Don't forget about touch! The texture of your tiles adds another sensory layer to your design. A smooth, cool polished marble feels different underfoot than a rough, earthy travertine. This tactile quality can make a space feel more inviting and complete. The French pattern layout, with its varied tile sizes, already creates visual depth; adding textural variation takes it a step further. It’s these details that turn a nice floor into a truly remarkable one, giving your French pattern paving that extra something special.
Ensuring Longevity: Sealing and Protecting Your Tile French Pattern Layout
So, you've put in the work, laid out that beautiful French pattern, and it looks fantastic. But what happens next? Just like anything valuable, your tile needs a little care to keep it looking good for years. That's where sealing comes in. It's not just an optional step; it's pretty important, especially if you're working with natural stone like marble or travertine.
The Necessity of Stone Sealing
Think of sealing as giving your tiles a protective coat. Natural stone, while gorgeous, is porous. This means it can soak up liquids, which can lead to stains or discoloration over time. Sealing fills in those tiny pores, making it harder for spills to penetrate. This simple step can make a huge difference in how your floor holds up. It’s a key part of any good bathroom tile design workflow.
Penetrating vs. Topical Sealers
There are two main types of sealers you'll run into:
- Penetrating Sealers: These soak into the stone itself, forming a barrier from within. They don't usually change the look of the stone and are great for maintaining its natural appearance.
- Topical Sealers: These form a protective layer on the surface of the tile. They can sometimes add a sheen or change the finish, and they might wear down faster than penetrating sealers.
For most French pattern layouts using natural stone, a good quality penetrating sealer is often the way to go. It offers protection without altering the stone's feel.
Applying Sealant for Maximum Protection
Getting the application right is key. You want to make sure the entire surface is covered evenly. Usually, this involves applying the sealer with a roller or a brush, letting it soak in for a bit, and then wiping off any excess before it dries. Always follow the specific product instructions, as they can vary.
Reapplication Schedules for Durability
Sealers don't last forever. Depending on the type of sealer, the stone, and how much traffic the area gets, you'll need to reapply it periodically. A good rule of thumb is to test a small, inconspicuous area every year or so. If water stops beading up on the surface and starts to soak in, it's probably time for another coat. For marble and travertine, regular sealing is a must to ensure longevity.
Protecting Against Stains and Etching
Beyond just general wear and tear, sealing helps protect against specific issues. Acidic substances like lemon juice or vinegar can etch certain stones, leaving dull spots. While sealing won't make your stone completely impervious to etching, it can give you a little more time to clean up spills before they cause damage.
Maintaining the Natural Beauty of Stone
Ultimately, the goal of sealing is to keep your French pattern looking as beautiful as the day it was installed. It preserves the stone's color and texture, preventing it from looking dull or worn out. It's about protecting your investment and enjoying the natural elegance of your chosen materials.
The Long-Term Benefits of Proper Sealing
Taking the time to seal your tiles properly might seem like extra work, but the payoff is significant. It means less worry about spills, easier cleaning, and a floor that maintains its appeal for decades. It’s a small effort for a big return in durability and beauty for your U.S. projects.
Navigating Complexities: Cutting and Fitting for the Tile French Pattern Layout
Getting the French pattern just right means paying close attention to how the tiles meet and fit together. It's not just about laying them out; it's about making sure every cut is clean and every edge lines up. This is where the real skill comes in, turning a good layout into a great one.
Essential Cutting Tools and Blades
To get those precise cuts needed for a French pattern, you'll need the right gear. A wet saw is pretty much a must-have for clean, straight cuts on natural stone. For smaller adjustments or specific shapes, a tile nipper or a handheld grinder with a diamond blade can be super handy. Always make sure your blades are sharp and suitable for the type of stone you're working with – marble and travertine can be a bit different to cut.
Techniques for Straight Cuts
Straight cuts are the backbone of any tile job, and the French pattern is no exception. When using a wet saw, a good guide or fence will help you keep the tile steady and the cut true. Measure twice, cut once is the golden rule here. Don't rush it; take your time to line up your marks perfectly before you start the saw. This saves you from wasting expensive stone.
Mastering Angled and Curved Cuts
Sometimes, you'll need to make cuts that aren't straight, especially around doorways or irregular features. For angled cuts, like a miter cut on an edge, you'll adjust the angle on your wet saw. Curved cuts are trickier and might require a grinder with a diamond blade or even a jigsaw with a specific stone blade. Practice on scrap pieces first if you're not used to these types of cuts. Getting these details right makes a big difference in the final look, especially when dealing with tile edging types.
Fitting Around Obstacles
Rooms aren't always simple squares. You'll likely run into pipes, vents, or built-in cabinets. For these, you'll need to cut tiles to fit snugly around them. Sometimes this means making multiple cuts to create a shape that fits the obstacle. A template made from cardboard can be a lifesaver here; trace the obstacle onto the cardboard, then transfer that shape to your tile for cutting. This is key for a professional finish.
Ensuring Precise Measurements
Accuracy is everything. Use a good quality tape measure and a pencil or chalk line to mark your cut lines clearly on the tiles. For complex areas, a digital angle finder can help you get exact measurements for tricky corners or angled cuts. Remember that natural stone can have slight variations, so always measure the actual space you're fitting into, not just rely on standard dimensions.
Minimizing Waste During Cutting
Natural stone can be pricey, so you want to avoid wasting it. Plan your cuts carefully to get the most out of each tile. Sometimes, a cut-off piece from one tile can be used elsewhere. Think about the overall layout and how you can arrange your cuts to be efficient. This is part of the art of the French pattern.
Achieving Seamless Transitions
When your French pattern layout meets walls, cabinets, or other flooring types, the transition needs to look clean. This might involve using specific edging profiles or ensuring your cuts are perfectly flush. For areas where the tile meets a different surface, like a wall, you might need to consider trim pieces or a clean caulk line. The goal is to make it look like the tile was meant to be there, without any awkward gaps or rough edges.
The Impact of Color and Contrast in Your Tile French Pattern Layout
Choosing the right colors and how they play off each other can really make or break your French pattern tile project. It's not just about picking pretty shades; it's about how those shades affect the feel of the room and how the pattern itself looks.
Selecting Harmonious Color Schemes
When you're working with a French pattern, which already has a lot going on with its mix of shapes, keeping the color palette simple can often be best. Think about using tiles that are all in the same general color family, maybe with just slight variations. This creates a sophisticated, unified look. For example, using different shades of beige and cream can make a space feel warm and inviting without being overwhelming. If you're going for a more classic vibe, consider using a neutral palette with subtle undertones. This approach lets the intricate pattern speak for itself. You can find some beautiful options for natural stone tiles that fit this description perfectly.
Using Contrast for Visual Interest
On the flip side, a little contrast can add a lot of drama and definition. If you have a mostly neutral space, introducing a darker tile or a tile with a bolder veining pattern can create a focal point. Imagine a French pattern layout where the main tiles are a light, creamy travertine, and then you strategically place a few darker marble pieces. This breaks up the monotony and highlights the geometric complexity of the pattern. It’s a way to add personality without going overboard. Just be mindful not to use too many contrasting colors, as it can make the floor look busy.
The Effect of Light Colors on Space
Light colors are your best friend if you want a room to feel bigger and brighter. Think whites, creams, light grays, and soft beiges. When used in a French pattern, these lighter shades can make the floor appear to recede, giving the illusion of more space. This is especially effective in smaller rooms or areas with limited natural light. A light-colored marble or travertine in a French pattern can make a bathroom or a small entryway feel more open and airy. Light colors reflect more light, making any space feel more expansive.
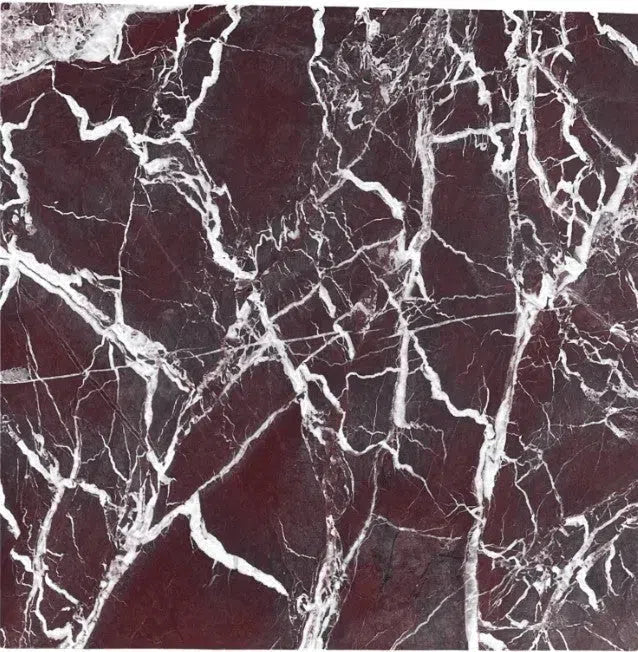
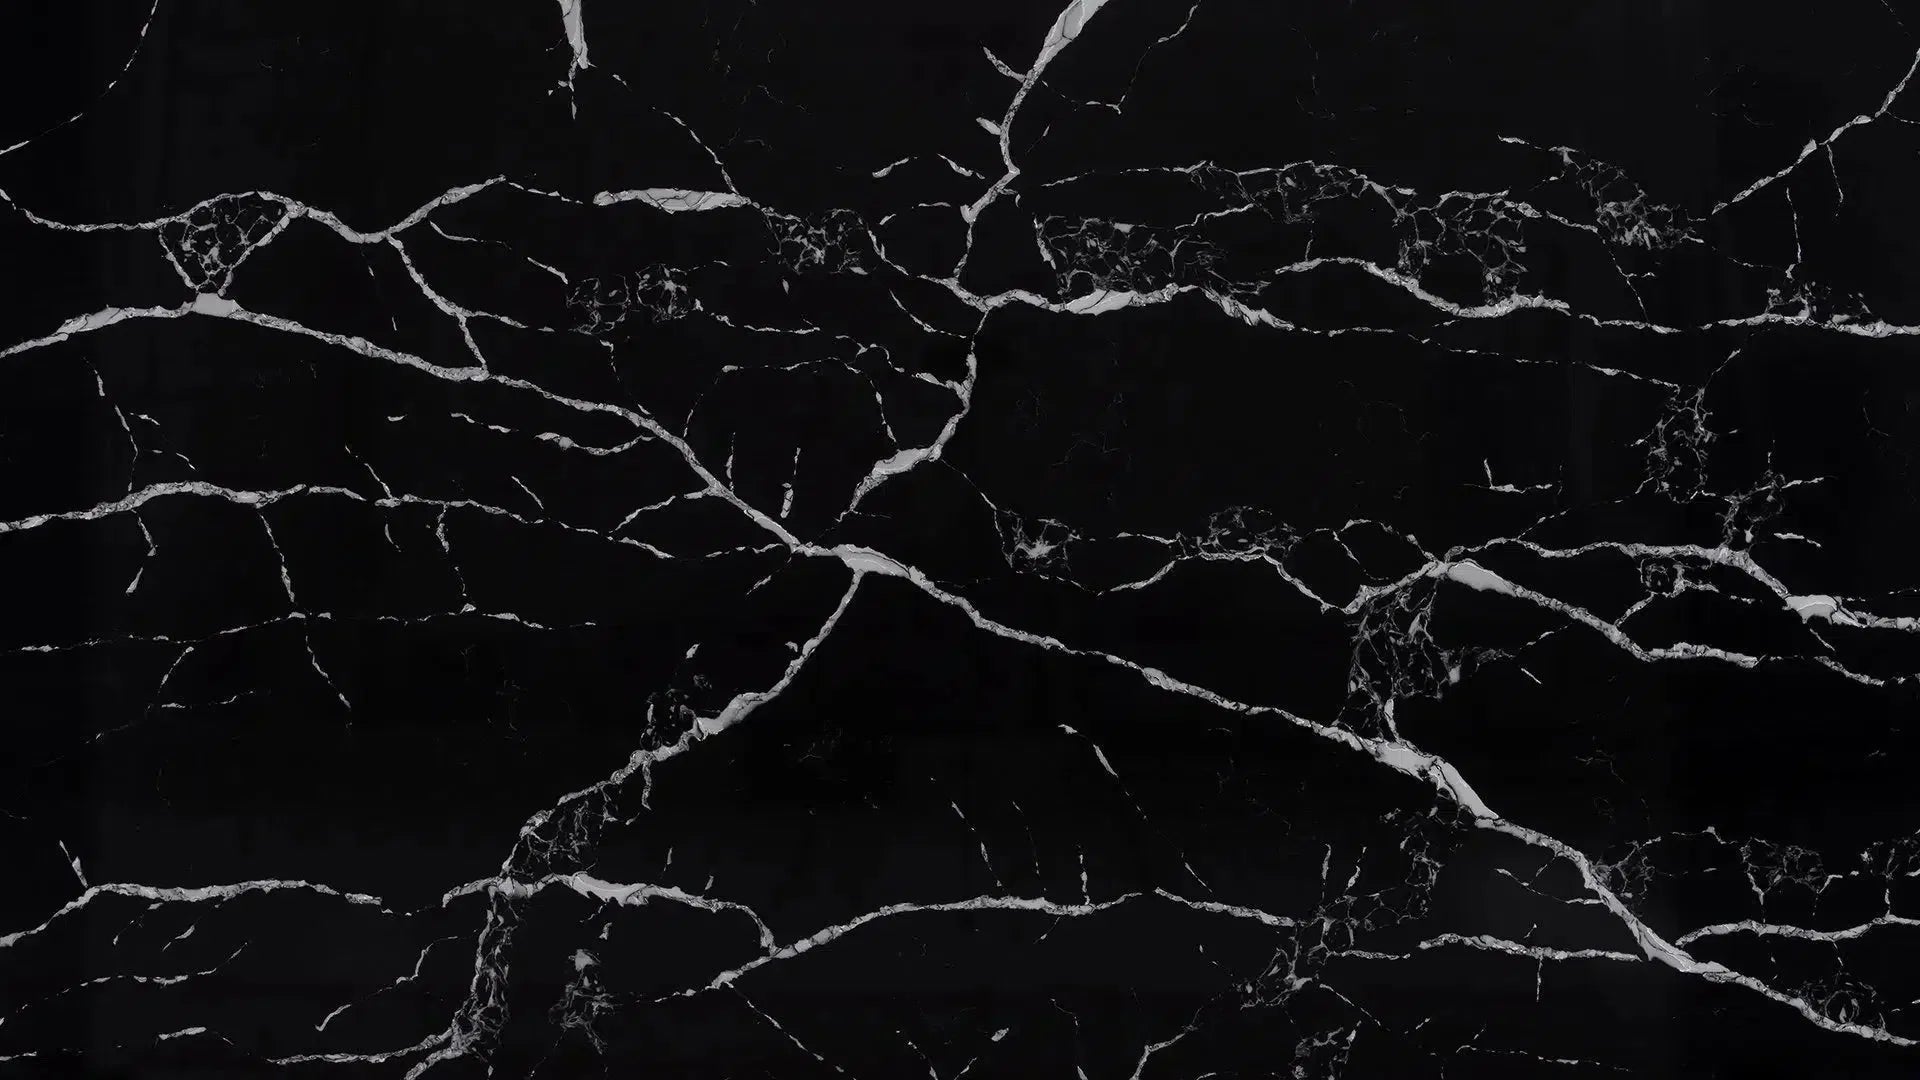
The Depth of Darker Hues
Darker colors, like deep grays, charcoal, or even black, can bring a sense of drama, luxury, and intimacy to a space. A French pattern laid with dark tiles can feel very grounded and sophisticated. It works particularly well in larger rooms or areas where you want to create a cozy atmosphere. However, dark tiles can show dust and scratches more easily, so consider the maintenance involved. They also absorb light, which can make a room feel smaller, so use them thoughtfully. A dark stone can add a real statement piece to a project.
Integrating Accent Colors Thoughtfully
Sometimes, a touch of accent color is all you need. This doesn't mean using brightly colored tiles throughout. Instead, you might use a neutral base and then incorporate a few accent tiles in a complementary color. For instance, if your main tiles are a warm beige, you could use a few tiles with subtle blue or green undertones as accents. This is a great way to tie your flooring into the rest of your room's decor. You could even look at patterns like toile de Jouy for inspiration on color combinations.
Considering the Surrounding Decor
Your tile colors shouldn't exist in a vacuum. They need to work with your walls, furniture, and overall style. If you have busy wallpaper, a simpler, more muted tile color scheme might be best. If your furniture is very neutral, you have more freedom to play with bolder tile colors or contrasts. Always look at samples in the actual room, under its lighting conditions, to see how the colors interact.
Creating a Cohesive Aesthetic
Ultimately, the goal is to create a look that feels put together and intentional. Whether you choose a monochromatic scheme, high contrast, or subtle accents, the colors should contribute to the overall mood and style you're aiming for. A well-chosen color palette in a French pattern can transform a floor from a mere surface into a work of art.
Achieving Perfect Alignment in Your Tile French Pattern Layout
Getting the alignment just right in a French pattern tile layout is super important. It's what makes the whole thing look professional and intentional, rather than just a jumble of tiles. If your lines aren't straight or your spacing is off, it can really throw off the whole vibe of the room.
The Importance of Consistent Spacing
Think of spacing as the glue that holds the pattern together visually. When you have consistent gaps between each tile, it creates a clean, orderly look. This is especially true for the French pattern, which already has a lot going on with different shapes and sizes. Consistent spacing prevents the pattern from looking chaotic. It allows the eye to follow the lines and appreciate the geometry.
Using Tile Spacers Effectively
Tile spacers are your best friend here. They're small plastic pieces that you wedge between tiles to keep them evenly spaced while the adhesive sets. For a French pattern, you'll want to use spacers that match your desired grout line width. It might seem tedious, but placing a spacer between every single tile, even the smaller ones, makes a huge difference. It's a simple tool that guarantees a much cleaner finish.
Maintaining Straight Lines
Keeping those lines straight, especially the longer ones formed by the rectangular tiles, is key. You'll want to start from a straight reference line, often established with chalk lines or a laser level. As you lay tiles, constantly check that they're following this line. It's easy for a few tiles to drift off course, especially when you're working with different shapes. A quick check with a level or a straight edge as you go can save a lot of headaches later.
Adjusting for Imperfect Tiles
Sometimes, tiles aren't perfectly uniform, especially natural stone. You might have slight variations in thickness or edge. When this happens, you might need to make small adjustments. Sometimes, a slightly thicker grout line in one spot can compensate for a tile that's a bit thinner. It's about finding a balance and making the installation look as perfect as possible, even with minor imperfections in the material. This is where understanding substrate preparation really comes into play, as a perfectly flat base helps a lot.
The Role of Leveling Tools
Beyond just straight lines, you also need to think about levelness. Lippage, which is when one tile edge is higher than another, is a common problem. Using a tile leveling system can help. These systems often involve clips and wedges that pull tiles together and keep them flush. This is particularly helpful for the larger tiles in the French pattern, as any unevenness there will be very noticeable. It's all about creating a smooth, unified surface.
Achieving perfect alignment isn't just about aesthetics; it's about the longevity and integrity of your tile installation. When tiles are properly aligned and spaced, the grout lines are more uniform, and the overall structure is stronger. It prevents stress points that could lead to cracking or loosening over time.
Ensuring a Professional, Finished Look
Ultimately, all these steps – consistent spacing, straight lines, and level tiles – add up to that polished, high-end look. It shows attention to detail and care in the installation process. When the alignment is spot on, the French pattern truly shines, showcasing its intricate beauty and timeless appeal. It transforms a floor from just a surface into a design feature. For inspiration on how different layouts can transform a space, check out modern layout ideas.
Preventing Grout Blowouts
Improper alignment and spacing can also lead to what's called a 'grout blowout'. This happens when there's too much pressure on a grout line, or if the tiles aren't properly supported underneath, causing the grout to crack or push out. By taking the time to get your alignment perfect from the start, you're also helping to prevent these kinds of issues down the road, making your beautiful new floor last much longer.
The Art of Dry Laying Your Tile French Pattern Layout
Before you even think about mixing thin-set or grout, there's a step that can save you a lot of headaches: dry laying. This is basically laying out your French pattern tiles on the floor without any adhesive. It’s like a dress rehearsal for your tile project, and it’s super important, especially with a pattern as intricate as the French layout.
Why Dry Laying is Crucial
Think of dry laying as your chance to catch any mistakes before they become permanent. You get to see how the different tile sizes fit together, check the overall look, and make sure the pattern flows nicely across the entire area. It’s your opportunity to visualize the final result and make adjustments on the fly. This step is particularly helpful for the French pattern because it involves multiple shapes and sizes, and seeing them laid out helps you understand the rhythm of the design.
Planning the Pattern Sequence
When you dry lay, you're not just randomly placing tiles. You're following the specific sequence that makes the French pattern work. This usually starts with the larger rectangular pieces, then incorporates the squares and smaller rectangles. You'll want to pay attention to how the pieces interlock and create that signature look. It’s a bit like putting together a puzzle, but on a much larger scale.
Visualizing the Final Layout
This is where the magic happens. As you lay out the tiles, you can step back and really see what your floor will look like. You can experiment with different starting points or orientations if needed. It helps you get a feel for the scale and how the pattern will fill the room. If you're working with natural stone, like our handpicked A+ top-quality marble or travertine, seeing the variations in color and veining laid out can be really informative.
Identifying Potential Issues Early
Dry laying is the perfect time to spot problems. Maybe a few tiles have a slight warp, or perhaps the spacing isn't quite right in a certain section. You might notice that a particular tile doesn't quite fit with its neighbors as smoothly as you'd hoped. Catching these issues now means you can swap out tiles, adjust spacing, or even plan for cuts without the mess and commitment of adhesive.
Making Adjustments Before Adhesives
Once you've identified any issues, you can fix them. This might involve swapping a tile for one with a better color match or a straighter edge. You can also adjust the overall layout if you feel something isn't quite right visually. This flexibility is the biggest advantage of dry laying. It’s much easier to move tiles around on a dry floor than to try and pry them up once they're set in adhesive.
Marking Tile Positions
After you're happy with the dry layout, you'll want to mark the position of each tile or section. You can use chalk, a pencil, or even masking tape to draw lines on the subfloor that correspond to where each tile should go. This makes the actual installation process much smoother, as you'll have a clear guide to follow. It helps maintain consistency, especially when you're working with different tile sizes in the French pattern.
Ensuring Optimal Tile Distribution
Dry laying also helps you distribute the tiles evenly. You can see if you have too many of one color or type of stone clustered in one area. This is your chance to spread them out for a more balanced and appealing final look. For projects across the U.S., this careful planning ensures a high-end finish that truly showcases the natural beauty of the stone.
Enhancing Your Space with Natural Stone Tile French Pattern Layouts
When you're looking to add a touch of class and lasting beauty to your home, natural stone tiles in a French pattern layout are a fantastic choice. This classic arrangement, with its mix of shapes, brings a unique character that just feels right. It’s not just about looks, though; natural stone itself has a lot going for it.
The Unrivaled Beauty of Natural Materials
There's something special about real stone. Each piece is different, with its own veining, color variations, and texture. This means your floor or wall will be truly one-of-a-kind. Unlike manufactured materials, natural stone has an organic depth that’s hard to replicate. It brings a piece of the earth's artistry right into your home.
Adding Value and Sophistication
Using natural stone, especially in a well-executed French pattern, can really boost your property's appeal. It signals quality and good taste to anyone who sees it. Think about how a beautiful marble or travertine floor can make a room feel more luxurious. It’s an investment that pays off in both enjoyment and potential resale value.
Creating Unique and Personalized Designs
The French pattern itself is versatile, but when you combine it with the variety of natural stones available, the possibilities expand even further. You can choose from different types of marble, travertine, limestone, and more, each offering a distinct look. This allows for a highly personalized design that perfectly matches your style.
The Durability of Premium Stone
Natural stone is known for its toughness. Materials like granite and certain types of marble are incredibly hard-wearing, making them suitable for high-traffic areas. Travertine, while a bit softer, still offers excellent durability, especially when properly sealed. With the right care, a natural stone French pattern can last for generations.
Timeless Appeal for Any Decor
One of the best things about this combination is its timelessness. A French pattern in natural stone doesn't really go out of style. It looks just as good in a modern home as it does in a traditional one. It’s a design choice that stays relevant, year after year.
Transforming Ordinary Spaces
Imagine walking into your entryway and seeing a stunning French pattern of tumbled travertine pavers. Or picture your kitchen backsplash with a unique marble mosaic in this classic layout. It’s these details that can take a space from ordinary to extraordinary. The pattern adds visual interest without being overwhelming, and the natural stone provides a rich, tactile experience.
Investing in Lasting Elegance
When you choose natural stone for your French pattern project, you're not just decorating; you're investing. You're choosing materials that have stood the test of time and will continue to look beautiful for decades. It’s a commitment to quality and a decision that brings enduring elegance to your home. For projects across the U.S., consider looking into options like Premium Select Tumbled French Pattern Silver Travertine Pavers for a beautiful, durable finish.
Understanding Substrate Preparation for Tile French Pattern Layout Success
Before you even think about laying a single tile for your French pattern, you absolutely have to get the foundation right. This isn't the part people get excited about, but honestly, it's maybe the most important step for a floor that lasts. A bad base means a bad floor, no matter how pretty the tiles are.
The Foundation of a Lasting Installation
Think of your subfloor as the bedrock for your beautiful tile work. If it's weak, uneven, or damp, your French pattern layout is destined for trouble down the road. We're talking about tiles cracking, grout lines opening up, and a general feeling of 'what went wrong?' Getting this part right from the start saves a massive headache later on. It’s about building something that stands the test of time, not just looks good for a few months.
Ensuring a Clean and Level Surface
First things first: the surface needs to be spotless. Any dust, debris, old adhesive, or paint can mess with how the new adhesive sticks. You want a clean slate. Then, it needs to be level. Use a long level to check for high spots and low spots. High spots can be ground down, and low spots might need a leveling compound. A perfectly flat surface is non-negotiable for a French pattern.
Addressing Subfloor Imperfections
Subfloors aren't always perfect. Old houses, in particular, can have dips or humps. You might find areas where the subfloor feels soft or bouncy. This needs fixing. Loose floorboards should be secured, and any significant unevenness needs to be smoothed out. For concrete, check for cracks or spalling. Repairing these issues now prevents them from showing up through your tiles later. It’s all about creating a stable base for your tile installation.
The Role of Underlayment
Sometimes, you need an extra layer. An underlayment, like cement board or a decoupling membrane, can be a lifesaver. Cement board provides a stable, rigid surface, especially over wood subfloors. Decoupling membranes are great for preventing cracks from transferring from the subfloor to the tile, which is super helpful if there's any movement. They also add a bit of sound dampening.
Moisture Barriers and Waterproofing
This is especially important in areas prone to moisture, like bathrooms or kitchens. A proper moisture barrier or waterproofing membrane under your tiles can stop water from getting into your subfloor and causing rot or mold. This is a critical step for long-term durability and preventing costly water damage. It’s a small step that makes a huge difference in the life of your floor.
Preparing for Adhesive Application
Once the substrate is clean, level, and any necessary underlayment or waterproofing is in place, you're almost ready for the adhesive. Make sure the surface is completely dry if you used any liquids for cleaning or waterproofing. The adhesive needs a solid, dry surface to bond to properly. This preparation work is what makes the difference between a floor that lasts for years and one that starts to fail.
Achieving a Stable Base
Ultimately, the goal is a stable, rigid, and clean base. For a French pattern, where you have different sizes of tiles fitting together, any instability in the subfloor can lead to unevenness and make the pattern look off. Taking the time to prepare your substrate correctly means your beautiful natural stone tiles will look their best and perform well for a very long time. It’s the unsung hero of a great tile job.
Getting the ground ready is super important for laying tiles in a French pattern. A smooth, flat surface means your tiles will look great and last longer. Don't skip this step – it's the foundation for a beautiful floor! Want to learn more about making your tile project a success? Visit our website for expert tips and inspiration.
Wrapping Up Your French Pattern Project
So, you've made it through the guide on laying that beautiful French pattern tile. It might seem like a lot, but taking it step-by-step really makes a difference. Remember, patience is key, and a little planning goes a long way. Whether you're a seasoned pro or just starting out, getting this pattern right adds a special touch to any room. If you're looking for top-notch natural stone, like marble or travertine, to bring your vision to life, check out places that offer handpicked, A+ quality stone. They often have the direct importer advantage, meaning better prices and real authenticity. Plus, fast shipping means you can get started sooner. Happy tiling!
Frequently Asked Questions
What makes the French pattern tile layout special?
The French pattern is cool because it uses different sizes of tiles mixed together. It looks fancy and has been around for a long time, but it still looks great today. It's not just a passing trend; it's a classic choice that makes any room feel more elegant.
What kind of tiles work best for a French pattern?
Natural stones like marble and travertine are awesome for this pattern. Marble adds a touch of class, while travertine gives a warm, earthy feel. You want stones that are durable and look good in the colors you pick for your room.
Do I need special tools to lay French pattern tiles?
You'll need the usual tiling tools like a tile cutter, trowel, and spacers. It's also super important to get your floor ready by making sure it's clean and flat. Doing a 'dry lay' first, where you place the tiles without glue, helps a lot to plan it out.
How do I start laying the French pattern tiles?
Start by figuring out where your main tiles will go. Then, carefully fit in the smaller square and rectangular pieces around them. The key is to keep the spaces between the tiles (grout lines) the same width all the way through for a neat look.
What are some tricky parts of laying this pattern?
Cutting tiles to fit around corners or edges can be tough. Making sure all the tiles line up nicely and aren't uneven (this is called 'lippage') takes patience. It's all about precision and taking your time.
How do I grout and seal the tiles?
After the tiles are down, you'll fill the gaps with grout. Pick a grout color that matches or contrasts nicely. Once the grout is dry, you need to seal the tiles and grout to protect them from stains and make them last longer.
How should I clean my French pattern tiles?
For daily cleaning, just sweep or vacuum and then mop with a mild cleaner. Avoid harsh chemicals. For tougher messes, use a cleaner made for natural stone. Sealing them regularly also helps keep them looking good.
What if I mess up while tiling?
If tiles are uneven, you might need to adjust them before the glue sets. If you chip a tile, you can sometimes replace it. If things get too complicated, it’s always best to call a professional tiler to fix it.
Where can I use a French pattern tile layout?
You can use it almost anywhere! It looks amazing on kitchen floors, in bathrooms, entryways, or even living rooms. It adds a touch of class to any space, making it feel more special and high-end.
Why buy tiles directly from a supplier like American Stone Center?
When you buy directly from an importer, you often get better prices because there's no middleman. You also get access to really good quality, handpicked stones that you might not find elsewhere. Plus, they usually have a great selection.
What does 'A+ top-quality stone' mean?
It means the stone is the very best available. It's carefully chosen for its beauty, strength, and lack of flaws. It's much better than the standard stuff you might find in big box stores. This quality makes your floor look truly luxurious.
How important is planning the layout before tiling?
Planning is super important! It helps you see how the pattern will look in your room before you start gluing. You can figure out the best way to place the tiles, make sure everything fits, and avoid mistakes. It's like drawing a map for your floor.