So, you've picked out the perfect tiles for your kitchen backsplash, and they look amazing. But wait, is that all there is to it? Not quite. To keep that new backsplash looking sharp and protected for years, you've got to think about sealing it. It's a step that many people overlook, but it makes a huge difference in how long your backsplash stays looking good and how easy it is to keep clean. Let's talk about how to seal your backsplash properly.
Key Takeaways
- Sealing your backsplash protects it from moisture, grease, and stains, making it easier to clean and maintain.
- Choose the right sealant based on your backsplash material, considering its porosity and finish.
- Proper preparation, including thorough cleaning and drying, is vital for effective sealant application.
- Apply sealant evenly to both the tiles and grout lines for a consistent protective barrier.
- Don't forget to seal the seam where the backsplash meets the countertop using a good quality caulk.
- Regular cleaning with mild agents and prompt spill cleanup helps preserve the sealant's effectiveness.
- Troubleshoot common issues like uneven application or sealant failure by following specific correction steps.
- Consider advanced techniques like multiple coats for added durability and longer-lasting protection.
Understanding the Importance of Sealing Your Backsplash
A backsplash does more than just look good; it's a vital part of your kitchen's defense system. Without proper sealing, your beautiful backsplash can quickly become a victim of daily kitchen life. Think about the constant splatters from cooking, the steam from the stove, and the occasional spills. These elements can seep into porous materials and grout lines, leading to stains, discoloration, and even mold growth over time. Sealing creates a protective barrier, making your backsplash easier to clean and helping it maintain its original appearance for years to come. It’s a simple step that makes a big difference in the longevity and upkeep of your kitchen’s most visible feature.
Protecting Your Kitchen Walls from Splatters
Every time you cook, your backsplash takes a hit. Grease, sauces, and food particles can easily splash onto the surface. If your backsplash isn't sealed, these substances can soak into the grout and tile, leaving behind stubborn stains that are tough to remove. A good sealant acts like a shield, preventing these kitchen messes from penetrating the material. This means less scrubbing and more time enjoying your kitchen. Keeping your backsplash protected from splatters is key to maintaining its fresh look.
Enhancing the Aesthetic Appeal of Your Kitchen
Beyond protection, sealing plays a role in how your backsplash looks. Many sealants can actually bring out the natural color and depth of your tile or stone, giving it a richer, more vibrant appearance. For natural stone, in particular, a sealant can highlight its unique veining and texture, making it a true focal point. It helps maintain that just-installed look, keeping your kitchen feeling bright and new. It’s about preserving the beauty you chose when you first picked out your materials.
Creating a Unified Look with Countertops
Your backsplash and countertops work together to define your kitchen's style. When they are properly sealed, especially at the seam where they meet, it creates a clean, finished line. This transition point is often overlooked, but a well-sealed seam prevents water and grime from getting trapped. It contributes to a cohesive design, making the entire space feel more put-together and intentional. Think of it like the frame around a picture – it completes the overall presentation.
Preventing Moisture and Grease Damage
Moisture and grease are the arch-nemeses of many kitchen surfaces. In the kitchen, moisture can come from cooking steam, sink splashes, or even condensation. Grease, as we know, is pervasive. Unsealed grout and porous tiles can absorb these elements, leading to discoloration, weakening of the material, and the potential for mold or mildew growth, especially in damp areas. A quality sealant repels these substances, keeping your backsplash dry and clean. This is particularly important for materials like natural stone, which can be quite porous.
The Role of Backsplash in Kitchen Design
The backsplash is more than just a protective layer; it's a significant design element. It can introduce color, pattern, and texture, tying together the various components of your kitchen. The choice of material and how it's installed, including how well it's maintained, directly impacts the overall aesthetic. A well-sealed backsplash looks intentional and cared for, contributing positively to the room's atmosphere. It’s part of the visual story your kitchen tells.
Achieving a Seamless Countertop to Backsplash Transition
The connection between your countertop and backsplash is a critical area. It’s where two different materials meet, and often, it’s a prime spot for moisture and dirt to accumulate if not properly addressed. Using the right sealant or caulk here creates a smooth, watertight barrier. This not only looks better but also makes cleaning much easier, preventing buildup in that often-awkward joint. A good silicone caulk is often the best choice for this specific application.
Making Your Backsplash an Integral Part of the Design
When a backsplash is properly sealed and maintained, it truly becomes an integrated part of the kitchen's design. It doesn't just sit there; it actively contributes to the room's functionality and visual appeal. A clean, well-protected backsplash reflects positively on the entire kitchen, suggesting care and attention to detail. It’s about ensuring that this key surface remains beautiful and functional, supporting the overall design vision for years.
Choosing the Right Sealant for Your Backsplash Material
Selecting the right sealant is a big step in making sure your backsplash looks good and stays protected. It's not a one-size-fits-all situation, and what works for one material might not be the best choice for another. Think of it like picking the right paint for different walls – you wouldn't use the same kind everywhere.
Natural Stone Backsplash Sealant Considerations
Natural stone, like granite, marble, or travertine, has a unique beauty, but it's also porous. This means it can soak up liquids, leading to stains. For natural stone, you'll want a penetrating sealant. These sealants soak into the stone itself, creating a barrier from within without changing the look or feel of the stone. They are great for protecting against oil-based stains and moisture. When you're picking one, check if it's specifically made for the type of stone you have. Some sealants are better for lighter stones, while others are formulated for darker ones.
Porcelain and Ceramic Tile Sealing Needs
Porcelain and ceramic tiles are generally less porous than natural stone, especially if they have a glazed finish. Glazed tiles often don't need sealing on the tile surface itself. However, the grout lines between the tiles are a different story. Grout is almost always porous and can easily absorb spills and stains. So, while the tiles might be fine on their own, sealing the grout is really important for both porcelain and ceramic backsplashes.
Grout Sealant Selection Guide
When it comes to grout, you have a few options. There are water-based sealants and solvent-based ones. Water-based sealants are usually easier to use and clean up, and they're good for general protection. Solvent-based sealants tend to penetrate deeper and offer stronger protection, especially against oil and grease, but they can have stronger fumes and require more careful application. For most kitchen backsplashes, a good quality water-based grout sealant is usually sufficient. Look for ones that are specifically labeled for grout.
Understanding Sealant Types: Penetrating vs. Topical
We've touched on this a bit, but it's worth going over. Penetrating sealants work by soaking into the material, like our natural stone example. They don't form a film on the surface, so they don't change the appearance. Topical sealants, on the other hand, form a protective film or coating on the surface. These can offer a high level of protection and sometimes add a sheen or gloss. However, they can sometimes wear off over time, especially in high-traffic areas, and might need reapplication more often. For backsplashes, especially those with natural stone or unglazed tiles, penetrating sealants are often preferred for a more natural look and long-lasting protection.
Factors Affecting Sealant Choice: Porosity and Finish
- Porosity: How much a material can absorb liquid. More porous materials need stronger, deeper-penetrating sealants.
- Finish: Is the tile matte, polished, or textured? Some sealants can alter the finish, especially topical ones. Always test in an inconspicuous area first.
- Environment: Kitchens are prone to grease and moisture. Choose a sealant that can handle these conditions.
Compatibility with Your Specific Tile and Grout
Always check the manufacturer's recommendations for both your tile and your grout. Some tiles might have special coatings or finishes that could react with certain sealants. Similarly, different types of grout (sanded, unsanded, epoxy) might have different sealing requirements. A quick look at the product packaging or the manufacturer's website can save you a lot of trouble down the line.
The Benefits of Mold-Resistant Sealants
Kitchens, especially around sinks and cooking areas, can be damp. This creates a perfect environment for mold and mildew to grow, particularly in grout lines. Using a sealant that contains mold inhibitors can significantly help prevent this. It adds an extra layer of defense, keeping your backsplash looking clean and hygienic for longer. This is especially beneficial in humid climates or kitchens where ventilation might not be ideal.
Preparing Your Backsplash for Effective Sealing
Before you can apply any sealant to your backsplash, it needs to be properly prepped. Think of it like getting ready for a big event – you wouldn't just show up without any preparation, right? Your backsplash is no different. Taking the time to prepare it correctly means the sealant will stick better and last longer, keeping your kitchen looking great.
Thoroughly Cleaning the Backsplash Surface
First things first, you've got to get everything clean. This means wiping down all the tiles and, importantly, the grout lines. You want to remove any dust, grease, or food splatters that might have accumulated. A good scrub with a mild cleaner or even a simple solution of vinegar and water usually does the trick. Just make sure to rinse away any cleaner residue afterward so it doesn't interfere with the sealant.
Ensuring the Backsplash is Completely Dry
This step is super important. Sealant won't adhere properly to a wet surface. You need to let your backsplash air dry completely. Depending on how much water you used during cleaning and the humidity in your kitchen, this could take anywhere from a few hours to a full day. Patience here really pays off for a good seal.
Removing Excess Grout or Adhesive Residue
Sometimes, during installation, a little extra grout or adhesive can get onto the tile faces or stick out from the grout lines. If you see any of this dried-on gunk, gently scrape it away with a putty knife or a grout saw. You want a smooth surface for the sealant to work on. Be careful not to scratch the tiles or damage the grout itself.
Addressing Any Existing Gaps or Cracks
Take a good look for any small gaps or cracks that might have appeared over time, especially between the backsplash and the countertop or cabinets. These little openings are prime spots for moisture and grime to sneak in. If you find any, you'll want to fill them with a suitable caulk or grout filler before you seal. This makes the whole area more robust.
Protecting Adjacent Surfaces During Preparation
While you're cleaning and scraping, it's a good idea to protect surfaces next to your backsplash. You can use painter's tape along the edges of your countertops, cabinets, or any adjacent walls. This prevents accidental scuffs or cleaner spills from getting onto areas you don't want to deal with.
Pre-Sealing Grout Lines for Optimal Protection
For materials like natural stone or porous tiles, it's often recommended to pre-seal the grout lines. This means applying a thin coat of sealant specifically to the grout before you seal the entire backsplash. It gives the grout an extra layer of defense against stains and moisture, which is especially helpful in busy kitchen areas.
The Importance of a Clean and Dry Surface
Seriously, can't stress this enough: a clean and dry surface is the foundation for a successful sealing job. Any dirt, dust, or moisture left behind will prevent the sealant from bonding correctly. This can lead to peeling, uneven coverage, or a seal that just doesn't last. So, give it one last wipe-down and a final check to make sure everything is perfect before you start applying the sealant. It’s a small step that makes a big difference in the final outcome of your kitchen backsplash.
Mastering the Art of Applying Backsplash Sealant
Applying sealant to your backsplash is a key step that many homeowners overlook, but it's really important for keeping things looking good and preventing damage. Think of it like giving your backsplash a protective coat. This process isn't overly complicated, but it does require some attention to detail to get it right. We'll walk you through how to do it properly.
Step-by-Step Guide to Sealant Application
Getting the sealant on correctly makes a big difference in how long it lasts and how well it protects. Here’s a breakdown of the process:
- Prepare the Surface: Before you even open the sealant, make sure the backsplash is clean and completely dry. Any dirt, dust, or moisture left behind can get trapped under the sealant, causing problems later on.
- Read the Manufacturer's Instructions: Seriously, don't skip this. Different sealants have different application methods and drying times. What works for one might not work for another.
- Test in an Inconspicuous Area: If you're nervous, try applying the sealant to a small, hidden spot first. This lets you see how it looks and behaves before you commit to the whole backsplash.
- Apply the Sealant: Use your chosen applicator (more on that below) to apply a thin, even coat. Work in manageable sections, especially if you have a large area.
- Wipe Away Excess: As you go, or immediately after applying a section, wipe away any excess sealant. You want a nice, even layer, not a thick, gloppy one.
- Allow to Cure: Let the sealant dry and cure according to the product's instructions. This usually involves keeping the area dry and avoiding heavy use for a specific period.
Using the Right Tools: Brushes, Rollers, or Sprayers
Choosing the right tool can make the job much easier and give you a better finish. For most backsplashes, especially tile and grout, a few options work well:
- Small Paintbrush: A good quality, natural bristle brush is great for getting into grout lines and smaller tile areas. It gives you a lot of control.
- Foam Roller: A small foam roller can be effective for larger, flat tile surfaces. It helps spread the sealant evenly and quickly.
- Sprayer: Some sealants can be sprayed. This is the fastest method for large areas, but it requires careful masking of surrounding surfaces to prevent overspray.
Achieving an Even and Consistent Sealant Coat
An even coat is key. If you apply it too thick in some spots and too thin in others, it won't protect as well and might look patchy. The goal is a uniform layer that covers all the tile and grout without leaving puddles or dry spots. Work methodically, and don't rush the process. It's better to do two thin coats than one thick, uneven one.
Applying Sealant to Tile and Grout Lines
When you're applying the sealant, pay special attention to the grout lines. Grout is porous and absorbs moisture and stains easily, so it needs good coverage. Use a brush to really work the sealant into the grout. For the tiles themselves, a roller or a cloth can work well, depending on the tile material and finish. Make sure you cover the entire surface, including the edges of the tiles where they meet the wall or countertop.
Understanding Curing Times for Sealants
Curing time is not the same as drying time. While a sealant might feel dry to the touch in a few hours, it often takes much longer – sometimes days – to fully cure and reach its maximum protective strength. During the curing period, it's best to keep the backsplash dry and avoid harsh cleaning. Always check the product label for specific curing instructions. Respecting these times is vital for the sealant to form a proper barrier.
The Technique for a Protective Barrier
Think about building a shield. You want to apply the sealant in a way that creates a continuous, unbroken layer. This means overlapping your strokes slightly and making sure there are no missed spots. For porous materials like natural stone, you might need to apply more sealant to achieve proper saturation. The idea is to fill the pores and create a surface that liquids can't easily penetrate.
Avoiding Common Application Mistakes
People often make a few common errors when applying sealant. One is not cleaning the surface thoroughly enough beforehand. Another is applying the sealant too thickly, which can lead to a sticky or uneven finish. Not wiping away excess sealant immediately is also a problem, as it can dry and be hard to remove. Finally, not allowing enough curing time before using or cleaning the backsplash can compromise the seal. Paying attention to these details will help you avoid these pitfalls.
Sealing the Countertop to Backsplash Transition
The connection between your countertop and backsplash is more than just a visual line; it's a functional junction that needs proper sealing. This seam is a prime spot for moisture, grease, and crumbs to collect, potentially leading to mold or damage over time. Getting this transition right means your kitchen will look cleaner and last longer.
Why Sealing the Seam is Crucial
Think of this seam as the final frontier against kitchen messes. Without a good seal, water from spills or cleaning can seep down behind the backsplash, potentially damaging your wall or even the cabinet structure. Grease splatters can also find their way into these tiny gaps, making them hard to clean and creating an unappealing look. A well-sealed transition protects your investment and keeps your kitchen looking sharp.
Choosing a High-Quality, Mildew-Resistant Caulk
Not all caulks are created equal, especially for kitchen environments. You'll want to select a caulk specifically designed for kitchens and bathrooms, which typically means it's mildew-resistant. This is important because the area between the countertop and backsplash can stay damp. Look for acrylic latex caulk with silicone for flexibility and durability. Many products are available nationwide for your kitchen backsplash project.
Applying Caulk for a Watertight Seal
Applying caulk might seem simple, but doing it well makes a big difference. Start by making sure the area is clean and dry. Then, cut the tip of the caulk tube at a slight angle to create a thin, even bead. Apply steady pressure as you run the bead along the entire seam. It's better to apply a consistent, thin bead than a thick, uneven one.
Ensuring a Flush and Even Overlap
When installing your backsplash, leaving a small gap, usually around 1/8 to 1/4 inch, between the bottom edge of the tile and the countertop is a good idea. This gap is where the caulk will sit, providing a flexible seal. Use spacers during tile installation to keep this gap consistent. After the caulk is applied, you can smooth it with a damp finger or a caulk-smoothing tool to create a clean, flush finish that blends nicely with both surfaces.
Preventing Water and Debris Seepage
Proper caulking acts as a barrier. It stops liquids from getting behind your tiles and prevents small food particles or dust from accumulating in the gap. This not only keeps your kitchen cleaner but also helps prevent the growth of mold and mildew, which can be a health concern and damage your surfaces.
The Role of Caulk in Maintaining Integrity
Caulk isn't just about looks; it's about structural integrity. It helps hold the backsplash in place by filling any minor imperfections in the fit against the countertop. It also accommodates slight movements between the two surfaces due to temperature changes, preventing cracks in the grout or tile.
Achieving a Polished and Secure Finish
Once the caulk is applied, smooth it out for a professional look. You can use a damp cloth or a specialized caulk tool. Wipe away any excess immediately. A clean, smooth caulk line makes the entire backsplash and countertop installation look more finished and put-together. It's the detail that really ties the design together.
Extending Protection: Sealing Around Kitchen Features
Beyond the main expanse of your backsplash, several other areas in your kitchen require attention to keep moisture and grime at bay. Think of these as the supporting cast to your backsplash's star performance. Properly sealing these transition points and edges is just as important for the overall longevity and clean appearance of your kitchen.
Sealing Around Windows and Shelving
Windowsills and the edges of open shelving can become collection points for dust, grease, and water splashes. Applying a bead of silicone caulk or a suitable sealant around the perimeter of window frames where they meet the backsplash, and along the edges of any built-in shelving, creates a barrier. This prevents moisture from seeping into the wall cavity or behind the shelving unit, which can lead to mold or material degradation. It also makes cleaning these often-neglected areas much simpler.
Protecting Edges Where Backsplash Meets Cabinets
The junction where your backsplash meets the underside of your upper cabinets is another spot prone to collecting grease and dust. A thin, neat bead of caulk here not only provides a clean visual line but also stops airborne kitchen grease from accumulating in the gap. This is especially important if your cabinets have a porous finish or if you have a lot of cooking activity.
Addressing Transitions to Other Wall Surfaces
When your backsplash doesn't cover an entire wall, you'll have edges where the tile meets painted or wallpapered walls. These transitions need sealing too. Using a paintable caulk or a color-matched sealant can create a smooth, protected edge. This stops dirt and moisture from creeping into the seam and keeps the transition looking sharp and intentional.
The Importance of Sealing All Exposed Edges
Essentially, any exposed edge of your backsplash material, whether it's tile, stone, or another material, is a potential entry point for moisture and dirt. This includes the top edge if it's not covered by cabinets, side edges against adjacent walls, and any cutouts for outlets or switches. Sealing these exposed edges is a small step that significantly contributes to the overall durability and ease of maintenance of your kitchen.
Creating a Unified and Protected Design
By taking the time to seal these various features, you're not just protecting your walls; you're also contributing to a more cohesive and finished look. It shows attention to detail and ensures that the protective qualities of your sealant extend throughout the entire backsplash area, not just the main field.
Preventing Moisture Intrusion in Nooks and Crannies
Kitchens are dynamic environments with constant activity. Water splashes, steam, and grease are common. These elements can find their way into even the smallest gaps. Proper sealing around windows, cabinets, and wall transitions acts as a defense, preventing these substances from causing hidden damage or creating unsightly buildup in hard-to-reach places.
Ensuring Longevity in Every Corner
Think of these seals as the final layer of defense for your entire backsplash installation. They work in tandem with the main sealant on the tile and grout to create a complete protective system. This attention to detail in every corner and transition is what truly makes a backsplash last and look its best for years to come.
Maintaining Your Sealed Backsplash for Lasting Beauty
Once your backsplash is properly sealed, keeping it looking great is all about a consistent, gentle approach. Think of it like caring for a favorite piece of clothing – the right treatment makes all the difference in how long it stays looking new.
Establishing a Regular Cleaning Routine
Making cleaning a habit is the first step. For most sealed backsplashes, especially those made of porcelain or ceramic, a simple routine works wonders. You don't need fancy products or a lot of time. Just a quick wipe-down after cooking or when you notice a spill can prevent bigger issues down the line.
Using Mild Cleaners and Soft Cloths
When it's time to clean, grab the gentle stuff. Mild, pH-neutral cleaners are your best friend here. They get the job done without stripping away the sealant or dulling the finish of your tiles. Pair that with a soft cloth or sponge – nothing abrasive. This combination is key to avoiding scratches and keeping that protective seal intact.
What to Avoid: Harsh Chemicals and Abrasives
It's just as important to know what not to use. Harsh chemicals, like bleach or ammonia-based cleaners, can break down the sealant over time. Similarly, abrasive scrubbers, steel wool, or even stiff-bristled brushes can scratch the surface and damage the grout. Stick to the gentle approach; your backsplash will thank you for it.
Promptly Wiping Down Spills and Stains
Kitchens are active places, and spills happen. Whether it's a splash of sauce, a bit of oil, or a drink that gets knocked over, the best thing you can do is wipe it up right away. This simple act prevents stains from setting in, especially on porous materials or grout lines, and stops liquids from potentially seeping through and compromising the seal.
Periodic Grout Maintenance and Re-sealing
While the tiles themselves might be well-protected, grout lines can sometimes need a little extra attention. Depending on the type of grout and how much traffic your kitchen sees, you might need to reapply a grout sealer every year or two. This helps keep the grout from absorbing stains and moisture, maintaining that clean look and protecting the overall installation.
Preserving the Sealant's Protective Qualities
Think of the sealant as a shield. By using the right cleaning methods and avoiding harsh treatments, you're actively preserving that shield. This means your backsplash will continue to resist stains, moisture, and grease, keeping its original beauty for much longer. It’s all about working with the sealant, not against it.
Keeping Your Backsplash Pristine Over Time
Ultimately, maintaining a sealed backsplash isn't complicated. It's about consistent, gentle care. Regular light cleaning, prompt spill management, and occasional grout touch-ups are the secrets to keeping your backsplash looking as good as the day it was installed. This attention to detail ensures your kitchen's focal point remains a source of pride for years to come.
Troubleshooting Common Backsplash Sealing Issues
Even with the best preparation and application, sometimes things don't go exactly as planned when sealing a backsplash. Don't worry, most issues are fixable. Let's look at some common problems and how to sort them out.
Dealing with Uneven Sealant Application
An uneven sealant coat can look messy and might not offer full protection. If you notice high spots or streaks while the sealant is still wet, try to smooth them out with a clean cloth or a small brush. If the sealant has already started to dry, you might need to gently scrape away the excess with a plastic scraper or a putty knife. For a more uniform finish, consider applying a second, thinner coat after the first has fully cured, paying close attention to an even spread.
Addressing Sealant Failure or Peeling
Sealant failure, like peeling or cracking, often happens if the surface wasn't properly cleaned or if the wrong type of sealant was used. If you see peeling, try to remove the loose sealant with a scraper. Clean the area thoroughly, making sure it's completely dry, and then reapply the sealant according to the manufacturer's instructions. Using a sealant specifically designed for your backsplash material and kitchen environment can prevent this in the future.
Removing Excess Sealant or Caulk
It's easy to get a bit too much sealant or caulk, especially around edges and corners. If it's still wet, a damp cloth usually does the trick. For dried-on excess, a plastic scraper or a razor blade held at a low angle can carefully remove it without damaging the tile or grout. For stubborn caulk, a dedicated caulk remover product might be necessary.
Correcting Grout Discoloration After Sealing
Sometimes, sealants can cause grout to darken or change color. This is more common with certain types of grout or sealants. If the discoloration is minor, it might fade over time. For more noticeable changes, you might need to use a specialized grout cleaner. In some cases, re-grouting or applying a tinted grout sealer might be the best solution.
When to Reapply Sealant
Sealant doesn't last forever. You'll know it's time to reapply when water no longer beads up on the surface but instead soaks in. This usually happens every 1-3 years, depending on the sealant type and how much the backsplash is used. A simple water test can tell you if your protection is wearing thin.
Identifying and Fixing Gaps in the Seal
Gaps in the sealant, especially between the backsplash and countertop or around fixtures, are weak points for moisture. Carefully inspect all edges and seams. Clean out any debris from the gap and then apply a fresh bead of high-quality, mildew-resistant caulk or sealant. Smooth it out for a clean finish.
Restoring the Protective Barrier
If your sealant has failed in multiple areas or looks generally worn, it might be time for a complete reseal. Start by removing any old, failing sealant. Clean the entire backsplash and grout lines thoroughly. Once completely dry, apply a new, even coat of sealant. This will restore the protective barrier and keep your backsplash looking great.
Enhancing Durability with Advanced Sealing Techniques
While basic sealing is important, taking extra steps with advanced techniques can really make your backsplash last and look good for years. It’s not just about slapping on a coat; it’s about building a real defense against kitchen messes.
The Benefits of Multiple Sealant Coats
Applying more than one layer of sealant might seem like overkill, but it actually builds a stronger, more complete barrier. Think of it like painting a wall – one coat might cover, but two or three give you real depth and protection. For backsplashes, especially those made of natural stone or porous tiles, an extra coat means better defense against stains and moisture. It fills in any tiny spots you might have missed the first time around.
Understanding Sealant Saturation Levels
Different materials soak up sealant differently. For something like natural stone, you want to reach a point of saturation where the stone has absorbed as much sealant as it can. This usually means applying the sealant, letting it soak in for a bit, and then applying more. Knowing when your material is 'saturated' is key to getting the best protection. Too little, and you leave weak spots; too much, and you might end up with a sticky residue.
Using Sealant Enhancers for Added Protection
Some sealants come with built-in
Choosing Premium Materials for Your Backsplash Project
When planning your kitchen remodel, selecting the right materials for your backsplash is a big decision. It’s not just about looks; it’s about durability and how it fits with the rest of your kitchen. Think about what you want your backsplash to do. Do you want it to be a subtle backdrop, or a real statement piece? The choices you make now will affect how your kitchen looks and functions for years to come.
Exploring Marble, Travertine, and Natural Stone
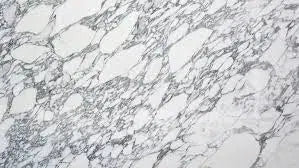
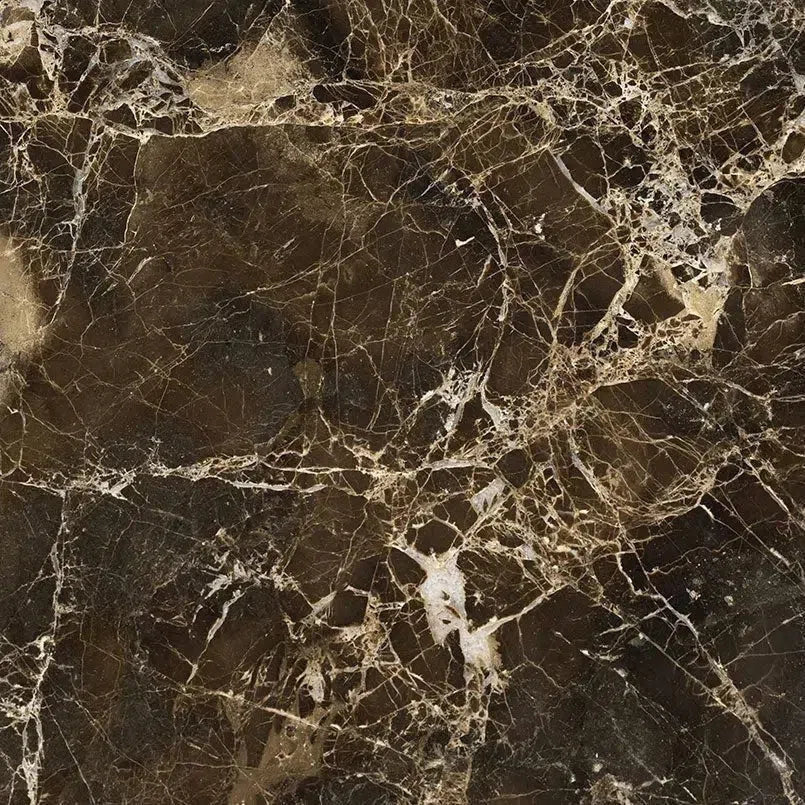
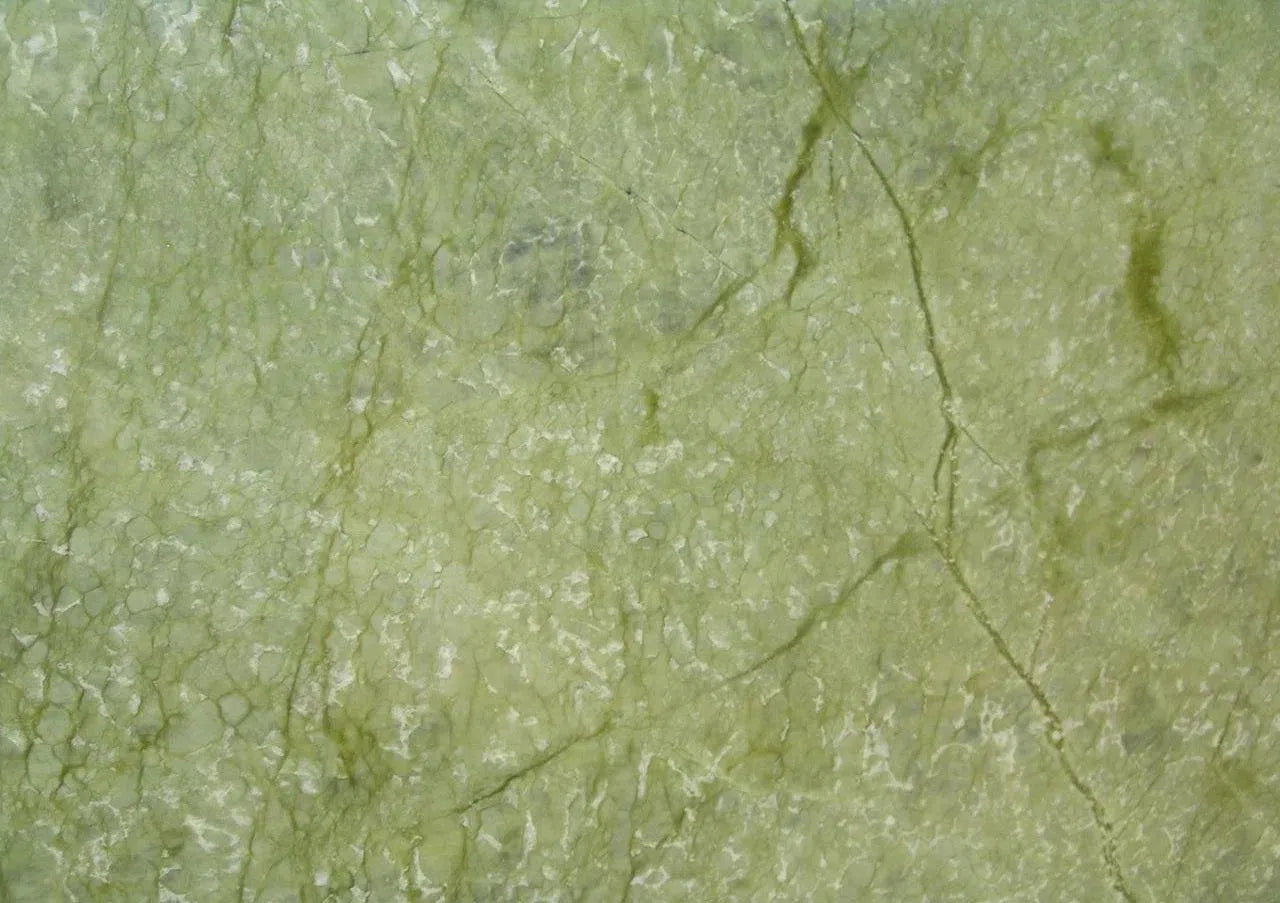
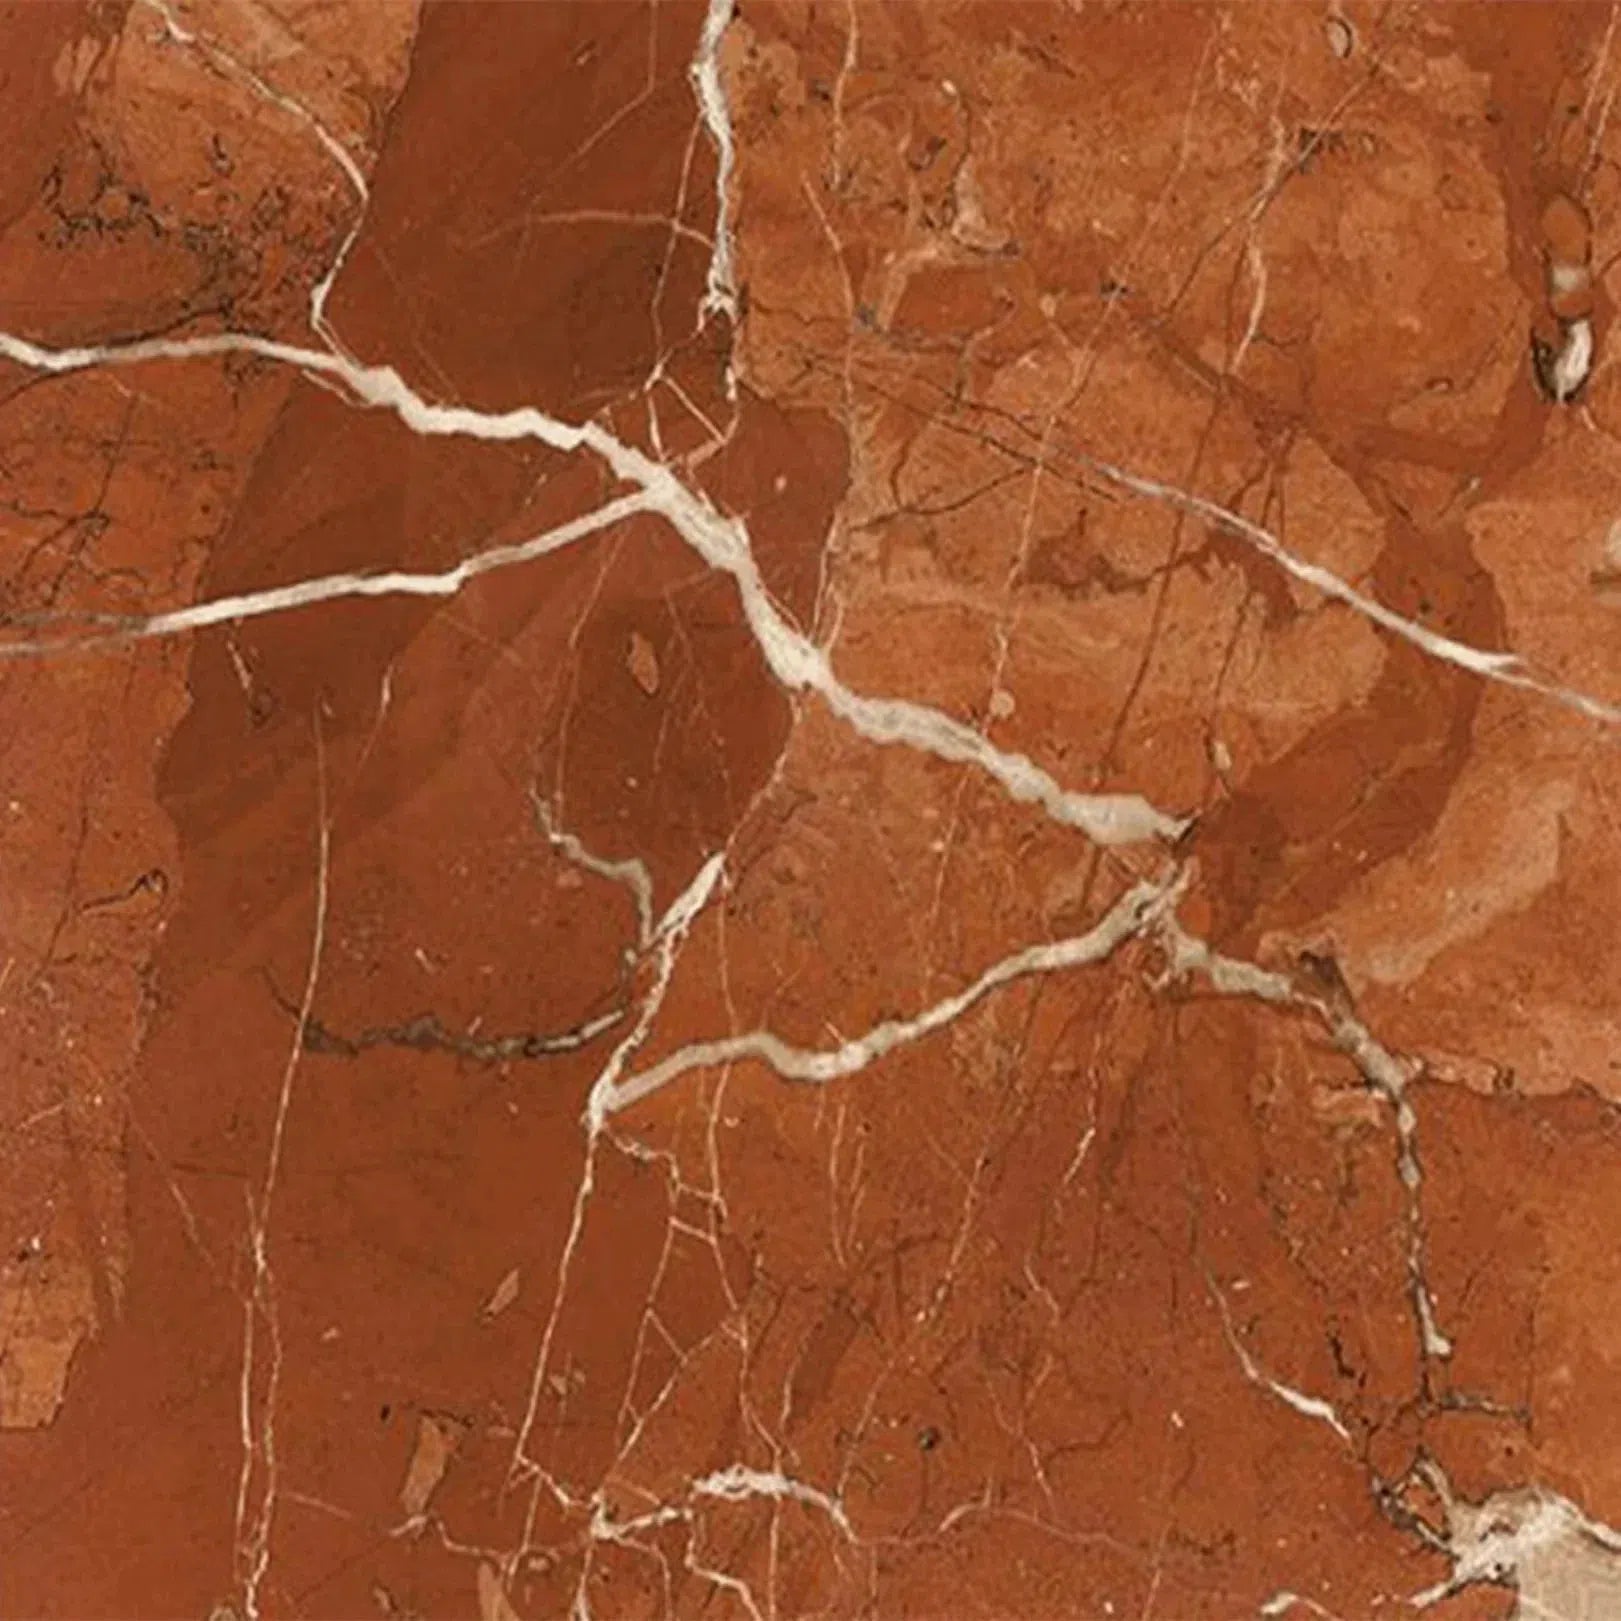
Natural stone backsplashes offer a unique beauty that’s hard to replicate. Materials like marble, travertine, and granite bring a touch of elegance and a one-of-a-kind look to any kitchen. Each type of stone has its own character, with variations in color, veining, and texture. This means your backsplash will truly be unique. However, natural stone can be more porous than other materials, which means it might need more attention when it comes to sealing to protect against stains and moisture.
The Aesthetic Appeal of Different Stone Types
Marble often brings a sense of luxury with its classic veining, while travertine offers a more earthy, rustic feel with its natural pits and textures. Granite, on the other hand, is known for its durability and wide range of colors and patterns. Choosing the right stone involves balancing your desired aesthetic with the practical needs of your kitchen environment.
Durability and Maintenance of Natural Stones
While beautiful, natural stones do require specific care. They are generally durable but can be susceptible to etching from acidic foods or staining if not properly sealed. Regular cleaning with mild, pH-neutral cleaners is important. Depending on the type of stone and how much it’s exposed to cooking splatters, you might need to re-seal it periodically, perhaps once a year or every few years, to maintain its protective qualities.
Understanding Stone Porosity and Sealing Needs
Porosity is a key factor when choosing stone. Denser stones like granite are less porous than softer stones like some marbles or limestones. Higher porosity means the stone can absorb liquids more easily, making it more prone to staining. This is why proper sealing is so important for natural stone backsplashes. A good quality penetrating sealer fills the pores, creating a barrier against spills and moisture without changing the stone's natural look or feel.
Selecting Tiles that Complement Your Kitchen Design
Your backsplash tile should work well with your countertops and cabinets. If your countertops have a lot of movement or a bold pattern, a simpler, solid-colored tile for the backsplash can create a nice balance. Conversely, if your countertops are a plain, solid color, you have more freedom to choose a backsplash with interesting patterns, textures, or colors. Think about the overall style you’re aiming for – modern, traditional, farmhouse, or something else – and pick tiles that fit that vision.
The Role of Tile Size and Shape
Tile size and shape can really change the feel of your kitchen. Larger tiles can make a space feel bigger and more open, and they mean fewer grout lines to clean. Smaller tiles, like mosaics, can add intricate detail and a custom look. Subway tiles are a classic choice, offering versatility in how they're laid out. Consider the scale of your kitchen and the overall design when deciding on tile dimensions and patterns.
Finding Quality Materials for a Lasting Impression
Investing in high-quality materials from reputable suppliers is always a good idea. Good quality tiles and natural stones are more likely to be consistent in color and thickness, making installation easier. They also tend to be more durable and resistant to wear and tear. When you choose quality materials, you’re not just making your kitchen look good today; you’re setting it up for lasting beauty and performance.
Designing for Durability: Backsplash and Countertop Harmony
Creating a kitchen that is both beautiful and built to last means paying close attention to how your backsplash and countertop work together. It’s not just about picking materials that look good side-by-side; it’s about making sure they function well together and stand up to daily use. A well-chosen combination can make your kitchen feel more cohesive and add to its overall appeal.
Coordinating Colors, Patterns, and Textures
When you’re thinking about your backsplash and countertop, consider how their colors, patterns, and textures will play off each other. You have a couple of main routes you can take here. You could go for a look where the backsplash closely matches the countertop, creating a smooth, almost monochromatic feel. This often results in a very clean and sophisticated appearance. On the other hand, you can create a striking contrast. This might involve pairing a busy or strongly veined countertop with a simpler, more subdued backsplash. For instance, a white marble countertop often looks great with a soft gray subway tile backsplash. Or, if your countertop is a solid color with little pattern, you might choose a more detailed or colorful mosaic tile for the backsplash to add some visual interest. The goal is to find a balance that feels right for your space.
Matching or Contrasting the Backsplash with Countertop
Deciding whether to match or contrast your backsplash and countertop really depends on the overall design you’re aiming for. Matching can create a unified, flowing look, especially if both materials share similar tones or finishes. This approach can make a kitchen feel larger and more open. Contrasting, however, can add personality and a focal point. A bold backsplash can really pop against a neutral countertop, or a countertop with dramatic veining can be the star with a simple tile behind it. It’s about making a deliberate choice that supports your kitchen’s style.
Creating a Balanced and Visually Appealing Combination
Achieving a balanced look is key. If your countertop already has a lot going on – maybe it’s very patterned or has strong, noticeable veining – it’s usually a good idea to pick a backsplash that’s a bit more understated. This prevents the kitchen from feeling too busy or overwhelming. Think of it as letting one element shine without competing too much with the other. Conversely, if your countertop is a solid color or has a very subtle pattern, you have more freedom to choose a backsplash with more detail, color, or texture. This can add depth and character to your kitchen design. The aim is to create a visual harmony where both elements complement each other without clashing.
The right pairing of backsplash and countertop materials can significantly impact the perceived spaciousness and overall aesthetic of your kitchen. Careful consideration of color, pattern, and texture is important for a cohesive design.
Avoiding Overly Busy Combinations
It’s easy to get carried away with exciting patterns or bold colors, but sometimes less is more, especially when you have both a patterned countertop and a patterned backsplash. Trying to make too many strong visual statements at once can make a kitchen feel cluttered and chaotic. Instead, try to let one element be the main focus. If you have a countertop with intricate veining, a simpler tile pattern for the backsplash often works best. This allows the natural beauty of the stone to stand out. Similarly, if you’re drawn to a very decorative backsplash, a more solid or subtly textured countertop can provide a good grounding effect. It’s all about creating a pleasing visual flow.
The Impact of Countertop Veining on Tile Choice
Countertop veining can really influence your backsplash selection. If your countertop has dramatic, flowing veins, you might want to choose a backsplash tile that either echoes those lines in a subtle way or offers a completely different, simpler texture. For example, a countertop with strong gray veining might pair well with a plain white or light gray tile. If you want to tie the two elements together, you could look for a backsplash tile that has a hint of the countertop’s color within its own pattern. It’s about finding a connection, whether it’s through color, pattern, or texture, that makes the combination feel intentional and well-put-together. For durable and easy-to-maintain options, consider porcelain or ceramic tiles that can complement various countertop styles.
Achieving a Cohesive Kitchen Aesthetic
Ultimately, the goal is to create a cohesive look for your entire kitchen. This means thinking about how the backsplash and countertop fit in with your cabinets, flooring, and even your appliances. Do you want a modern, minimalist feel, or something more traditional and cozy? The materials you choose for your backsplash and countertop are major players in setting that tone. By carefully coordinating these elements, you can create a kitchen that feels unified, stylish, and truly reflects your personal taste. It’s about making sure all the pieces fit together to create a beautiful and functional whole.
Finishing Touches: Trim and Edge Protection
When you're putting in a new backsplash, it's not just about the tiles themselves. You also have to think about how the edges will look. Leaving the raw edges of your tiles exposed can make the whole project look unfinished, and it can also leave them open to damage. That's where trim and edge protection come in. These details might seem small, but they really make a difference in the final appearance and how long your backsplash lasts.
The Necessity of Tile Edge Trim
Think of tile edge trim as the frame for a picture. It gives your backsplash a clean, finished look. More than just looks, though, these trims protect the exposed edges of your tiles. They act as a barrier against moisture, grease, and everyday wear and tear. This helps keep your backsplash looking good for a long time, preventing chips or damage to those vulnerable edges.
Protecting Exposed Edges from Wear and Tear
Kitchen backsplashes, especially around the stove and sink, deal with a lot. Splashes of water, grease, and food are common. Without protection, the edges of your tiles can start to look worn, chipped, or stained. Tile edge trim provides a durable shield against these daily assaults. It's a simple way to add a layer of defense that keeps your backsplash looking fresh and new, even with regular use.
Options for Finishing Backsplash Edges
There are a few good ways to finish off those backsplash edges. You can go with traditional metal or plastic trim pieces, which offer a very clean and defined line. Another popular and often easier option is using caulk tape, which creates a smooth, sealed edge. For a really simple DIY approach, peel-and-stick trims are also available, making installation straightforward.
- Traditional Tile Trim: Metal, PVC, or ceramic pieces that fit along the edge. They offer a robust and classic finish.
- Caulk Tape: Flexible, adhesive strips that create a smooth, waterproof seal. Great for a quick, clean look.
- Peel-and-Stick Trim: Adhesive-backed decorative strips that are very easy to apply, often used for quick updates or DIY projects.
Using Caulk for a Waterproof Seal
Caulk is a really important material for finishing backsplash edges, especially where the backsplash meets the countertop or other surfaces. It fills in any small gaps, creating a watertight barrier. This is super important in the kitchen, where water and spills are common. A good caulk seal stops moisture from getting behind the tiles or into the grout lines, which can prevent mold and mildew growth. It also helps keep crumbs and dirt from getting stuck in those tricky transition areas.
Exploring Peel-and-Stick Trim Solutions
For homeowners looking for an easier installation, peel-and-stick trims are a great choice. These trims come with a strong adhesive backing. You just peel off the protective layer and stick them right onto the edge of your tiles. They're often made from durable materials like vinyl or aluminum and come in various colors and finishes to match your design. They don't require any special tools or messy grout, making them a fast and clean way to get a finished edge.
Schluter Strips for a Clean Transition
Schluter strips, often made of metal like aluminum or stainless steel, are a professional-grade option for finishing tile edges. They are designed to create a very clean, sharp transition between your tiled backsplash and adjacent surfaces, like countertops or walls. These strips not only protect the tile edges but also add a sleek, modern look. They are installed along with the tiles, often set into the adhesive, providing a very secure and durable finish that's built to last.
Enhancing Aesthetic Appeal with Edge Treatments
Don't underestimate the power of edge treatments to boost your backsplash's look. Whether you choose a sleek metal Schluter strip, a simple caulk line, or a decorative peel-and-stick trim, these finishing touches tie everything together. They give your backsplash a professional, complete appearance that really makes your kitchen design shine. Picking the right edge treatment can really make your backsplash stand out and look like it was done by a pro.
The Role of Caulking in Backsplash Integrity
Caulking plays a surprisingly big role in how your backsplash holds up over time. It's not just about making things look neat, though that's part of it. Think of caulk as the final seal, the thing that really locks everything in place and keeps moisture out. When you've got tiles meeting a countertop or cabinets, there's always a tiny gap, right? Caulk fills that gap. It stops water, crumbs, and all sorts of kitchen gunk from getting behind your beautiful tiles, which can cause real problems down the road, like mold or damage to your walls.
Cauling as a Crucial Sealant
Caulking is pretty important for keeping your backsplash looking good and staying protected. It's the stuff that fills in those small spaces where different materials meet, like where your tile backsplash meets the countertop. This filling action gives a clean, finished look, but more than that, it acts as a barrier. This barrier is key to preventing water and other messes from getting into places they shouldn't be. Without it, water can seep behind the tiles, potentially causing damage or mold growth over time. It really helps maintain the overall integrity of your backsplash installation.
Filling Gaps for a Polished Finish
When you're done tiling, there are often small gaps left where the tiles meet the countertop, or where the backsplash ends at a corner or cabinet. Caulk is used to fill these gaps. It creates a smooth, continuous line that makes the whole installation look more professional and put-together. It's like the final touch that ties everything together visually. You can get caulk in different colors to match your grout or tile, making the transition look intentional and clean.
Sealing Perimeters and Intersections
It's not just the main countertop seam that needs caulking. You'll want to apply caulk around the entire perimeter of your backsplash where it meets the wall or cabinets. Also, any place where different surfaces intersect, like around window frames or built-in shelving within the backsplash area, can benefit from a bead of caulk. This ensures that moisture and dirt have fewer places to sneak in. Think of it as creating a complete protective seal around the entire backsplash area.
Creating a Watertight Barrier
Water is the enemy of many kitchen surfaces, and your backsplash is no exception. When you're cooking, water can splash, and if there are gaps, it can get behind the tiles. Caulking creates a watertight seal in these vulnerable spots. This is especially important around sinks or areas where water is frequently used. A good caulk job means that splashes and spills are less likely to cause damage or lead to mold growth behind your tiles.
Preventing Water and Debris Seepage
Beyond just water, caulk also stops small bits of food, grease, and general kitchen debris from getting into those tiny cracks. These particles can be hard to clean out once they're in there, and they can also attract pests or contribute to unsanitary conditions. By sealing these gaps, you make your backsplash easier to clean and maintain, keeping your kitchen healthier and more hygienic.
Choosing High-Quality, Mold-Resistant Caulk
Not all caulk is created equal. For kitchen backsplashes, it's a good idea to use a caulk that's specifically designed for kitchens or bathrooms. These often have added features like mildew resistance, which is a big plus in a potentially damp environment. Look for silicone-based or siliconized acrylic latex caulks, as they offer good flexibility and water resistance. Always check the product label to make sure it's suitable for your specific tile and grout materials, and consider the color options available to best match your design.
Maintaining the Crispness of Your Design
Proper caulking doesn't just protect your backsplash; it also helps keep your design looking sharp. A clean, consistent bead of caulk along the edges makes the lines of your tilework look crisp and intentional. It prevents grout from cracking or crumbling at the edges over time, which can make the whole backsplash look messy. By maintaining these edges, caulk helps preserve the intended aesthetic of your kitchen design for the long haul.
Protecting Your Countertops During Installation
Installing a backsplash is exciting, but it's easy to forget that the process itself can pose risks to your countertops. Think about it: you've got tools, tiles, adhesive, and grout all coming into play. Without proper care, your beautiful new countertop could end up with scratches, chips, or even stains from stray materials. For porous surfaces like natural stone, a spill of grout or adhesive left too long can cause etching, which is a real headache to fix. Taking a few simple steps beforehand can save a lot of trouble later.
Applying Temporary Protective Films
Before you even think about laying the first tile, cover your countertops. You can get special self-adhesive plastic sheets made for this, or even use heavy-duty kraft paper. These act like a shield, keeping scratches, spills, and general construction dust away from your counter surface. It’s a small step that makes a big difference in keeping things looking pristine.
Using a Barrier Between the Countertop and Tile
Beyond just a film, consider adding a physical buffer right where the tiles will meet the counter. A strip of sturdy cardboard or a piece of foam can sit between the countertop edge and the first row of tiles. This prevents direct contact, which is where most accidental chips and dings happen during installation.
Shielding from Scratches and Debris
During the installation, you'll be moving tiles, cutting them, and applying adhesive. All of these actions create opportunities for something to fall or scrape against your countertop. Keeping a protective layer on is your best bet. Think of it like putting a blanket over your furniture before painting a room – it’s just good practice.
Preventing Damage from Spills and Adhesive
Adhesive and grout are sticky business. If they get on your countertop, especially porous ones, they can stain or etch the surface if not cleaned up immediately. The protective coverings help contain these messes, making cleanup much easier and preventing permanent marks.
Ensuring a Pristine Countertop Surface
Ultimately, the goal is to have a stunning backsplash and a countertop that looks just as good as it did before you started. Protecting your countertop during installation is about preserving that initial beauty and avoiding costly repairs or replacements down the line. It’s a proactive measure that pays off.
Achieving a Level and Stable Backsplash Surface
Achieving a level and stable backsplash surface is a key step for a professional and long-lasting installation. Any wobbles or unevenness in the tile can lead to problems down the line, like cracking or tiles coming loose. It’s not just about looks; it’s about making sure your backsplash holds up over time.
The Importance of a Level and Stable Surface
When you put your backsplash tile directly onto the countertop, making sure that surface is flat and steady is really important. If the countertop isn't perfectly even, it can cause the tile to crack, pop off, or just look bad with an uneven line where it meets the counter. This can also make sealing the seam later much harder.
Preventing Tile Cracking and Loosening
Tiles need a solid, flat base to stick to. If there are dips or bumps on the wall or substrate where you're applying the adhesive, the tile won't have full contact. This means the adhesive can't do its job properly, and the tile might not be supported evenly. Over time, this can lead to stress on the tile, causing it to crack or loosen, especially in areas with a lot of activity like behind a stove or sink.
Ensuring an Even Transition to the Countertop
Getting that transition from the backsplash to the countertop just right makes a big difference in the overall appearance of your kitchen. If the first row of tiles isn't level with the countertop, you'll have a gap. This gap isn't just unsightly; it's a place where water, grease, and crumbs can collect, making it hard to clean and potentially leading to mold or mildew.
Using a Straight Edge or Level for Guidance
To get that perfect line, you'll want to use tools. A straight edge or a level is your best friend here. Before you even start applying adhesive, check your wall or substrate for flatness. You can use a long level or a straight piece of wood to see where the high and low spots are. Mark these areas if needed. When you start setting your tiles, use the level frequently on rows and individual tiles to make sure everything is lining up correctly.
Employing Tile Leveling Systems
For a really precise finish, especially with larger tiles or materials that aren't perfectly flat, tile leveling systems are a game-changer. These systems usually involve clips that go under the tile and screws or wedges that you tighten to pull the tiles together, making them all sit at the same height. They help eliminate lippage – that's when one tile edge is higher than the next. It’s a bit more work, but the result is a super smooth, professional-looking surface.
Maintaining Consistent Gaps with Spacers
Spacers are small plastic pieces that you put between tiles as you set them. They do more than just keep your grout lines even; they also help keep the tiles from shifting too much as the adhesive cures. Using the right size spacers and making sure they are placed correctly helps create a uniform look and contributes to the overall stability of the backsplash. If tiles are too close or too far apart, it can affect how the whole section sits and how stable it feels.
Creating a Perfectly Flush Installation
A flush installation means all the tiles are on the same plane, with no high or low spots. This is what you're aiming for. It looks better, it's easier to clean, and it makes the whole backsplash feel more solid. It takes patience and careful work, checking your level often and making small adjustments as you go. If you're using a natural stone or a tile with a bit of variation, this step is even more important to get right.
Extending Your Backsplash Design to the Ceiling
Extending your backsplash design all the way up to the ceiling can really change the feel of a kitchen. It makes the space seem taller, which is great if you have lower ceilings or a smaller kitchen. It’s like giving your kitchen a visual lift, drawing the eye upward and making everything feel more open and airy. This approach also creates a really cohesive look, making the backsplash feel like a natural part of the room’s architecture rather than just an add-on.
When you run the tile to the ceiling, it also means you're thinking about how the tile interacts with other parts of the kitchen. For instance, continuing the tile around windows or any open shelving creates a unified design. It stops the backsplash from looking like a separate element and instead makes it an integrated feature. This attention to detail really ties the whole kitchen together.
Choosing the right tile size and shape plays a part too. Larger tiles can make a small kitchen feel bigger, while smaller tiles or mosaics can add detail to a larger space. Think about the overall style of your kitchen when picking patterns – classic subway tiles are always a safe bet, but herringbone or intricate mosaics can add a unique touch. It’s all about making the backsplash work with your countertops and cabinets for a balanced look.
Taking your backsplash tile all the way to the ceiling can give your kitchen a polished, finished appearance. It creates a continuous surface that feels intentional and well-designed. This method helps to unify the space, making the walls look more like a complete design element rather than just a protective barrier. It’s a way to add a significant design statement without overwhelming the room.
For kitchens that feel a bit cramped or have lower ceilings, extending the backsplash upwards can create a wonderful illusion of height. The vertical lines of the tile draw the eye upwards, making the ceiling appear higher than it actually is. This can make a significant difference in how spacious and open the kitchen feels, even if the physical dimensions haven't changed.
In smaller kitchens, every design trick counts. Running tile to the ceiling is a smart way to visually elongate the space. It breaks up the wall in a way that emphasizes verticality, which can make a compact kitchen feel much more expansive and comfortable to be in. It’s a simple change that can have a big impact on the perception of space.
Low ceilings can sometimes make a kitchen feel a bit cave-like. By extending the backsplash tile upwards, you introduce a strong vertical element that counteracts the feeling of being closed in. This draws attention away from the low ceiling and towards the beautifully tiled wall, making the entire area feel more open and inviting.
The placement of your tile is key. When it goes all the way to the ceiling, it naturally directs the gaze upward. This is particularly effective if you choose a tile with some visual interest, like a subtle pattern or a unique finish. It turns the backsplash into a focal point that contributes to the overall aesthetic of the kitchen.
Extending the backsplash creates a strong vertical line that contributes to a unified design. It connects the countertop area with the upper parts of the kitchen, like cabinets or the ceiling itself. This continuity makes the entire space feel more cohesive and thoughtfully designed, as if everything was planned together from the start.
A backsplash that reaches the ceiling is more than just a design choice; it’s a statement. It can dramatically alter the character of a kitchen, adding a sense of luxury and completeness. It’s a way to make your kitchen feel more custom and high-end, showing a commitment to detail in the overall design.
Wrapping Tile Around Kitchen Features for Cohesion
Continuing your backsplash tile around windows, open shelving, or other architectural features can really tie the whole kitchen together. It makes the backsplash feel like a planned part of the design, not just something stuck on the wall. This approach helps create a unified look, making the kitchen feel more complete and polished.
Think about wrapping tile around a window frame. It frames the view and adds a decorative element. Or, consider carrying the tile onto open shelving units. This can make those shelves look more built-in and intentional. It’s a way to make sure the backsplash isn't just a splash guard, but a real design feature that flows with the rest of the room. When you do this, you’re essentially making the backsplash an integral part of the overall kitchen aesthetic. It’s about creating a cohesive look throughout the space, avoiding any abrupt stops or awkward transitions. This attention to detail can make a big difference in how the kitchen feels as a whole.
- Frame windows: Tile around window frames to create a decorative border. This draws attention to the window and adds a finished look.
- Integrate with shelving: Carry tile onto the sides or back of open shelving for a built-in appearance.
- Wrap around architectural details: If you have any unique architectural features, consider how tile can flow around them to maintain visual continuity.
When you wrap tile around features, you’re essentially creating a continuous surface. This not only looks good but also helps prevent moisture and dirt from getting into those tricky transition areas. It’s a practical choice that also boosts the visual appeal of your kitchen. For example, using the same tile for your backsplash and a nearby range hood can create a striking visual connection, making the entire kitchen feel more cohesive.
This method is especially effective when you want to make a statement. It shows a thoughtful approach to design, where every element works together. It’s a way to achieve a truly polished and intentional kitchen design.
The Impact of Tile Size on Kitchen Aesthetics
The size of the tiles you choose for your kitchen backsplash can really change how the whole room feels. It’s not just about the color or pattern; the dimensions play a big part in the overall look and perception of your kitchen space. Think about it: different tile sizes can make a kitchen seem larger or smaller, more open or more detailed.
How Tile Size Affects Perceived Space
When you're working with a smaller kitchen, or even one with lower ceilings, picking the right tile size can make a surprising difference. Larger tiles, for instance, can create a sense of openness. They mean fewer grout lines, which can make a surface look more continuous and expansive. This visual continuity helps the eye travel further, making the space feel bigger than it actually is. On the flip side, very small tiles or intricate mosaics can sometimes make a space feel a bit more cluttered if not used carefully, especially in a compact area.
Larger Tiles for Spaciousness
If the goal is to make your kitchen feel more open and airy, larger format tiles are often a great choice. Think about tiles that are 4 inches by 8 inches, or even 4 inches by 12 inches. These sizes, often seen in subway tile styles, reduce the number of grout lines you see. This lack of visual interruption helps the backsplash blend into the wall, giving the impression of a larger, more unified surface. It’s a simple trick that can really open up a room, especially in kitchens where every inch counts.
Smaller Tiles for Intricate Detail
On the other hand, smaller tiles, like mosaics or penny rounds, bring a different kind of appeal. These are perfect for adding a lot of detail and visual interest. If you have a larger kitchen or a backsplash area that you want to be a real focal point, smaller tiles can be fantastic. They allow for more complex patterns and textures. While they do mean more grout lines, which can sometimes make a space feel smaller if overdone, they also offer a chance to get creative with intricate designs that add personality and a handcrafted feel to your kitchen.
Choosing Tile Size Based on Kitchen Dimensions
So, how do you pick the right size? It really comes down to your kitchen's specific layout and your personal style. For smaller kitchens, leaning towards larger tiles or simpler patterns can help create that feeling of spaciousness. If you have a larger kitchen and want to add some flair, smaller tiles or more detailed patterns can work well. It’s about balancing the scale of the tile with the scale of your kitchen. You don't want tiny tiles in a huge room that make it look busy, nor do you want massive tiles in a small space that overwhelm it.
Creating Visual Interest with Tile Scale
Don't forget that tile size also affects how you perceive texture and color. Larger tiles might show off a subtle texture or a beautiful veining in natural stone more clearly. Smaller tiles, especially mosaics, can create a shimmering effect or a complex color blend. The scale of the tile can really emphasize the material's qualities. It’s a way to add depth and character to your backsplash, making it more than just a protective surface.
The Relationship Between Tile Size and Overall Design
Ultimately, the size of your backsplash tile should work in harmony with your countertops, cabinets, and the overall style of your kitchen. A busy countertop might pair best with a simpler, larger tile to avoid overwhelming the space. Conversely, simple cabinets might benefit from a more detailed backsplash with smaller tiles or a unique pattern. It’s all about creating a balanced and cohesive look that reflects your personal taste and makes your kitchen a place you love to be in.
Making Informed Decisions on Tile Dimensions
When you're planning your backsplash, take a moment to consider the tile dimensions. Think about how the size will impact the feel of your kitchen. Will larger tiles make your small kitchen feel more open? Will smaller, detailed tiles add the perfect touch of personality to your larger space? By thinking about the scale, you can make a choice that truly complements your kitchen's design and helps achieve the aesthetic you're aiming for. It’s a small detail that can have a big impact on the final result.
Exploring Trending Tile Shapes and Patterns
When it comes to kitchen backsplashes, the shape and pattern of your tiles can really change the whole vibe of your space. It’s not just about picking a color; the form and arrangement play a big role in how your kitchen looks and feels. Thinking about what’s trending can give you some great ideas, whether you’re going for a complete remodel or just a small update.
The Popularity of Classic Subway Tiles
Subway tiles are still a big deal, and for good reason. They’re simple, clean, and fit with pretty much any kitchen style, from modern to farmhouse. You see them everywhere, and they just work. They come in different sizes, too, like the common 3x6 inch, but also longer ones like 4x12 inches. These longer ones can make a kitchen feel bigger, which is nice for smaller spaces. They give a clean look that’s easy to match with countertops and cabinets.
Elegant Herringbone Layouts
Herringbone is a pattern where tiles are laid in a V-shape, kind of like fish bones. It’s a classic look that adds a lot of visual interest without being too busy. This pattern has a way of making a kitchen feel both timeless and a little bit fancy. It works really well with glass tiles, giving them a nice shimmer. You can find tiles specifically made for this pattern, or you can cut them yourself if you’re feeling adventurous. It’s a step up from a straight lay and really makes the backsplash pop.
Intricate Mosaic Designs
Mosaics are smaller tiles, often grouped together on a mesh backing. They can be made of glass, stone, ceramic, or even metal. Mosaics are great for adding detail and texture. You can get them in all sorts of patterns, from simple linear arrangements to complex geometric designs or even abstract art looks. They’re perfect for creating a focal point or adding a bit of sparkle. If you’re looking for kitchen backsplash ideas, mosaics offer a lot of variety.
Choosing Patterns that Complement Kitchen Style
When you pick a pattern, think about your kitchen’s overall style. A modern kitchen might look great with a clean, geometric pattern or a simple subway tile. A more traditional or rustic kitchen could suit a classic herringbone or a mosaic with natural stone. It’s about making sure the tile pattern fits in and doesn’t clash with your cabinets, countertops, or flooring. Sometimes, a simple pattern is best, especially if your countertops have a lot of movement or color.
Matching Patterns to Your Design Vision
Your backsplash is a chance to show off your personal style. Do you like bold and geometric, or something more subtle and organic? Linear patterns, like straight lines or stacked designs, offer a clean, modern look. French patterns, which mix different shapes and sizes, can add a touch of old-world charm or artistic flair. Even simple shapes like triangles can create a dynamic and eye-catching design. The key is to find a pattern that you’ll enjoy looking at every day.
Adding Visual Interest with Tile Patterns
Patterns are a fantastic way to add personality to your kitchen. They can break up the monotony of plain walls and add depth and character. Consider how the pattern will interact with the lighting in your kitchen. Some patterns, especially those with glossy finishes or metallic elements, can really catch the light and add a bit of sparkle. Others, with matte finishes or natural textures, offer a more subdued, sophisticated look. It’s all about creating the right atmosphere for your cooking and gathering space.
Thinking about new tile styles? From cool geometric shapes to eye-catching patterns, there's a lot to explore. These designs can really change the look of any room. Want to see the latest trends and find the perfect tiles for your space? Visit our website today to discover a world of beautiful tile options!
A Lasting Impression
So, there you have it. Taking the time to properly seal your backsplash, along with paying attention to details like caulking the edges and protecting your countertops during installation, really makes a difference. It’s not just about making things look good right away; it’s about protecting your investment and keeping that beautiful finish for years to come. Think of it as giving your kitchen a little extra armor against daily life. With these steps, your backsplash will stay looking great, adding charm and value to your home without you having to worry about it too much.
Frequently Asked Questions
Why is it important to seal a kitchen backsplash?
Sealing a backsplash helps protect it from stains, grease, and moisture, keeping it looking nice for longer. It’s like putting a shield on your kitchen walls to prevent damage from cooking messes.
How do I choose the right sealant for my backsplash material?
The best sealant depends on what your backsplash is made of. Natural stones like marble or granite need different sealants than ceramic or porcelain tiles. Always check the material of your tiles and grout to pick the right product.
What are the important steps to prepare a backsplash for sealing?
Before sealing, make sure the backsplash is super clean and completely dry. Any dirt or leftover glue will get trapped under the sealant, making it look messy. Also, protect nearby areas like your countertops and walls with tape or plastic.
What is the best way to apply sealant to a backsplash?
Apply the sealant evenly using a brush, roller, or sprayer, depending on the product. Make sure to cover all the tile and grout lines. It’s often best to apply two thin coats rather than one thick one, letting each coat dry as the instructions say.
Should I also seal the area where the backsplash meets the countertop?
Yes, sealing the line where the backsplash meets the countertop is very important. It stops water and food bits from getting behind the backsplash, which can cause problems like mold. Use a special caulk made for kitchens and bathrooms for this.
How should I clean and maintain my sealed backsplash?
Regular cleaning with mild soap and water is key. Avoid using harsh chemicals or scrubby pads, as they can wear down the sealant over time. Wipe up spills right away to prevent stains.
How often do I need to reseal my backsplash?
If the sealant looks patchy, is peeling, or isn't protecting the backsplash anymore, it's time to reapply. This usually happens every few years, depending on how much the kitchen is used and what kind of sealant was used.
Can applying multiple coats of sealant make my backsplash more durable?
Applying more than one coat of sealant can make it stronger and last longer. It creates a thicker protective layer. Just be sure to let each coat dry properly before applying the next one.
How does the type of tile material affect sealing needs?
Natural stones like marble and granite are more porous, meaning they soak up liquids more easily. They need sealants that soak into the stone to block stains. Ceramic and porcelain tiles are less porous and might only need sealing on the grout.
Are there sealants that can help prevent mold and mildew?
Yes, some sealants have special ingredients to fight mold and mildew, especially in grout lines. This is a good idea for kitchens where moisture can be a problem.
What is the purpose of using trim or caulk on backsplash edges?
Using trim pieces or caulk along the edges where the backsplash meets cabinets or walls helps protect these areas from moisture and wear. It also gives a clean, finished look, making the backsplash look more complete.
Does extending the backsplash tile to the ceiling have any design benefits?
Yes, extending the tile all the way to the ceiling can make a kitchen look bigger and more open. It also creates a really nice, finished look that ties the whole room together.

