


Thinking about a new floor? Quartz tile is a really popular choice right now, and for good reason. It looks great, it's tough, and it can really change the feel of a room. But picking the right one and getting it installed can seem a bit overwhelming. This guide breaks down everything you need to know about choosing and installing a quartz tile floor, from understanding what makes it special to making sure it looks perfect in your home.
Key Takeaways
- Quartz tile floors offer a blend of durability and visual appeal, making them a solid choice for many homes.
- When selecting quartz tiles, consider your specific needs, desired look, tile size, and budget.
- Proper subfloor preparation is vital for a long-lasting and stable quartz tile floor installation.
- Gathering the right tools and materials beforehand will make the installation process much smoother.
- Careful planning of the tile layout, including dry laying, helps avoid mistakes and ensures a professional finish.
- Precise cutting and careful application of adhesive are critical steps for a successful quartz tile floor.
- Proper grouting and cleaning are necessary to protect your new quartz tile floor and achieve a polished look.
- While DIY is possible, understanding the complexities and potential risks is important before starting your quartz tile floor project.
Understanding Quartz Tile Flooring
Quartz tile flooring is a popular choice for many homeowners and designers, and for good reason. It brings together a lot of desirable qualities into one package. If you're thinking about updating your floors, understanding what quartz tile is all about is the first step. It's not quite natural stone, but it's not entirely artificial either, which makes it a bit unique.
The Enduring Appeal of Quartz Tile Floors
People keep coming back to quartz tile for their homes. It looks good, feels solid underfoot, and generally holds up well over time. This kind of flooring can really change the feel of a room, making it look more polished and put-together. It’s a material that seems to fit into many different home styles, from modern to more traditional.
Key Characteristics of Quartz Tile
So, what exactly makes up quartz tile? It's typically made from crushed quartz crystals, mixed with resins, polymers, and pigments. This blend is then compacted under intense pressure and heat. The result is a non-porous, incredibly hard surface. This composition is what gives quartz tile its impressive strength and low maintenance.
Benefits of a Quartz Tile Floor
There are quite a few advantages to choosing quartz tile. For starters, it's very durable, resisting scratches and stains pretty well. It's also non-porous, meaning it doesn't absorb liquids, which is a big plus in kitchens and bathrooms. Plus, the manufacturing process allows for a wide range of colors and patterns, offering a lot of design flexibility. You can get a look that mimics natural stone without all the upkeep. Many homeowners appreciate the ease of cleaning; a simple sweep and mop usually do the trick.
Comparing Quartz Tile to Other Flooring Options
When you look at quartz tile next to other popular flooring materials, it often stands out. Compared to natural stone like granite or marble, quartz is generally more consistent in color and pattern, and often less expensive. It's also more durable than laminate or vinyl, which can scratch or fade more easily. While hardwood floors offer warmth, they are susceptible to water damage and require more careful maintenance. Quartz tile offers a good balance of looks, durability, and practicality.
The Durability Factor in Quartz Tile
Durability is a major selling point for quartz tile. The high quartz content, combined with the manufacturing process, creates a surface that's tough to scratch or chip. This makes it a great option for high-traffic areas in your home, like hallways, kitchens, and living rooms. You won't have to worry as much about everyday wear and tear compared to softer materials. This long-lasting quality means your investment will pay off over many years.
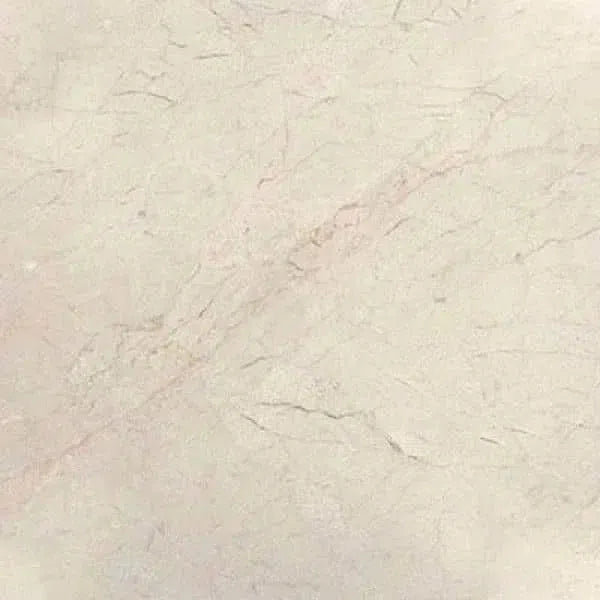
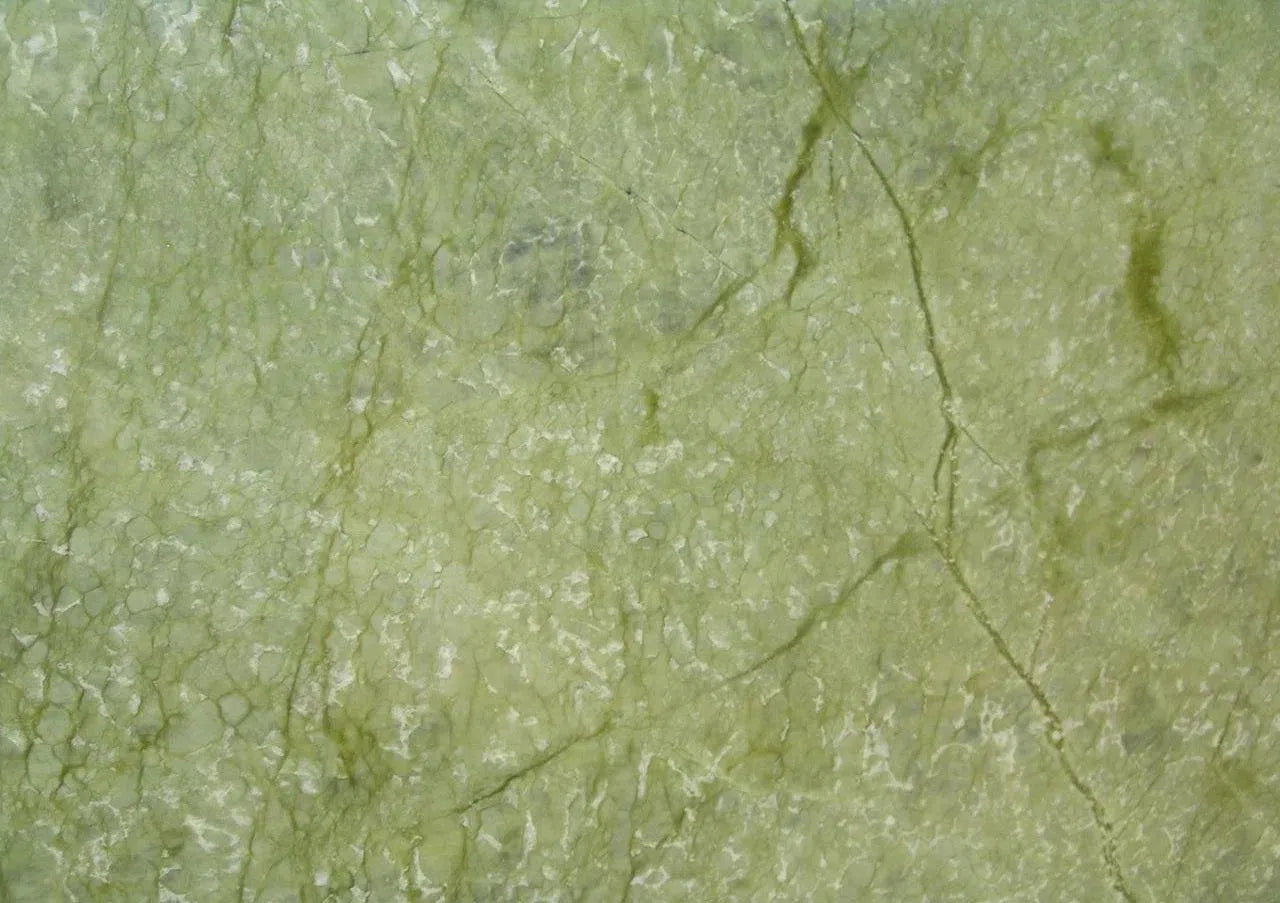
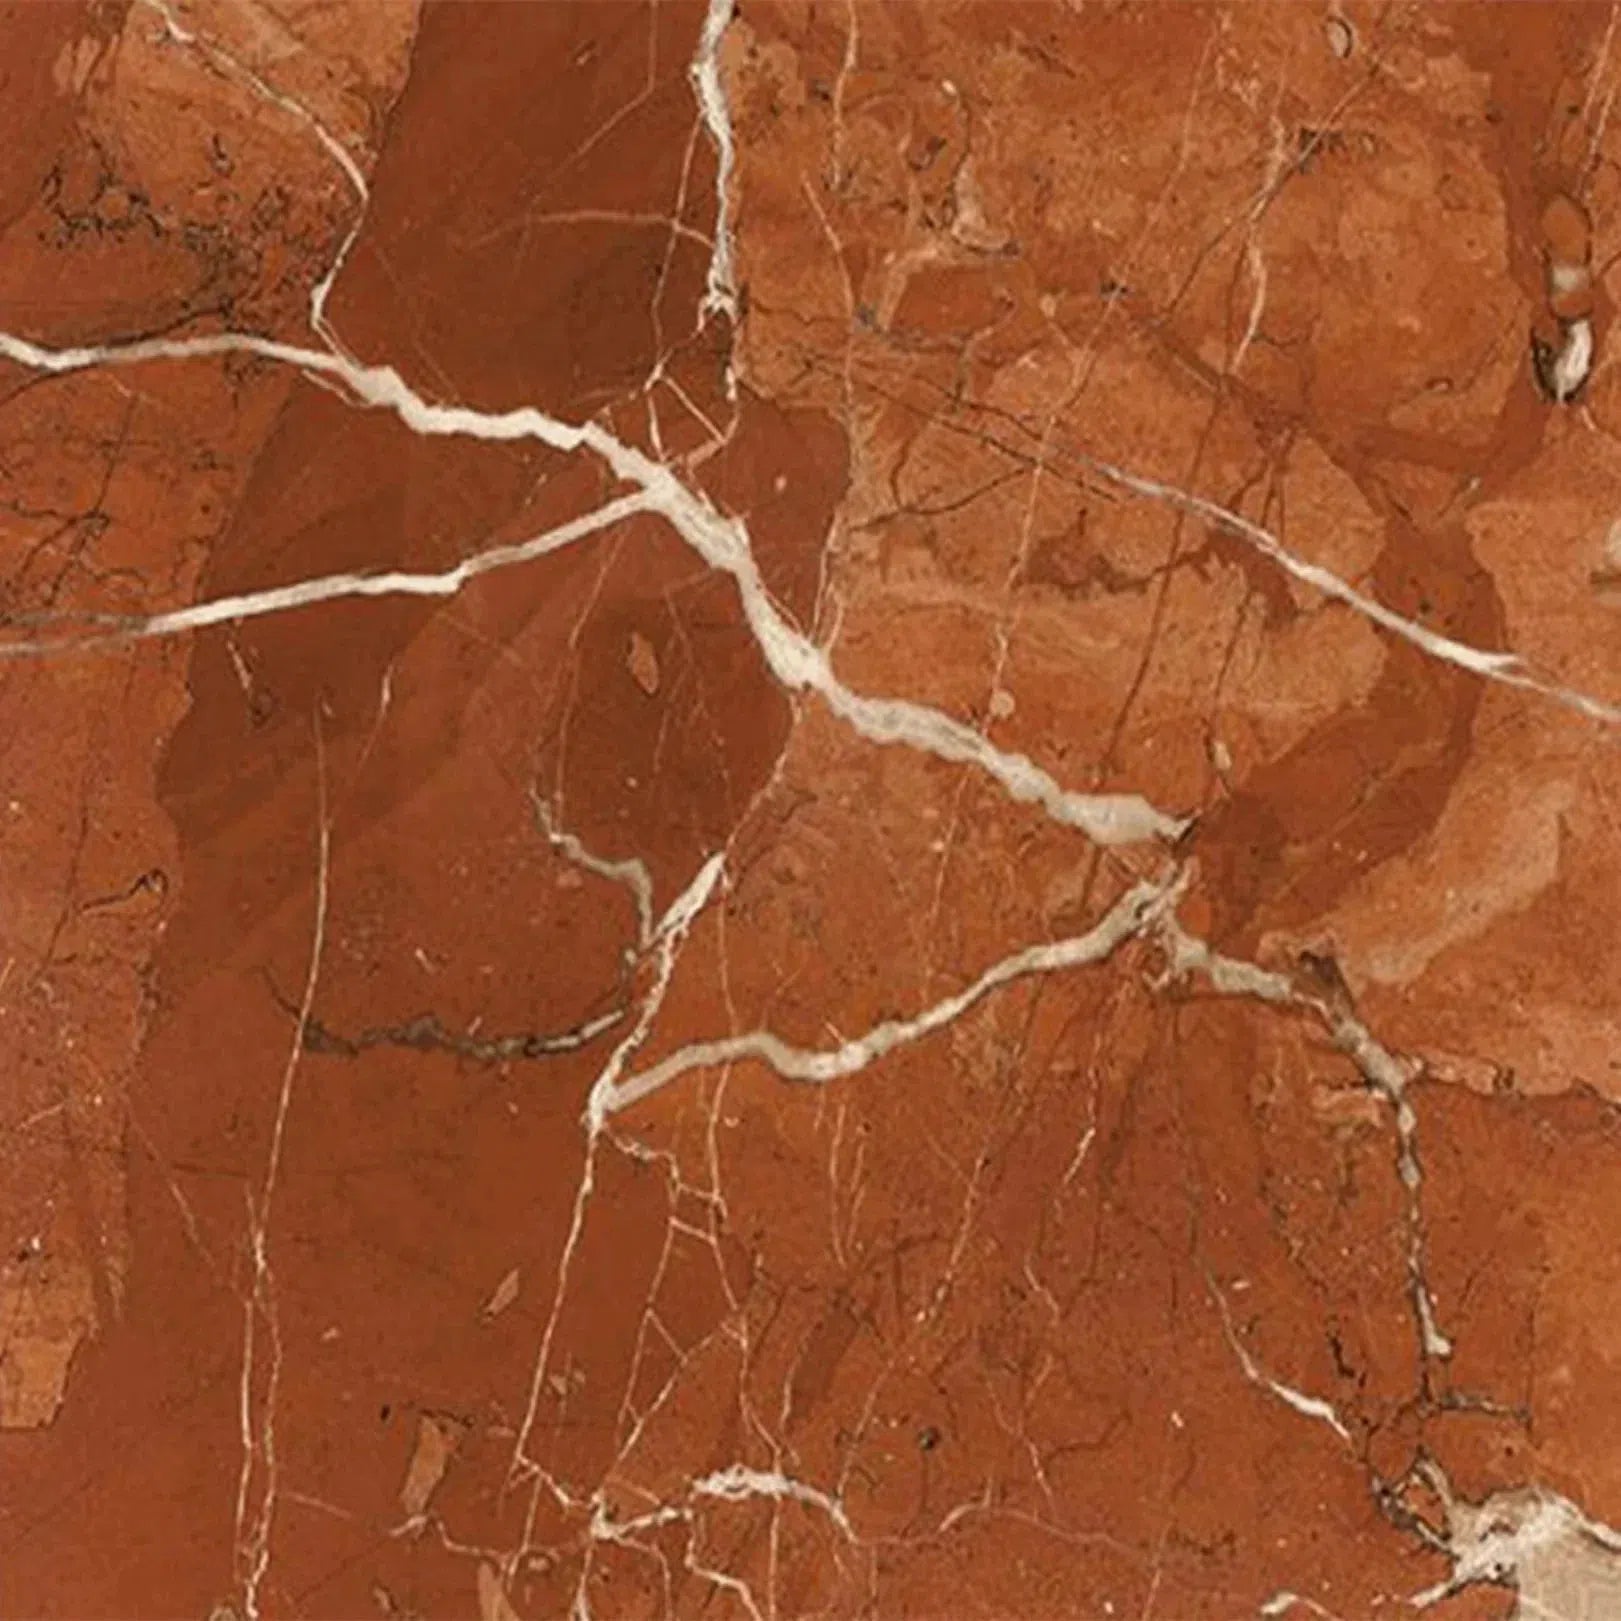
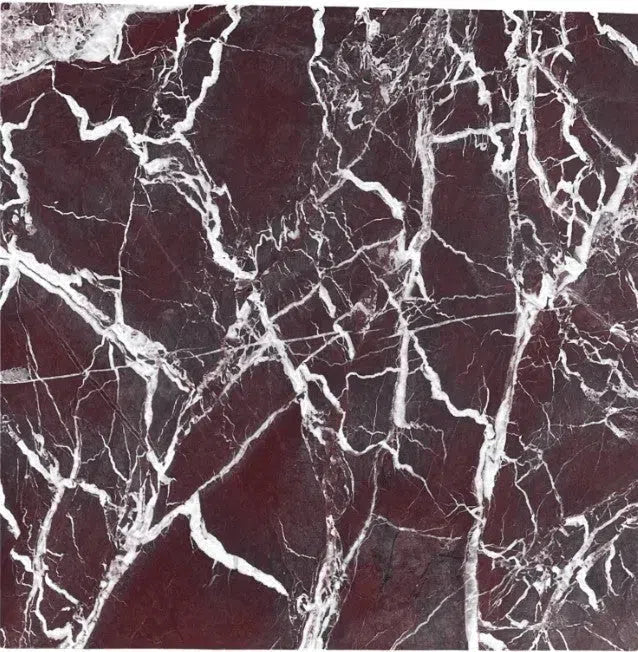
Aesthetic Versatility of Quartz Tile
One of the best things about quartz tile is how many different looks you can achieve. Manufacturers can create tiles that look remarkably like natural stone, such as marble or granite, but with more predictable patterns. They also come in solid colors, abstract designs, and even wood-look finishes. This means you can find a quartz tile to match almost any interior design scheme. Whether you want a sleek, modern look or something more rustic, quartz tile can deliver.
Maintenance Advantages of Quartz Tile
Keeping a quartz tile floor looking its best is surprisingly simple. Because the material is non-porous, spills and stains don't easily penetrate the surface. This makes cleanup straightforward. Regular sweeping or vacuuming is usually enough for daily maintenance. For deeper cleaning, a damp mop with a mild detergent is typically all that's needed. There's no need for special sealants or waxes, which saves time and effort. This low-maintenance aspect is a big draw for busy households. You can find great cleaning supplies for your new floors nationwide shipping to ensure you have everything you need.
Selecting the Perfect Quartz Tile Floor
Choosing the right quartz tile for your project is a big step, and honestly, it can feel a little overwhelming with all the options out there. But don't worry, we're here to break it down. Think of this section as your personal guide to making sure you pick tiles that look great, perform well, and fit your budget. It’s all about finding that sweet spot between style and practicality for your U.S. home or renovation.
Assessing Your Project's Needs
Before you even start looking at colors, take a moment to think about where these tiles are going and what they'll go through. Is it a busy kitchen that sees a lot of foot traffic and potential spills? Or maybe a quiet bathroom where moisture is the main concern? Knowing the environment helps you narrow down the best type of quartz tile. For high-traffic areas, you'll want something super durable, while a low-traffic entryway might allow for more decorative choices. Consider the overall style of your home too – are you going for modern, rustic, or something in between? This initial assessment is key to avoiding costly mistakes down the line.
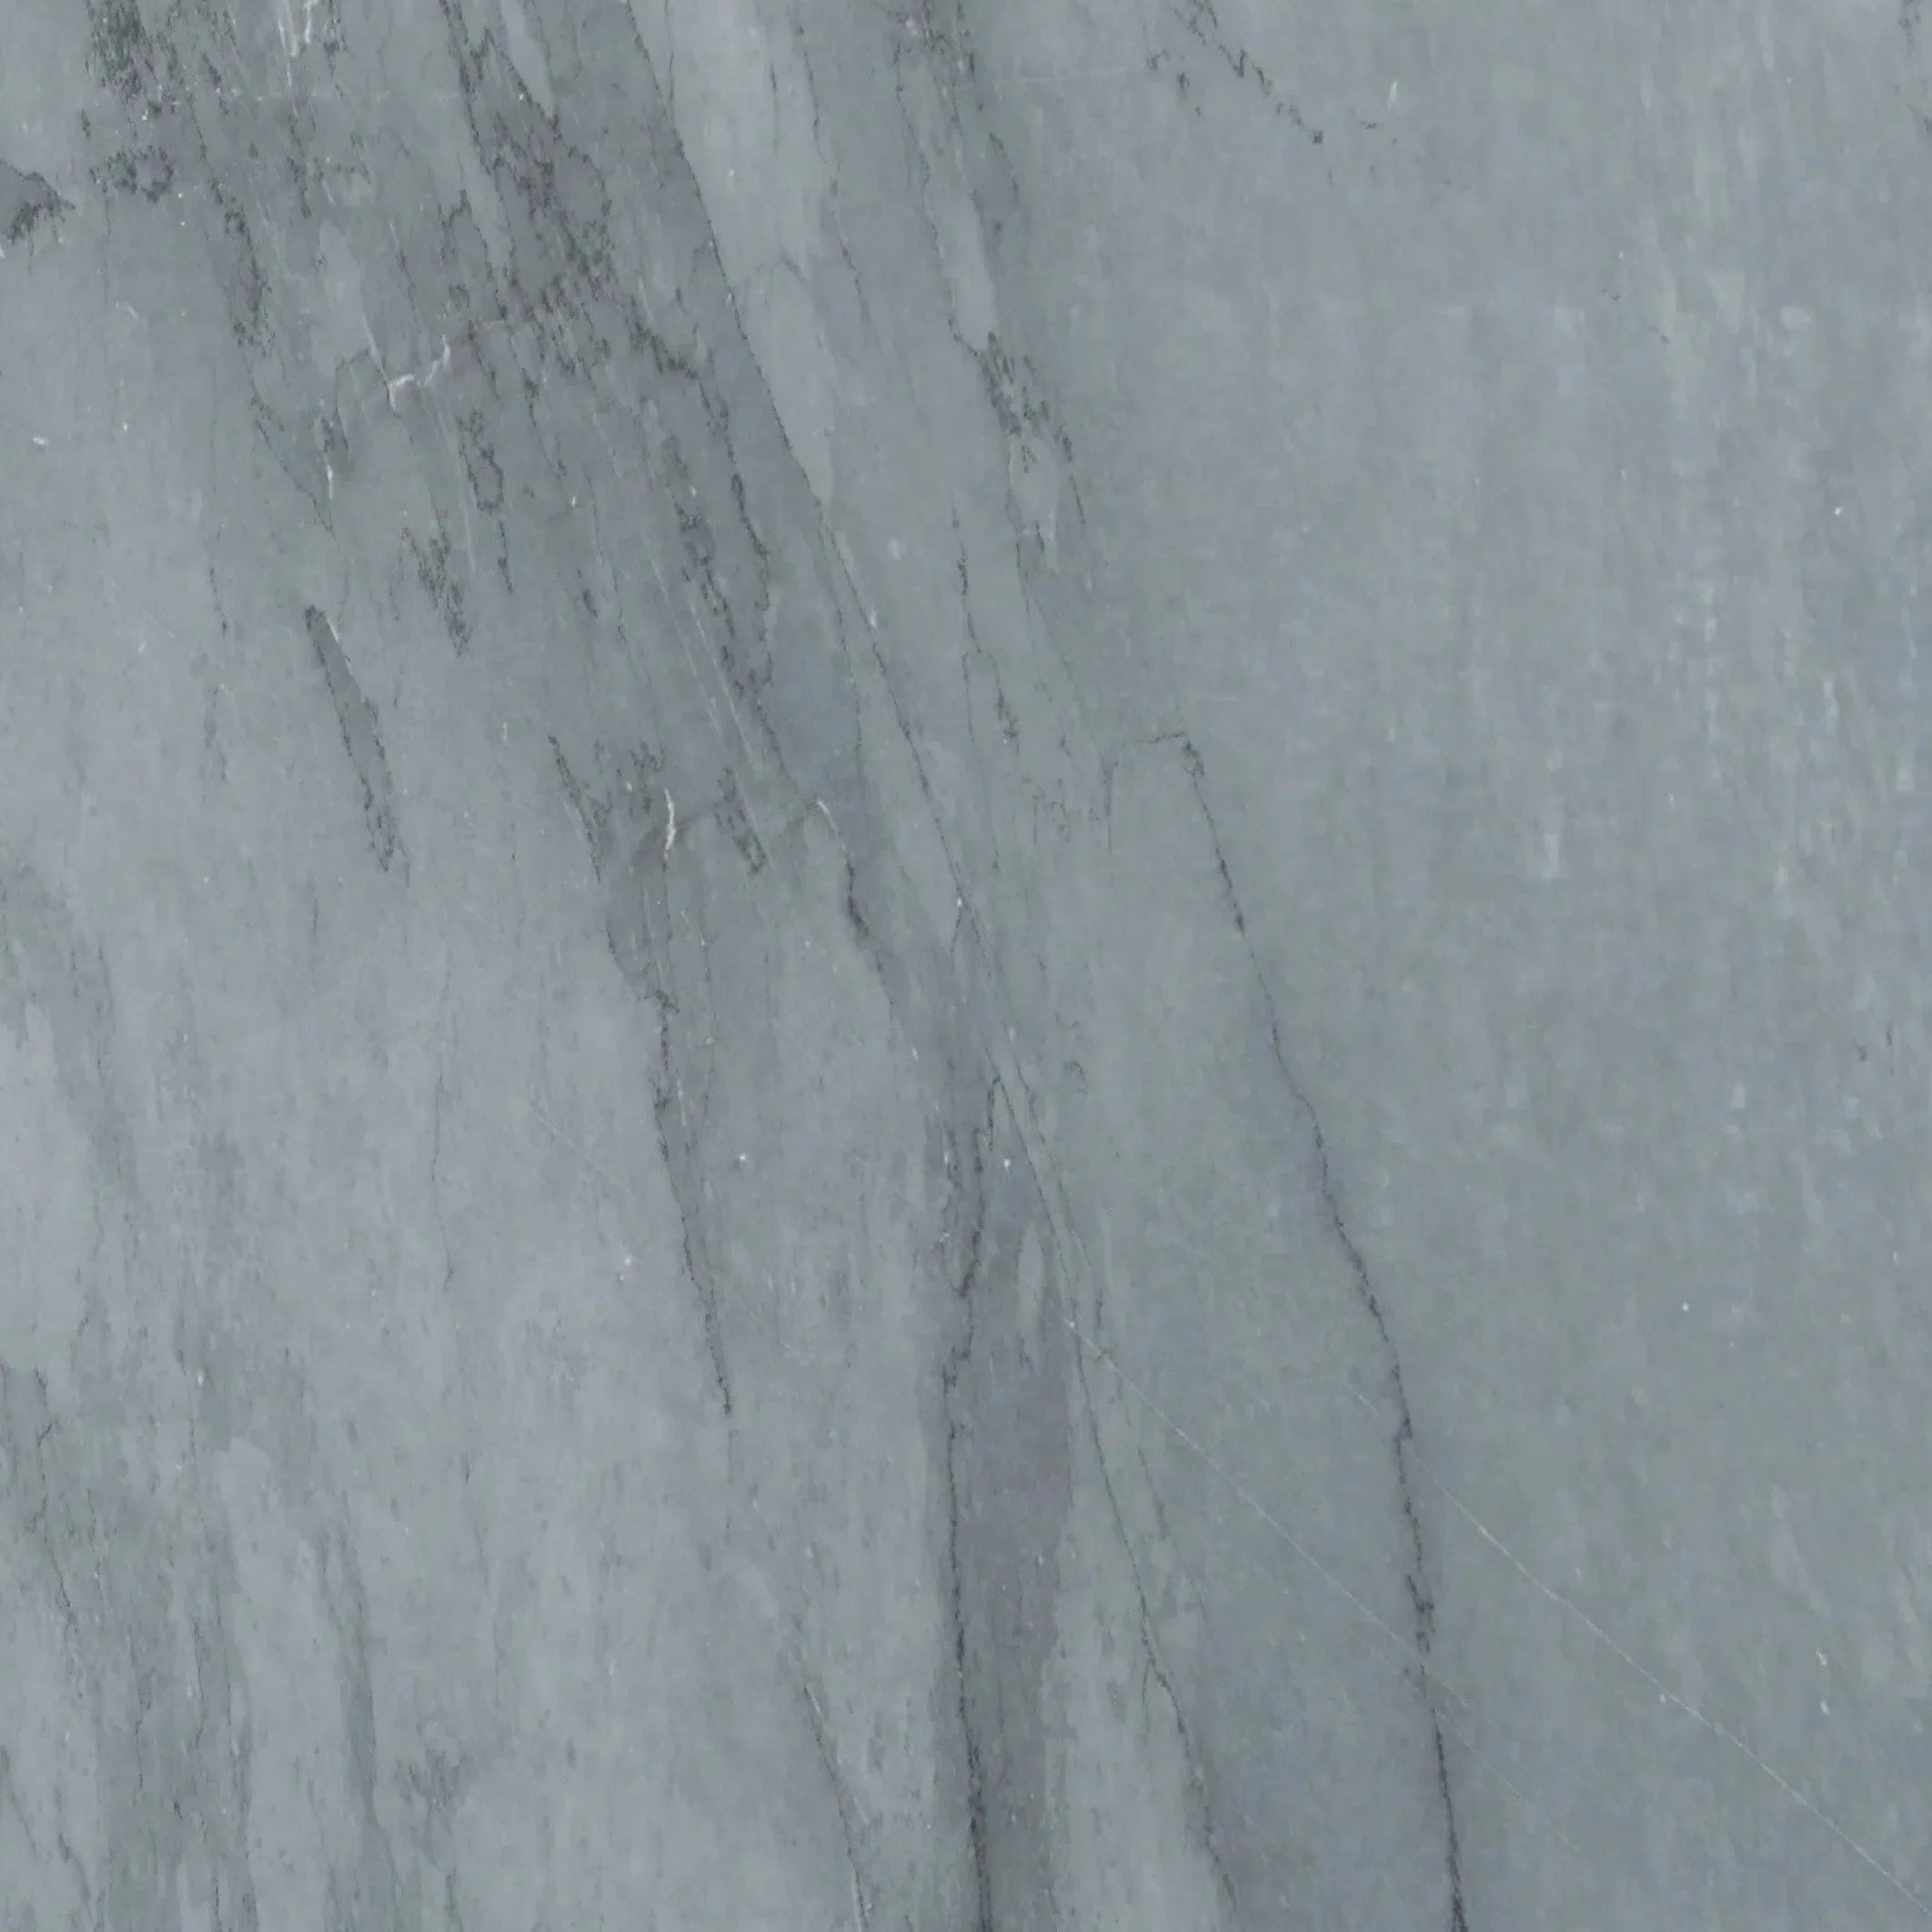
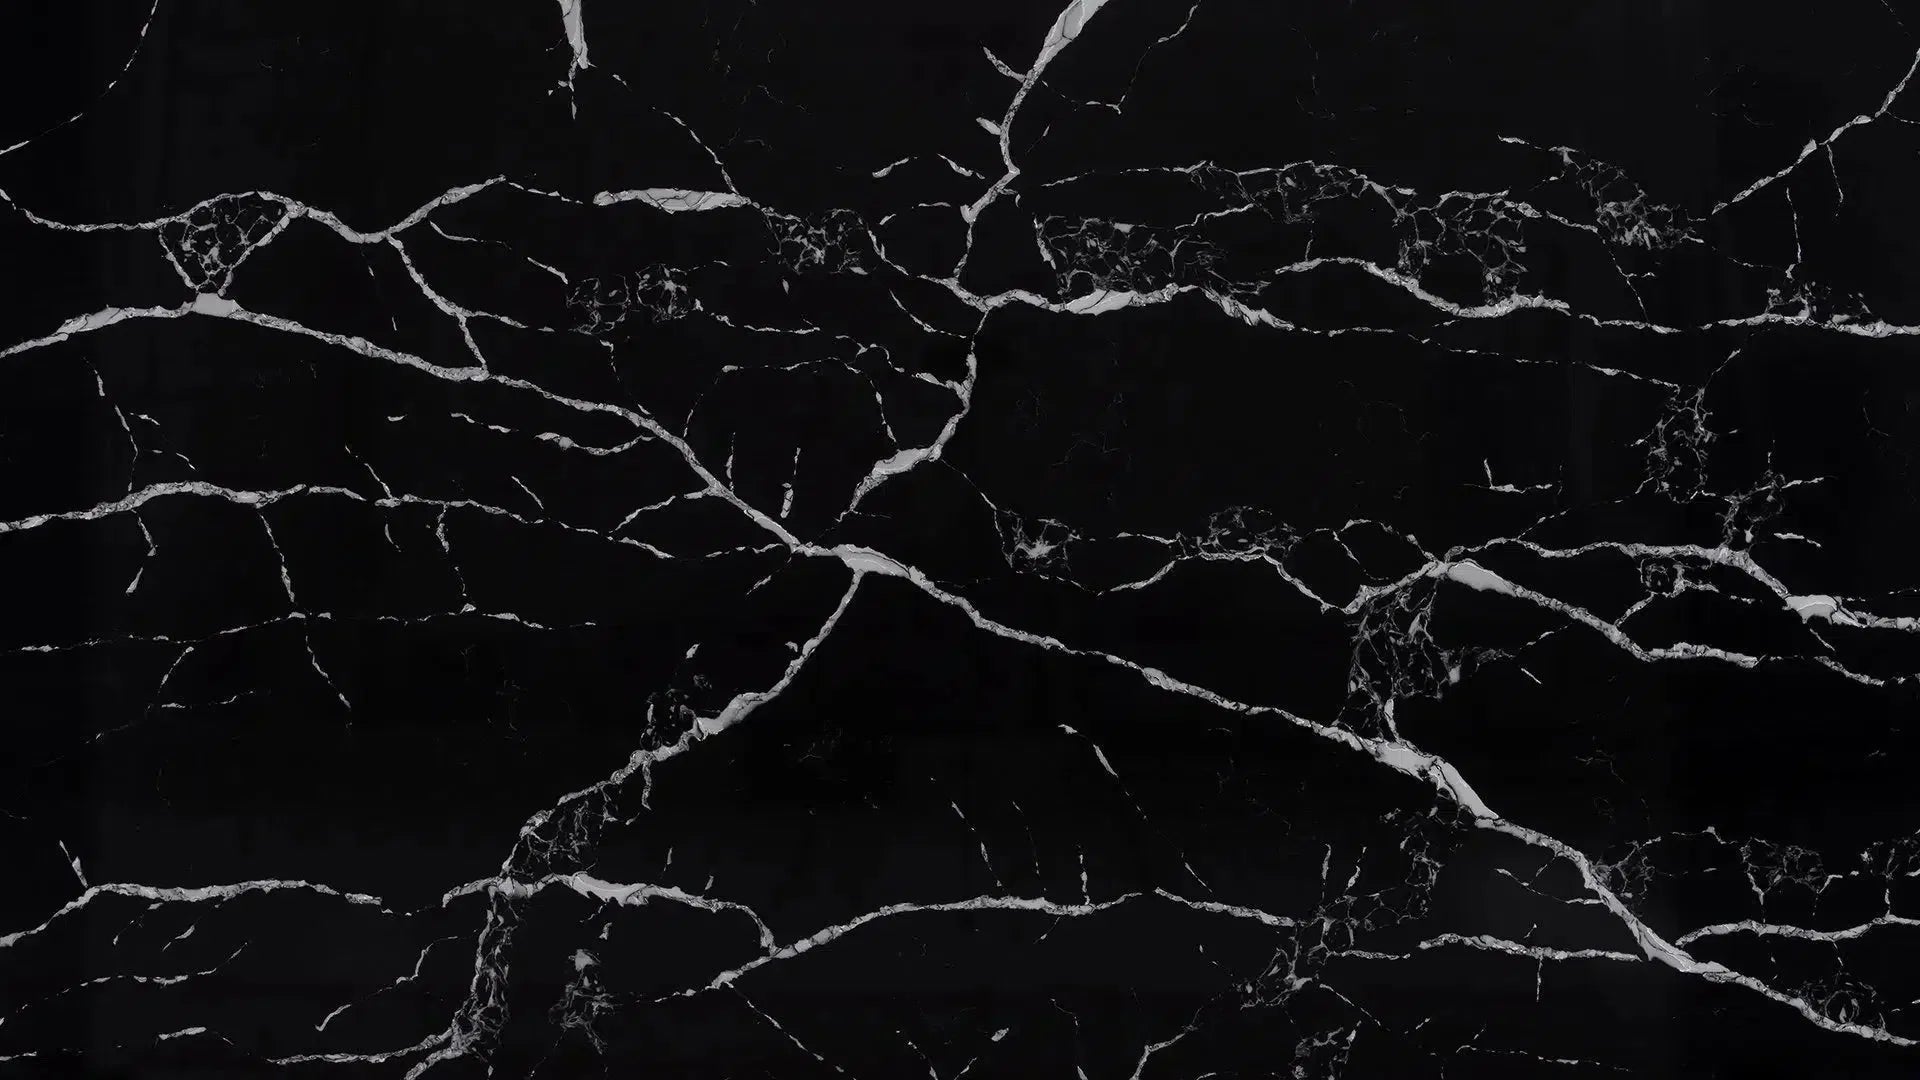
Choosing the Right Color and Finish
This is where the fun really begins! Quartz tiles come in a huge range of colors and finishes. You've got everything from deep, rich blacks and crisp whites to earthy beiges and cool grays. The finish makes a big difference too. A polished finish gives you that high-shine, reflective look, which can make a space feel larger and more luxurious. On the other hand, a honed or matte finish offers a softer, more subdued appearance and can be better at hiding minor smudges or water spots. Think about how the color and finish will work with your existing cabinets, countertops, and wall colors. It’s often helpful to get a few samples to see how they look in your home's natural light throughout the day.
Understanding Tile Sizes and Shapes
Tile size and shape can dramatically change the feel of a room. Large format tiles, for instance, can make a small space feel more expansive because they have fewer grout lines. They're also quite popular right now for a modern look. Smaller tiles, like mosaics or subway tiles, can add intricate detail and texture, perfect for backsplashes or accent areas. Don't forget about shapes beyond the standard square or rectangle – hexagons, chevrons, and arabesques can add a unique design element. Consider the scale of your room; a very small room might be overwhelmed by huge tiles, while a large room can handle them beautifully.
Evaluating the Quality of Quartz Tiles
Not all quartz tiles are created equal. When you're looking at quality, pay attention to a few things. First, check the thickness of the tile; thicker tiles are generally more durable. Look for consistency in color and pattern across the tiles – significant variations might indicate lower quality. Also, examine the edges; they should be clean and well-defined. A truly premium quartz tile will feel substantial and look consistent. If you're buying from a reputable supplier, they should be able to provide information about the tile's composition and manufacturing process. We only offer handpicked A+ top-quality natural stone products, never commercial grade.
Considering the Manufacturer's Reputation
Just like with any major purchase, the reputation of the manufacturer or supplier matters. A company with a long history of producing high-quality quartz tiles is more likely to stand behind their products. Look for brands that offer good warranties and have positive customer reviews. Direct importers, like American Stone Center, often have an advantage because they source directly from quarries, which can mean better pricing and more consistent quality control. It’s worth doing a little research to see who you’re buying from.
Budgeting for Your Quartz Tile Project
It's smart to have a clear budget before you start shopping. Quartz tile prices can vary quite a bit based on brand, finish, size, and origin. Remember to factor in not just the cost of the tiles themselves, but also the adhesive, grout, underlayment, and any special tools you might need. Don't forget to account for potential waste from cuts, which is why ordering about 10-15% extra tile is usually recommended. If you're hiring installers, get quotes early on to understand that part of the cost as well.
Where to Source Premium Quartz Tiles
Finding a reliable source for premium quartz tiles is important. You can find them at specialized tile and flooring stores, home improvement centers, and increasingly, online. Buying directly from importers can sometimes offer better value. If you're looking for luxury natural stone you can trust, consider suppliers who are direct importers and emphasize A+ quality. Many nationwide suppliers offer fast, reliable shipping, sometimes even same-day, which is great for keeping your project on schedule. Requesting samples before you buy is always a good idea, no matter where you source your tiles from.
Preparing Your Subfloor for Quartz Tile
Before you even think about laying down those beautiful quartz tiles, there's a step that's super important, and honestly, kind of a pain if you mess it up: getting your subfloor ready. Think of your subfloor as the foundation for your entire tile project. If it's not solid and level, your tiles won't look right, they might crack, and you'll probably end up with a headache down the road.
Importance of a Solid Subfloor Foundation
A strong subfloor is non-negotiable for a quartz tile installation. It needs to be rigid enough to support the weight of the tiles and any traffic they'll see. A flexible or weak subfloor can lead to tiles cracking or grout lines breaking apart over time. We're talking about a floor that needs to last, right? So, giving it a good base is key.
Assessing Existing Floor Conditions
First things first, take a good look at what you're working with. Is there an existing floor covering? You'll likely need to remove it completely. Check for any signs of damage, like water stains, rot, or loose sections. If you have old vinyl or linoleum, make sure it's fully adhered and not peeling up anywhere. Sometimes, you can tile over certain existing floors, but it's usually best to go down to the bare subfloor for the most reliable result.
Addressing Subfloor Imperfections
Once you've got a clean subfloor, it's time to hunt for problems. Are there any dips, humps, or uneven spots? Even a small imperfection can cause issues. You might need to use a leveling compound to fill low areas or grind down high spots. For wood subfloors, check for squeaks and secure any loose boards with screws. A perfectly flat and smooth surface is what you're aiming for.
Ensuring Proper Subfloor Levelness
Levelness is critical. Use a long, straight edge or a level to check your subfloor in multiple directions. Most tile manufacturers recommend that the subfloor be within 1/8 inch of level over a 10-foot span. If it's not, you'll need to use a self-leveling underlayment to achieve this flatness. This step might seem tedious, but it makes a huge difference in the final look and longevity of your quartz tile floor.
Moisture Testing and Mitigation Strategies
Moisture is the enemy of most flooring, including quartz tile. If you're installing over a concrete slab, especially on or below grade, you absolutely must test for moisture. You can get inexpensive moisture test kits at most hardware stores. If the test shows high moisture levels, you'll need to address it before tiling. This might involve applying a moisture barrier or a specialized primer. For wood subfloors, check for any signs of past water damage and ensure there's proper ventilation.
Choosing the Right Underlayment
Depending on your subfloor type and the specific quartz tiles you've chosen, you might need an underlayment. For concrete slabs, a decoupling membrane can help prevent cracks from transferring from the slab to the tile. For wood subfloors, cement board or a similar rigid underlayment is often recommended to provide a stable, moisture-resistant base. Always check the tile manufacturer's recommendations for underlayment.
Preparing for Tile Adhesives
Finally, make sure your subfloor is clean and free of dust, debris, or any substances that could prevent the adhesive from bonding properly. A quick sweep and vacuum should do the trick. A clean subfloor is the last step before you can start applying your adhesive.
Essential Tools and Materials for Installation
Getting ready to install your new quartz tile floor is exciting, but having the right gear makes all the difference. It’s not just about the tiles themselves; it’s about the supporting cast of tools and materials that help you get the job done right. Think of it like preparing for a big project – you wouldn't start building a house without a hammer, right? The same applies here. Having a well-stocked toolbox means fewer trips to the hardware store and a smoother installation process overall.
Gathering Your Cutting Tools
Cutting tiles to fit around edges, corners, and obstacles is a big part of the job. You'll need tools that can handle the hardness of quartz. A good quality wet saw is often the go-to for clean, precise cuts, especially for straight lines and larger pieces. For smaller adjustments or more intricate cuts, a tile nipper can be handy. Don't forget safety glasses – quartz dust can be harmful, so protecting your eyes is a must.
Essential Measuring and Marking Supplies
Accuracy is key in tiling. You'll need a reliable measuring tape to get your dimensions just right. A chalk line or a laser level is great for marking straight lines across your subfloor, giving you a guide for your tile layout. Pencils or markers are also useful for marking cut lines directly onto the tiles. Precise measurements prevent costly mistakes and ensure a professional look.
Adhesives and Grouts for Quartz Tile
Choosing the right adhesive is critical for a strong, lasting bond. For quartz tiles, you'll typically want a high-quality thin-set mortar specifically designed for dense materials like quartz. Make sure it's suitable for your subfloor type. The grout you choose will fill the spaces between tiles. It comes in various types, like sanded or unsanded, and a wide range of colors. Consider a high-performance grout that resists staining and cracking for durability. You can find a wide variety of flooring supplies and accessories to suit your project.
Trowels and Spreading Tools
To apply the adhesive evenly, you'll need a notched trowel. The size of the notches depends on the tile size and the adhesive manufacturer's recommendations – usually, a 1/2-inch or 3/8-inch notch is appropriate for most quartz tiles. A grout float is used to spread the grout into the tile joints. Having a margin trowel can also be helpful for scooping adhesive from the bucket.
Safety Equipment for Protection
Safety should always be your top priority. This includes safety glasses to protect your eyes from dust and debris, work gloves to protect your hands, and knee pads to make kneeling on hard surfaces more comfortable. If you're using a wet saw, consider a dust mask or respirator to avoid inhaling fine particles. Proper footwear is also important – closed-toe shoes are a must.
Cleaning and Finishing Materials
Once the tiles are set and grouted, you'll need materials for cleaning up. Sponges, buckets, and clean cloths are necessary for removing excess adhesive and grout haze. You might also need a grout sealer to protect the grout lines from stains and moisture, especially in areas like kitchens and bathrooms. A good tile installation often includes these finishing touches.
Specialty Tools for Precision
Depending on the complexity of your layout, you might consider some specialty tools. Tile spacers are vital for maintaining consistent grout lines, which gives your floor a uniform appearance. A tile cutter can be useful for making straight cuts, while a tile saw is better for more complex shapes. If you're working with a large area, a tile leveling system can help ensure all your tiles are perfectly flush.
Mastering the Quartz Tile Layout
Getting the layout right before you start sticking tiles down is a big deal. It's like drawing a blueprint for your floor; it makes everything else go smoother. A good layout plan means fewer cuts, less waste, and a much better-looking final floor. It's not just about making it look pretty, though. A well-planned layout can actually make installation easier, especially if you're doing it yourself.
Planning Your Tile Pattern
Before you even think about cutting a single tile, you need to decide on your pattern. Are you going for a simple grid, a staggered brick pattern, or something more complex like a herringbone? The pattern you choose will affect how many tiles you need and how you'll lay them out. Think about the size of your room and the size of the tiles. Large tiles in a small room might look best with a simple grid, while smaller tiles can handle more intricate patterns. Don't forget to consider the direction of the tiles; running them parallel to the longest wall can make a room feel bigger.
Finding the Center Point of the Room
This is where you start getting precise. You need to find the exact center of your room. A common way to do this is to measure the width and length of the room, find the halfway point for each, and then mark those points on the walls. Then, stretch a chalk line or use a laser level to connect opposite halfway marks. Where these lines intersect is your room's center. This spot is usually your starting point for laying tiles, especially for symmetrical patterns. It helps ensure that any cuts you make at the walls are even on opposite sides.
Dry Laying Tiles for Visualization
This step is super helpful. Before you mix any adhesive, lay out a section of your tiles without any glue. This is called dry laying. It lets you see exactly how the pattern will look in your space. You can experiment with different starting points and see how the tiles fit. It's also a good time to check for any tiles that might have color variations or defects. You can also use this to figure out where your cuts will fall. If you're not sure about the look, you can use online tools to visualize your flooring ideas visualize your flooring ideas.
Marking Your Starting Lines
Once you're happy with your dry layout and have found your center point, it's time to mark your starting lines. These are usually chalk lines or pencil marks on the subfloor that guide your first row of tiles. If you started from the center, you'll have lines running in both directions. If you're starting from a wall, you'll have one main line. Make sure these lines are straight and square to the room. This is your guide for the entire installation, so accuracy here is key.
Accounting for Obstacles and Edges
Rooms aren't always perfect squares or rectangles. You'll likely run into things like doorways, cabinets, or irregular wall shapes. You need to plan how your tiles will meet these obstacles. For doorways, you might want a full tile or a clean cut. Under cabinets, you might not even need to tile if they're permanent. Measure these areas carefully and adjust your layout plan accordingly. It's better to figure this out now than when you're halfway through the job.
Ensuring Consistent Grout Lines
Consistent grout lines make a huge difference in the final look. This is where tile spacers come in. You'll place these small plastic pieces between each tile as you lay them. They ensure that every gap is the same width. The width of the grout line can also affect the overall appearance. Wider grout lines can be a design feature, while narrower lines create a more subtle look. Always check your spacers to make sure they're the right size and that you're using them consistently throughout the installation.
Adapting Layouts for Complex Spaces
Sometimes, a simple grid or brick pattern just won't work for a tricky room. You might need to get creative. For L-shaped rooms or areas with lots of angles, you might need to start your layout from a different point, like the most visible corner. You might also need to use smaller tiles or mosaics to fill in awkward gaps. Don't be afraid to adjust your plan as you go, but always keep your main goal in mind: a floor that looks good and is installed correctly. Planning ahead saves a lot of headaches later on.
Cutting and Shaping Quartz Tiles
Cutting quartz tiles might sound intimidating, but with the right tools and a bit of patience, you can achieve clean, precise edges for a professional finish. Whether you're working with straight lines, angles, or intricate shapes, understanding the techniques makes all the difference. This section will walk you through the process, ensuring your tile cuts are as impressive as the tiles themselves.
Techniques for Straight Cuts
For most standard installations, you'll need to make straight cuts to fit tiles along walls or around obstacles. A wet saw is the go-to tool for this. It uses a diamond blade and a water reservoir to keep the blade cool and reduce dust. You'll want to measure carefully and mark your cut line on the tile. Then, guide the tile through the saw blade at a steady pace. Remember to always wear safety glasses and hearing protection. For simpler cuts or smaller tiles, a manual tile cutter can also work, scoring the tile and then snapping it along the line.
Making Precise Angle Cuts
Angle cuts, often called miter cuts, are used when two tiles meet at a corner, like on a countertop edge or a stair tread. This requires a wet saw with an adjustable miter base. You'll set the angle on the saw – typically 45 degrees – and carefully cut each tile. The goal is for the two cut edges to meet perfectly, creating a clean, seamless corner. This takes practice, so it's a good idea to cut a few practice tiles first.
Notching Around Fixtures
Sometimes, you'll need to cut out sections of a tile to fit around pipes, columns, or other fixed elements. This is often referred to as notching. You can achieve this with a wet saw by making a series of straight cuts to remove the unwanted section. For more complex curves, a tile nipper or a grinder with a diamond blade can be used to carefully shape the tile. Always measure twice and cut once to avoid wasting material.
Creating Custom Shapes
Beyond straight cuts and notches, you might need to create unique shapes for decorative purposes or to fit irregular spaces. This is where a wet saw with a good diamond blade really shines. You can make curved cuts by slowly guiding the tile along the desired path. For very intricate designs, a jigsaw with a diamond blade or even a rotary tool can be employed, though these methods require a steady hand and careful execution. Don't forget that utilizing the factory edge can sometimes simplify complex cuts.
Using Wet Saws for Clean Edges
A wet saw is indispensable for cutting quartz tile. The water not only cools the blade, preventing it from overheating and cracking the tile, but it also suppresses dust, making the process safer and cleaner. When using a wet saw, ensure the water reservoir is full and the blade is properly seated. Feed the tile slowly and steadily through the blade. The diamond blade will grind through the quartz, leaving a smooth edge. For the best results, consider preparing the tile base before making your cuts.
Safety Precautions During Cutting
Safety should always be your top priority when cutting tiles. Always wear safety glasses to protect your eyes from flying debris. Hearing protection is also recommended, as wet saws can be quite loud. If you're working with a wet saw, be mindful of the water and electricity. Ensure your hands are dry and that the saw is on a stable surface. Long sleeves and closed-toe shoes are also a good idea.
Handling Delicate Edges
While quartz is durable, cut edges can sometimes be a bit more fragile than the factory-finished edges. After cutting, inspect the edges for any chips or rough spots. You can smooth these out gently with a rubbing stone or fine-grit sandpaper. If you're making miter cuts, handle the tiles with extra care to avoid chipping the precisely cut edges before they are installed and grouted.
Applying Adhesive for Your Quartz Tile Floor
Getting the adhesive right is a big deal when you're laying quartz tile. It's what holds everything down, so you want to do it properly. It’s not super complicated, but you do need to pay attention to a few things.
Selecting the Appropriate Adhesive
Not all glues are made for quartz tile. You'll want to look for a high-quality tile adhesive, often called thin-set mortar, that's specifically designed for tile installation. Some adhesives are better suited for certain types of tiles or subfloors, so check the product label. For quartz, you generally want something with good bonding strength and flexibility. Many tile stores will have experts who can point you to the right product for your specific project.
Mixing and Preparing the Mortar
This is where you can mess things up if you're not careful. You usually mix a powder with water. The ratio of water to powder is really important for the adhesive's performance. Too much water makes it weak, and too little makes it hard to spread. Always follow the manufacturer's instructions on the bag. You'll need a clean bucket and a mixing paddle, preferably one that attaches to a drill for a smoother mix. Mix it until it's lump-free and has a peanut butter-like consistency. Let it slake (sit for a few minutes) if the instructions say so, then give it another quick mix.
Using the Correct Trowel Size
The trowel is the tool you use to spread the adhesive. It has notches on the edge, and the size of those notches matters. A larger notch spreads more adhesive, which is usually what you want for larger tiles like quartz. This ensures there's enough glue to hold the tile securely and prevents voids underneath. Check the tile manufacturer's recommendations or ask at the store for the right trowel size for your specific tiles. A common size for larger tiles is a 1/2-inch by 1/2-inch square-notched trowel.
Applying Adhesive Evenly
Spread the adhesive onto the subfloor in small sections. Don't cover the whole room at once, because the adhesive can start to dry out before you get tiles down. Use the flat side of the trowel to spread a thin layer first, then use the notched side at an angle to comb ridges into the adhesive. This creates a consistent bed for the tiles and helps them bond properly. You want to see those nice, uniform ridges.
Working in Manageable Sections
As mentioned, work in areas that you can tile within about 15-20 minutes. This time frame can vary depending on the temperature and humidity, so it's good to test the adhesive's tackiness. If it starts to skin over, scrape it up and put down fresh adhesive. This is especially important for larger rooms where you might be tiling over several days.
Ensuring Full Coverage Under Tiles
This is key for a durable floor. You want the adhesive to cover as much of the back of the tile as possible. When you press the tile into the adhesive, you should see a little bit of adhesive squeeze up between the tiles. This
Setting the Quartz Tiles with Precision
Alright, so you've got your tiles, your adhesive, and you're ready to lay them down. This is where things get real. Getting the tiles placed just right is super important for how the whole floor will look and how long it'll last. It’s not just about slapping them down; it’s about being careful and deliberate.
Starting Your Tile Placement
This is the moment of truth. You've planned your layout, marked your lines, and now it's time to actually put the tiles on the floor. It's best to start from the center of the room or from your main starting line. Don't rush this part. The first few tiles set the tone for the entire installation.
Pressing Tiles Firmly into Adhesive
Once a tile is in position, give it a good, firm press. You want to make sure it's fully embedded in the adhesive. A slight twist can help too. This makes sure there are no air pockets underneath and that the tile is as level as possible. You're aiming for full contact between the tile and the adhesive.
Using Tile Spacers for Uniformity
Spacers are your best friend here. They're small plastic pieces that you put between tiles to keep the gaps (grout lines) all the same width. This makes the whole floor look neat and professional. Pick a spacer size that matches the grout line width you decided on earlier, and stick with it.
Maintaining Straight Lines
Keep an eye on those lines you drew on the floor. Your tiles should follow them. If you notice a tile is starting to drift, gently adjust it before the adhesive starts to set. It’s much easier to fix it now than later.
Checking for Levelness as You Go
Periodically, grab a level and check your work. Lay it across a couple of tiles. They should all be at the same height. If one tile is a bit high or low, you can gently tap it down with a rubber mallet or add a little more adhesive underneath if it's too low. This step is key to avoiding a bumpy floor.
Dealing with Adhesive Squeeze-Out
As you press tiles down, some adhesive might ooze up into the grout lines. This is normal. You need to clean this up as you go, but don't wipe it all away. Just remove the excess from the surface of the tile and the edges of the grout line. A damp sponge or cloth works well for this. If you let it dry, it's a pain to get off later.
Adjusting Tiles as Needed
Sometimes, tiles don't go down perfectly the first time. Don't be afraid to lift a tile up, scrape off a bit of adhesive if there's too much, or add a bit more if there's too little. Then, reset the tile. It’s better to do this while the adhesive is still wet and workable.
Remember, patience is a virtue when laying tile. Taking your time now will save you a lot of headaches down the road and result in a floor you'll be proud of for years to come. It’s all about precision and attention to detail at this stage.
Grouting Your New Quartz Tile Floor
After all that careful tile setting, the grout is the final step that really pulls your quartz tile floor together. It's not just about filling the gaps; it's about adding definition and protecting your installation. Getting this part right makes a big difference in the final look and how well your floor holds up.
Choosing the Right Grout Color
The color of your grout can dramatically change the appearance of your quartz tile floor. Think about the overall style you're going for. A grout color that closely matches your tiles will create a more uniform, blended look. This can make a space feel larger and more continuous. On the other hand, a contrasting grout color can highlight the individual tiles, adding a decorative element and defining the pattern. Darker grout colors tend to hide dirt and stains better than lighter ones, which is a practical consideration for high-traffic areas. Always consider getting a few samples to see how they look next to your chosen tiles in your home's lighting.
Mixing Grout to the Correct Consistency
Getting the grout mixture right is key. Most grouts come in powder form and need to be mixed with water. The instructions on the bag are your best friend here. You're aiming for a consistency like peanut butter or thick toothpaste – something that holds its shape but is still spreadable. Too watery, and it won't hold up in the joints; too dry, and it will be crumbly and hard to work with. Mix only what you can use within the pot life specified by the manufacturer, usually about 30 minutes to an hour. It's better to mix a second batch than to have your first batch harden before you can use it.
Applying Grout with a Grout Float
A grout float is a specialized tool with a rubber base designed for spreading grout. Hold the float at a 45-degree angle to the tile surface. Start in a corner and spread the grout across the tiles, pressing down firmly to push the grout deep into the joints. Work diagonally across the tiles to avoid pulling grout out of the joints you just filled. Cover a manageable section at a time, usually a few square feet, before moving on to the next. Don't try to grout the entire floor at once; you'll likely run out of time before the grout starts to set.
Working Grout into All Joints
This is where you make sure every single gap between tiles is completely filled. As you spread the grout with your float, go over each joint multiple times from different directions. The goal is to pack the grout in there tightly, leaving no air pockets. Air pockets can lead to weak spots and eventually grout failure. Pay extra attention to the edges and corners of each tile to ensure a solid fill.
Removing Excess Grout Promptly
Once the joints are filled, you need to remove the excess grout from the tile surface. Wait about 10-20 minutes, or until the grout starts to firm up slightly (this time varies based on temperature and humidity). Use a damp (not wet!) grout sponge, wiping diagonally across the tiles. Rinse the sponge frequently in a clean bucket of water, wringing it out thoroughly each time. You'll likely need two buckets: one for the initial rinse and one for a cleaner final rinse. The aim is to clean the tile surface without digging grout out of the joints. This step might take a few passes.
The Importance of Grout Curing Time
After you've cleaned up the excess grout, the most important thing you can do is let it cure properly. Grout needs time to harden and reach its full strength. This typically takes at least 24 to 72 hours, but always check the manufacturer's recommendations. During this time, avoid walking on the floor, placing heavy objects on it, or getting it excessively wet. Rushing this process can weaken the grout and lead to problems down the line.
Achieving a Seamless Finish
Once the grout has cured, there might be a slight haze left on the tiles. This is called grout haze and is usually removed with a clean, dry microfiber cloth. For stubborn haze, a specialized grout haze remover can be used, following the product's instructions carefully. The final result should be a floor where the grout lines are clean, consistent, and neatly finished, complementing your beautiful quartz tiles. A well-grouted floor not only looks great but also adds durability to your entire installation.
Cleaning and Sealing Your Quartz Tile Installation
So, you've got that beautiful new quartz tile floor installed – congrats! Now comes the part that keeps it looking great for years: cleaning and sealing. It’s not complicated, but doing it right makes a big difference.
Initial Cleaning After Grouting
Right after the grout has been applied and is starting to set, you'll need to do a first clean. This is usually done with a damp sponge. The goal here is to wipe away any excess grout that's sitting on the surface of the tiles without pulling too much grout out of the joints. You'll want to rinse your sponge frequently in clean water. Don't use too much water, though; you don't want to wash the grout out of the lines.
Removing Grout Haze Effectively
After the grout has fully cured (check the manufacturer's instructions, but it's usually 24-72 hours), you'll likely see a light film on the tiles. This is called grout haze. For most quartz tiles, a dry microfiber cloth is enough to buff this out. If it's a bit stubborn, you can use a slightly damp cloth or a specialized grout haze remover. Always test any cleaner in an inconspicuous spot first.
Understanding Sealing Requirements
Quartz tile itself is non-porous and doesn't typically need sealing. However, the grout lines do need sealing. Grout is porous and can absorb stains and moisture if left unprotected. Sealing the grout is a key step in protecting your investment.
Applying Sealant for Protection
When it's time to seal, make sure the grout is completely dry. You'll want to use a quality penetrating grout sealer. Apply it carefully to the grout lines using a small brush or applicator. Wipe off any excess sealer from the tile surface immediately; sealers can sometimes leave a residue or alter the appearance of the tile if they dry on the surface.
Curing Times for Sealant
After applying the sealer, it needs time to cure. This can take anywhere from a few hours to a couple of days, depending on the product. During this time, try to keep foot traffic off the floor and avoid getting it wet. This allows the sealer to fully penetrate and bond with the grout.
Routine Cleaning Practices
For daily or weekly cleaning, stick to simple methods. A soft broom or a vacuum cleaner with the beater bar turned off works well for dry debris. For damp cleaning, use a damp mop with plain water or a pH-neutral cleaner. Avoid harsh chemicals or abrasive scrubbers, as these can damage the grout or the tile finish over time. For tougher spots, a mild detergent and water solution is usually sufficient. Keeping your quartz clean is straightforward with the right approach.
Maintaining the Shine of Your Floor
To keep your quartz tile floor looking its best, address spills as soon as they happen. For general upkeep, a regular cleaning routine is all that's needed. If you notice any dullness, it might be time for a slightly more thorough clean or a check to see if the grout sealer needs a refresh (this is usually needed every 1-3 years, depending on traffic and cleaning habits). Remember, the right cleaning products and methods will preserve the beauty of your floor for years to come.
Addressing Common Quartz Tile Installation Challenges
Even with the best planning, sometimes things don't go exactly as expected during a tile installation. It's pretty normal, honestly. Most issues that pop up with quartz tile floors are fixable, and knowing what to look for can save you a lot of stress. Let's talk about some common problems and how to sort them out.
Dealing with Uneven Tiles
Sometimes, after you've set a tile, you notice it's not quite level with its neighbors. This can happen if the adhesive isn't spread evenly or if the subfloor has a slight dip. The best way to handle this is to address it while the adhesive is still wet.
- Gently lift the high tile and scrape away some of the excess adhesive underneath.
- Add a little more adhesive to the low spot on the subfloor or the back of the tile.
- Press the tile back down firmly, using a level to check that it's flush with the surrounding tiles.
- If the adhesive has already started to set, it's trickier. You might need to carefully pry up the tile and re-set it. Be gentle to avoid chipping the tile.
Repairing Cracked or Chipped Tiles
Accidents happen, and a tile might get cracked or chipped during installation or shortly after. Small chips can often be filled with a color-matched epoxy or grout filler. For larger cracks or breaks, you'll likely need to replace the entire tile.
- Carefully remove the grout around the damaged tile.
- Gently tap the cracked tile with a hammer (wear safety glasses!) to break it into smaller pieces, making it easier to remove.
- Clean out all the old adhesive from the space.
- Install a new tile using the same adhesive and grouting process as before.
Fixing Grout Issues
Problems with grout can include cracking, crumbling, or inconsistent color. If you notice small cracks, you can often repair them by applying new grout to the affected areas. For larger issues or if the grout is crumbling, it might be best to remove the old grout and re-grout the entire section for a uniform look.
Managing Adhesive Problems
Too much adhesive squeezing up between tiles is a common sight. It's best to wipe away the excess immediately with a damp sponge before it dries. If the adhesive is too dry when you lay the tile, it won't bond properly. Make sure you're mixing your mortar correctly and working in manageable sections so it stays workable.
Correcting Layout Mistakes
If you realize your layout is off, especially early on, it's better to fix it than live with it. This might mean pulling up a few tiles and starting that section over. It's a pain, but it's worth it for the final appearance. This is why dry-laying tiles first is so helpful.
Troubleshooting Subfloor Issues
An uneven or unstable subfloor is a recipe for tile problems down the line. If you discover dips, humps, or movement in the subfloor during installation, you'll need to address these before continuing. This might involve adding leveling compound or reinforcing the subfloor. A solid foundation is key for any successful tile installation.
Don't rush the preparation steps. A little extra time spent ensuring the subfloor is perfect will save you headaches later on. It's the base for everything else.
Long-Term Care for Your Quartz Tile Floor
So, you've got that gorgeous quartz tile floor installed. Awesome! Now, how do you keep it looking that way for years to come? It's not rocket science, but a little bit of regular attention goes a long way. Think of it like taking care of a nice car – you wouldn't just ignore it, right?
Daily Cleaning Routines
For everyday upkeep, you really don't need much. A quick sweep or vacuum is usually all it takes to pick up dust, dirt, and crumbs. This prevents grit from scratching the surface over time. If you spill something, just wipe it up right away. Most spills on quartz tile clean up easily with a damp cloth. For tougher spots, a pH-neutral cleaner or mild soap and water works wonders. Just spread the cleaner on the surface and wipe clean using a damp cloth or paper towel.
Deep Cleaning Methods
Once in a while, you'll want to give your floor a more thorough clean. This is especially true in high-traffic areas like kitchens or entryways. You can use a slightly stronger cleaner, but always stick to pH-neutral options. Avoid anything abrasive or acidic, as these can dull the finish or even damage the grout.
Here's a simple deep cleaning process:
- Sweep or vacuum the floor thoroughly.
- Mix a mild detergent with warm water.
- Mop the floor, working in small sections.
- Rinse the mop frequently in clean water.
- Wipe up any excess water with a clean, dry cloth.
Protecting Against Stains
Quartz tile is pretty good at resisting stains, but it's not completely invincible. Things like red wine, coffee, or certain oils can potentially leave a mark if left sitting for too long. The key is prompt cleanup. If you do notice a stubborn spot, a paste of baking soda and water can sometimes help lift it. Let it sit for a bit, then gently scrub and rinse.
Preventing Scratches and Wear
While quartz is tough, sharp objects can still scratch it. Be mindful of dragging heavy furniture across the floor. Using felt pads on the bottom of chair legs and furniture feet is a smart move. Also, be careful with things like pet claws – keeping them trimmed can help. For areas that get a lot of foot traffic, consider using area rugs or mats.
Maintaining Grout Integrity
The grout between your tiles is often the part that shows wear first. It can get dirty and discolored over time. If you sealed your grout properly during installation, it will be much easier to clean. Use a grout cleaner specifically designed for the type of grout you have. For stubborn stains, a stiff brush can help, but be gentle to avoid damaging the grout itself.
Keeping your grout looking fresh is key to the overall appearance of your quartz tile floor. Regular cleaning and prompt attention to spills will make a big difference.
Addressing Minor Damage Promptly
If you notice a chipped tile or a small crack, it's best to address it sooner rather than later. Small issues can sometimes lead to bigger problems if left unattended. You can often find repair kits at hardware stores that can help you patch up minor chips or cracks. For more significant damage, you might need to replace the tile entirely.
Extending the Lifespan of Your Floor
Ultimately, the lifespan of your quartz tile floor comes down to how well you care for it. By following these simple maintenance steps, you can keep your floor looking beautiful and performing well for decades. It's a durable choice, and with a little effort, you'll get a fantastic return on your investment. If you're looking for premium natural stone products, consider exploring options from direct importers who focus on quality for your U.S. projects.
Enhancing Your Space with Quartz Tile Accents
Quartz tile isn't just for floors. It's a fantastic material for adding stylish touches throughout your home. Think beyond the main flooring; these tiles can really make a statement in smaller, impactful ways. Using quartz tile for accents can dramatically change the feel of a room.
Creating Stunning Backsplashes
A quartz tile backsplash is a popular choice for kitchens and bathrooms. It's practical, easy to clean, and adds a touch of luxury. You can go for a classic subway tile look or something more modern with larger format tiles. A well-chosen backsplash can tie your whole design together, especially when paired with countertops. For ideas on complementing specific countertops, you might explore backsplash ideas.
Designing Elegant Shower Enclosures
Transform your bathroom into a spa-like retreat with quartz tile in your shower. Its water-resistant properties make it ideal for wet areas. You can use it for the walls, the shower floor, or even as a decorative niche. The clean look of quartz can make a small bathroom feel more open and sophisticated.
Adding Character to Entryways
Your entryway is the first impression guests have of your home. Using quartz tile here, perhaps as a decorative border or a small accent area, can add a welcoming and high-end feel. It's a durable option that can handle foot traffic while looking great.
Using Quartz Tile for Feature Walls
Want a focal point in your living room or bedroom? A feature wall clad in quartz tile can be incredibly striking. This works especially well with tiles that have unique textures or patterns. It's a bold design choice that adds depth and visual interest.
Incorporating Mosaic Patterns
Mosaics made from quartz offer endless design possibilities. They can be used for intricate patterns on floors, walls, or as decorative inlays. These small, detailed pieces can add a custom, artistic flair to any project, making it truly unique.
Complementing Existing Decor
When choosing accent tiles, consider your current decor. Quartz comes in so many colors and finishes, from bright whites to deep grays and even subtle veining that mimics natural stone. The key is to select a tile that harmonizes with your existing color palette and style.
The Impact of Accent Tiles
Accent tiles are all about making a big impact with a small area. They draw the eye, add texture, and can introduce a pop of color or a sophisticated pattern. Whether it's a small mosaic strip or a full accent wall, quartz tiles provide a durable and beautiful way to personalize your space. For those looking for premium natural stone options, consider brands that focus on handpicked A+ top-quality stone for your accent projects.
The Environmental Considerations of Quartz Tile
When you're thinking about flooring, it's not just about how it looks or how tough it is. We also need to consider what's in it and how it's made. Quartz tile, often called engineered stone, is a popular choice, and it's good to know a bit about its environmental side.
Sustainability in Quartz Production
Quartz tiles are made by mixing natural quartz crystals with resins and pigments. This process uses energy, of course, but manufacturers are increasingly looking for ways to make it more sustainable. Some companies are working on using less energy in their factories or finding ways to recycle waste materials from the production line. It's a developing area, and you might see more eco-friendly options popping up.
Recycled Content in Tiles
Some quartz tiles can include recycled materials. This could be anything from recycled glass to other industrial byproducts. Using recycled content means less raw material needs to be extracted from the earth, which is generally a good thing for the environment. It's worth asking manufacturers if their tiles contain any recycled components.
Durability and Longevity
One of the biggest environmental pluses for quartz tile is how long it lasts. Because it's so durable and resistant to wear and tear, it doesn't need to be replaced very often. Think about it: if your floor lasts for decades, that's a lot less waste going into landfills compared to materials that need frequent replacement. This long lifespan means fewer resources are used over time.
Low VOC Emissions
Volatile Organic Compounds, or VOCs, are chemicals that can be released into the air from building materials. Some materials can affect indoor air quality. Quartz tile, especially when made with modern, low-VOC resins, generally has very low emissions. This means it's a healthier choice for your home's air.
Energy Efficiency of Quartz
While quartz itself doesn't generate energy, its dense nature can contribute to a home's thermal mass. This means it can absorb heat during the day and release it slowly at night, potentially helping to regulate indoor temperatures a bit. This might mean less reliance on heating and cooling systems, saving energy.
Responsible Sourcing Practices
Where the quartz and other materials come from matters. Some companies are focusing on sourcing their raw materials responsibly. This can mean working with suppliers who have good environmental practices or ensuring that mining operations are conducted with care for the land. It's a complex supply chain, but responsible sourcing is becoming more important.
The Lifecycle of Quartz Flooring
When we talk about the environmental impact, we should look at the whole life of the product. From mining the raw materials, manufacturing the tile, shipping it across the country, installation, its use in your home, and finally, what happens when it's removed. Quartz tile scores well on durability, meaning its 'use' phase is very long. The manufacturing and transport are areas where environmental improvements are still being made by the industry. For homeowners, choosing a durable product like quartz is a step towards reducing waste over the long run. If you're looking for quality materials for your U.S. projects, consider the full picture.
Engineered stone products, often composed of 90-95% crystalline silica, pose health risks due to silica dust generated during fabrication. This dust is a significant concern in the industry. This is a serious health concern that installers and fabricators must be aware of and manage properly.
Understanding Warranties for Quartz Tile
When you're investing in quartz tile flooring for your U.S. project, it's smart to know what kind of protection comes with it. Warranties can seem a bit confusing, but they're really there to give you peace of mind about your purchase. Think of it like a promise from the manufacturer that their product will hold up as expected.
What Tile Warranties Typically Cover
Most quartz tile warranties focus on manufacturing defects. This means if the tiles themselves have flaws from the factory, like cracks or inconsistencies that weren't there when installed, the warranty should cover it. They generally don't cover issues that arise from installation mistakes or everyday wear and tear. It's important to read the specifics, as coverage can vary a lot between brands.
- Manufacturing defects (e.g., cracks, chips from production)
- Color consistency issues from the factory
- Defects in the material composition
Decoding Manufacturer Guarantees
Manufacturers offer different lengths and types of guarantees. Some might offer a 10-year warranty, while others, like Cambria, provide a Lifetime Limited Warranty for their natural quartz surfaces, which is pretty substantial. Always check if the warranty is tied to the product itself or if it extends to the installation. A longer warranty period usually signals a manufacturer's confidence in their product's quality.
The Role of Installation in Warranties
This is a big one. Many quartz tile warranties are voided if the tiles aren't installed correctly. Improper subfloor preparation, using the wrong adhesive, or poor grouting can all lead to problems that the manufacturer won't cover. This is why following best practices during installation, or hiring a professional installer, is so important. Some manufacturers might even require proof of professional installation. You can find technical data and warranty information for various products, including Allstate Quartz Tile, on their respective sites.
Common Warranty Exclusions
It's just as important to know what's not covered. Common exclusions include:
- Damage from improper cleaning or harsh chemicals
- Chips or scratches from impact or abrasion
- Issues caused by extreme temperature fluctuations
- Stains from spills that aren't cleaned promptly
- Damage from flooding or excessive moisture
Always keep your proof of purchase and installation records. These documents are vital if you ever need to make a claim. Without them, even a valid claim might be difficult to process.
Registering Your Quartz Tile Purchase
Don't forget to register your purchase with the manufacturer after installation. Many warranties require registration within a specific timeframe, often 30 to 90 days. This step officially links you, the homeowner, to the warranty and ensures you'll be notified of any updates or recalls. It’s a simple step that can save a lot of hassle later.
Making a Warranty Claim
If you suspect an issue covered by your warranty, the first step is usually to contact the retailer or installer you purchased from. They can guide you through the claim process. Be prepared to provide photos of the issue, your proof of purchase, and installation details. The manufacturer will then assess the situation to determine if the claim is valid.
Choosing Brands with Strong Warranties
When comparing different quartz tile options, pay attention to the warranty offered. A brand that stands behind its product with a solid, clear warranty is often a sign of a reliable manufacturer. It shows they're committed to customer satisfaction and the long-term performance of their flooring. This can be a deciding factor when choosing between similar products.
The Value Proposition of a Quartz Tile Floor
When you're thinking about flooring, it's easy to get caught up in the initial price tag. But with quartz tile, you're really looking at a long-term investment that pays off in a lot of ways. It's not just about how it looks today; it's about how it performs and holds up over the years.
Return on Investment for Your Home
Installing quartz tile can definitely boost your home's appeal. Buyers often see durable, attractive flooring as a major plus. It's one of those upgrades that can make a noticeable difference when it's time to sell. Think of it as adding a solid feature that prospective buyers will appreciate, knowing they won't have to replace it anytime soon.
Increasing Property Appeal
Beyond just resale value, quartz tile simply makes a home feel more polished and well-maintained. The consistent look and feel, combined with its resilience, contribute to a generally more attractive living space. It’s a material that speaks to quality and care, which is always a good thing for any property.
Long-Term Cost-Effectiveness
While the upfront cost might be higher than some alternatives, quartz tile often proves more economical over its lifespan. Its durability means fewer repairs and replacements. You're not constantly battling wear and tear, which saves money and hassle down the road. This makes it a smart choice for budget-conscious homeowners who are thinking ahead.
Comparing Initial vs. Lifetime Costs
Let's break it down a bit. You might spend more initially on quartz tile compared to, say, vinyl or laminate. However, consider how long each material typically lasts and what maintenance it requires. Quartz tile, with its inherent strength, can last for decades with basic care, whereas other materials might need replacement much sooner.
| Flooring Type | Initial Cost (per sq ft) | Estimated Lifespan | Maintenance Needs | Lifetime Cost Consideration |
|---|---|---|---|---|
| Quartz Tile | $$ - $$$ | 20+ years | Low | Low |
| Vinyl Plank | $ - $$ | 5-15 years | Moderate | Moderate |
| Laminate | $ - $$ | 10-20 years | Moderate | Moderate |
The Impact on Resale Value
Flooring is a significant factor in home appraisals and buyer decisions. High-quality materials like quartz tile signal that the home has been well-cared for and updated with durable finishes. This can translate directly into a higher asking price and a quicker sale. It's a tangible improvement that buyers can see and appreciate.
A Smart Investment in Durability
The core appeal of quartz tile lies in its toughness. It resists scratches, stains, and moisture better than many other surfaces. This means it can handle the daily grind of family life, pets, and high traffic areas without showing its age quickly. You get peace of mind knowing your floor can take a beating and still look good. For areas prone to spills, like kitchens or bathrooms, its non-porous nature is a real advantage, preventing stains from setting in.
The Aesthetic and Functional Payoff
Ultimately, a quartz tile floor offers both beauty and practicality. You get a wide range of styles and finishes to match your design vision, and you don't have to sacrifice performance for looks. It's a flooring solution that works hard, looks great, and holds its value, making it a truly worthwhile choice for many U.S. projects.
Professional Installation vs. DIY Quartz Tile
Deciding whether to tackle your quartz tile flooring project yourself or hire a professional can feel like a big choice. Both paths have their own set of pros and cons, and what's right for you really depends on a few things. It’s not just about saving money; it’s also about the final look and how much stress you’re willing to take on.
Assessing Your Skill Level
Let's be honest, not everyone is cut out for tiling. Do you have a knack for detail work? Are you comfortable with tools and precise measurements? If you've never laid tile before, a large, complex room might be a tough starting point. Smaller areas, like a powder room or a small entryway, can be good practice grounds if you're feeling adventurous. A successful DIY project requires patience and a willingness to learn.
Time Commitment for DIY Projects
DIY tiling isn't usually a weekend affair, especially if you want it done right. You'll need time to prepare the subfloor, plan the layout, cut tiles, set them, grout, and then clean up. This can easily stretch over several days or even a couple of weeks, depending on your schedule and the project's size. If you're on a tight deadline, professional installation might be the way to go.
Cost Savings of DIY Installation
This is often the biggest draw for DIYers. By doing the labor yourself, you can save a significant amount on the overall project cost. Professional installers charge for their time, skill, and overhead. However, remember to factor in the cost of tools you might need to buy or rent, plus any potential mistakes that could lead to buying extra tiles. For example, DIY installation can save money on lighter materials.
Risks of Improper DIY Installation
Mistakes happen, and with tile, they can be costly and frustrating. Poorly laid tiles can lead to uneven surfaces, cracked tiles, or grout that fails prematurely. If the subfloor isn't prepped correctly, you could face issues down the line like loose tiles or even structural damage. These problems often end up costing more to fix than hiring a professional would have in the first place.
When to Hire a Professional Installer
If your project involves:
- Complex layouts with many cuts or intricate patterns.
- Large format tiles, which are heavier and harder to handle.
- Rooms with unusual shapes or many obstacles (like cabinets or fixtures).
- A tight deadline.
- A desire for a flawless, high-end finish.
Then hiring a pro is likely your best bet. They have the experience and specialized tools to handle these situations efficiently and effectively.
Finding and Vetting Qualified Professionals
If you decide to go pro, do your homework. Ask for recommendations from friends, family, or your tile supplier. Get multiple quotes from different installers. Check their references and look at photos of their past work. A good installer will be licensed, insured, and able to provide a clear contract.
The Peace of Mind with Expert Installation
Ultimately, hiring a professional means you can relax and let someone else handle the hard work. You get the benefit of their experience, which often translates to a better-looking floor that will last longer. Plus, many professional installers offer a warranty on their workmanship, giving you extra peace of mind.
Exploring Different Types of Quartz Tile Finishes
When you're looking at quartz tile for your floors, the finish is a big deal. It's not just about the color; it's about how the surface looks and feels. Different finishes can change the whole vibe of a room and how you'll need to care for your floor. Let's break down the common options you'll find.
Polished Quartz for High Shine
Polished quartz is probably what most people picture when they think of quartz. It's super smooth and has a really high gloss, almost like a mirror. This finish reflects light, which can make a room feel brighter and more open. It's a popular choice for kitchens and bathrooms because it looks really clean and modern. This high-gloss surface is also quite non-porous, making it resistant to stains. However, that shine can sometimes show smudges or water spots more easily, so it might need more frequent wiping down. It's a statement finish that really makes a space pop.
Honed Quartz for a Softer Look
Honed quartz has a more muted, matte appearance compared to polished. It's not shiny at all, giving it a softer, more natural look. This finish is great if you're going for a more relaxed or rustic feel. Because it doesn't have that high gloss, it tends to hide minor imperfections and smudges a bit better than polished. It's a good option for busy areas where you might not want to worry about every little fingerprint. It feels smooth to the touch, but without the glare.
Textured Finishes for Grip
Beyond just polished and honed, there are textured finishes. These can include things like a leathered look, which has a slightly dimpled surface, or a brushed finish that gives a subtle roughness. Textured quartz is fantastic for areas where slip resistance is a concern, like entryways or bathrooms. The texture adds visual interest too, giving the tile a unique character. It can feel really good underfoot and adds a layer of sophistication that a flat finish might not.
Matte Quartz for Modern Aesthetics
Matte finishes are similar to honed but often have an even more subdued, velvety appearance. They are very much on-trend right now, fitting perfectly with minimalist and contemporary design styles. A matte finish absorbs light rather than reflecting it, creating a calm and understated atmosphere. It's a sophisticated choice that pairs well with a variety of decor styles. Like honed finishes, matte quartz is also good at disguising everyday wear and tear.
The Impact of Finish on Maintenance
Choosing a finish really does affect how you'll maintain your floor. Polished surfaces show everything – fingerprints, water spots, dust. They need regular cleaning with a soft cloth to keep that shine. Honed and matte finishes are more forgiving. They hide smudges and minor scratches better, meaning you might not have to clean them quite as often. Textured finishes can sometimes trap dirt in their crevices, so a good brush or vacuum attachment might be needed during cleaning. It's a trade-off between the look you want and the upkeep you're willing to do.
Choosing a Finish for Different Rooms
Think about the room's function. For a high-traffic entryway or a busy kitchen, a honed, matte, or textured finish might be more practical. They're less likely to show every little thing. In a master bathroom or a formal living area where you want a bit of glamour, a polished finish could be stunning. It really depends on the overall design plan and how the room will be used day-to-day. You can even mix finishes in different areas of your home for varied effects.
Visualizing Finishes in Your Space
It's always a good idea to get samples of the finishes you're considering. Seeing them in your home's lighting, next to your cabinets and furniture, is the best way to decide. What looks great in a showroom might appear different in your own space. Pay attention to how the light hits the surface and how it feels to the touch. This step is key to making sure you'll love your new quartz tile floor for years to come. We offer fast, reliable shipping nationwide, so you can get those samples to your project site quickly.
The Role of Grout in Quartz Tile Floors
When you're installing quartz tile flooring, grout might seem like a small detail, but it plays a pretty big part. It's not just about filling the gaps between tiles; it's about the overall look, the durability, and even how easy your floor is to keep clean. Think of it as the glue that holds the aesthetic together, literally and figuratively.
Grout Types and Their Properties
Not all grout is created equal. You've got a few main types to consider, and each has its own strengths and weaknesses. Understanding these will help you pick the right one for your project.
- Cementitious Grout: This is the most common type. It's a mix of cement, sand, and other additives. It's affordable and works well for most residential applications. However, it can be porous and might need sealing to prevent stains and moisture absorption.
- Epoxy Grout: This is a more high-performance option. It's made from epoxy resins and a hardener. Epoxy grout is incredibly durable, stain-resistant, and waterproof, making it a great choice for high-traffic areas or places prone to moisture, like kitchens and bathrooms. It's also more expensive and can be trickier to work with.
- Urethane Grout: This type offers a good balance between cementitious and epoxy grouts. It's flexible, stain-resistant, and doesn't require sealing. It's a bit pricier than cementitious grout but easier to apply than epoxy.
Color Coordination with Quartz Tiles
The color of your grout can dramatically change the look of your quartz tile floor. It's a design choice that really matters.
- Contrasting Grout: Using a grout color that stands out against your tiles can highlight the tile pattern and add a bold statement. For example, dark grout with light tiles can create a graphic, modern look.
- Matching Grout: If you want a more subtle, seamless appearance, choose a grout color that closely matches your tiles. This can make the space feel larger and more unified.
- Neutral Grout: Colors like gray, beige, or off-white are versatile and work with almost any tile color. They offer a classic look that doesn't overpower the tiles themselves.
Ensuring Proper Grout Joint Width
Getting the space between your tiles just right is important. This is where tile spacers come in handy during installation. The width of the grout line affects both the look and the structural integrity of the floor.
A consistent grout joint width is key to a professional-looking installation. Too wide, and it can look messy; too narrow, and it might not hold up over time. Aim for uniformity across the entire floor.
The Importance of Grout Sealing
For cementitious grout, sealing is often a necessary step. It helps protect the grout from stains, moisture, and dirt, which can otherwise seep in and cause discoloration or damage. Epoxy and urethane grouts are generally non-porous and don't require sealing, which is a nice perk if you're looking for lower maintenance.
Maintaining Grout Appearance
Even with the best grout, keeping it looking fresh requires some attention. Regular cleaning is the best way to prevent dirt and grime from building up. For tougher stains, you might need specialized grout cleaners. If your grout starts to look worn or discolored over time, you can sometimes refresh it with a grout recolorant or even re-grout the affected areas. For those looking for a low-maintenance alternative to natural stone, consider quartzite-look tiles which often pair well with durable grout options.
Repairing Damaged Grout
Sometimes, grout can crack or crumble, especially in high-traffic areas or if it wasn't installed perfectly. Small repairs are usually manageable. You can carefully remove the damaged grout with a grout saw or utility knife and then reapply new grout. For larger areas of damage, you might need to consider re-grouting the entire section or even consulting a professional.
Innovative Trends in Quartz Tile Flooring
The world of flooring is always changing, and quartz tile is right there with it, showing off some really cool new looks. Forget what you thought you knew about quartz; designers are pushing the boundaries, and it's exciting stuff for anyone looking to update their home or a client's project across the U.S.
Large Format Tile Designs
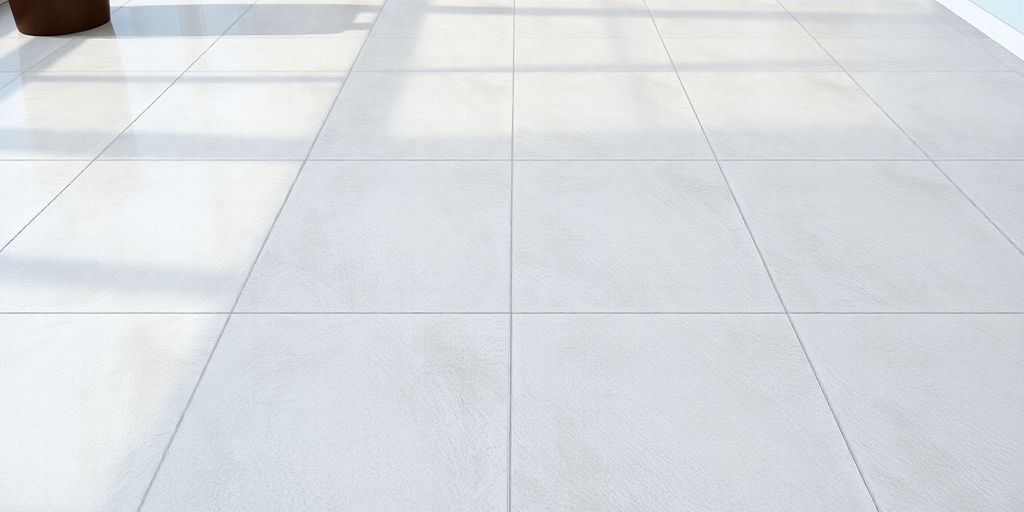
One of the biggest shifts you'll see is the move towards larger tiles. We're talking about tiles that can be 24x24 inches, 36x36 inches, or even bigger. The idea here is to create a more expansive, less cluttered look. With fewer grout lines, the floor appears more continuous, almost like a solid surface. This is especially great for making smaller rooms feel bigger and more open. It also means less grout to clean, which is always a win.
Realistic Stone and Wood Looks
Quartz tile has gotten incredibly good at mimicking natural materials. You can now find tiles that look remarkably like marble, granite, or even exotic stones, complete with veining and subtle color variations. On the other hand, there are also quartz tiles designed to replicate the look of natural wood planks. These offer the durability and water resistance of tile with the warm aesthetic of wood, making them a fantastic choice for kitchens, bathrooms, or basements where real wood might not be practical. You can find some really convincing marble-effect slabs that bring a touch of luxury to any space.
Geometric Patterns and Mosaics
While large format tiles are popular for a minimalist feel, there's also a strong trend towards intricate patterns and mosaics. Think hexagonal tiles, chevron patterns, or custom mosaic designs. These can add a significant amount of personality and visual interest to a floor, turning it into a focal point. They work well in entryways, accent walls, or even as a statement floor in a powder room. It’s a way to get creative and really personalize your design.
Metallic and High-Gloss Effects
For those looking for a modern, glamorous touch, metallic finishes and high-gloss surfaces are making a comeback. These quartz tiles can add a bit of sparkle and sophistication. High-gloss finishes reflect light, which can make a room feel brighter and more spacious. Metallic accents, whether in subtle flecks or bold veins, add a contemporary edge. These finishes can really transform a space, giving it a polished, upscale feel.
Sustainable and Eco-Friendly Options
As people become more conscious of their environmental impact, manufacturers are responding with more sustainable quartz tile options. This can include tiles made with recycled content or produced using more energy-efficient processes. The inherent durability of quartz also means these floors last a long time, reducing the need for frequent replacement, which is a form of sustainability in itself. You can find brands like Wilsonart Quartz that are expanding their design options with trending looks.
Smart Tile Technologies
While still emerging, the integration of technology into flooring is a trend to watch. This could include tiles with embedded sensors or features that interact with smart home systems. For now, it's more about the advanced manufacturing that allows for these new aesthetics and performance characteristics. The focus is on creating materials that are not only beautiful but also perform better and offer more possibilities.
The Future of Quartz Tile Design
Looking ahead, expect quartz tile to continue evolving. We'll likely see even more realistic natural material imitations, bolder color palettes, and perhaps new textures and finishes we haven't even imagined yet. The versatility of quartz as a material means it can adapt to almost any design trend, making it a reliable choice for both current projects and future renovations.
Quartz tiles are changing the flooring game with cool new styles and features. They look amazing and are super tough, making them a great choice for any room. Want to see the latest in quartz flooring? Check out our website for all the newest options and find the perfect look for your home!
Your Beautiful Quartz Floor Awaits
So, you've made it through the guide, and hopefully, you're feeling pretty good about picking out and putting in quartz tile flooring. It’s a solid choice, really. It looks great, it holds up well, and honestly, it just makes a space feel a bit more put-together. Remember, taking your time with the selection and the installation steps makes all the difference. Don't rush it. If you hit a snag, it's okay to pause or even call in a pro for a tricky bit. But with a little patience and the right approach, you'll have a floor you can be proud of for years to come. Happy tiling!
Frequently Asked Questions
What exactly is quartz tile flooring?
Quartz tile flooring is made from a mix of natural quartz crystals and resins. Think of it as a super-strong, engineered stone. It's not natural stone like marble, but it's designed to look beautiful and last a very long time.
Why would I choose quartz tile over other floor types?
Quartz tiles are tough cookies! They resist scratches, stains, and moisture really well, making them great for busy areas like kitchens and bathrooms. Plus, they come in tons of colors and patterns, so you can get almost any look you want.
Is quartz tile flooring really as durable as they say?
Yes, it's known for being super durable. It's much harder than many natural stones and resists chips and cracks. This means your floor can look great for many years without needing a lot of fuss.
How do I pick the right color and style for my room?
Look at the colors and light in your room. Do you want something bright and airy, or dark and cozy? It's also helpful to consider the overall style of your home. You can even get samples to see how they look in your space before you buy.
What kind of prep work does my floor need before installing quartz tiles?
Your floor needs to be clean, dry, and super flat. Any bumps or dips can cause problems later. Sometimes, you might need to add a special layer called an underlayment to make sure everything is perfectly smooth and ready for the tiles.
What tools do I absolutely need to install quartz tiles?
You'll need tools to cut the tiles (like a wet saw), spread the glue (a notched trowel), and put the grout in between (a grout float). Don't forget safety gear like gloves and eye protection!
How do I make sure the tiles are laid out nicely and straight?
It's all about planning! Start by finding the center of the room and marking lines. Using tile spacers helps keep the gaps between tiles even. Laying out a few tiles first, without glue, can show you how it will look.
Can I cut quartz tiles myself, or do I need a pro?
You can cut them yourself if you have the right tools, like a wet saw, and follow safety steps carefully. For tricky cuts or if you're not comfortable, hiring someone is a good idea.
How much glue should I use under each tile?
You want just enough glue to cover the back of the tile completely, but not so much that it oozes out everywhere. Use the right size trowel to spread it evenly. This makes sure the tiles stick well and don't come loose.
What's the deal with grout? What color should I pick?
Grout fills the spaces between tiles. You can pick a color that matches your tiles for a seamless look or a contrasting color to make the tile pattern stand out. Make sure to use the right kind of grout for floors.
How do I clean my new quartz tile floor after it's installed?
After the grout dries, clean off any dusty residue. For regular cleaning, a soft broom or a damp mop is usually best. Avoid harsh cleaners that could damage the grout or the tile's finish.
What if I accidentally chip or crack a tile later on?
Minor chips and cracks can often be repaired with special epoxy fillers that match the tile color. If a tile is badly damaged, it can usually be carefully removed and replaced with a new one.