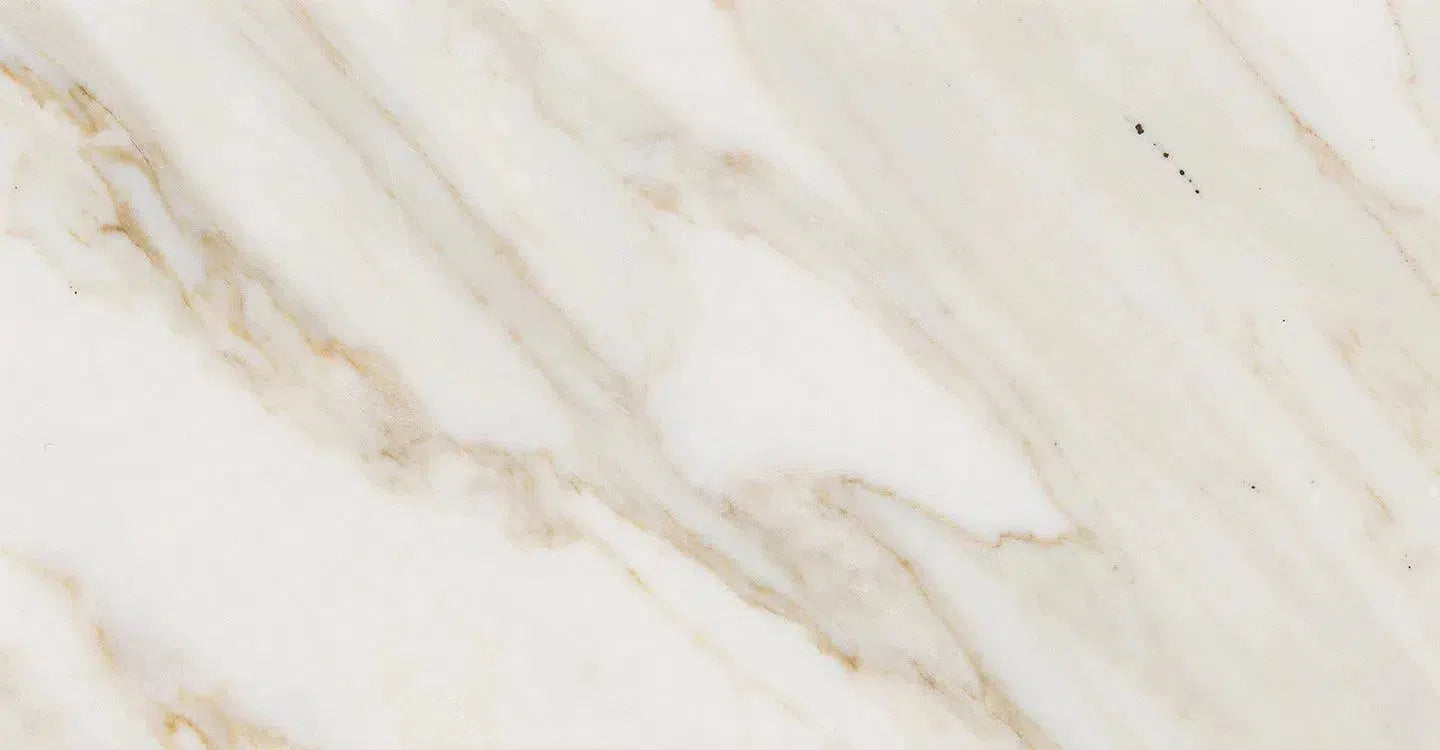
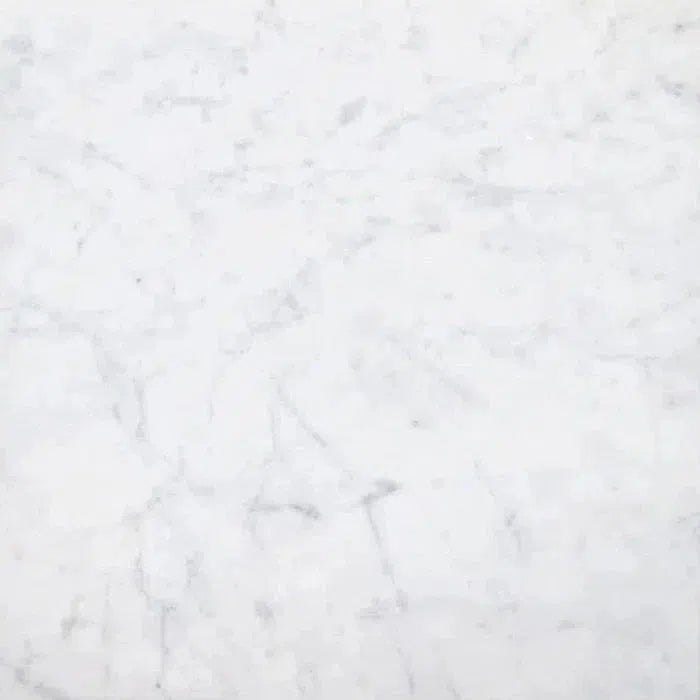
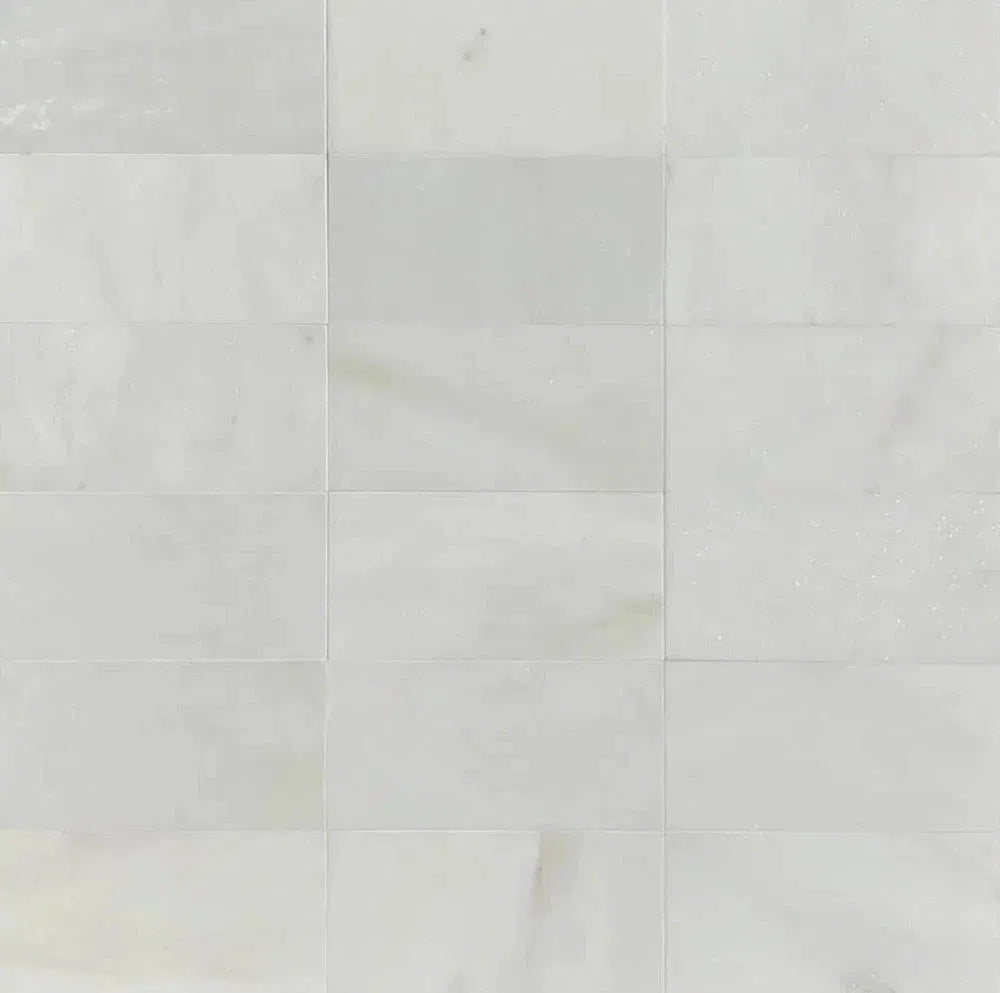


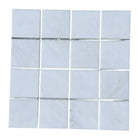

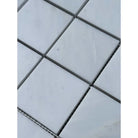
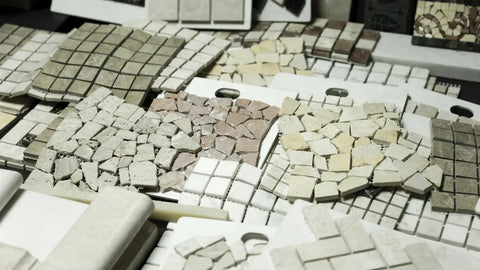
Oriental White Aurora (Asian Statuary) White Marble 3X3 Mosaic
Custom orders take 10-15 business days, locally made in CA
Covers 1 sq.ft
Couldn't load pickup availability
DESCRIPTION
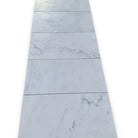
Oriental (Asian Statuary) White Marble 3" x 3" Mosaic – Polished Glossy & Honed Matte
Experience the refined beauty and enduring elegance of Oriental (Asian Statuary) White Marble 3" x 3" Mosaic Tile. This luxurious natural stone showcases a pristine white background highlighted by dramatic, expressive gray veining unique to premium Asian Statuary marble. Crafted for both polished (glossy) and honed (matte) finishes, this high-end mosaic tile elevates any space, making it an ideal choice for floors, walls, showers, and backsplashes while offering a sophisticated, timeless appearance that enhances both residential and commercial interiors.
Why Choose Oriental (Asian Statuary) White Marble Mosaic?
✔ Premium White Marble: Sourced from distinguished Asian quarries, Oriental White Marble delivers a pure white base punctuated by bold, natural gray veining. Each 3” x 3” mosaic tile offers individual visual interest while blending harmoniously for a unified look.
✔ Two Elegant Finishes:
◾ Polished (Glossy): The high-sheen, mirror-like finish amplifies the stone’s veining, infusing surfaces with a brilliant luster that elevates the sense of luxury in any room.
◾ Honed (Matte): The satin, low-gloss surface exudes understated elegance while providing practical slip resistance—especially valued in wet zones such as bathrooms, showers, and entryways.
✔ Ideal for Wet & Dry Applications: Each tile is expertly crafted for versatile installation on shower floors, bathroom walls, kitchen backsplashes, and feature walls, combining decorative appeal with resilient performance.
✔ Timeless Appeal: With its crisp white coloring and bold, organic veining, this marble complements modern minimalist settings just as seamlessly as it does traditional luxury interiors, offering a lasting investment in design.
✔ Durable & Long-Lasting: Crafted exclusively from 100% natural Oriental (Asian Statuary) White Marble, each mosaic tile ensures sustained beauty and resilience, bringing lasting sophistication and property value to any environment.
Product Details – Oriental (Asian Statuary) White Marble 3" x 3" Mosaic Tile
✔ Material: 100% Natural Oriental White (Asian Statuary) Marble, renowned for its consistent coloration and durability
✔ Tile Size: 3" x 3" mosaic format mounted on mesh sheets for easy installation and uniform grout lines
✔ Finish Options: Available in high-impact polished glossy or classic honed matte to suit various design aesthetics
✔ Application: Well-suited for use on floors, walls, showers, kitchen backsplashes, and accent features within both homes and commercial projects
✔ Color Profile: Features a crisp, clean white marble foundation with striking, naturally occurring gray veining patterns for maximum visual effect
Where to Use Oriental (Asian Statuary) White Marble 3" x 3" Mosaic?
- Shower Walls & Floors: Bring spa-inspired sophistication to bathrooms with durable marble mosaics that maintain style and integrity even under frequent moisture.
- Kitchen Backsplashes: Create an elegant focal point that pairs beautifully with a wide range of cabinetry and hardware, enhancing both contemporary and classic kitchens.
- Bathroom & Powder Room Flooring: The honed finish delivers a naturally non-slip surface, adding safety alongside tasteful design for busy and wet areas.
- Feature Walls & Fireplace Surrounds: Highlight architectural details with mosaics that showcase bold veining and impart a sense of grandeur and refinement.
- Hallways & Entryways: Designed for high-traffic environments, these marble tiles merge durability with visual appeal, conveying a timeless marble aesthetic on arrival.
Order Oriental (Asian Statuary) White Marble 3" x 3" Mosaic – Luxury Marble for Elegant Interiors
Upgrade your home or business with the distinguished presence of Oriental (Asian Statuary) White Marble 3" x 3" Mosaic Tile, offered in both polished glossy and honed matte finishes. Designed to deliver designer-level impact for shower floors, kitchen backsplashes, or statement feature walls, this premium white marble mosaic combines outstanding craftsmanship with a refined, upscale aesthetic that stands the test of time.
SPECIFICATIONS
INSTALLATION
Material Inspection and Installation Guidelines
Material Inspection
Before installation, carefully inspect all goods for any damage or defects such as chipped edges or broken pieces. Natural stone surfaces, including marble and travertine, will have naturally occurring variations in color, pattern, texture, and veining that may differ from what was pictured. No adjustments or services can be provided once installation has begun.
Substrate Preparation
To ensure a proper installation, follow these substrate guidelines:
• Surface Condition: The substrate must be clean, flat, and free of contaminants, including curing compounds. It should also be free of cracks.
• Waterproofing: In wet areas, waterproof the substrate following the manufacturer's recommendation for a waterproofing and crack prevention membrane compatible with your setting material.
• Expansion Joints: Install expansion joints at all changes in plane in the tile work and where tile abuts restraining surfaces. Use silicone caulking sealant instead of grout in all corner joints.
Installation
Dry-Fitting
• Pattern Planning: Dry-fit your pattern before starting installation. Visualize the installation and plan the placement of pieces, especially with tiles that have a lot of variation.
Mortar Application
• Thin-Set Mortar: Use white thin-set mortar to avoid affecting the tile color. For faster installation, use a rapid curing thin-set mortar.
• Application:
◦ Apply adhesive to an area that can be covered within 10-15 minutes.
◦ Grout joints should be a minimum of 1/16” and not butt set.
◦ Smooth down the ridges using the flat side of the trowel before fixing the tiles in the mortar bed.
◦ For our ceramic material, use a 3/16" or 1/4" square notch trowel. For other tiles, a 9" trowel with a 1/8" square notch is recommended.
Grouting
• Non-Sanded Grout: Use non-sanded grout for ceramic tiles to prevent scratching. Test a small area before grouting to ensure the stone surface does not scratch.
• Packing Grout Joints: Pack grout joints fully, avoiding pits or voids. Clean excess grout as you work, and do not let it harden completely.
• Cleaning: Never use acids to clean grout haze. Use a damp sponge for final cleaning and smoothing grout joints.
• Grout Release: Apply grout release before grouting to facilitate cleaning and protect against staining from contrasting color grouts.
Cutting
• Tools: Use a wet-saw with a new, continuous rim diamond blade designed for cutting ceramic tile for the best results.
Cleaning
General Cleaning
• Porcelain Tile: Clean with a damp sponge mop and a solution of 1/4 cup white vinegar to every 2 gallons of water. Sweep or vacuum regularly.
Unpolished Surfaces
• Sweeping: Use a soft-bristle broom and sweep in two directions: along the grain and diagonally to dislodge dust and debris.
• Cleaning Solution: Saturate the tile with a neutral cleaning solution like vinegar and hot water, let it sit for 5–10 minutes, then scrub with a brush using the two-direction method.
• Rinsing: Rinse with clean water to remove the cleaning solution.
High Traffic Areas
• Clean at least once per day and wet mop regularly.
Reminders
• Avoid Certain Cleaners: Do not use ammonia, bleach, or acid-based cleaners, as they may alter grout color. Avoid wax, oil-based, abrasive cleaners, sealants, and agents with dyes or colors.
• Steel Wool: Do not use steel wool pads, as leftover particles may rust.
• Entrance Rugs: Place rugs at entrances to minimize dirt and grit from being tracked onto the tile flooring from outdoors.
By following these guidelines, you will ensure the successful and lasting installation of your natural stone surfaces.
The Waste Factor
How Much Do I Need to Order?
The best practice is to order at least 10-30% more than your project requirements to account for potential issues, waste due to cutting material, and other potential breakage during installation.
When installing natural stone, understanding the waste factor is crucial. The waste factor refers to the amount of stone that will be cut, trimmed, or otherwise discarded during the installation process. The waste factor varies depending on how tightly the stones are fitted; tighter joints require more trimming and thus produce more waste.
Waste Factor Considerations
• Project Size: Larger projects might have a slightly lower percentage of waste due to more efficient use of materials.
• Joint Tightness: Tighter joints increase the waste factor due to more precise trimming.
• Stone Variations: Natural stones have variations in color and texture, necessitating extra materials to ensure consistency across the installation.
Example Calculation
For a project area of 1,000 square feet with an expected waste factor of 10% to 30%, you would need to purchase between 1,100 and 1,300 square feet of stone.
Tips for Managing Waste
1. Mock-Up: Create a small mock-up to better estimate your specific waste factor before ordering materials.
2. Order Extra: Always order extra materials for future repairs or additions, as natural stone batches can vary.
3. Efficient Cutting: Plan cuts carefully to minimize waste and use off-cuts in less visible areas.
By accurately calculating the waste factor and ordering extra material, you can ensure a smoother installation process and a consistent appearance of your natural stone veneer.
Installation Tips
Installing natural stone flooring can be a rewarding project, giving your home a luxurious and timeless look. Here's a step-by-step guide to help you through the process:
Materials and Tools Needed:
• Natural stone tiles (marble, granite, slate, etc.)
• Tile adhesive (thin-set mortar)
• Grout
• Tile spacers
• Notched trowel
• Level
• Tape measure
• Tile cutter or wet saw
• Rubber mallet
• Sponge and bucket
• Grout float
• Sealer (specific to your type of stone)
• Safety equipment (gloves, goggles, knee pads)
Step-by-Step Guide:
1. Preparation:
• Measure the Area: Calculate the square footage of the area where you plan to install the tiles.
• Prepare the Subfloor: Ensure that the subfloor is clean, dry, and level. If necessary, apply a self-leveling compound.
• Acclimate the Tiles: Let the stone tiles sit in the installation area for a couple of days to acclimate to the room temperature and humidity.
2. Layout Planning:
• Dry Lay the Tiles: Lay out the tiles without adhesive to plan the pattern and placement. Start from the center and work your way out to ensure an even layout.
• Mark Guidelines: Use a chalk line to mark the center of the room and create reference lines for laying the tiles.
3. Applying Adhesive:
• Mix the Thin-set Mortar: Follow the manufacturer's instructions to mix the mortar.
• Spread the Mortar: Using the notched trowel, spread the thin-set mortar on a small section of the subfloor. Hold the trowel at a 45-degree angle to create ridges in the mortar.
4. Laying the Tiles:
• Place the Tiles: Press the tiles into the mortar, twisting them slightly to ensure a good bond. Use tile spacers to maintain consistent gaps between the tiles.
• Check for Level: Regularly check that the tiles are level and adjust as necessary using the rubber mallet.
5. Cutting Tiles:
• Measure and Mark: Measure the tiles that need to be cut to fit along the edges and mark them.
• Cut the Tiles: Use a tile cutter or wet saw to cut the tiles to the required size.
6. Grouting:
• Allow Adhesive to Cure: Let the adhesive dry for at least 24 hours or as recommended by the manufacturer.
• Mix the Grout: Mix the grout according to the instructions.
• Apply the Grout: Using a grout float, apply the grout diagonally across the tiles to fill the gaps. Remove excess grout with the float.
• Clean the Tiles: Use a damp sponge to wipe off excess grout from the tile surfaces. Rinse the sponge frequently and be careful not to remove grout from the joints.
7. Sealing:
• Allow Grout to Cure: Let the grout cure for the recommended time, usually 48-72 hours.
• Seal the Tiles: Apply a stone sealer to protect the tiles from stains and moisture. Follow the manufacturer's instructions for application and curing times.
8. Final Touches:
• Clean the Floor: After the sealer has dried, give the floor a final cleaning to remove any residue.
• Inspect the Installation: Check the tiles and grout lines for any imperfections and make any necessary repairs.
Tips:
• Always wear safety equipment when cutting tiles.
• Follow the manufacturer's instructions for all materials used.
• Work in small sections to prevent the adhesive from drying out before the tiles are laid.
• Regularly clean your tools to prevent the mortar and grout from hardening on them.
This guide should help you install natural stone flooring successfully. If you have any specific questions or encounter any issues during the installation, feel free to ask!
California Proposition 65
WARNING: Products sold at Surfaces Galore contain chemicals, including stone dust, which are known to the State of California to cause cancer, birth defects or other reproductive harm.
Disclaimer: Surfaces Galore provides information to give customers an overview of the process from choosing to installation of our natural stone surfaces. However, we are not responsible for any mistakes, problems, or issues that may arise. All responsibility for the selection, installation, and any associated outcomes rests solely with the customers.
|
TILE DIMENSIONS |
1 TILE COVERS |
|
2"x8" Tile |
Price is per Square Foot, Each tile covers 0.11 sq.ft. |
|
4"x4" Tile |
Price is per Square Foot, Each tile covers 0.11 sq.ft. |
|
4"x8" Tile |
Price is per sq.ft., Each tile covers 0.22 sq.ft. |
|
4"x12" Tile |
Price is per Square Foot, Each tile covers 0.333 sq.ft. |
|
3"x6" Subway Tile |
Price is per Square Foot, Each tile covers 0.125 sq.ft. |
|
3"x12" Subway Tile |
Price is per Square Foot, Each tile covers 0.25 sq.ft. |
|
9"x18" Subway Tile |
Price is per Square Foot, Each tile covers 1.13 sq.ft. |
|
8"x12" Tile |
Price is per Square Foot, Each tile covers 0.67 sq.ft. |
|
6"x18" Tile |
Each tile covers 0.75 sq.ft. |
|
6"x6" Tile |
Each tile covers 0.25 sq.ft. |
|
12"X12" Tile |
1 sq. ft. / priced per piece |
|
12"X24" Tile |
2 sq. ft. / priced per piece |
|
12"x36" Tile |
Price is per Square Foot, Each tile covers 3 sq.ft. |
|
16"X16" Tile |
1.77 sq. ft. / priced per piece |
|
18"X18" Tile |
2.25 sq. ft. / priced per piece |
|
18"X36" Tile |
4.5 sq. ft. / priced per piece |
|
24"X24" Tile |
4 sq. ft. / priced per piece |
|
36"X36"Tile |
9 sq. ft. / priced per piece |
|
Mosaic Tile Dimensions |
1 Sheet of Mosaic Tile Coverage |
|
1" Hexagon Mosaic Tile |
0.85 sq. ft. / priced per sheet |
|
2" Hexagon Mosaic Tile |
1 sq. ft. / priced per sheet |
|
3" Hexagon Mosaic Tile |
0.80 sq. ft. / priced per sheet |
|
4" Hexagon Mosaic Tile |
0.56 sq. ft. / priced per sheet |
|
5" Hexagon Mosaic Tile |
0.90 sq. ft. / priced per sheet |
|
6" Hexagon Mosaic Tile |
0.84 sq. ft. / priced per sheet |
|
10" Hexagon Mosaic Tile |
0.60 sq. ft. / priced per sheet |
|
5" Combo Hexagon Mosaic Tile |
0.70 sq. ft. / priced per sheet |
|
Vortex Hexagon Mosaic Tile |
1.16 sq. ft. / priced per sheet |
|
1"x2" Basketweave Mosaic Tile |
0.92 sq. ft. / priced per sheet |
|
2"x2" Square Mosaic Tile |
0.94 sq. ft. / priced per sheet |
|
3/8"x3/8" Square Mosaic Tile |
1 sq. ft. / priced per sheet |
|
5/8"x5/8" Square Mosaic Tile |
1 sq. ft. / priced per sheet |
|
5/8x3/4 Mini Brick Mosaic Tile |
1 sq. ft. / priced per sheet |
|
1x1 Checkerboard Mosaic Tile |
0.97 sq. ft. / priced per sheet |
|
Manhattan/Random Strip Mosaic Tile |
0.90 sq. ft. / priced per sheet |
|
Octave Mosaic Tile |
0.90 sq. ft. / priced per sheet |
|
Triple Weave Mosaic Tile |
0.80 sq. ft. / priced per sheet |
|
Florita Mosaic Tile |
1.17 sq. ft. / priced per sheet |
|
Berlinetta Mosaic Tile |
0.80 sq. ft. / priced per sheet |
|
6" Arabesque/Lantern Mosaic Tile |
0.62 sq. ft. / priced per sheet |
|
2"x4" Grand Brick Subway Mosaic Tile |
0.93 sq. ft. / priced per sheet |
|
Mini Herringbone Mosaic Tile |
0.86 sq. ft. / priced per sheet |
|
1"X2" Herringbone Mosaic Tile |
0.85 sq. ft. / priced per sheet |
|
1"x3" Herringbone Mosaic Tile |
1 sq. ft. / priced per sheet |
|
1"X4" Herringbone Mosaic Tile |
0.92 sq. ft. / priced per sheet |
|
1"X6" Herringbone Mosaic Tile |
0.94 sq. ft. / priced per sheet |
|
1"x1" Square Mosaic Tile |
0.97 sq. ft. / priced per sheet |
Disclaimer: All coverages by tile and mosaics in this list might have a 5%-10% difference. The reason for this change is that we strive to keep our stock in good value by working with different suppliers worldwide. Each factory has its own templates, which is why all these coverages might change without updating this information panel. Please keep in mind that these calculations are quite accurate, but in the end, they are just estimates.All Sizes are nominal
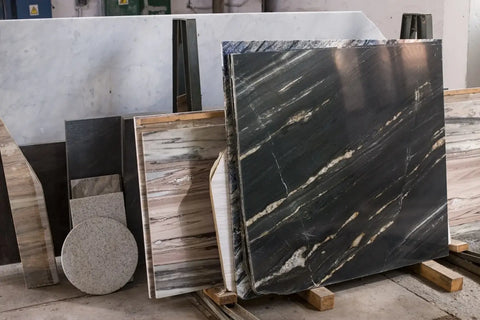
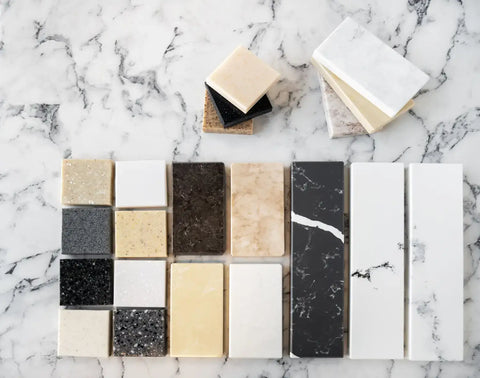
Exploring the Beauty and Benefits of Natural Stone
Types of Stones
Natural stone has been a beloved building material for centuries, admired for its beauty, durability, and timeless appeal. Whether you’re planning a major renovation or a small update, incorporating natural stone can elevate the look and feel of your home. In this blog post, we’ll explore the many benefits of natural stone, the different types available, and how to choose the perfect stone for your project.
At Surfaces Galore, we understand the allure of natural stone. It's a material that has been admired for centuries, offering unparalleled beauty and durability. Among the most sought-after natural stones are marble and travertine. Let's explore what makes these stones so special and why they could be the perfect addition to your home.
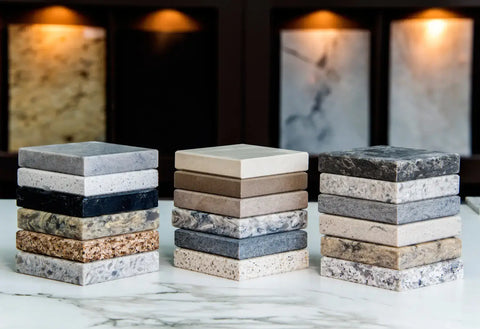
Surfaces Galore offers a diverse selection of stone tiles and mosaics for decorative purposes. Here's a rundown of our range sourced from around the globe:
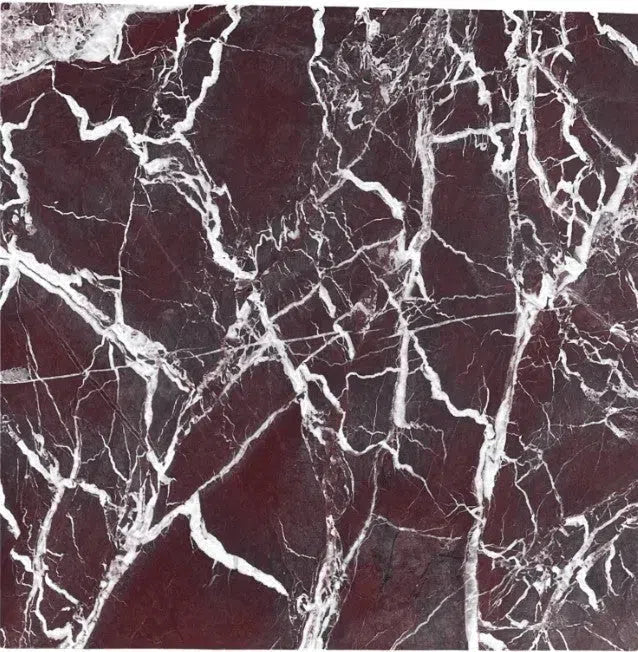
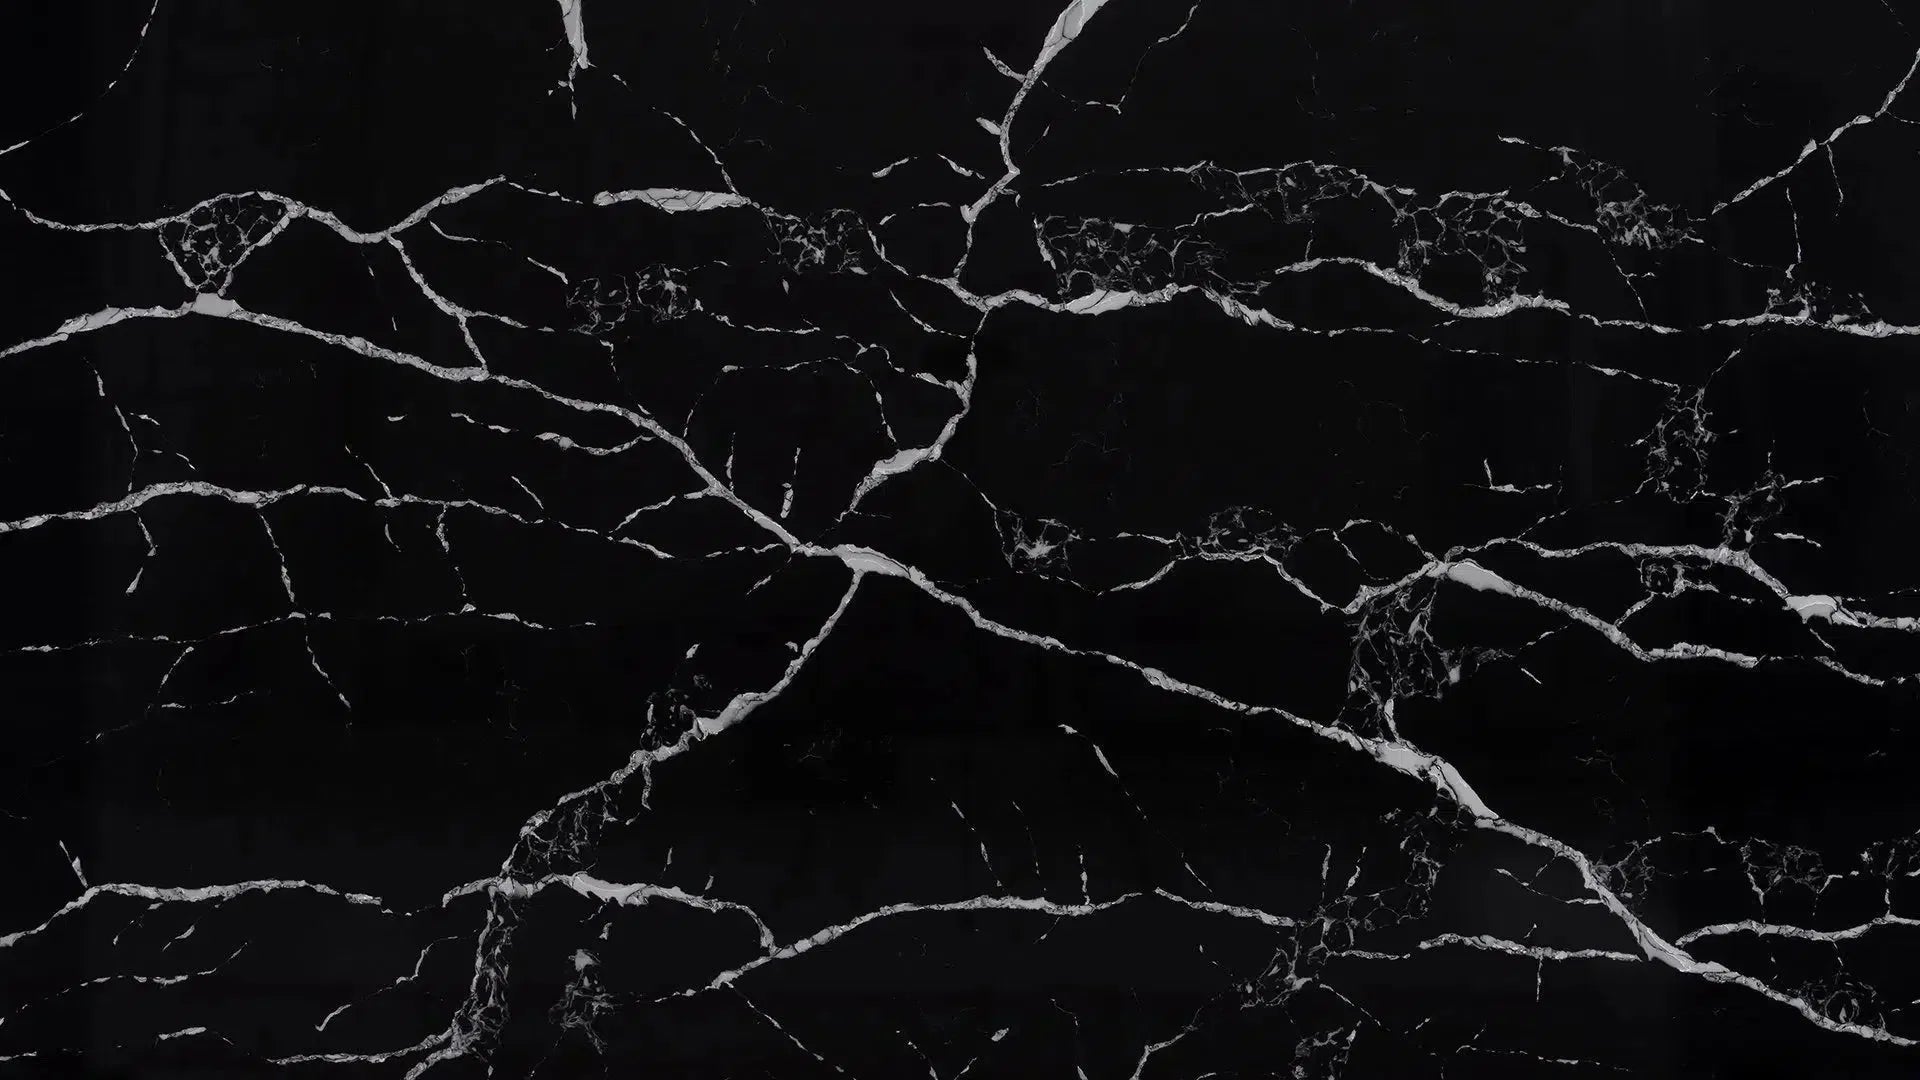
Marble Tiles
Highly preferred for their elegance and variety. Marble tiles offer a luxurious aesthetic for any setting. Marble is synonymous with luxury. Its classic beauty and range of colors make it a favorite for bathrooms, fireplaces, and other decorative features. However, it requires more maintenance to prevent staining and scratching.
Limestone Tiles
Offering a marble-like texture at a more affordable price, limestone tiles are a popular choice. Limestone offers a softer, more subtle look with its light colors and smooth texture. It’s perfect for indoor flooring and wall cladding, providing a warm and inviting ambiance.
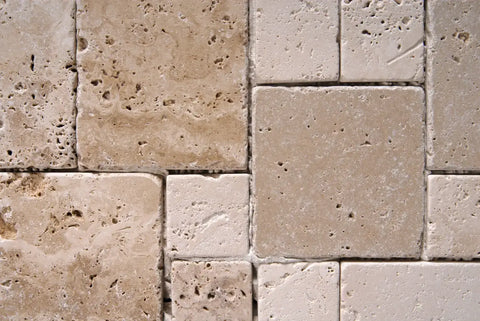
Travertine Tiles
Perfect for a cozy, natural look, and a budget-friendly alternative to marble. With its distinct, porous surface, travertine adds character to any space. It’s commonly used for flooring, backsplashes, and shower surrounds, giving a Mediterranean feel to your home.
Pebble Mosaics
Great for unique decorative elements, pebble mosaics can add a distinctive touch to any space.
Terracotta Tiles
Excellent for creating a warm, traditional look, available in various shapes and sizes.
Granite Tiles
Preferred for their noble black and dark shades, available in a range of organic options.
Terrazzo Tiles
Ideal for adding color to traditional decor, our limited selection of terrazzo tiles is sure to impress.
Slate Tiles
Add texture and are available in a variety of appealing models.
Cement Tiles
Featuring vibrant patterns, cement tiles are perfect for adding color to any decor.
Basalt Tiles
Especially suitable for areas prone to wetness, available in different shapes and sizes.
Soapstone
Known for its stain-proof qualities, used for hearths, washtubs, table tops, carved ornaments, and chemical laboratories.
Sandstone
Consists of quartz, cemented with silica, iron oxide, or calcium carbonate, durable with a wide range of colors and textures.
Quartz
A silicon dioxide mineral that occurs in colorless and transparent or colored hexagonal crystals and also in crystalline masses.
Stone Finishes and Edges
Finishes:
-
Polished: Offers a shiny, modern look but requires more care.
-
Antiqued or Tumbled: Have a natural patina and are more durable.
-
Natural Holes: Stones like travertine can have natural holes filled or left unfilled for a more rustic look.
-
Split Face (Natural Bed): Sawn against the grain, showing the natural bed – grain of the stone – as it was formed.
-
Straight Cut (SC): Tiles are sawn for a sharp edge, preferred for seamless floors without grout joints.
-
Vein Cut (VC): Favors the natural veins of the stone, resulting in a harmonious surface with continuous and almost straight lines.
Edges:
-
Beveled (Chamfered): The beveled edge makes installation easier and eliminates sharp level differences between tiles.
-
Straight Edge: Also known as a squared edge, this is a simple, clean, and contemporary edge style.
-
Chiseled Edge: For a more rustic or industrial look, the chiseled edge provides a raw, natural appearance as if the stone has been freshly quarried.
-
Tumbled: A tumbled finish leaves the edges of stone artfully rough and chipped, creating a weathered, aged look.
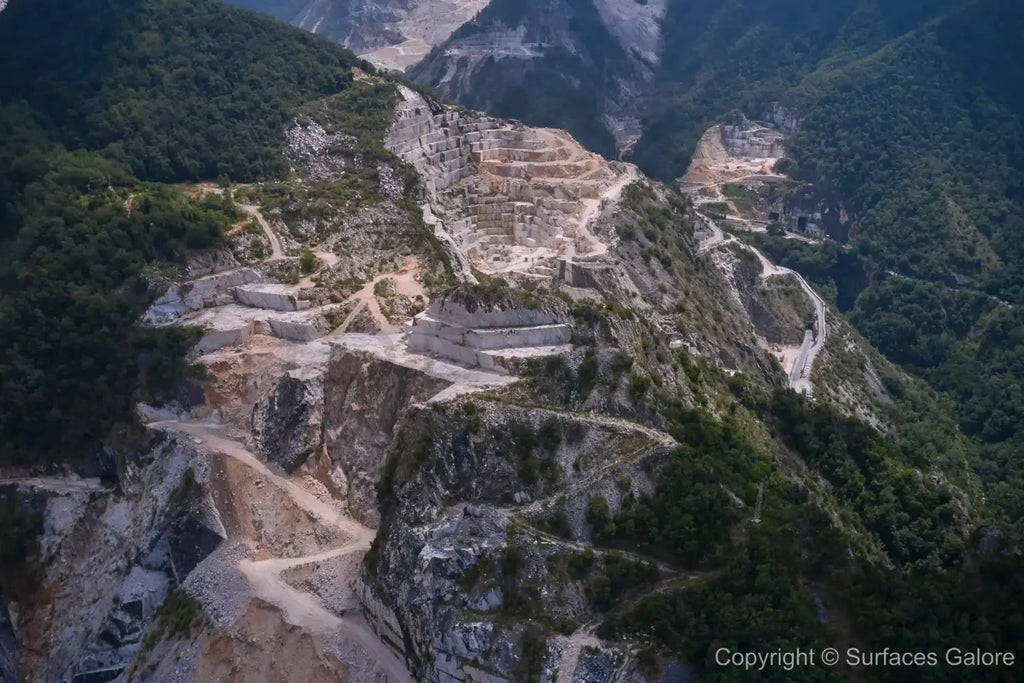
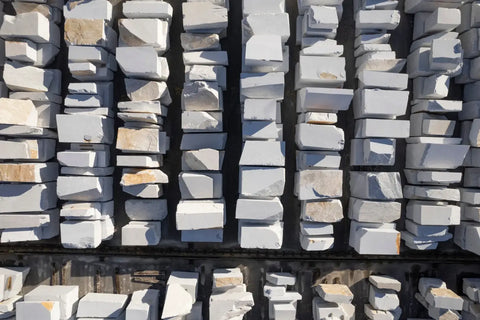
Stone Origins and Characteristics
-
Origins: Most of our stones are mined from mountains, while others are sourced from riverbeds and seas. We ensure premium-quality natural stones, primarily sourced from Turkey, Italy, Spain, and China.
-
Shiny Flakes: The shiny flakes in stones are minerals that contribute to the stone's unique properties and appearance.
-
Best Stone: Each natural stone is unique with its own characteristics. The best stone depends on the specific application and context. For example, marble is ideal for high-traffic flooring, while limestone is better for wall applications.
-
Country of Origin: The quality of natural stones is determined more by the manufacturing processes that bring out their beauty. Surfaces Galore ensures high-quality natural stone products by using advanced manufacturing facilities.
Buying Guide for Natural Stone
-
Purpose: Determine where you intend to use the stone (e.g., kitchen countertops, bathroom, flooring, outdoor patio).
-
Style and Color: Natural stone offers unique patterns and colors. Choose one that complements your design.
-
Durability: Some stones are harder and more resistant to wear than others. Match the stone type to the expected use.
-
Maintenance: Understand the maintenance requirements. Some stones need regular sealing to prevent stains.
-
Budget: Natural stone can vary greatly in price. Set a budget and explore options within that range.
-
Installation and Maintenance: Ensure the stone is installed by experienced professionals to avoid issues. Use pH-neutral cleaners specifically designed for natural stone. Avoid acidic or abrasive cleaners.
Stone Care
-
Stain Resistance: To prevent staining, we recommend sealing all natural stone with a high-quality sealer, such as Miracle Sealants. Once properly sealed, the stone will be stain-resistant. Follow the instructions on your sealer for the best results.
-
Color Change: Sealers can vary in how much they alter the stone's color. Generally, sealing will give the stone a slightly wet and cleaner appearance. Sealers without color enhancers are available if you prefer to retain the stone's original look.
-
Sealing Frequency: Sealing frequency depends on usage. Typically, sealing once a year is sufficient. Always refer to your sealer’s instructions for specific recommendations.
Why Choose Natural Stone?
-
Unmatched Durability Natural stone is incredibly durable and can withstand the test of time. Materials like granite and slate are resistant to scratches, chips, and other damage, making them ideal for high-traffic areas such as kitchens and hallways.
-
Timeless Aesthetic The unique patterns and colors of natural stone add a touch of elegance and sophistication to any space. Unlike synthetic materials, each piece of natural stone is one-of-a-kind, ensuring a unique look for your home.
-
Low Maintenance With proper sealing and care, natural stone surfaces are easy to maintain. They resist staining and are simple to clean, requiring only regular wiping with a mild cleaner to keep them looking their best.
-
Eco-Friendly Choice Natural stone is a sustainable building material. It’s abundant in nature and requires minimal processing compared to synthetic options, resulting in a lower environmental impact.
Choosing the Right Stone for Your Project
Choosing the right natural stone for your home can be a daunting task. With so many beautiful options available, it’s essential to understand the characteristics and benefits of each type to make an informed decision. At Surfaces Galore, we specialize in providing a wide range of natural stones, including marble, travertine, granite, and more. Here’s a guide to help you choose the best natural stone for your home.
When selecting natural stone for your home, consider the following factors:
-
Location Different stones are suited to different areas of the home. For high-traffic areas, opt for harder stones like granite or slate. For decorative features, marble or travertine might be more appropriate.
-
Maintenance Consider how much time you’re willing to spend on maintenance. While granite and slate are low-maintenance options, marble and limestone require more care to keep them looking their best.
-
Aesthetic Preferences Think about the overall look you want to achieve. Natural stone comes in a wide range of colors and patterns, so choose one that complements your existing decor and personal style.
-
Budget Natural stone can vary widely in price. Granite and marble tend to be more expensive, while limestone and travertine are often more affordable. Determine your budget before making a selection.
Types of Natural Stone
Marble
-
Aesthetic Appeal: Known for its luxurious appearance, marble comes in a variety of colors and veining patterns.
-
Best For: Bathrooms, fireplaces, and low-traffic areas.
-
Maintenance: Requires regular sealing to prevent staining and etching.
Travertine
-
Rustic Charm: Travertine offers a warm, earthy look with natural pits and variations.
-
Best For: Floors, walls, and outdoor patios.
-
Maintenance: Needs sealing and occasional filling of natural pits.
Granite
-
Durability: Extremely hard and resistant to scratches and heat.
-
Best For: Kitchen countertops and high-traffic areas.
-
Maintenance: Low maintenance, requires sealing once a year.
Quartzite
-
Strength and Beauty: Combines the hardness of granite with the look of marble.
-
Best For: Countertops and accent walls.
-
Maintenance: Low maintenance, requires sealing.
Slate
-
Natural Texture: Offers a unique, textured appearance with a range of colors.
-
Best For: Flooring and outdoor areas.
-
Maintenance: Requires sealing to prevent staining.
The Timeless Beauty of Natural Stone: Marble and Travertine
Marble: A Symbol of Elegance
Marble has long been associated with luxury and sophistication. From the ancient Greek and Roman sculptures to the iconic Taj Mahal, marble has been a symbol of beauty and refinement. Here are some reasons why marble continues to be a popular choice:
-
Aesthetic Appeal: Marble’s unique veining patterns and a wide range of colors make it a versatile choice for various design styles, from classic to contemporary.
-
Durability: Despite its delicate appearance, marble is a highly durable stone, suitable for high-traffic areas like kitchens and bathrooms.
-
Heat Resistance: Marble is resistant to heat, making it an excellent choice for kitchen countertops and fireplace surrounds.
Travertine: Rustic Charm
Travertine offers a different but equally charming aesthetic. Known for its rustic and earthy appearance, travertine is a type of limestone that has been used in construction for thousands of years. Here's why travertine is a great option for your home:
-
Natural Texture: Travertine’s naturally pitted surface can be polished for a smoother finish or left as-is for a more rustic look.
-
Versatility: It can be used for floors, walls, and outdoor spaces, providing a cohesive look throughout your property.
-
Warm Tones: Travertine comes in a range of warm, neutral tones that can complement any color scheme.
How Natural Stone Adds Value to Your Home
Investing in your home is always a wise decision, and one of the most effective ways to enhance its value is by incorporating natural stone. At Surfaces Galore, we specialize in offering high-quality natural stones like marble, travertine, granite, and more. Natural stone not only enhances the beauty of your home but also increases its market value:
-
Buyer Appeal: Homes with natural stone features are often more appealing to buyers. The presence of marble countertops or travertine floors can be a significant selling point.
-
Higher Selling Price: The luxurious appearance and durability of natural stone can justify a higher asking price when selling your home.
-
Return on Investment (ROI): Natural stone improvements can offer a high return on investment. Potential buyers recognize the value and are willing to pay more for homes with these high-end finishes.
-
Unique Patterns and Colors: Each piece of natural stone is unique, offering distinct patterns and colors that can’t be replicated. This uniqueness adds a touch of elegance and exclusivity to your home.
-
Versatility: Natural stone can be used in various applications, including countertops, flooring, walls, and outdoor spaces. This versatility allows for a cohesive design throughout your home.
-
Timelessness: Unlike trends that come and go, natural stone has a timeless appeal. Its classic look ensures that your home remains stylish for years to come.
-
Strength and Resilience: Natural stones like granite and quartzite are incredibly durable, making them ideal for high-traffic areas such as kitchens and hallways.
-
Long-lasting Investment: When properly maintained, natural stone can last a lifetime. This long-term durability makes it a cost-effective investment.
-
Low Maintenance: Many natural stones require minimal maintenance. Regular sealing and cleaning can keep your stone surfaces looking pristine for years.
Natural Stone FAQs
What is natural stone?
Natural stone is a collective term for materials like granite, marble, limestone, travertine, slate, and quartzite. These stones are quarried from the earth and used in their natural state for construction and decorative purposes.
What are the benefits of using natural stone in my home?
Natural stone is durable, timeless, and adds unique beauty to any space. It is also heat-resistant, environmentally friendly, and can increase your home's market value.
How do I maintain natural stone surfaces?
Regular cleaning with a pH-neutral cleaner, sealing as needed, and avoiding harsh chemicals will help maintain natural stone surfaces. Promptly wiping up spills can prevent stains and damage.
Can natural stone be used for both indoor and outdoor projects?
Yes, natural stone is versatile and can be used for countertops, flooring, walls, patios, walkways, and more. Each type of stone has specific properties that make it suitable for different applications.
Signs of Quality Stone
Consistent color and pattern, absence of large cracks or flaws, and a smooth, even finish are indicators of quality stone.
Using Natural Stone Outdoors
Yes, many natural stones are suitable for outdoor use. Ensure the stone is properly sealed to protect it from the elements.
Travertine FAQs
What is travertine?
Travertine is a type of limestone formed by mineral springs, especially hot springs. It is characterized by its porous surface and comes in a variety of earthy colors.
Where is travertine commonly used?
Travertine is commonly used for flooring, countertops, backsplashes, and outdoor pavers. Its natural beauty and durability make it a popular choice for both indoor and outdoor applications.
How do I care for travertine surfaces?
Travertine requires regular sealing to protect its porous surface. Clean it with a mild, pH-neutral cleaner and avoid acidic or abrasive cleaners that can damage the stone.
Is travertine a good choice for high-traffic areas?
Yes, travertine is a durable stone that can withstand high traffic, especially when properly sealed and maintained. However, its porous nature makes it more susceptible to staining, so it requires a bit more care.
Can travertine be used in wet areas like bathrooms or around pools?
Yes, travertine is suitable for wet areas, but it must be sealed to prevent water absorption and staining. Its naturally slip-resistant texture makes it a safe choice for pool decks and shower floors.
Sealing Frequency
Typically, sealing is recommended once a year, but high-traffic areas may require more frequent sealing.
For more information and to explore our extensive collection, visit Surfaces Galore.
Why Choose Surfaces Galore?
At Surfaces Galore, we are dedicated to helping you enhance your home with the finest natural stones. Here’s why you should choose us:
-
Extensive Selection: We offer a wide range of high-quality natural stones, including both marble and travertine, to suit any design preference and budget.
-
Quality Assurance: We source only the finest materials, ensuring that you receive the best quality stone for your home.
-
Expert Advice: Our knowledgeable team is here to guide you through the selection process, ensuring you choose the best stone for your needs and providing guidance on maintenance and care.
-
Competitive Pricing: We provide premium natural stones at competitive prices, making luxury more accessible without compromising on quality.

Our Commitment to Quality and Value
At Surfaces Galore, we offer an extensive selection of premium natural stones at the best prices. As direct distributors, we eliminate the middleman, allowing us to provide you with top-quality materials at unbeatable prices. Additionally, we regularly update our inventory with overstock items, giving you access to flawless stones at discounted rates.
Conclusion
Whether you’re looking to add a touch of elegance with marble or a rustic charm with travertine, Surfaces Galore has you covered. Our extensive selection and expert advice ensure that you find the perfect stone for your home. Visit Surfaces Galore to explore our collection and transform your space with the timeless beauty of natural stone.
Incorporating natural stone into your home is a surefire way to enhance its beauty, durability, and market value. Whether you’re looking to sell your home or simply want to enjoy the timeless elegance of natural stone, Surfaces Galore has you covered.
Explore our extensive collection and discover how natural stone can transform your home today. Natural stone is a beautiful, durable, and sustainable choice for any home. By selecting the right type of stone for your project, you can create a stunning and unique space that will stand the test of time. Visit Surfaces Galore to discover the timeless beauty of natural stone for yourself.
Disclaimer: Surfaces Galore provides information to give customers an overview of the process from choosing to installation of our natural stone surfaces. However, we are not responsible for any mistakes, problems, or issues that may arise. All responsibility for the selection, installation, and any associated outcomes rests solely with the customers.